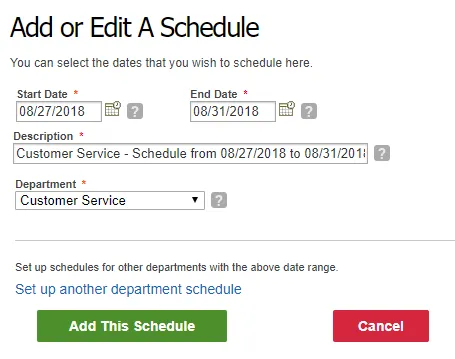

Enable and configure departments
TimeForge Departments provide larger organizations with the ability to assign groups of employees to individual managers.
Each department can have a number of positions, employees, supervisors, and managers. Employees may belong to more than one department, if necessary, and positions can even span multiple departments.
Examples of departments include:
- Front of house, back of house, and bar (restaurants)
- Cashier, meat counter, bakery, etc. (grocery stores)
- Ticket counter, concessions, and floor (movie theater or cinema)
Departments are created at the Corporate Level - all locations (or stores) within a single corporation share departments.
Navigate to the Departments page
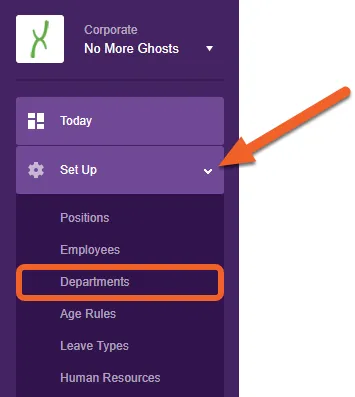
Section titled “Navigate to the Departments page”From the Corporate level, expand the Set Up tab, then select Departments from the sub-menu.
Enable Departments in TimeForge
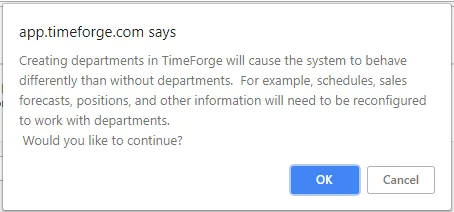
Section titled “Enable Departments in TimeForge”To enable Departments, click the Add Department button.

Read the warning in the pop-up box, and if you’re sure you want to enable departments, click the OK button to proceed.
Create your new department
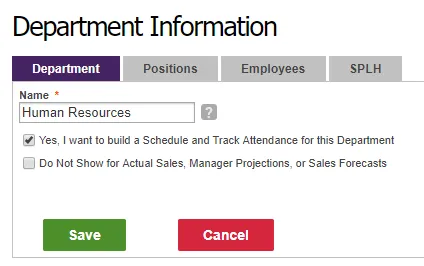
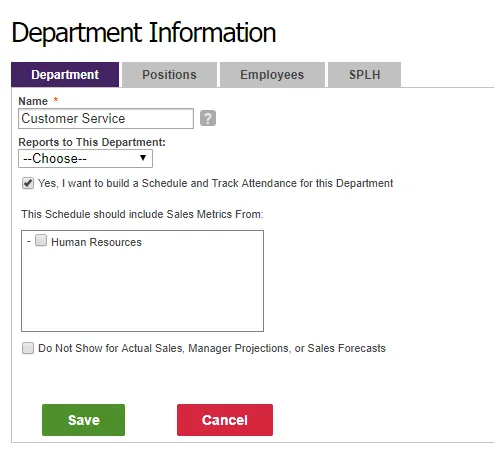
Section titled “Create your new department”Fill out the form. Fields marked with a red asterisk (*) are required.
If you’d like to schedule and track employee hours for this department, be sure to check the appropriate box.
Additional departments can be created the same way. Once you have at least one department, the form for additional departments will include more fields to account for this:
Assign positions to your new department
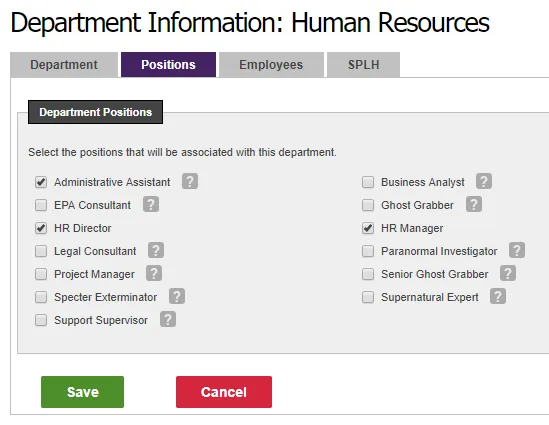
Section titled “Assign positions to your new department”Each Department can have one, or more, positions assigned to it. Assigning positions will ensure that staff members, supervisors, and managers are not distracted or confused by other departments that are using TimeForge.
To assign positions to this department, click the Positions tab and check the boxes next to the positions you’d like to associate with this new department.
Assign employees to the department
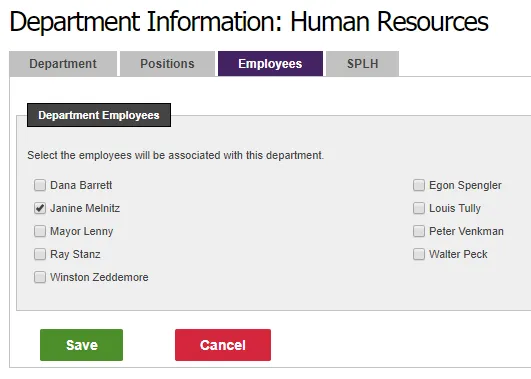
Section titled “Assign employees to the department”Assigning Employees to your Department is done exactly like assigning positions to it. Navigate to the employees tab of your Department and click the checkbox for the employee you want to add.
(Optional) Set the department’s SPLH rules
Section titled “(Optional) Set the department’s SPLH rules”The SPLH (Sales Per Labor Hour) tab lets you choose how many labor hours you want to schedule and for what amount of sales. The SPLH grid is mainly used for the ShiftBuilder to calculate how many hours to schedule and is especially handy for retail departments and restaurant staff.
The SPLH tab lets you choose start and end dates, weekly or daily recording, and how many sales you want per labor hour. If you do not need to schedule this department, you can simply leave the SPLH grid blank.
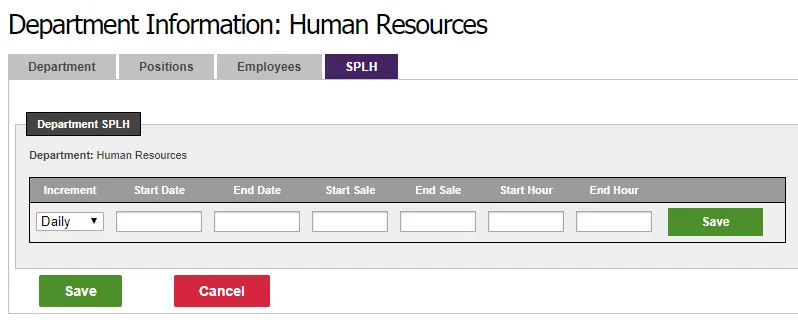
- Increment covers the range (weekly, daily, or hourly) for making calculations based on Sales data.
- Start date is the first effective date of the grid, while End Date is the last effective date of the grid.
- Start/End Sales represent the range for this particular section of the sales curve, in integers. For example, 3000 and 8000.
- Start/End Hour represent the bottom range of hours (when your sales equal the start sales) and the top range of hours (when your sales are equal to the end hour).
Be sure to click Save when done.
Create schedules on a department basis
Section titled “Create schedules on a department basis”You’re now ready to start creating schedules for departments! Each schedule can be assigned to a specific department, providing very fast reporting and schedule building on a per-department basis. Additionally, Schedule Templates provide one-click scheduling for each department.