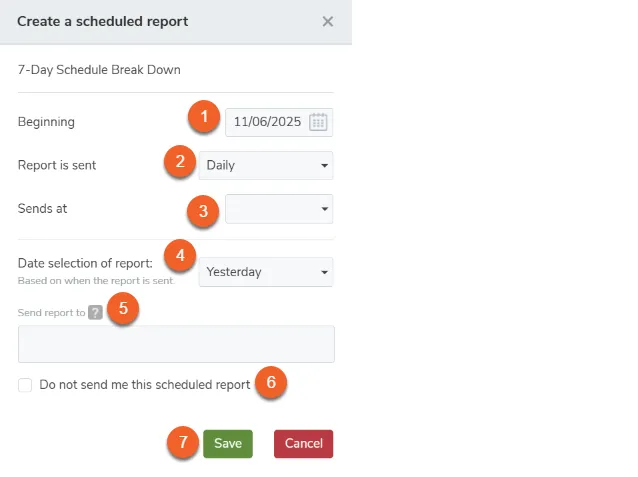
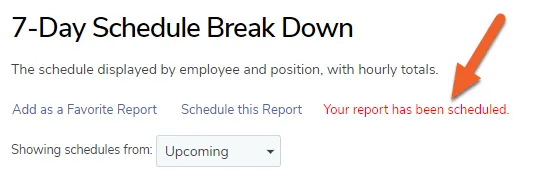
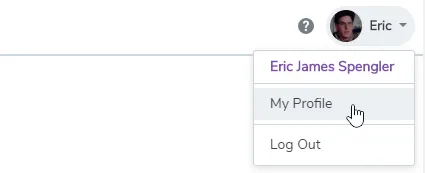
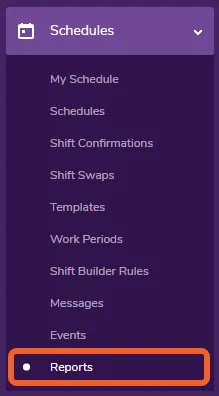
TimeForge gives you the power to set up and receive email reports whenever you need them. Reports can be viewed for anything from employee schedules to net gross sales. Having the feature to send the reports is useful if you need a report regularly at the same time each week or day. Depending on how you set up the report, TimeForge can automatically send your reports to anybody, anytime, so that you never have to worry about it.
This article will teach you how to schedule email reports, as well as how to edit and remove them from your profile.
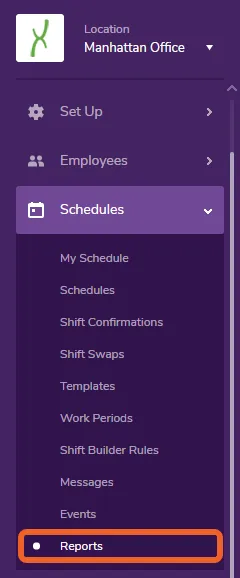
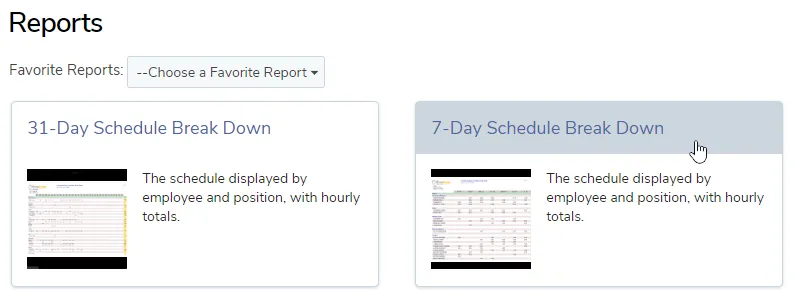
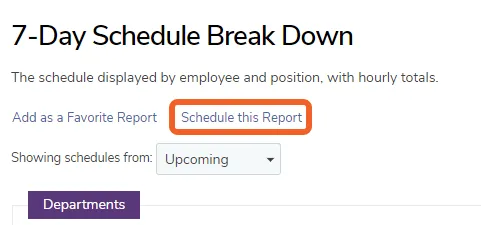
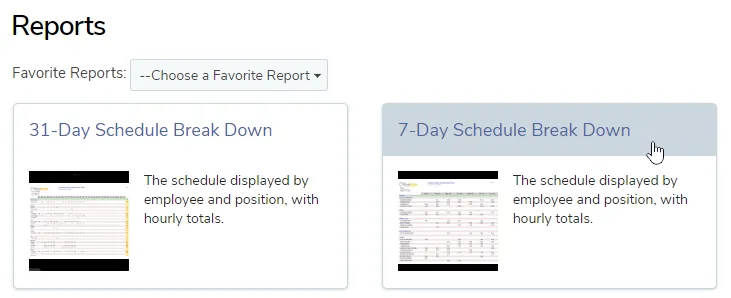
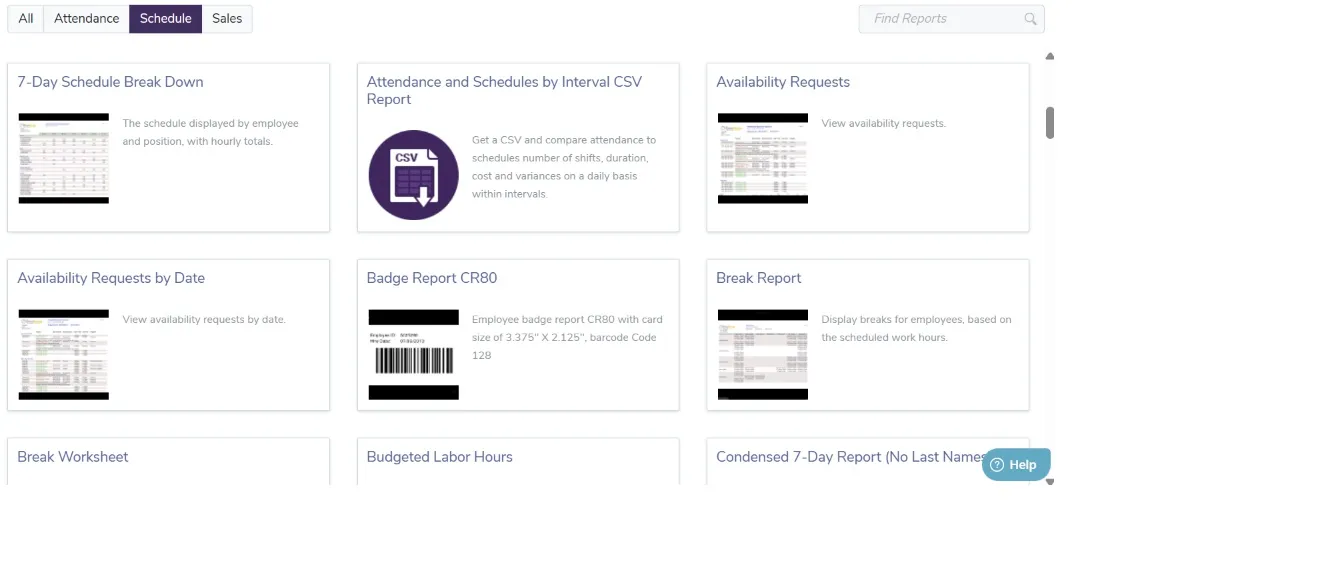
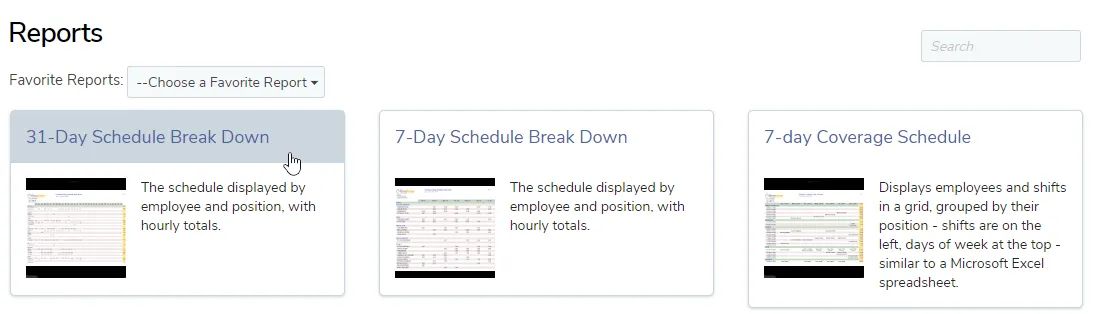
Reports will be listed in grid/card format with a title and description for each. Click a card to configure and schedule a report. For this example, we’ll select “7-Day Schedule Break Down.”
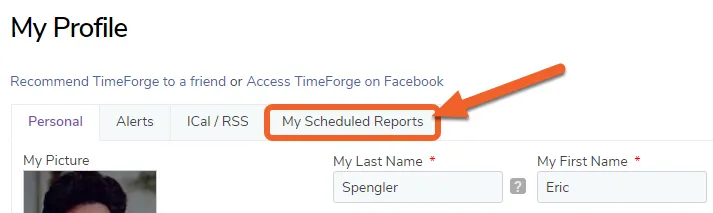
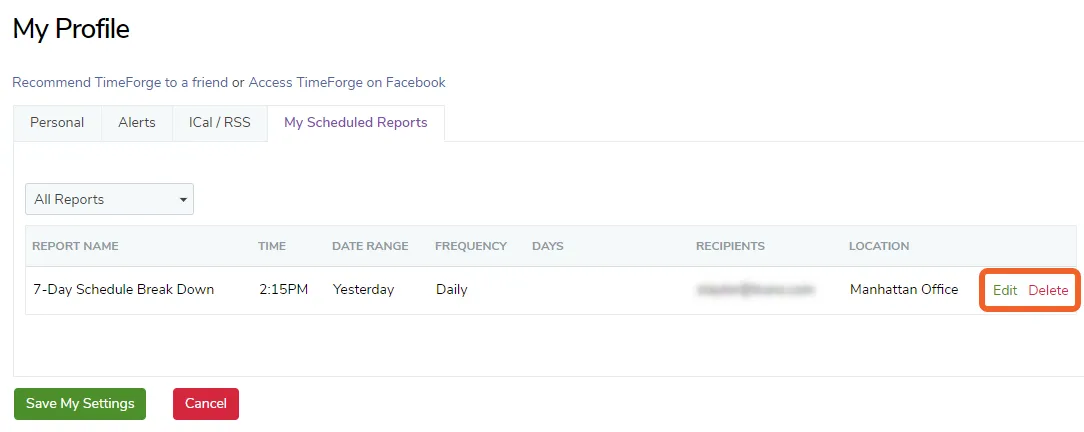
You’ll see a list of all your scheduled reports here. Simply click the Edit or Delete link on the row to edit or delete the scheduled report. This will not delete the report itself – it’ll simply remove it from your list of emailed reports.
Don’t forget to save your changes! If you need to reschedule a report, you can do so anytime by repeating the instructions at the top of this article.
Set reports to use 24 hour time
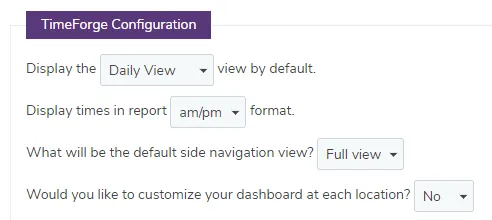
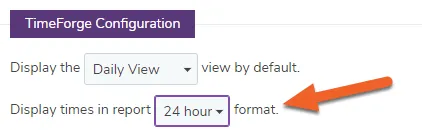
With TimeForge, you can easily set the default times on your reports to use 24 hour time format instead of AM/PM. Although you can set your default option, you can also switch back and forth between 24 hour and AM/PM for each report. Setting these option only takes a few clicks! Here’s how.
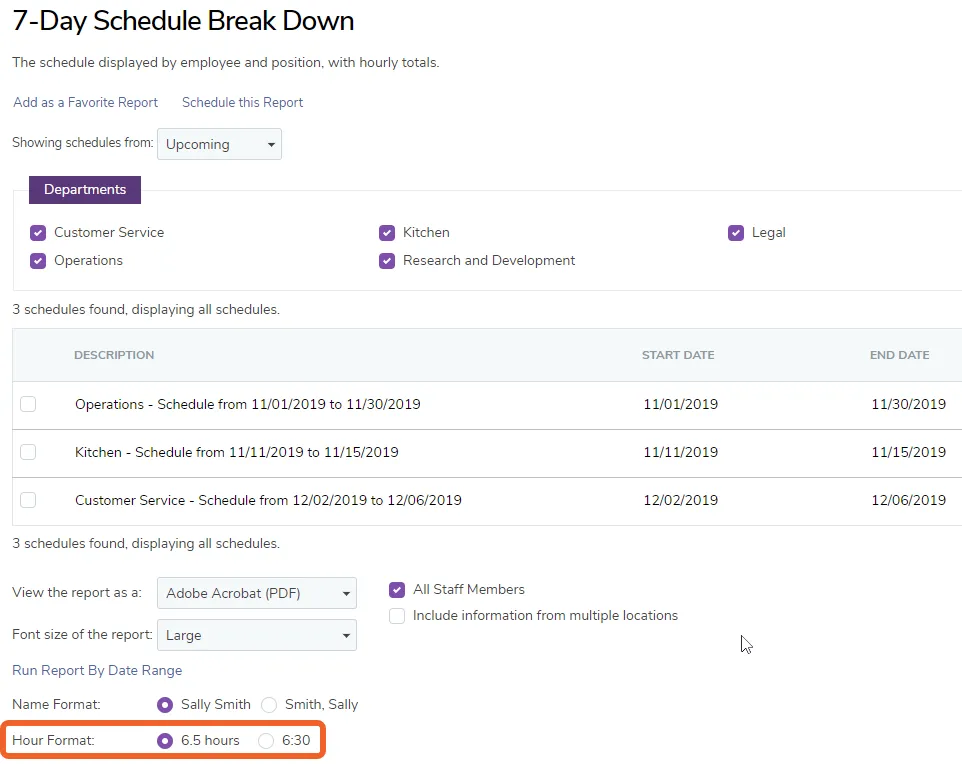
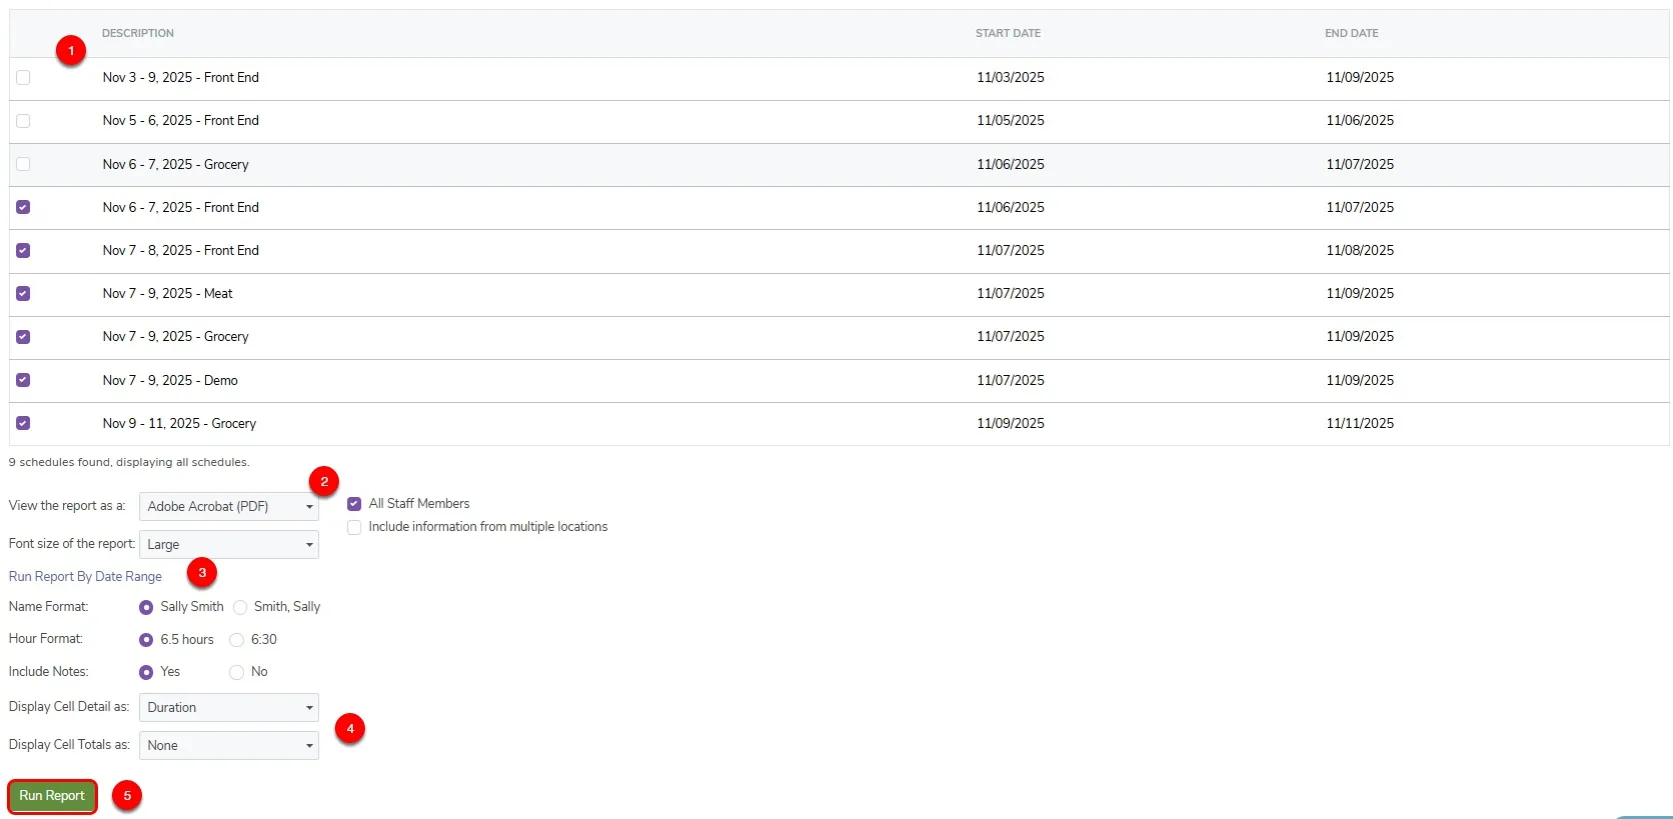
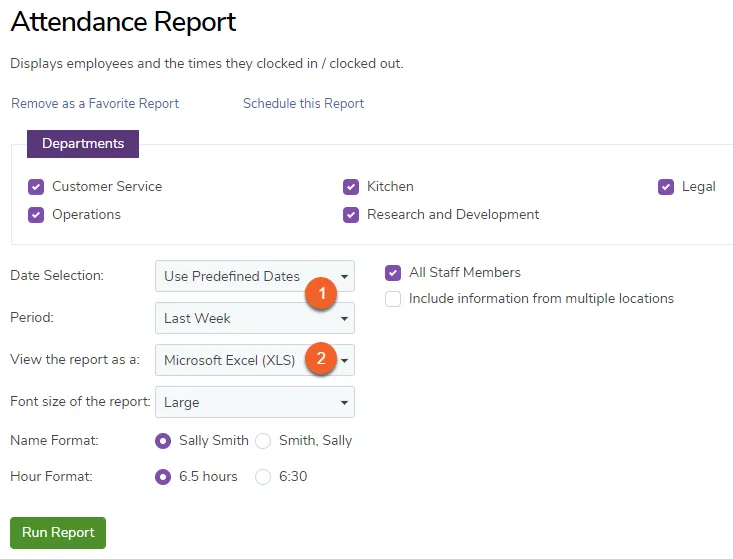
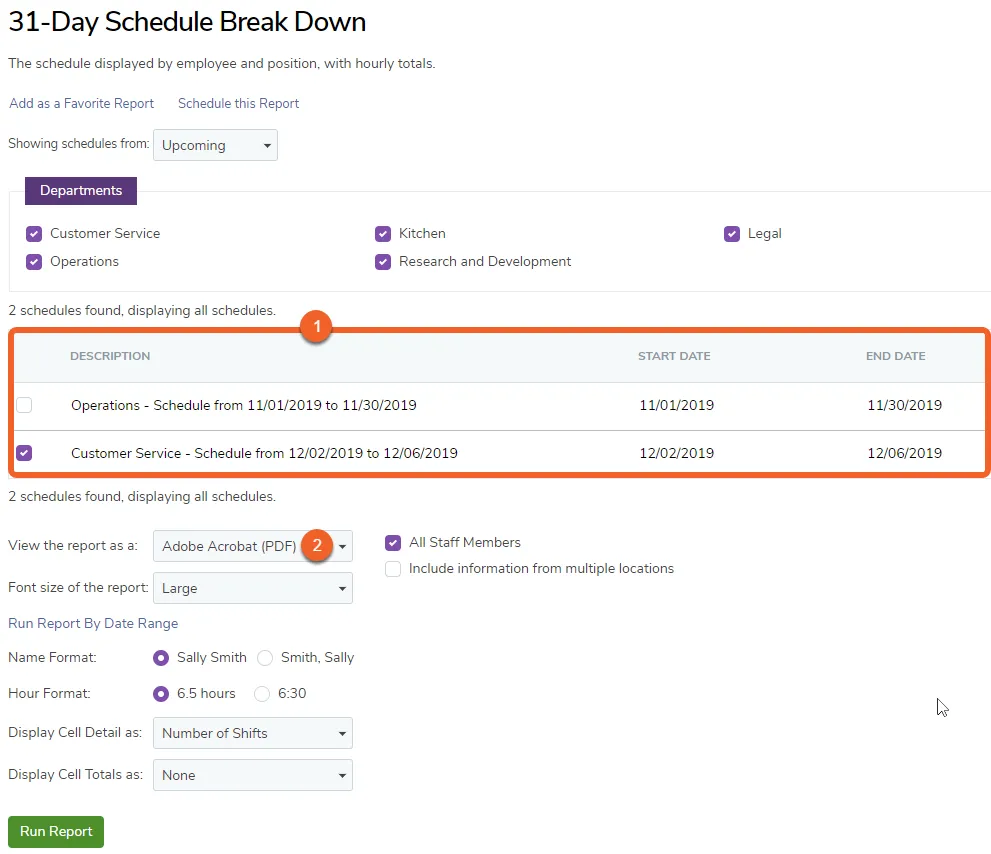
Beneath the schedules list, you’ll see some options for formatting the report. The one we’re looking for is the Hour Format. Setting this to 6.5 will force the report to use 24-hour format. Selecting 6:30 will cause the report to use 12-hour AM/PM format.
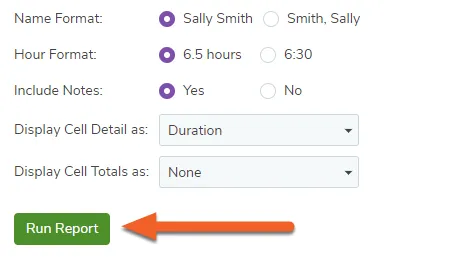
To run the configured report using the selected Hour Format, click the Run Report button.
Add a report to your favorites list
TimeForge offers a variety of reports in each of the scheduling, attendance, and sales modules. No matter what you’re looking for, TimeForge has a report that will tell you the information you need to know.
In addition to choosing a favorite report, you can also set up reports to be automatically emailed to any address at a specific time and frequency.
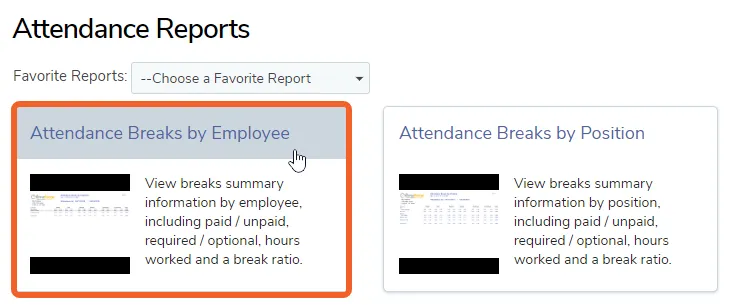
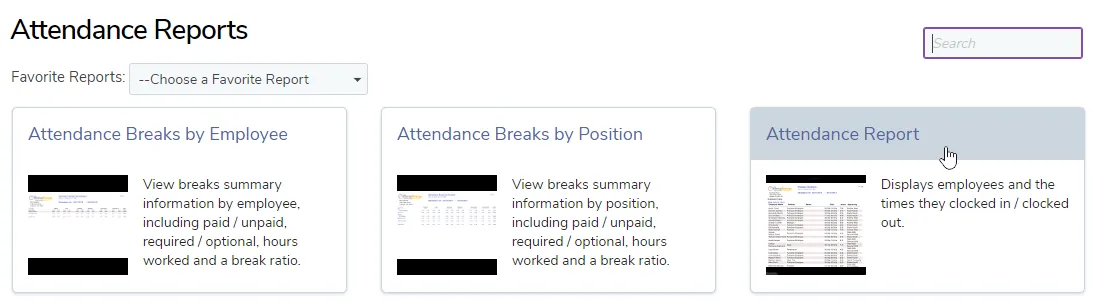
If you already have favorite reports, they’ll appear in the dropdown menu next to Favorite Reports. To add a new one, click on any card to open up that particular report.
For this example, we’ll add ‘Attendance Breaks by Employee’ as a favorite.
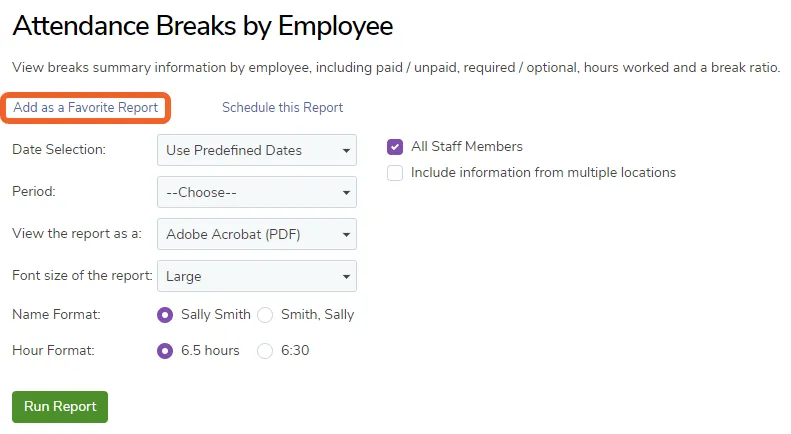
Near the top of the page, above the report options, you’ll see a link to Add as a Favorite Report. Simply click this link to add this report to your list of favorites.
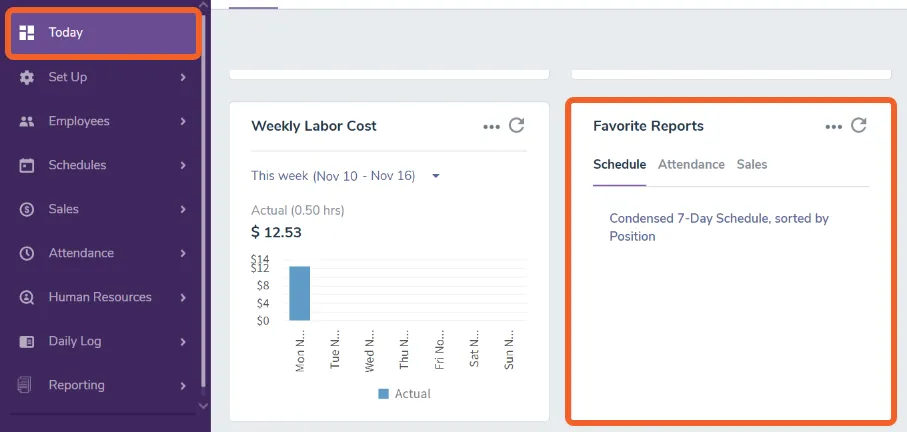
Now return to the main menu and click Today. In the Favorite Reports section, you will see the report you just added.
Create a minimum wage report
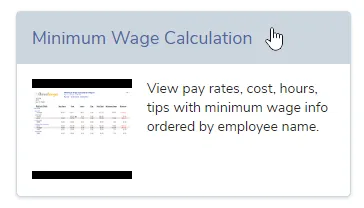
In TimeForge, a minimum wage report is based on tips, and it shows how much more an employee should be paid per hour to meet minimum wage requirements.
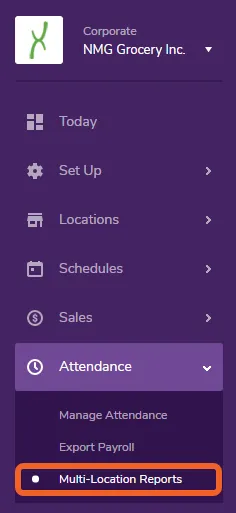
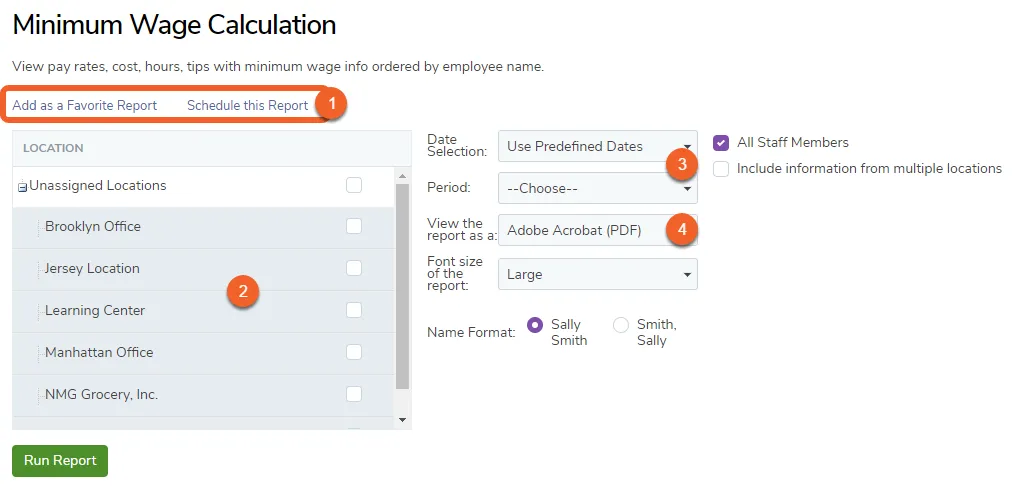
Choose which locations you would like to appear on the report.
Select a date range or period (e.g. yesterday, last week, last month, etc.). Selecting a period may present department options if you have departments enabled.
Choose whether to view the report as a PDF or Excel spreadsheet.
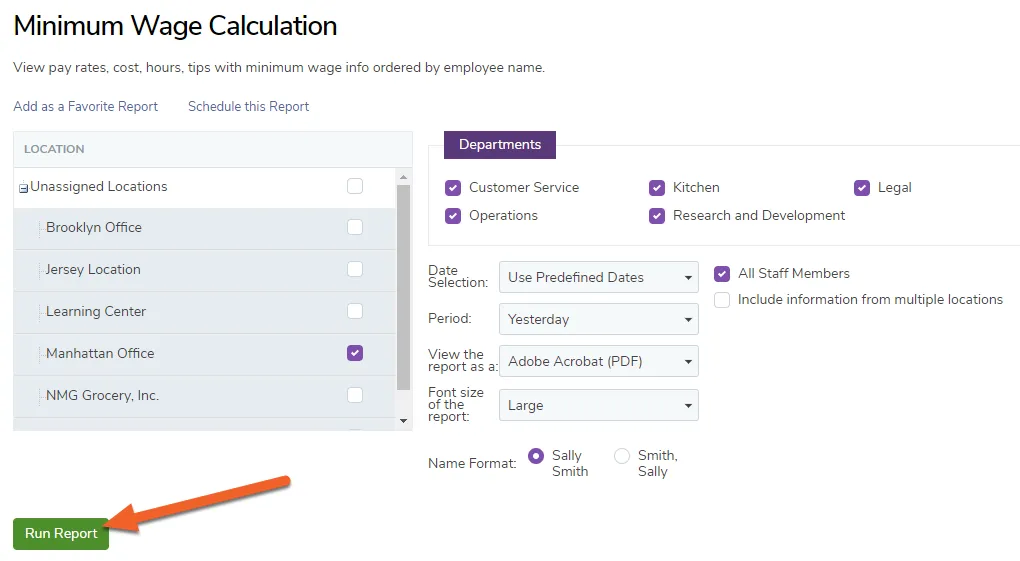
Once you’re done configuring the report, select the Run Report button to generate the report.
If you choose to run the report as a PDF, it will load on your screen. If you run it as an Excel file, it will save to your computer and you will have to open it in Excel or a similar software.
The report will include columns for Employee Name, Pay Rates, Cost, Hours, Tips, Sub Total, Minimum Wage, and Difference.
Create an employee schedule report
TimeForge is the most flexible and powerful labor management system available. With it, you have the ability to quickly and easily create, view, and print employee schedules.
In addition to the various reports that can be printed, you can also quickly view and print your weekly schedule with one click on the “Schedules” page.
Printing reports of your employee schedule is easy, and here is how it’s done.
1. Select the schedule(s) you would like to run as a report
2. Choose to view the report as either a PDF file or Excel document. (Note: If you choose Excel, Timeforge will export the report to an Excel file, and you can print it from Excel.)
3. Determine how the cell data will be displayed. Choose either the number of shifts, duration of shift, cost of shift, or the actual time of shift.
4. Determine what will be displayed in the “total” cell of your report. Choose either number of shifts, duration of shift, or cost of shift.
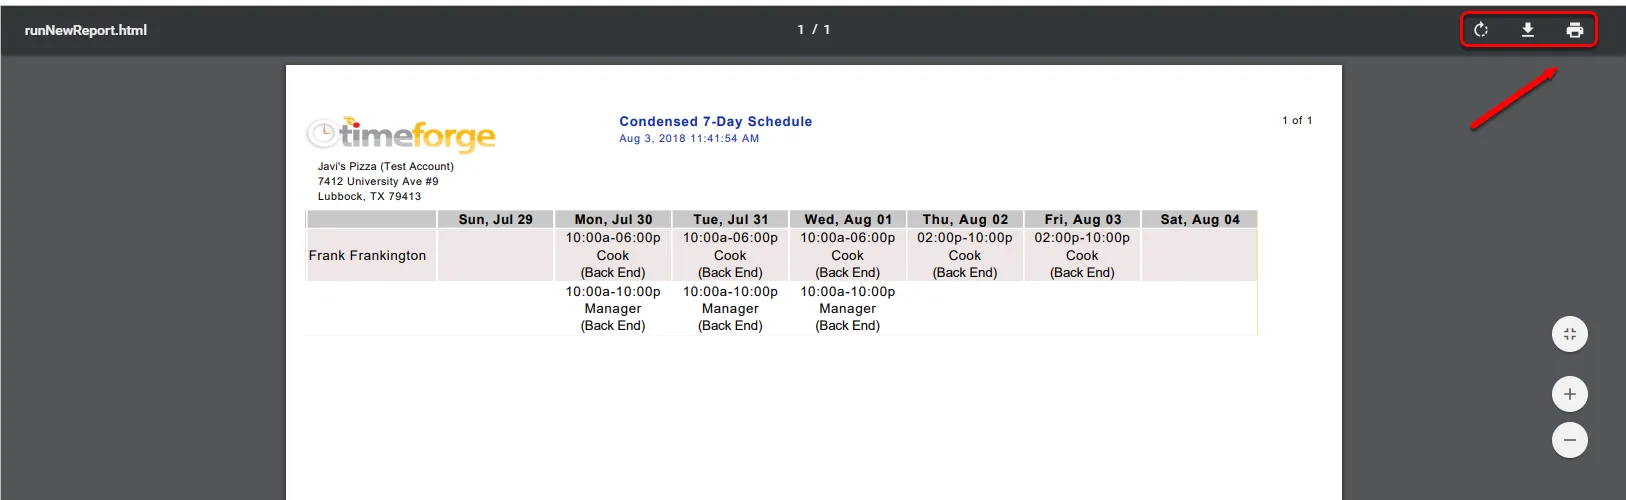
After you run the report, your schedule will appear as an image. The options highlighted in red will appear when you mouse over the report.
To print, click the furthest icon on the right.
Create an employee attendance report
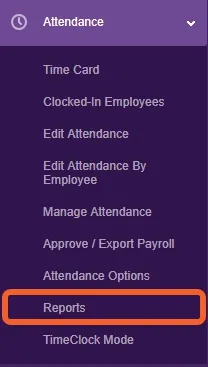
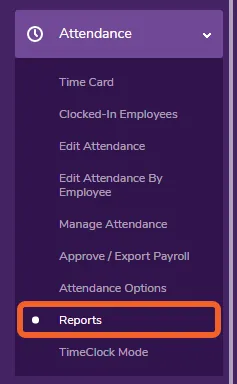
TimeForge is an extensive and powerful employee scheduling and attendance tracking management package, and you can begin to see some of the power by clicking on the Attendance tab. Many, but not all, of the attendance and time card capabilities occur within the Attendance tab.
Additionally, TimeForge has many labor management reports that can display things like sales, approved payroll, time card punches, and many other labor metrics that are important for successfully managing a work force.
Keep reading to learn how to quickly and easily create an employee attendance report.
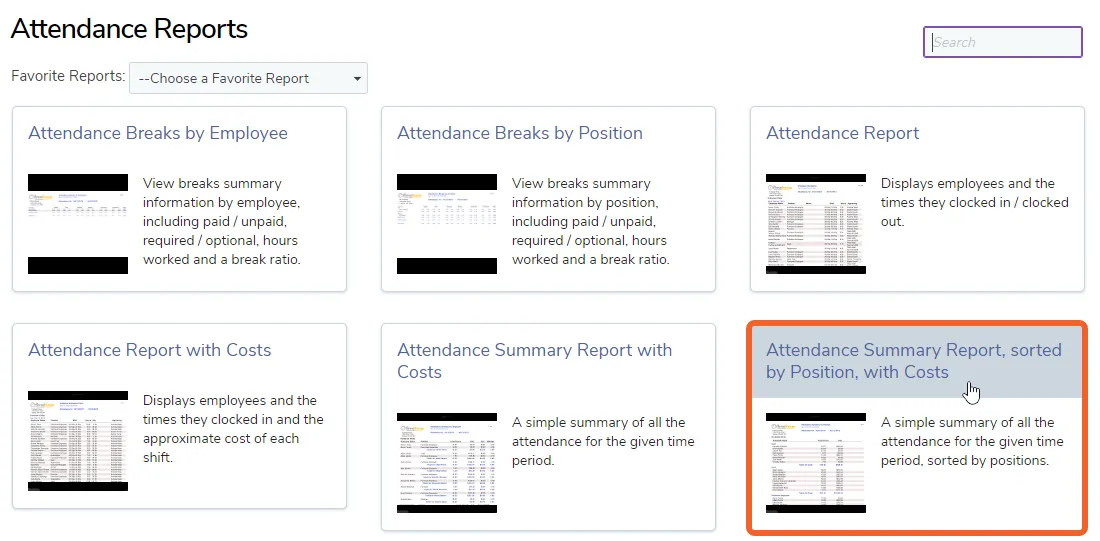
TimeForge contains dozens of time card and staff member attendance reports, including PTO, sick, and vacation reports, reports detailing employee time sheets, payroll summary reports, and actual vs. scheduled time reports. Many TimeForge users like the “Attendance Summary Report, sorted by Position, with Costs” report because it offers a lot of valuable information all in one report.
Reports are ordered alphabetically, but you can narrow down the list by entering keywords in the search box at the top of the page.
For this example, we’ll run the Attendance Summary Report, sorted by Position, with Costs.
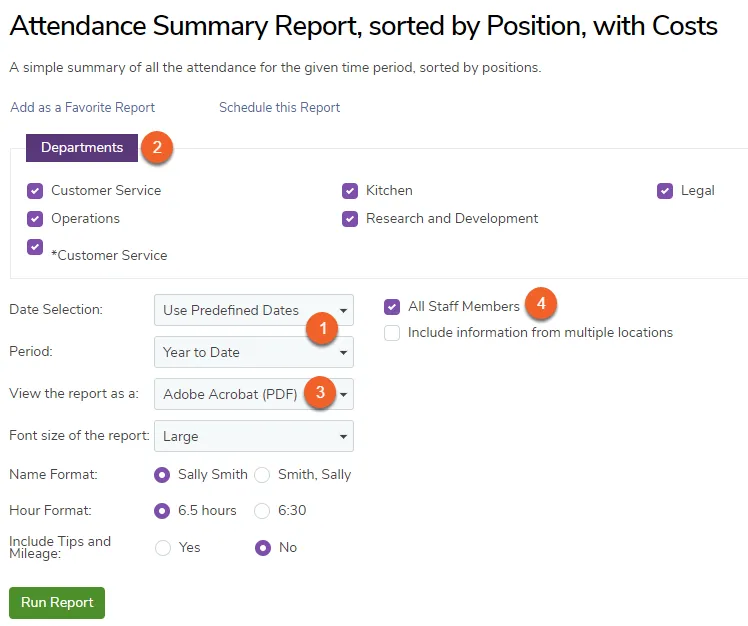
You can run staff member attendance reports either by choosing your specific date range or, choose from a drop down box containing various predefined date ranges. Once you select a date range or period, departments may become available for selection.
Next, check the departments you wish to run the report for. You can run a report for multiple departments.
Choose how you would like to view the report, whether as a PDF or Excel spreadsheet.
Choose whether the report needs to include attendance for all staff members. If you only want to run the report for one or just a few employees, uncheck the “All Staff Members” box and select the appropriate employees to include in the report
Configure any other settings as best suits your needs.
When you’re satisfied with the configuration, click the Run Report button at the bottom of the screen. What happens next will depend on your browser configurations.
If you selected to view as a PDF, the report will likely display on screen, and you can use your browser’s built-in options to download and/or print.
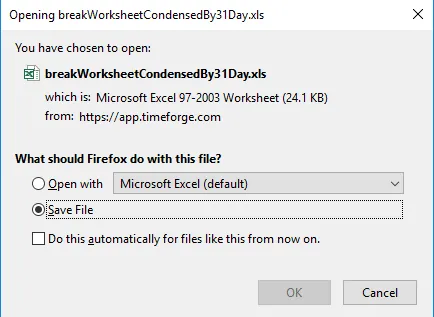
If you selected to view as an Excel spreadsheet, the file will either automatically download, or you will be presented with options to open/save (shown below). Selecting Save File will ensure you save a copy to your computer.
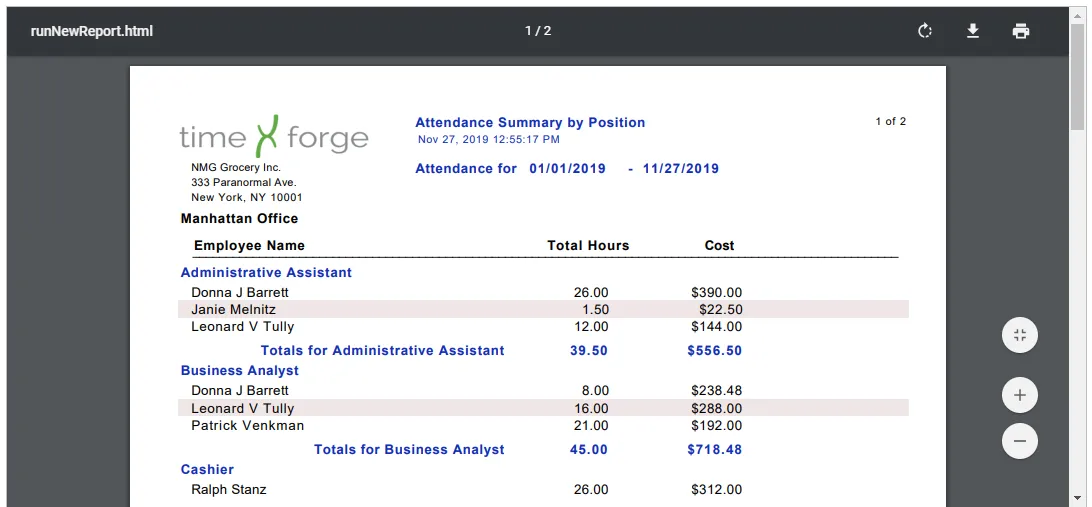
This particular report will generate columns for Employee Name (grouped by Position), Total Hours, and Cost, with totals for each position. For example:
Create a sales report
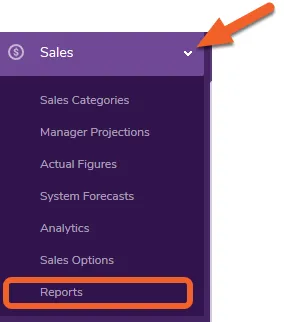
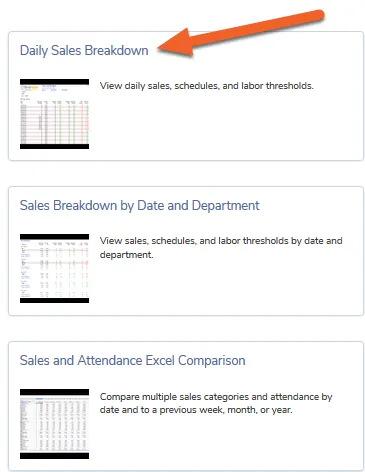
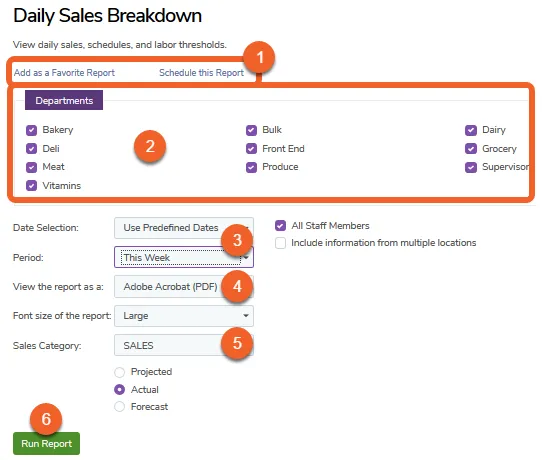
TimeForge sales is the most powerful way to keep track of your sales information and keep your labor costs at a minimum. Printing your sales report is easy in TimeForge. Here’s how it’s done.
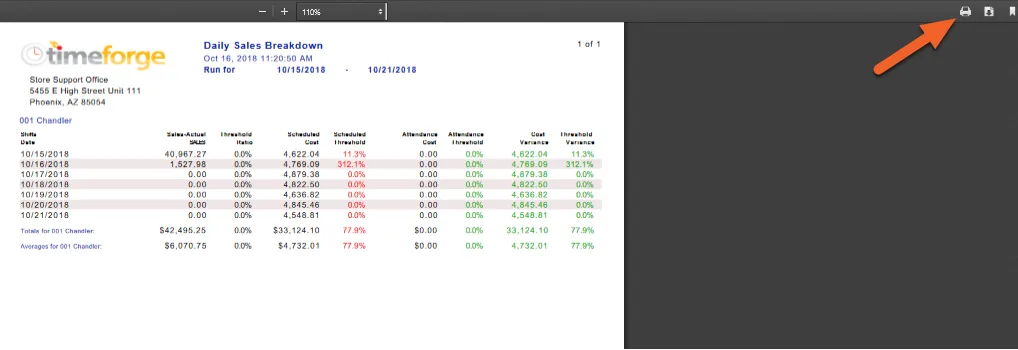
If you chose to view/print as PDF, you’ll be able to print or save the file from your browser. If you chose to view as an Excel file, the spreadsheet will be downloaded, and you’ll be able to open it up and print from there.
Export an attendance (or other) report to PDF or Excel
In some cases, it may be important to export and save information from TimeForge into an Excel spreadsheet or PDF format for backup – say, for example, if you sell your business or need to further crunch the data.
This article will show you how to export an Attendance report as a PDF document or Excel spreadsheet and save it for future use, but these steps can actually be applied to any report in TimeForge.
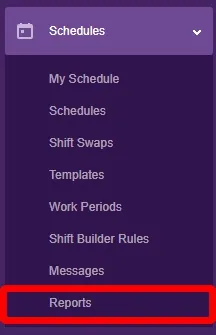
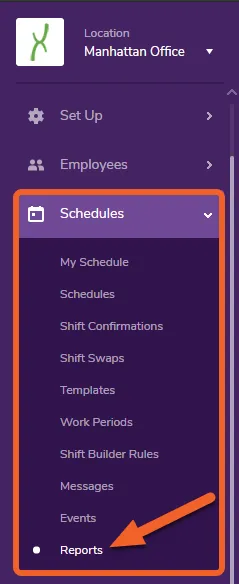
Go to a Reports page, such as your Attendance Reports
When you’re satisfied with the configuration, click the Run Report button at the bottom of the screen. What happens next will depend on your browser configurations.
If you selected to view as a PDF, the report will likely display on screen, and you can use your browser’s built-in options to download and/or print.
If you selected to view as an Excel spreadsheet, the file will either automatically download, or you will be presented with options to open/save (shown below). Selecting Save File will ensure you save a copy to your computer.
Export a schedule report to PDF or Excel
This article will show you how to export and save a Schedule report as either a PDF or Excel file.
When you’re satisfied with the configuration, click the Run Report button at the bottom of the screen. What happens next will depend on your browser configurations.
If you selected to view as a PDF, the report will likely display on screen, and you can use your browser’s built-in options to download and/or print.
If you selected to view as an Excel spreadsheet, the file will either automatically download, or you will be presented with options to open/save (shown below). Selecting Save File will ensure you save a copy to your computer.
View changes to employee pay rates
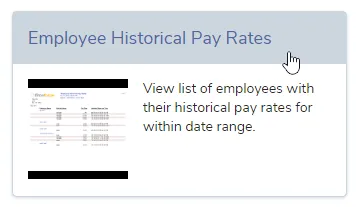
In TimeForge, you can always view a list of employees with their historical pay rates for a given date range using the Employee Historical Pay Rates report. This article will show you how to run the report.
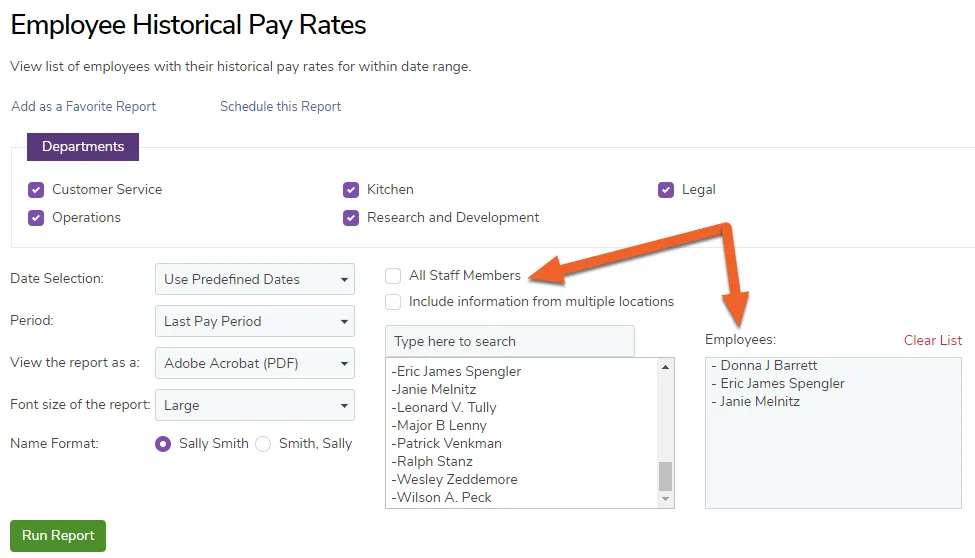
Configure the report options so that it will run the way you want.
For example, if you only want to run the report for one or just a few employees, uncheck the “All Staff Members” box and select the appropriate employees to include in the report (shown in example below).
When you’re satisfied with the configuration, click the Run Report button at the bottom of the screen. What happens next will depend on your browser configurations.
If you selected to view as a PDF, the report will likely display on screen, and you can use your browser’s built-in options to download and/or print.
If you selected to view as an Excel spreadsheet, the file will either automatically download, or you will be presented with options to open/save (shown below). Selecting Save File will ensure you save a copy to your computer.
This particular report will generate columns for Employee Name, Position Name, Old Pay Rate, New Pay Rate, and the date and time the pay rate was modified.
View employee clock-in and clock-out times
TimeForge Attendance was created to save management the time and hassle of keeping up with employee schedules. You can even enforce your employee schedule so that your employees only clock in and out at the times designated by their schedules.
In TimeForge, there are many ways to keep track of your employees’ time punches. For example, you can view currently clocked-in employees, quickly view who’s clocking in too early or out too late, and even create and enforce break rules.
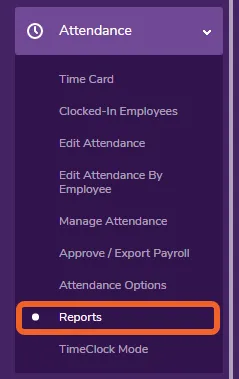
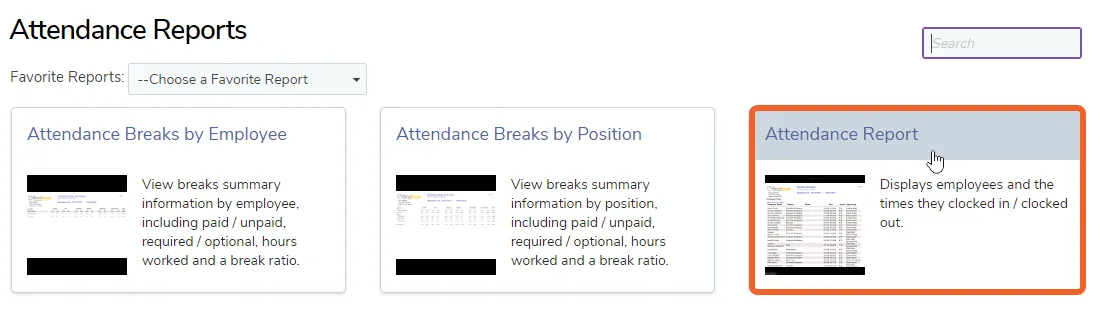
Here’s how you can quickly run a report to view employee clock-in and clock-out times.
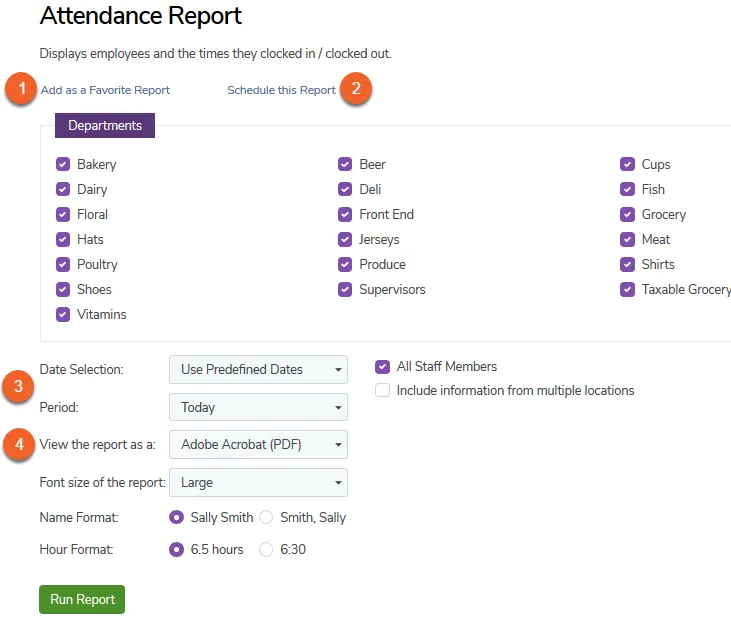
This report will display employee clock-in/clock-out times for the selected department(s). Department selection becomes available when you choose a Period for the report.
You can add this report to your favorites, which will make it available in a drop-down menu on your reports page. This is for quick access to frequently used reports.
You can Schedule this Report if you would like it to be emailed directly to one or more addresses at a specified date/time. Learn more about how to schedule reports.
You can choose a date range or a period (today, yesterday, next week, last week, etc.).
Choose whether to view the report as a PDF file or as a Microsoft Excel file.
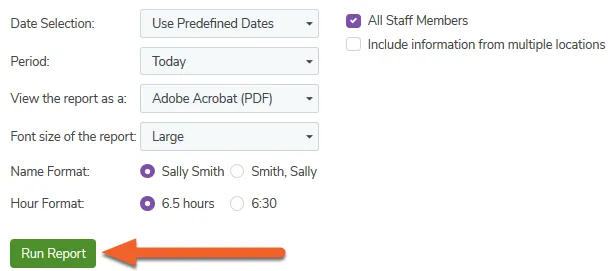
Once you’re done customizing the report, click the Run Report button.
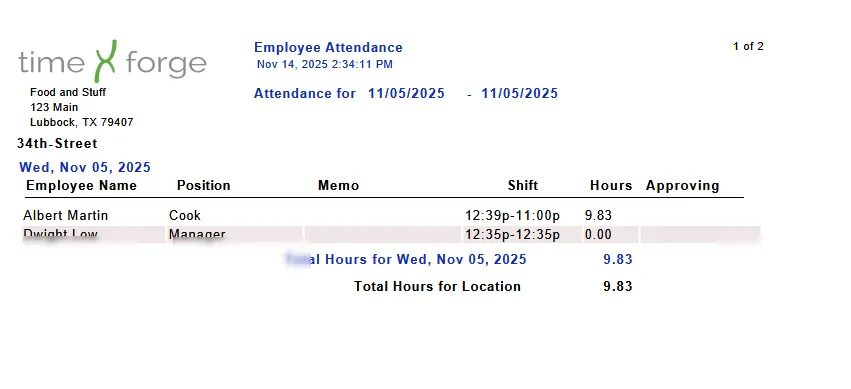
Your report will load as a PDF or will save as an Excel file, depending on what you selected in the previous step. From here, you can view all staff members’ clock-in and clock-out times as well as print or save the report.
Ad-hoc reports, including hourly sales reports
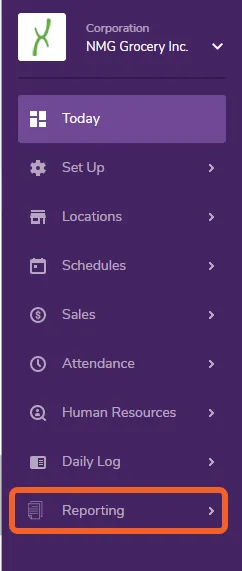
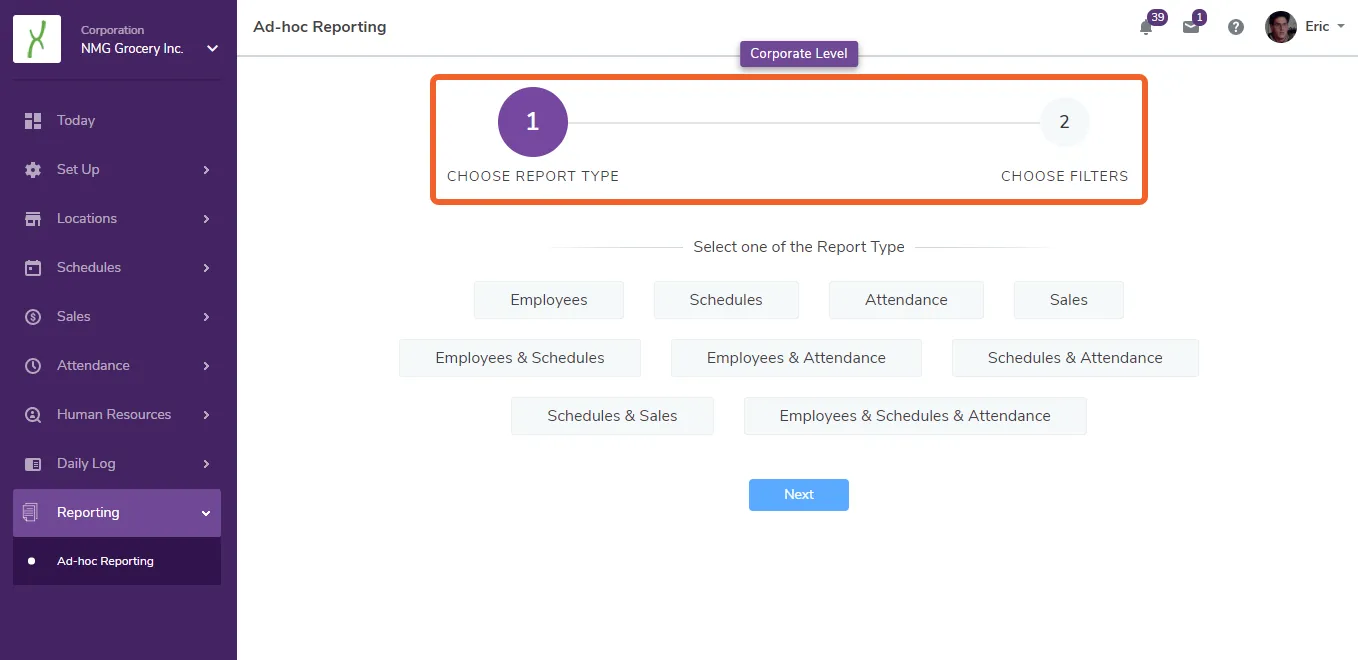
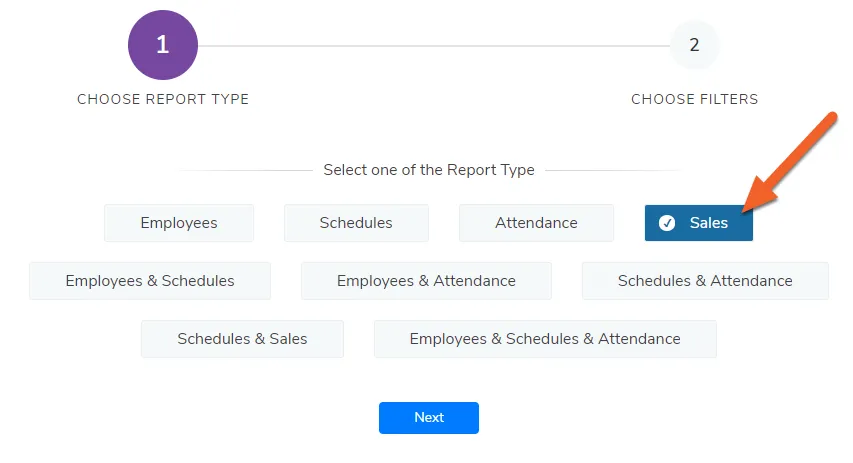
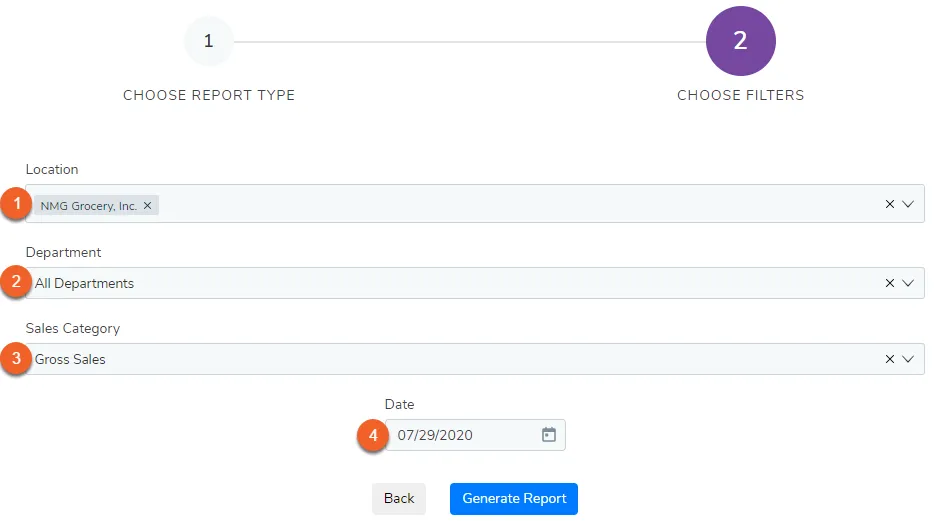
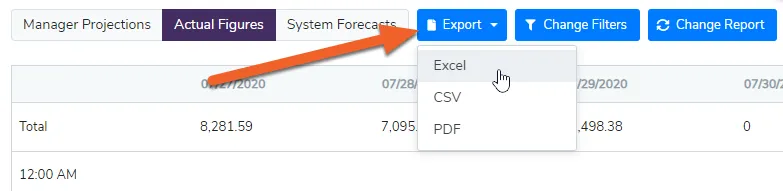
Under the new Reporting tab, managers now have access to ad-hoc reporting: a simple yet powerful tool that allows you to build and run your own reports in just a few easy steps!
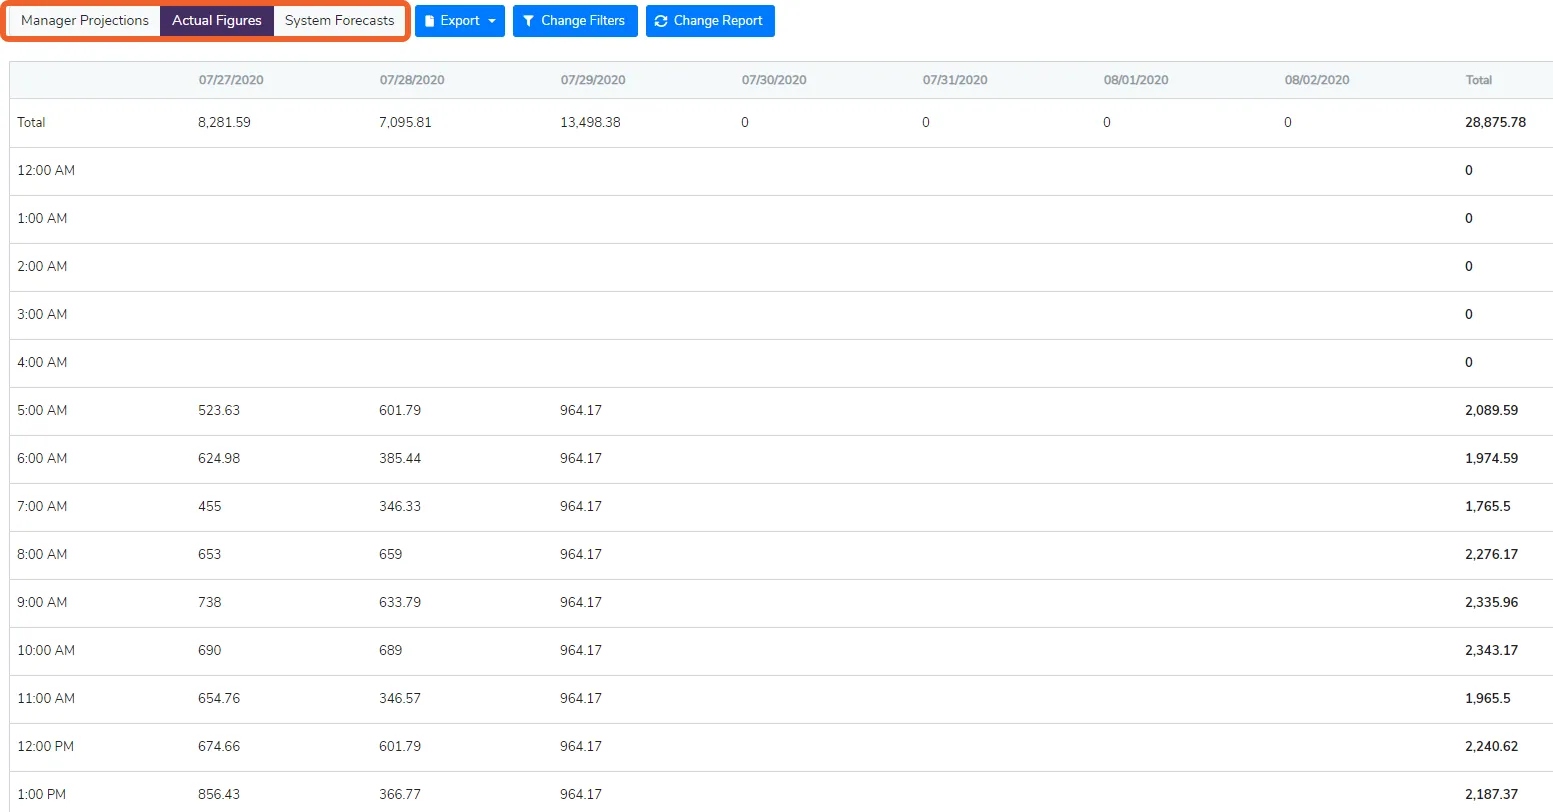
One of the biggest benefits to ad-hoc reporting is that you can now run hourly sales reports. TimeForge will show you the entire week’s sales, with the option to view manager projections, actual figures, or system forecasts.