
Terminate an employee
In addition to the simple ways you can do things like create an employee profile and track attendance, TimeForge makes common HR tasks, such as hiring and terminating staff, a simple one-click process. The process involved to terminate an employee is very easy, and it is similar to how you would edit an employee’s schedule. There are two ways to terminate an employee. By clicking the “Terminate” link or through the “Edit” link on the “Employees” page. The “Terminate” link will immediately terminate the employee. The “Edit” link provides you the option of setting a terminate date.
Here is how you can easily terminate staff as necessary at your business.
Open the Employees tab and select Employees from the dropdown menu
Section titled “Open the Employees tab and select Employees from the dropdown menu”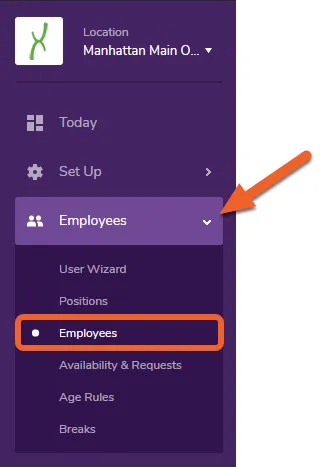
Locate the employee to terminate
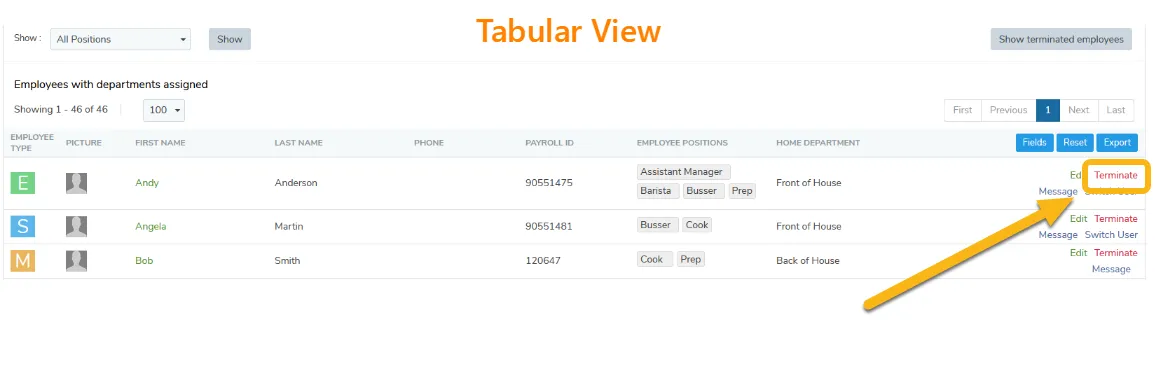
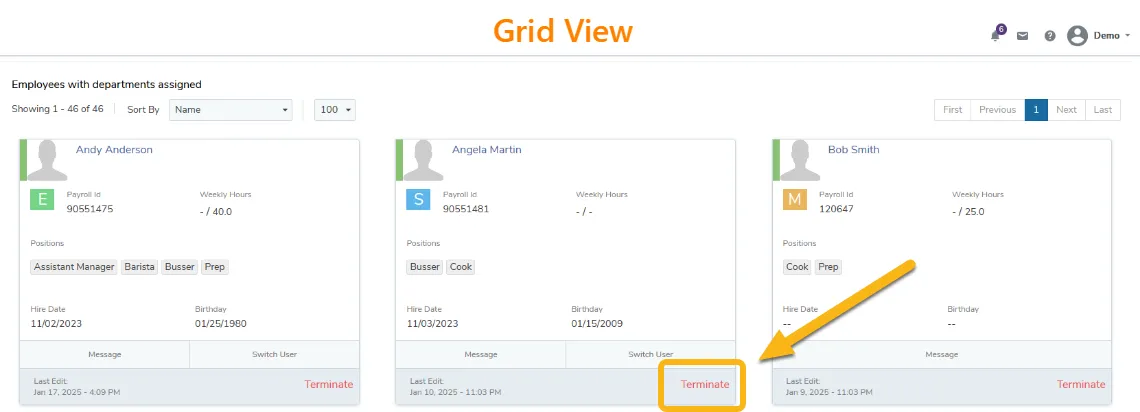
Section titled “Locate the employee to terminate”To terminate an employee, locate their profile in the Employees page and click the Terminate button next their profile. The screenshots below slows where the Terminate button appears when using the grid or tabular view of the Employees page.
After you select to terminate the employee, TimeForge requires you to review the fields shown below before finalizing the termination.
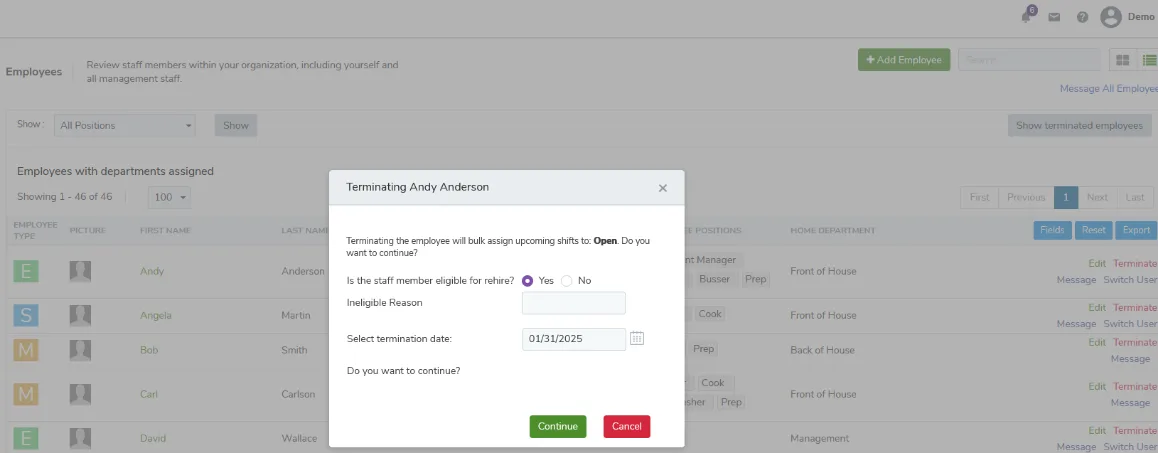
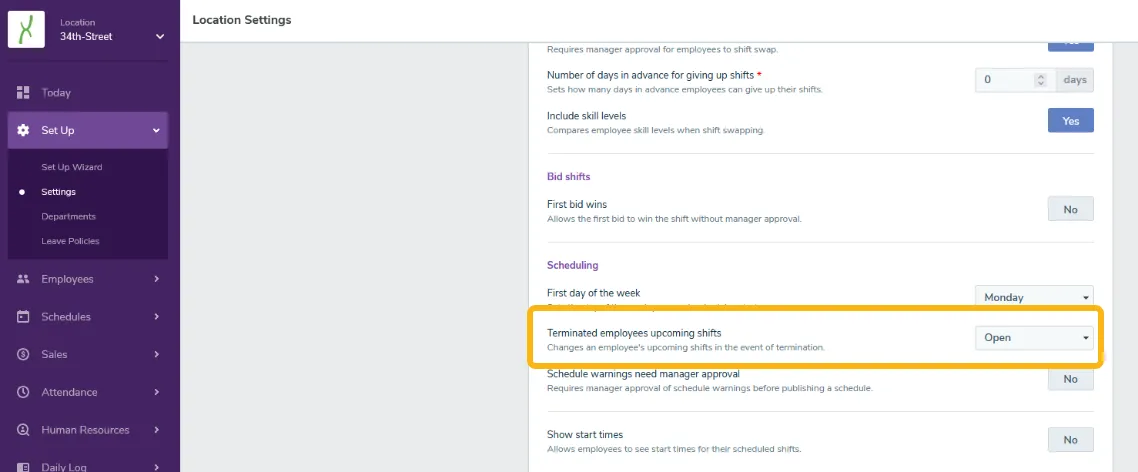
- If the employee has any upcoming shifts, TimeForge displays a warning notifying you the system will delete or update upcoming shifts to either open, bid or autoschedule shifts *
- If the staff member is eligible for rehire.
- TimeForge does not require input in the “Ineligible Reason” field, but leaving a note can help you better document an employee’s termination.
- You can set the termination date in the past or future depending on when the employee’s last day worked occurs.
Once you’ve reviewed all of the termination fields, click the Continue button to finalize terminating the employee. Note, the Employees page displays a terminated employee in the active list until their termination date is set in the past. If you assign the current date as the employee’s termination date, the employee’s name will appear in the active list until the next day.
Terminate an employee from their profile
Section titled “Terminate an employee from their profile”You can also terminate an employee from their profile. To access their profile, click the Edit link on the row (if in List view) or simply click the employee’s card (if in Grid view, shown here).
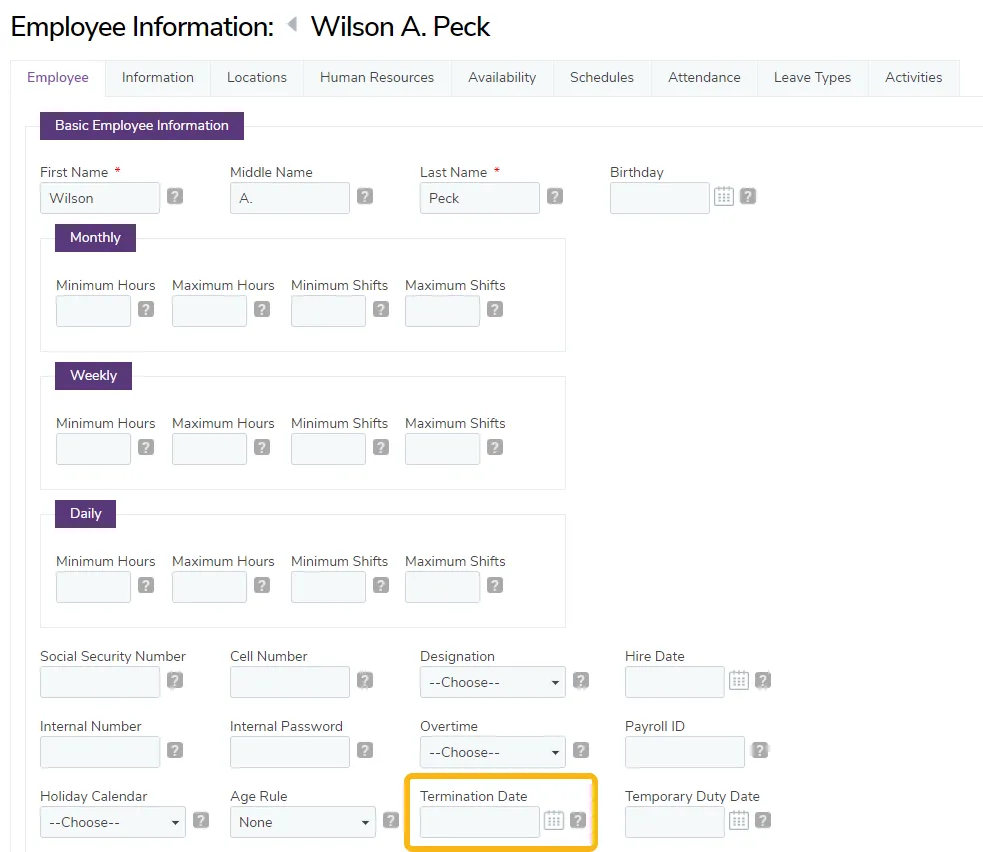
Look for the field titled Termination Date. Enter the date on which you wish the staff member’s employment to end.
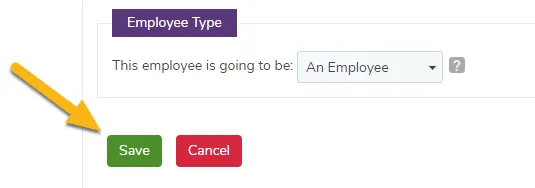
Don’t forget to click Save at the bottom of their profile when you’re finished!
Terminating an employee at multiple locations
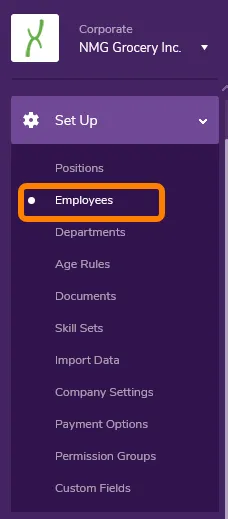
Section titled “Terminating an employee at multiple locations”From the Corporate level, you can assign a termination date at multiple locations to an employee profile. This saves you time as you don’t have to switch into each location you want to assign a termination date. To do this, navigate to the Setup tab and select Employees.
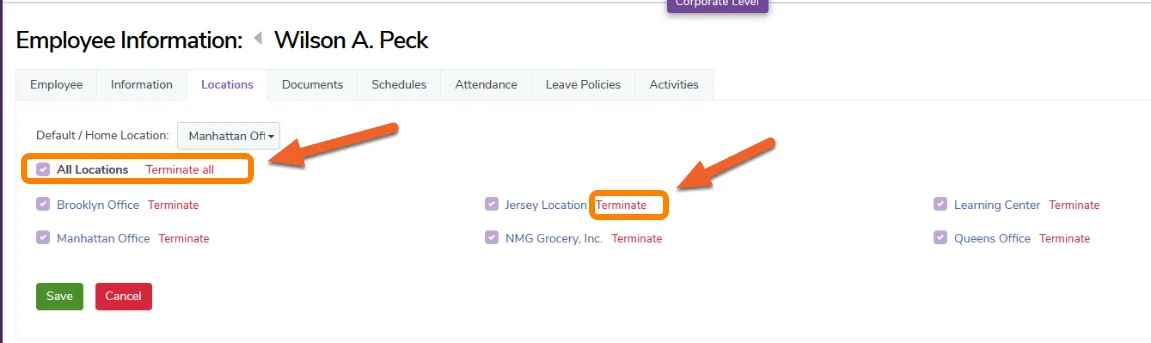
After you click on the profile you want to update, click the Locations button. If you want to terminate the employee across all locations, you can click on the Terminate All option. Clicking the Terminate option next a location’s name terminates the employee from that specific location.
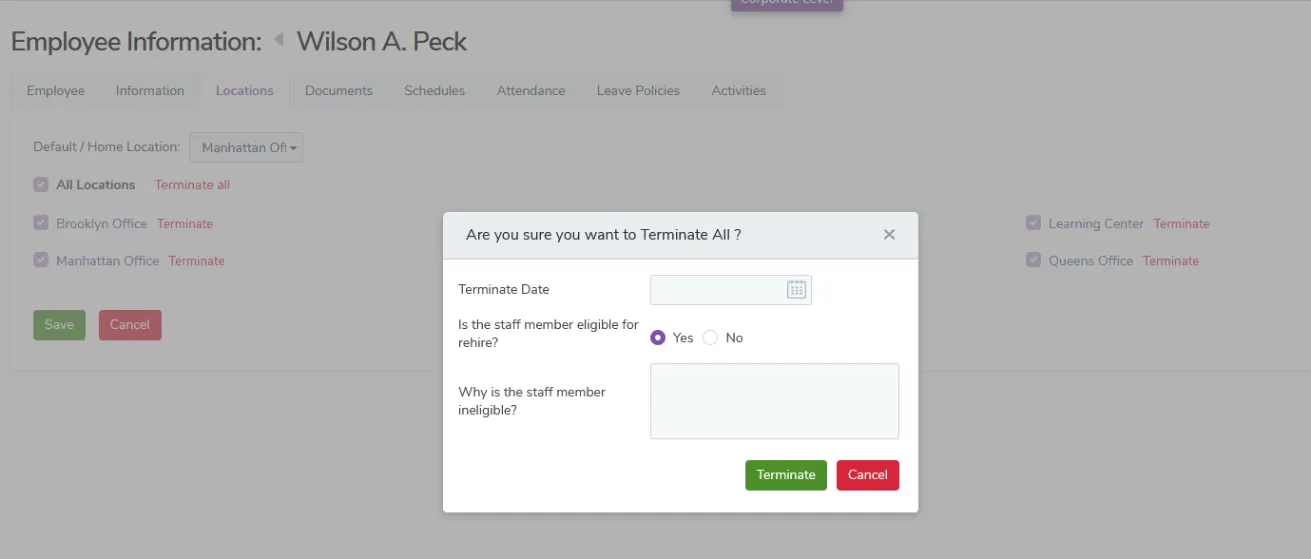
The prompt below appears when you select Terminate All or Terminate. You must complete the prompt to finalize your changes.
Rehire an employee
Section titled “Rehire an employee”To rehire an employee, all you have to do is remove the termination date.
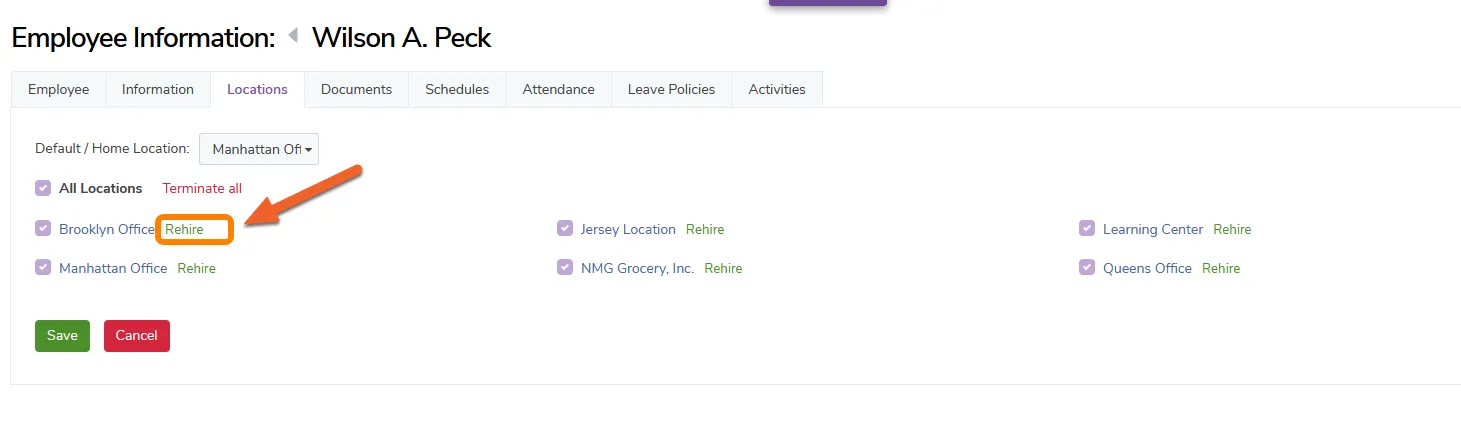
If you have multiple locations, you can navigate to the corporate level and click the Rehire option next to the locations where you want to remove the termination date.