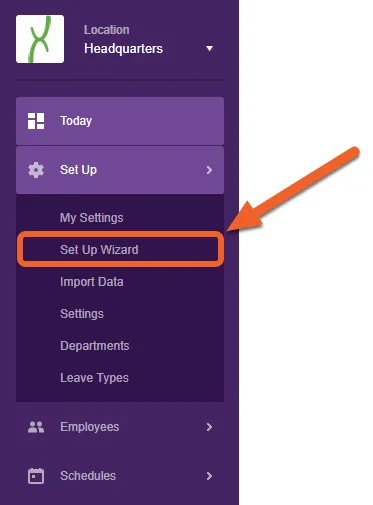
The TimeForge Setup Wizard makes getting started with TimeForge easy.
The wizard is designed to simplify the process of inputting information that TimeForge needs to help you manage your labor.
The Setup Wizard will walk you through setting up basic information about your company and staff, like basic staff information, a list of your positions, etc.
It also captures your location information, which is displayed on reports (printables), so you never need to worry about determining what schedule applies to which location.
How it works:
The Setup Wizard will also ask you some basic questions about how your store is organized. This information helps TimeForge more accurately customize our systems for your maximum convenience and ease of use. You shouldn’t have to re-organize your business just to use our product; TimeForge customizes itself to your business. Our “fill in the blank” format saves you tons of time (money), and makes setting up your account easy and fast.
Information about your employees makes contacting them simple. Just enter their email addresses, and TimeForge automatically emails them with a prompt to set up their account. Once their accounts are set up, TimeForge can notify each employee (according to their preferences) via email, Facebook notification, and/or cell phone message. We make an automatic audit confirming that the employee received notification of the schedule. Never again will you hear, “I didn’t know I was scheduled”!
After supplying position and employee information, your basic setup is complete - you’re ready to start building a schedule!
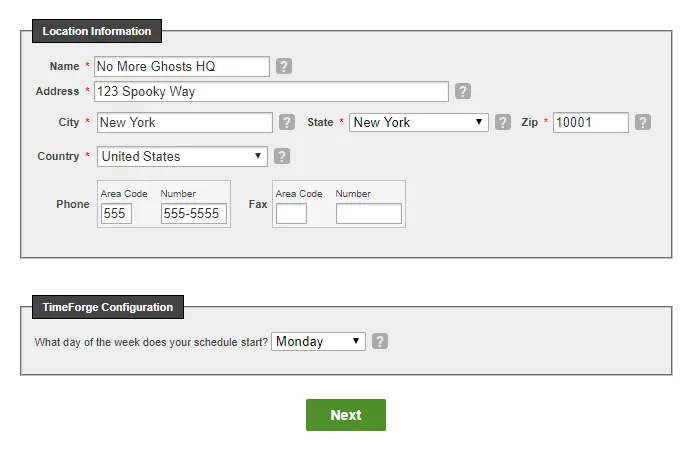
For the first step, enter your basic company and location information, such as the name, address, phone, and fax number for your store. Then, set the day of the week that your schedule starts. If you use bi-weekly or monthly schedules, choose the most appropriate day.
Click the Next button when you’re ready to proceed.
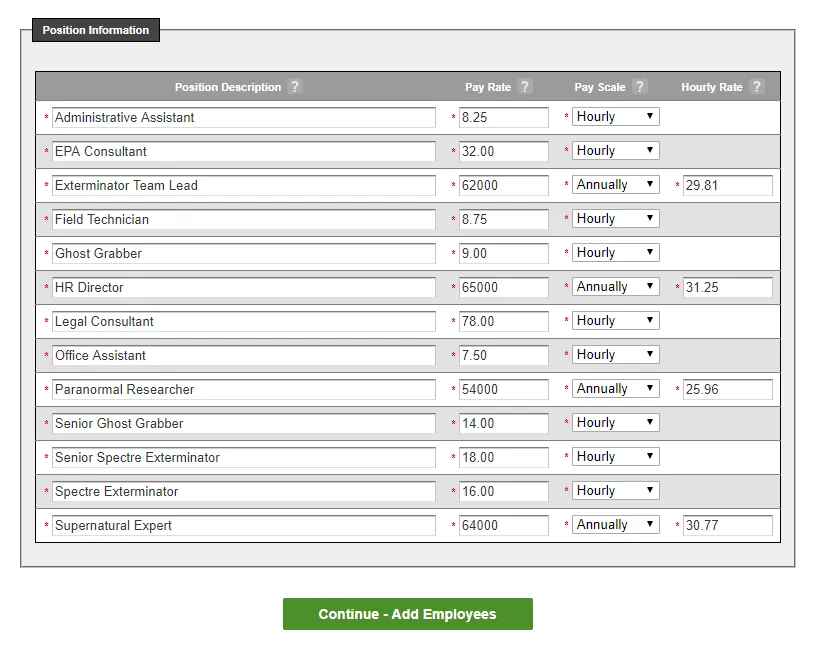
For Step 2, enter the positions or job codes that your business uses to schedule employees. Base pay rates and pay scales can also be entered for each Position (don’t worry, you can override these rates on a per-employee basis if needed).
Pay rates will be useful later to compute schedule costs and determine sales to labor ratios, and if you’re using TimeForge Attendance, they’re also used when employees clock in and clock out.
For example:
A table service restaurant might have positions for: Waiter, Food Runner, Busser, Bartender, Delivery Driver, Cook, Assistant Manager, Bar Manager, etc.
A quick service restaurant might have positions for: Cashier / Register, Drive Through, Cook, Assistant Manager, Manager, etc.
A car wash retail business might have positions for: Cashier, Attendant, Car Wash Detailer, Team Member, Assistant Manager, Manager, etc.
Other retail businesses could have positions for: Register, Security, Carry Out, Delivery Driver, Bagger, Assistant Manager, Manager, Supervisor, etc.
If you set a Pay Scale to “Annually” (for example, a salaried manager), the software will automatically compute an equivalent hourly rate in the “Hourly Rate” column. You may override this field if necessary.
Click Continue - Add Employees when you’re ready to move on.
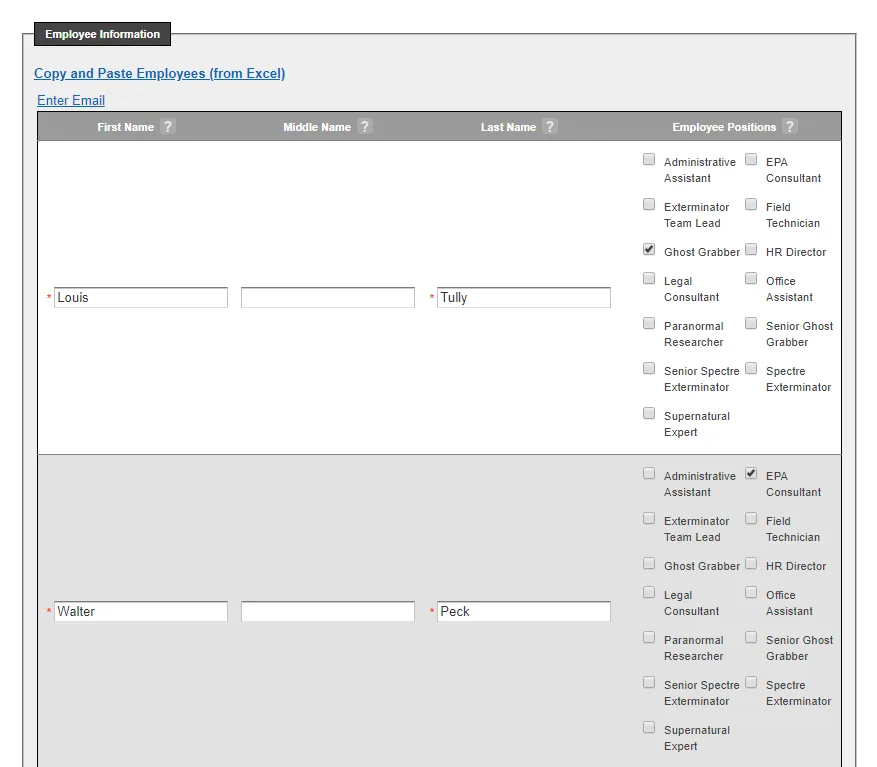
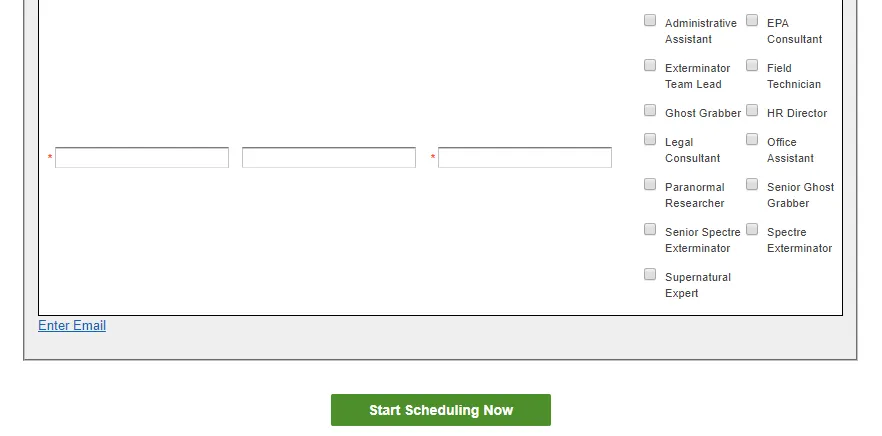
For the last step, enter the employees at your business that will be on the schedule and assign them positions by checking the boxes in the far right column. Each employee will need to have a first and last name in the system, but the middle name or initial is optional.
If you know your employees’ email addresses, you can click the Enter Email link at the top to enter them in. When you complete the wizard, TimeForge will automatically send those employees an email with instructions to access TimeForge.
When you’re done entering employees and assigning positions, click the Start Scheduling Now to save your changes. That’s all there is to it!
Use the Daily Log to stay organized
Keeping track of daily store logs, task lists, to-do items, and sticky notes can be tedious even for a small business. Add to that juggling maintenance visits, training events, human resource tasks, staff meetings, and other necessary items across multiple shifts (where the manager that scheduled the event may not be the manager responsible for the event) and you can quickly have what feels like a second full-time job.
Clear, organized communication among the management team and the rest of the staff is a requirement for every business, in any industry. As your business grows, keeping up with the pile of paperwork will not only become more difficult but also more critical for continued success. Fortunately, the TimeForge Daily Log is here to help you keep your business organized! This article will tell you how.
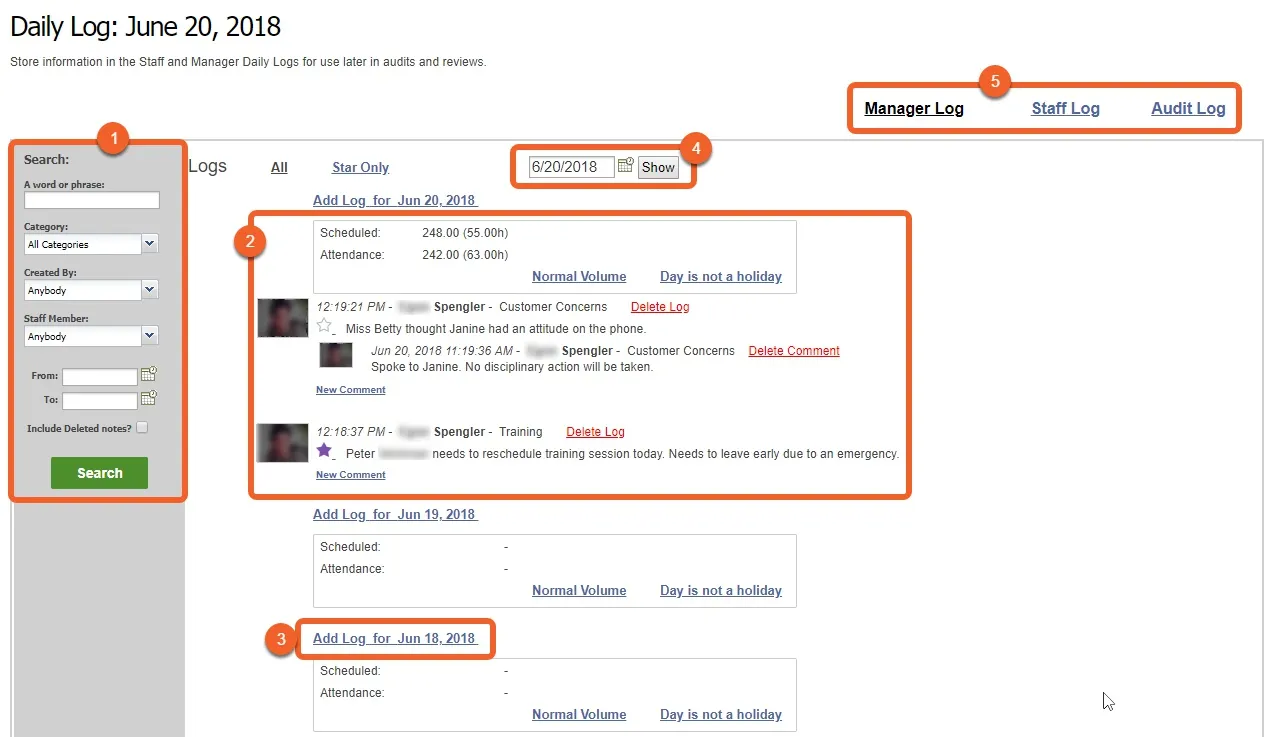
The Daily Log is a powerful yet easy-to-use tool to help keep your business organized. The chart and instructions below will help you get started.
Search the Daily Log by keyword, category, the manager who created the log entry, employee, or date range.
Logs for the day are displayed in an easy to read format, along with information about the number of hours scheduled for that day, attendance, sales, volume, and whether or not the day is a holiday.
Add a new Daily Log entry with a single click! You can add log entries for the current day (always listed at the top) or previous days, as shown here.
The date picker allows you to jump to a specific day.
Switch between the three components of the Daily Log: the Manager Log (viewable only by management staff), the Staff Log (viewable by all employees), and the Audit Log (contains audit information about changes made within TimeForge).
Occasionally, there are matters that need to be addressed with your staff (managers or general employees) to keep your operation running smoothly. Businesses in the restaurant, retail, and hospitality industries frequently struggle with relatively negligible problems like minor tardiness and uniform issues. Company guidelines and requirements can be neglected by busy employees and even busier managers.
To assist in addressing these labor management issues, TimeForge created Important Notes. You can upload files such as restaurant menus or notices about upcoming training events directly to the and categorize these messages and files as “Important Notes”.
Important Notes will always show up at the top of the page for managers and staff, so you’ll never have to search through the daily logs to find what you’re looking for. When the Important Notes you’ve delegated are no longer pertinent, you can simply delete those notes in order to make room for more timely news.
Important Notes also enables you to broadcast memos to managers, staff, or both, with alerts sent directly to a staff member’s e-mail, mobile phone, or Facebook.
TimeForge is a very sophisticated labor management system that works well for both independently owned and operated businesses, as well as chain concepts and franchises with multiple locations. More than just an employee scheduling system, TimeForge has two separate operating levels that can be customized to match your business hierarchy:
The Corporate (or Corporation) level is used to manage settings that affect multiple locations, such as separate retail stores, hotels, or restaurants.
The Location level is used to manage employee schedules and attendance at a specific location.
When operated by a business with more than one location, some of the functionality of TimeForge is moved to the Corporate level to ensure consistent labor reports and pay rules across all business locations.
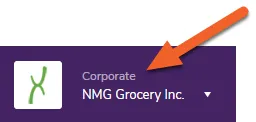
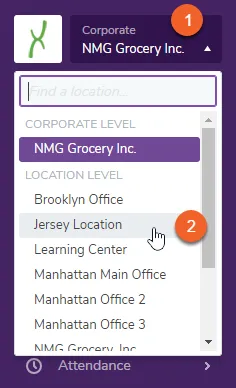
When you have multiple locations (2 or more) in TimeForge and you’re at the Corporate level, you will see the word “Corporate” followed by the name of your business:
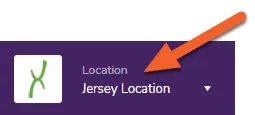
When you’re at the Location level and operating with multiple locations inside of TimeForge, you will see the word “Location” followed by the name of your currently-selected location.
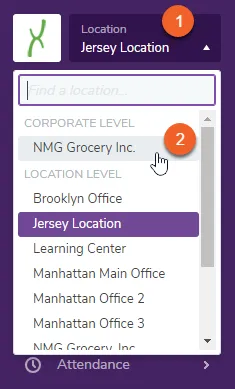
Simply click the top of the navigation pane to open up the menu, then select the name of a location under LOCATION LEVEL.
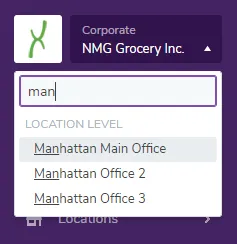
A real-time search box also allows you to quickly search through tens, hundreds, or thousands of store locations by name, store number, address, or zip code:
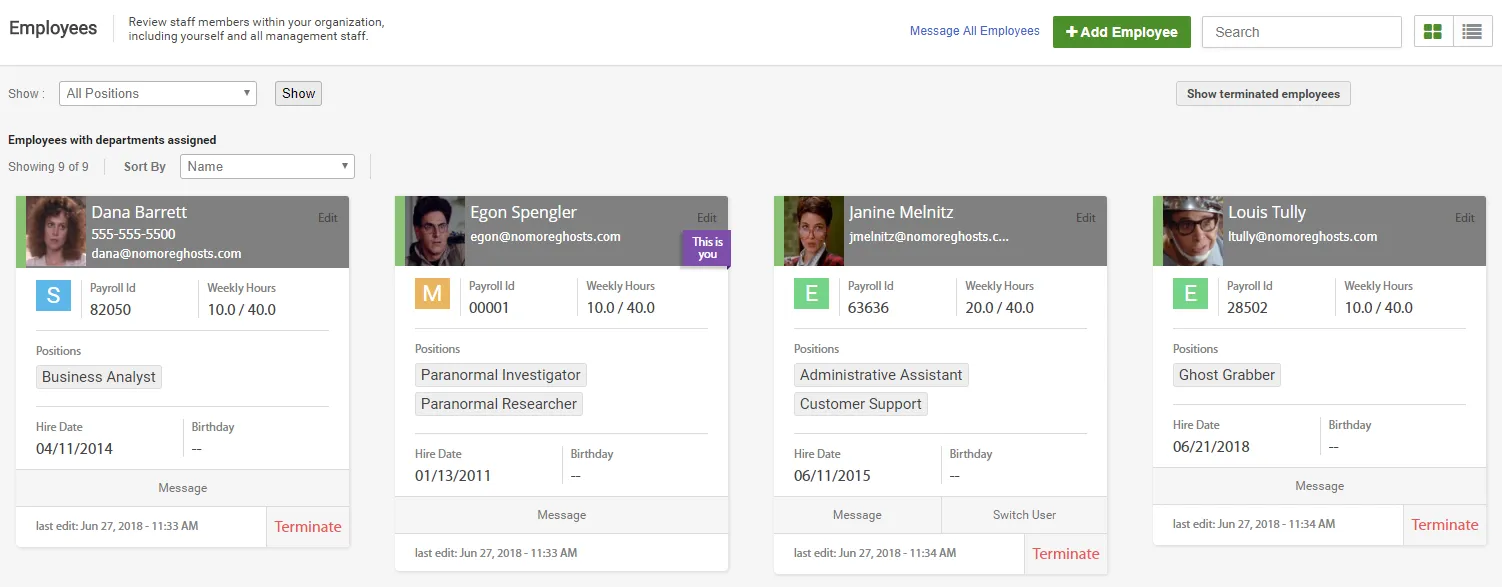
View your list of employees
All staff members are considered employees in TimeForge. Employees are defined across 3 categories (employee, supervisor, or manager) in the TimeForge system. More specifically, if a staff member can log in to TimeForge, can be scheduled inside of TimeForge, or can clock in on TimeForge (or with a 3rd party plug in), then that staff member is considered an “Employee” by TimeForge.
Account owners can add, edit, and terminate employees from the Employee List page.
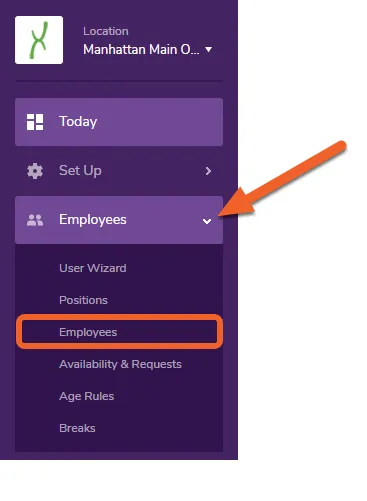
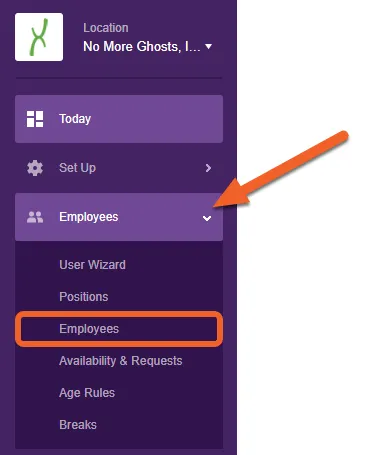
Navigate to the Employees page under the Employee tab
If you have multiple locations, first go to the Location level for a particular store, then open the Employees tab. Select Employees from the sub-menu.
What about from the Corporate level?
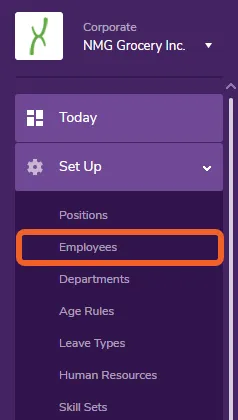
You can also view a company-wide employee list from the Corporate level if you have appropriate permissions, but you won’t have access to certain features, such as the ability to message all employees or import data.
To view your employees from the Corporate level, open the Set Up tab, then select Employees from the sub-menu.
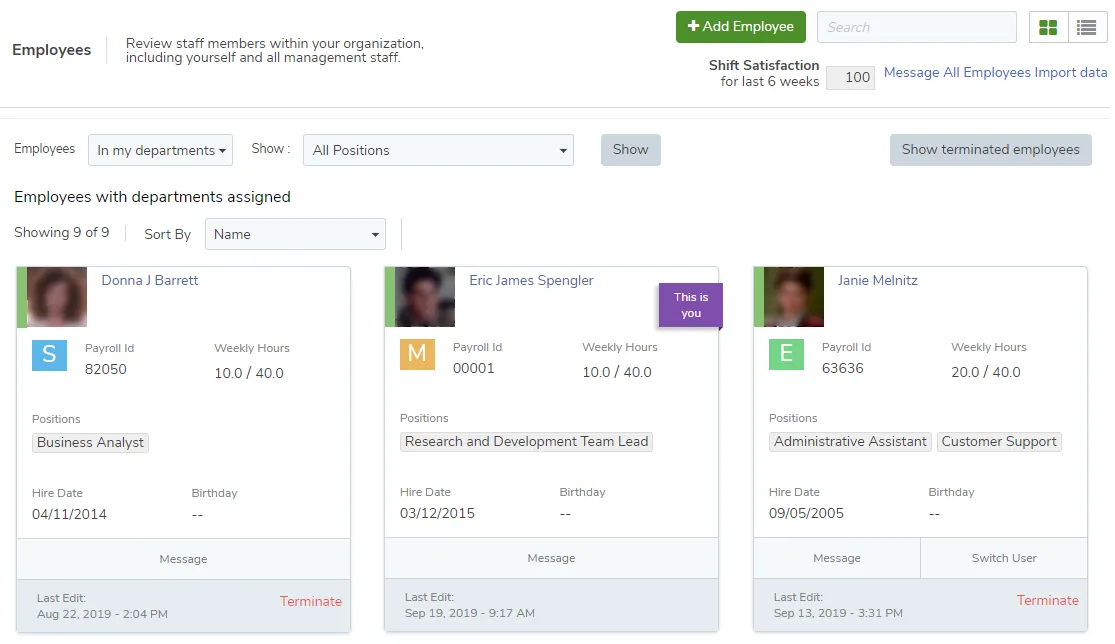
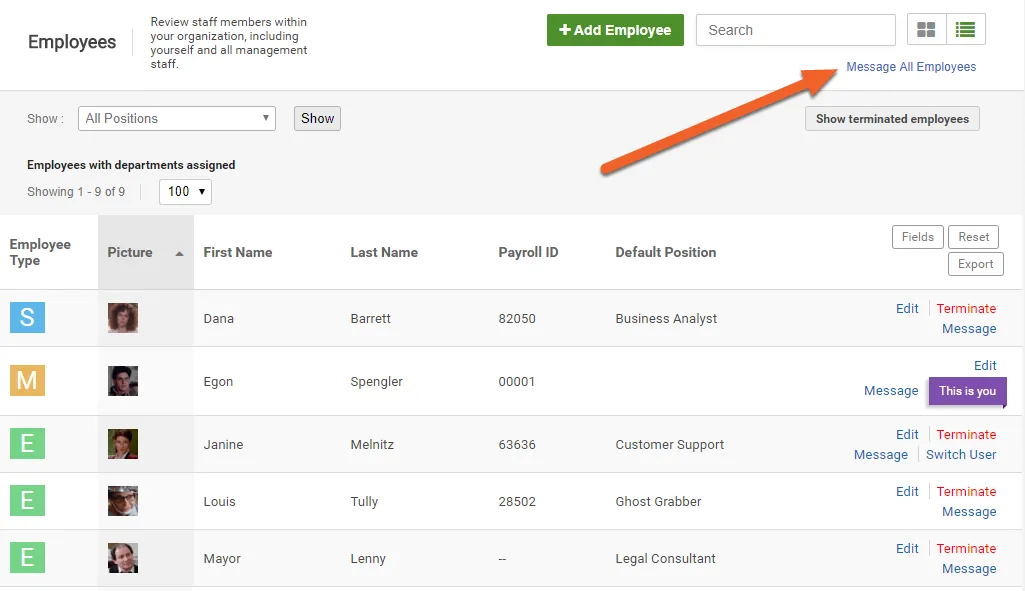
From this page, you can view and edit important details, send individual messages, or even message all employees at this location. If you have the appropriate permissions, you can also Terminate employees, as well.
By default, TimeForge allows both Managers and Supervisors to send messages to employees. (Though, this setting can be customized for Supervisors on per-location basis.) This article will teach you how to send a message to all employees at a given location, which can be handy for sending out reminders, announcing upcoming events or requirements, or providing important alerts about the store.
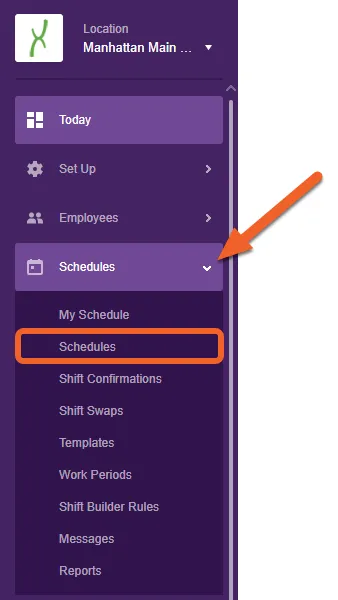
You can also view and send messages at any time by opening the Schedules tab and selecting Messages from the sub-menu.
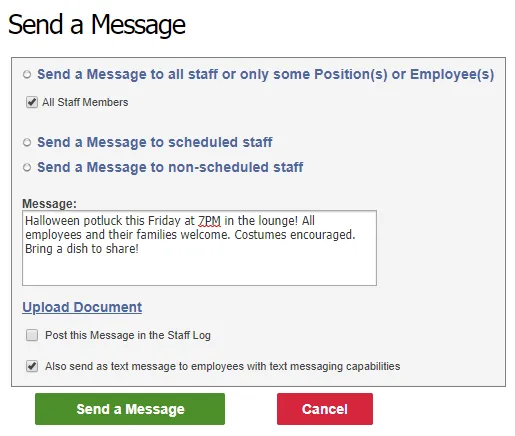
Enter your message into the text box. You can also customize the recipient list at this time, if you do not want to send the message to literally all of your staff members. Simply click on one of the available options (e.g. “Send a Message to scheduled staff”).
Other options include the ability to attach a document to the message, post the message to the Staff Log, and send the message as a text message to employees who can receive them (requires the message to be 140 characters or less).
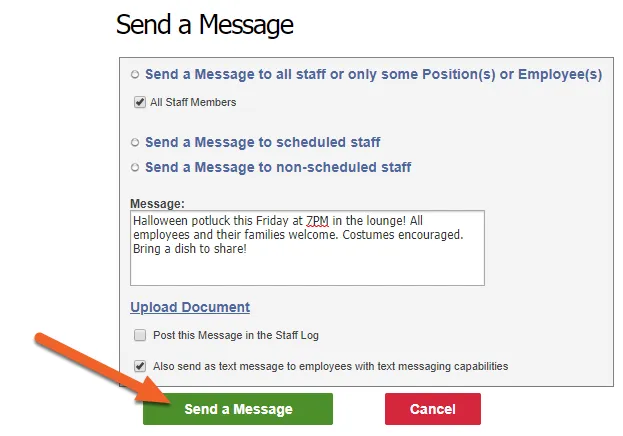
When you’re satisfied with your message, click the Send a Message button to send it to your employees!
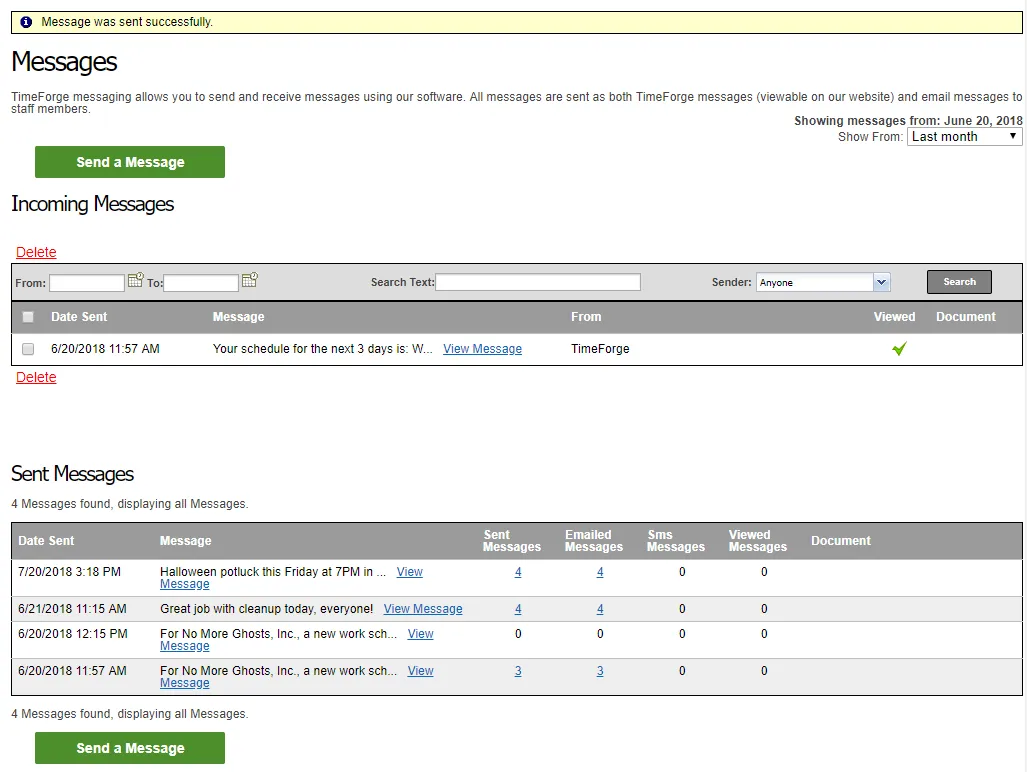
You’ll then be taken to your Messages page under the Schedules tab, where you can review the message in your Sent Messages list or send another one.
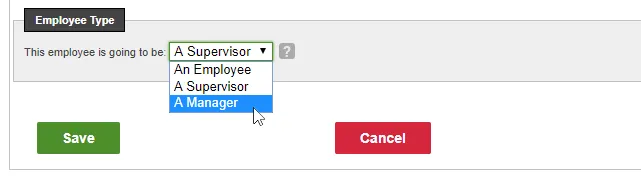
Set a user's security level to Employee, Supervisor, or Manager
TimeForge has 3 different security levels that determine what each staff member can do within the TimeForge labor management system.
Manager - A TimeForge Manager is able to do anything inside of the TimeForge system, including adding staff members, adding/editing employee schedules, changing sales forecasts, modifying the daily log, and running payroll reports.
Supervisor - A TimeForge Supervisor is intermediate between a TimeForge Employee and a TimeForge Manager. Using security templates, Supervisor permissions can be customized on a location-by-location basis to best fit your business’s needs. By default, supervisors are able to perform every TimeForge function that a TimeForge Manager can. However, Supervisors cannot view the pay rates or salaries of other Supervisors or of any Manager.
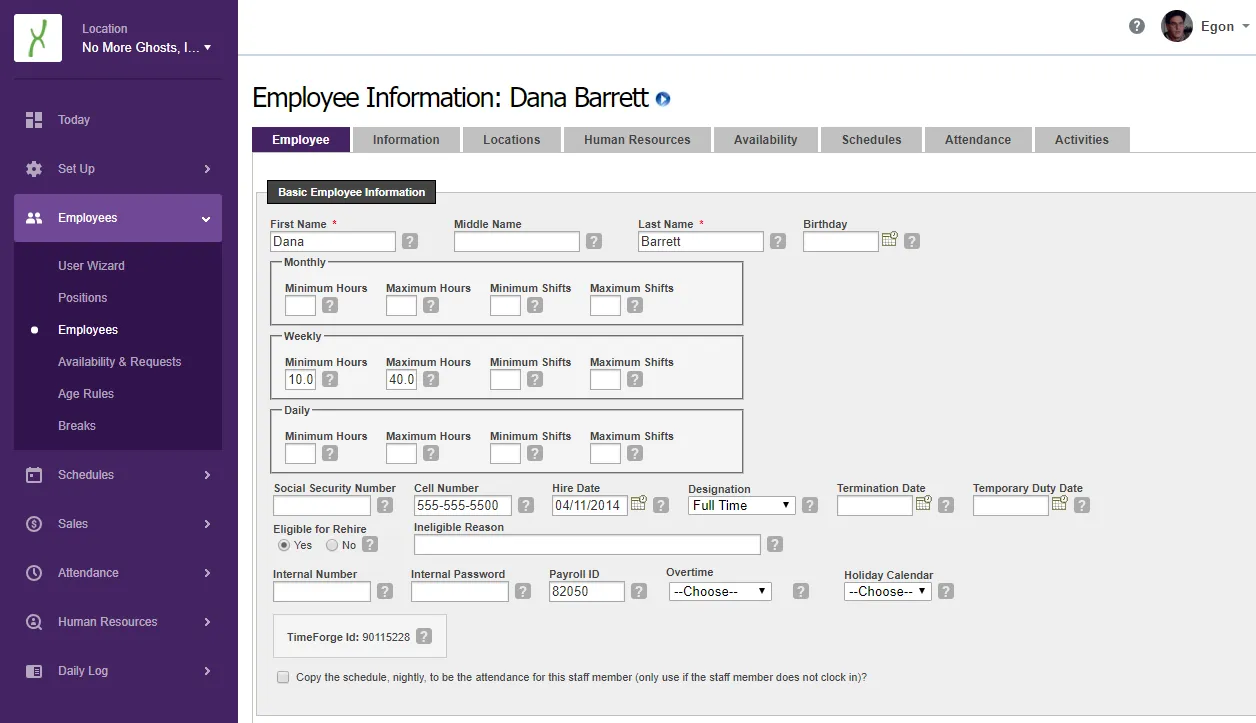
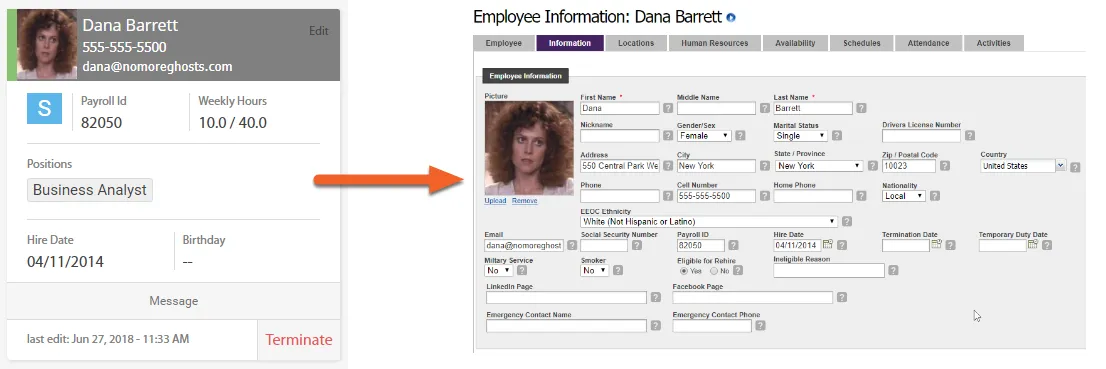
Navigate to your employee list and select an employee. This will open up the employee’s profile (see example below), which includes information about their positions, departments, demographic characteristics, and more.
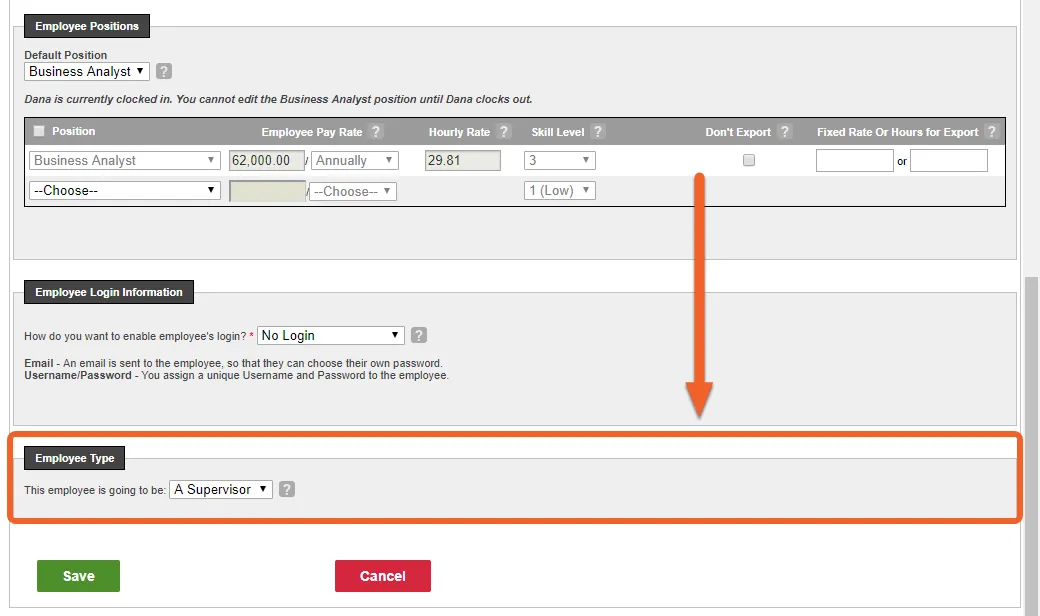
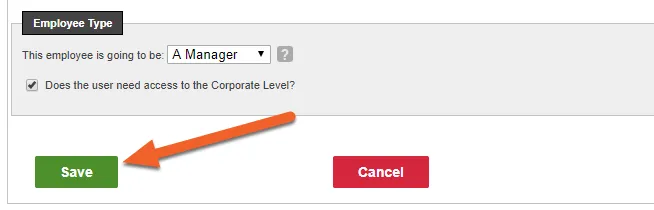
Scroll down to the page to the Employee Type section
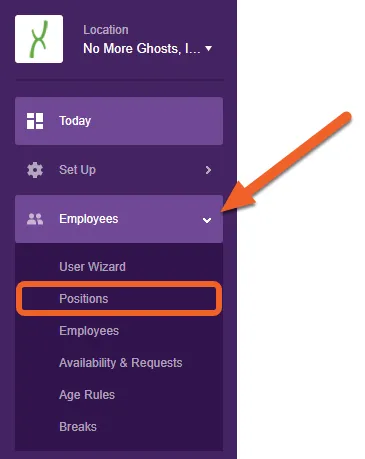
TimeForge positions are similar to job descriptions, position codes, or job codes that are available with many Point of Sale systems. In TimeForge, employees can work as many positions as necessary.
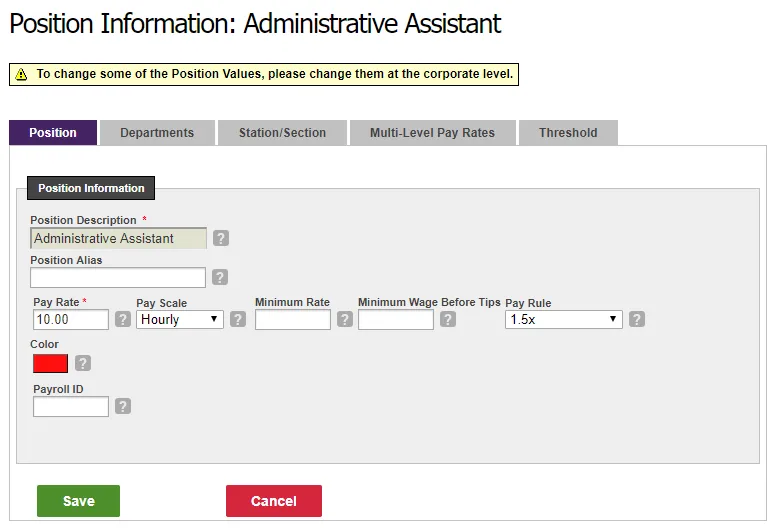
Each position can have its own name and description, pay rate (and pay scale), color (for drawing on graphs), and overtime calculation. In addition, positions can have payroll identifiers (for use in some payroll programs), stations or sections (useful when assigning shifts to employees), and multi-level pay rates.
When used at the Corporate level within TimeForge, positions are available at every location. However, each location can have individual base pay rates, multi-level pay rates, sections/stations, overtime calculations, and colors. This functionality enables businesses with multiple locations to easily perform labor management with a single, simple tool – TimeForge!
Stations/sections are used to identify areas of work for a specific position or job code. For example, a “Waiter” or “Server” position might have several sections that correspond to tables at a restaurant, such as “Section 1”, “Section 2,” etc.
What are multi-level pay rates, and what are they used for?
Multi-level Pay Rates can be used to pay staff members at varied rates throughout the work day. For example, a “Waiter” or “Server” position might receive a normal hourly rate of $2.13 from the hours of 10am and 11pm. However, prior to 10am, employees working as a Server may receive $7.35.
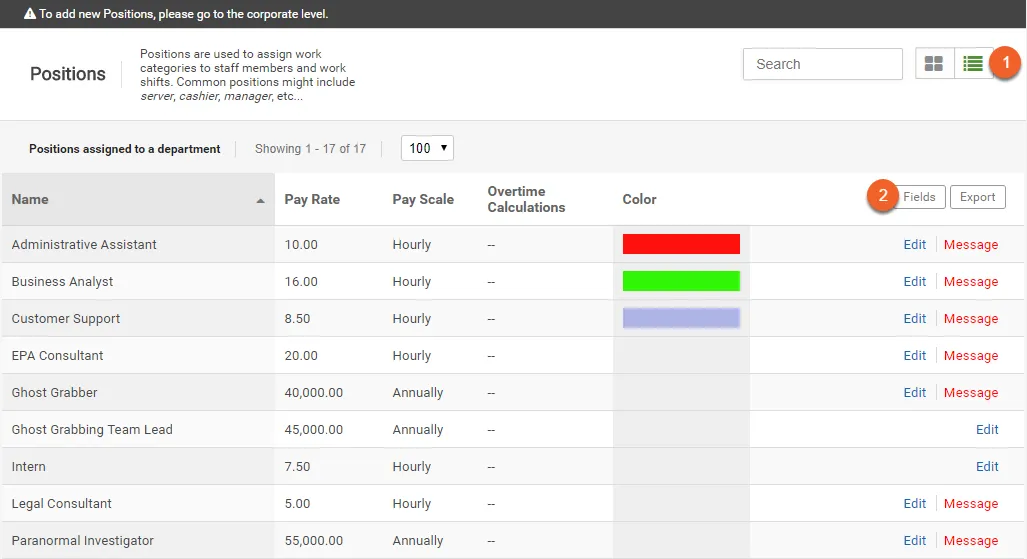
By default, you’ll see information about the name of the position, the pay rate and pay scale, overtime calculations (if any), and the color used in charts (if any). Not finding the info you need? Try these steps:
Click the List view button to view your positions in a column/table format, as shown here.
Click the Fields button to customize which columns are shown.
Review and edit the details for a specific position
If you make any changes to the information in these tabs, don’t forget to click the Save button!
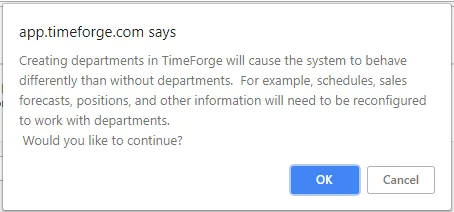
Enable and configure departments
TimeForge Departments provide larger organizations with the ability to assign groups of employees to individual managers.
Each department can have a number of positions, employees, supervisors, and managers. Employees may belong to more than one department, if necessary, and positions can even span multiple departments.
Examples of departments include:
Front of house, back of house, and bar (restaurants)
Cashier, meat counter, bakery, etc. (grocery stores)
Ticket counter, concessions, and floor (movie theater or cinema)
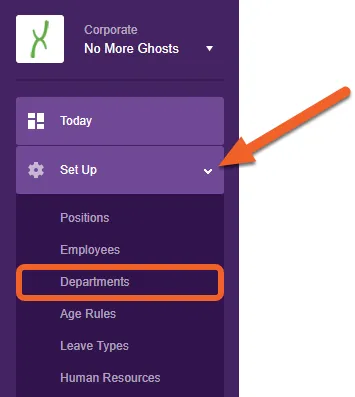
Departments are created at the Corporate Level - all locations (or stores) within a single corporation share departments.
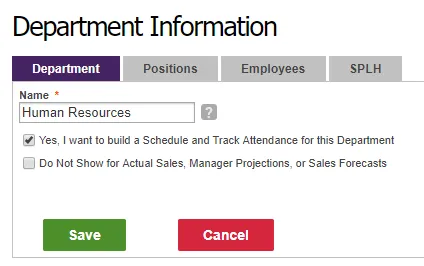
Fill out the form. Fields marked with a red asterisk (*) are required.
If you’d like to schedule and track employee hours for this department, be sure to check the appropriate box.
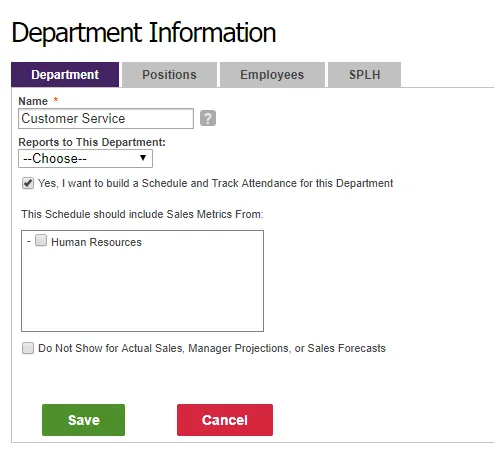
Additional departments can be created the same way. Once you have at least one department, the form for additional departments will include more fields to account for this:
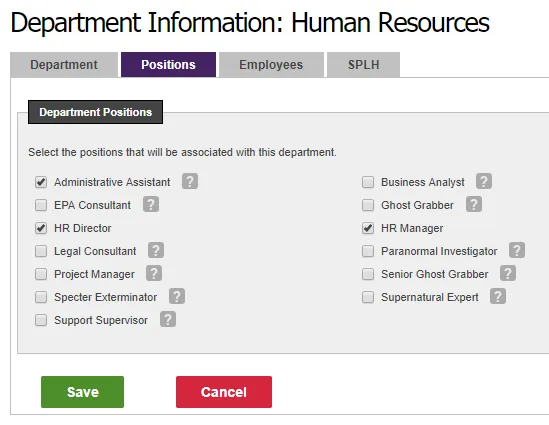
Each Department can have one, or more, positions assigned to it. Assigning positions will ensure that staff members, supervisors, and managers are not distracted or confused by other departments that are using TimeForge.
To assign positions to this department, click the Positions tab and check the boxes next to the positions you’d like to associate with this new department.
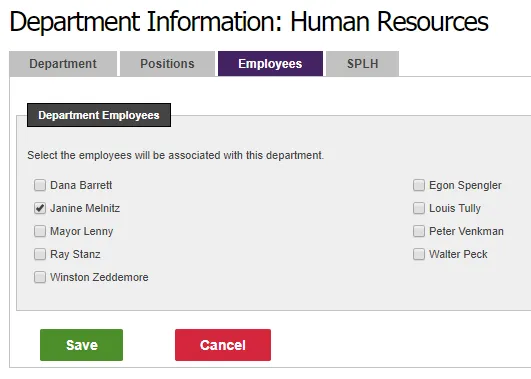
Assigning Employees to your Department is done exactly like assigning positions to it. Navigate to the employees tab of your Department and click the checkbox for the employee you want to add.
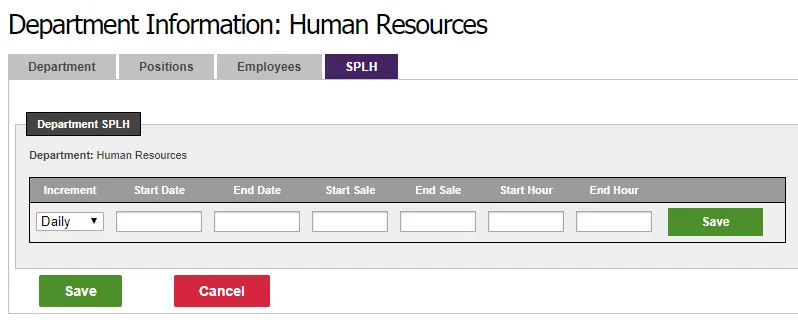
The SPLH (Sales Per Labor Hour) tab lets you choose how many labor hours you want to schedule and for what amount of sales. The SPLH grid is mainly used for the ShiftBuilder to calculate how many hours to schedule and is especially handy for retail departments and restaurant staff.
The SPLH tab lets you choose start and end dates, weekly or daily recording, and how many sales you want per labor hour. If you do not need to schedule this department, you can simply leave the SPLH grid blank.
Increment covers the range (weekly, daily, or hourly) for making calculations based on Sales data.
Start date is the first effective date of the grid, while End Date is the last effective date of the grid.
Start/EndSales represent the range for this particular section of the sales curve, in integers. For example, 3000 and 8000.
Start/End Hour represent the bottom range of hours (when your sales equal the start sales) and the top range of hours (when your sales are equal to the end hour).
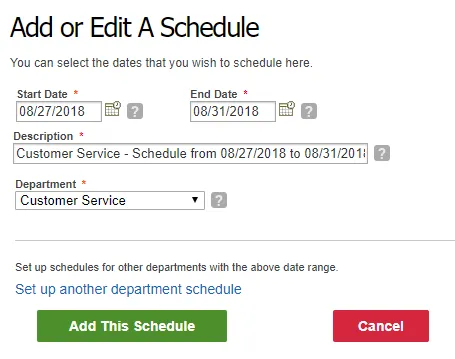
You’re now ready to start creating schedules for departments! Each schedule can be assigned to a specific department, providing very fast reporting and schedule building on a per-department basis. Additionally, Schedule Templates provide one-click scheduling for each department.
Import employees from a CSV file
At TimeForge, we understand that many of our customers switch to us from old-fashioned spreadsheets. That’s why we offer the ability to import employees directly from a CSV file. Most spreadsheets can easily be saved as a CSV, which makes the transition over to TimeForge smooth and painless.
TimeForge is a complete labor management tool that is great for making things like tracking attendance and creating employee schedules quick and easy. Plus, from the employee profile page, you can keep track of information like cell phone numbers, social security numbers, passwords, payrates, and much more.
You can import employees with just a few clicks! Here’s how:
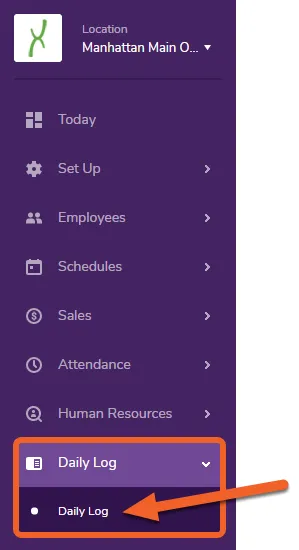
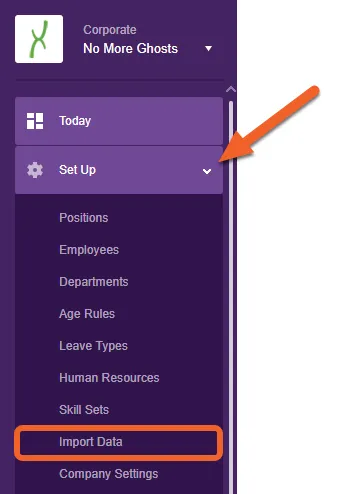
Open up the Set Up tab, then select Import Data from the sub-menu. (The screenshot below shows this at the Corporate level, but you can also do it from the Location level, depending on your needs.)
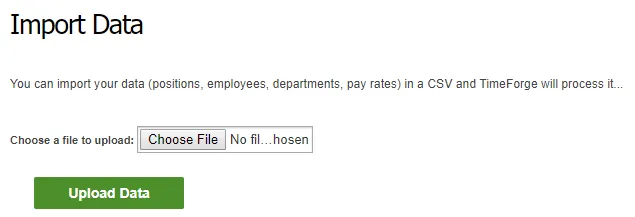
If your file is currently saved as an .xls or .xlsx, you’ll need to first open up Microsoft Excel, then go to File > Save As and export it a CSV. You can then select this .csv in TimeForge.
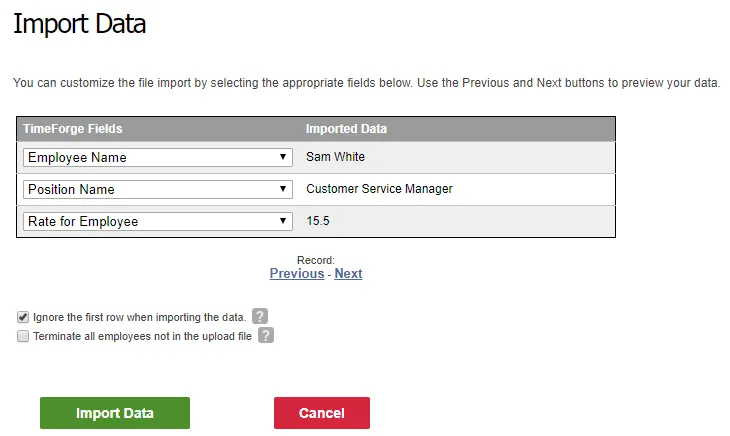
TimeForge will automatically attempt to match the header of each column with a field in TimeForge, such as “Employee Name” and “Position,” and will show you a preview of the import, starting with the first row in your sheet.
Click the Next link to review each subsequent row (employee) in the file.
If satisfied, click the Import Data button to import the file. If your first row was a header row, leave the box checked to ignore that row when importing.
View employee schedules
Accurate and correct employee scheduling is a powerful labor cost control measure. With TimeForge, supervisors and managers can quickly and accurately create employee schedules while considering the needs of their business, as well as the desires of other staff members.
Each TimeForge employee schedule is a collection of many shifts, and each shift is assigned a corresponding start and end time, as well as position (or job), and employee. Other information can be included with each shift, including whether the shift is for an “extra” staff member, the section or station being worked, and other pertinent information.
TimeForge employee schedules can be of any usable business length - some businesses prefer one-week, two-week, or one-month schedules. Other businesses prefer a mix of schedules, and may have differing schedules based on departments or store requirements.
In the event of a scheduling conflict, TimeForge automatically notifies managers and supervisors responsible for creating schedules.
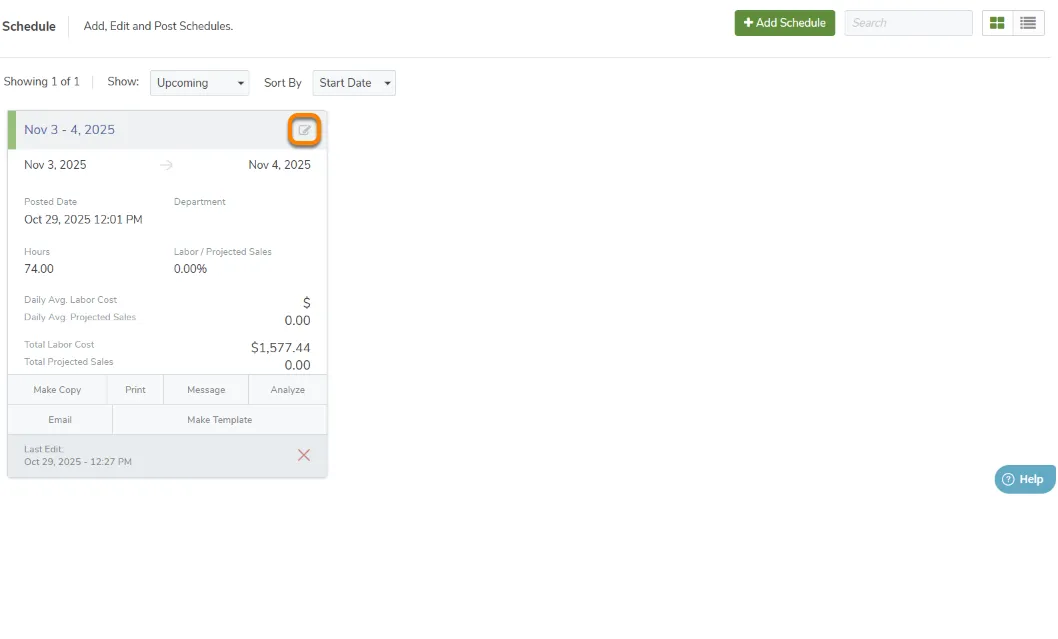
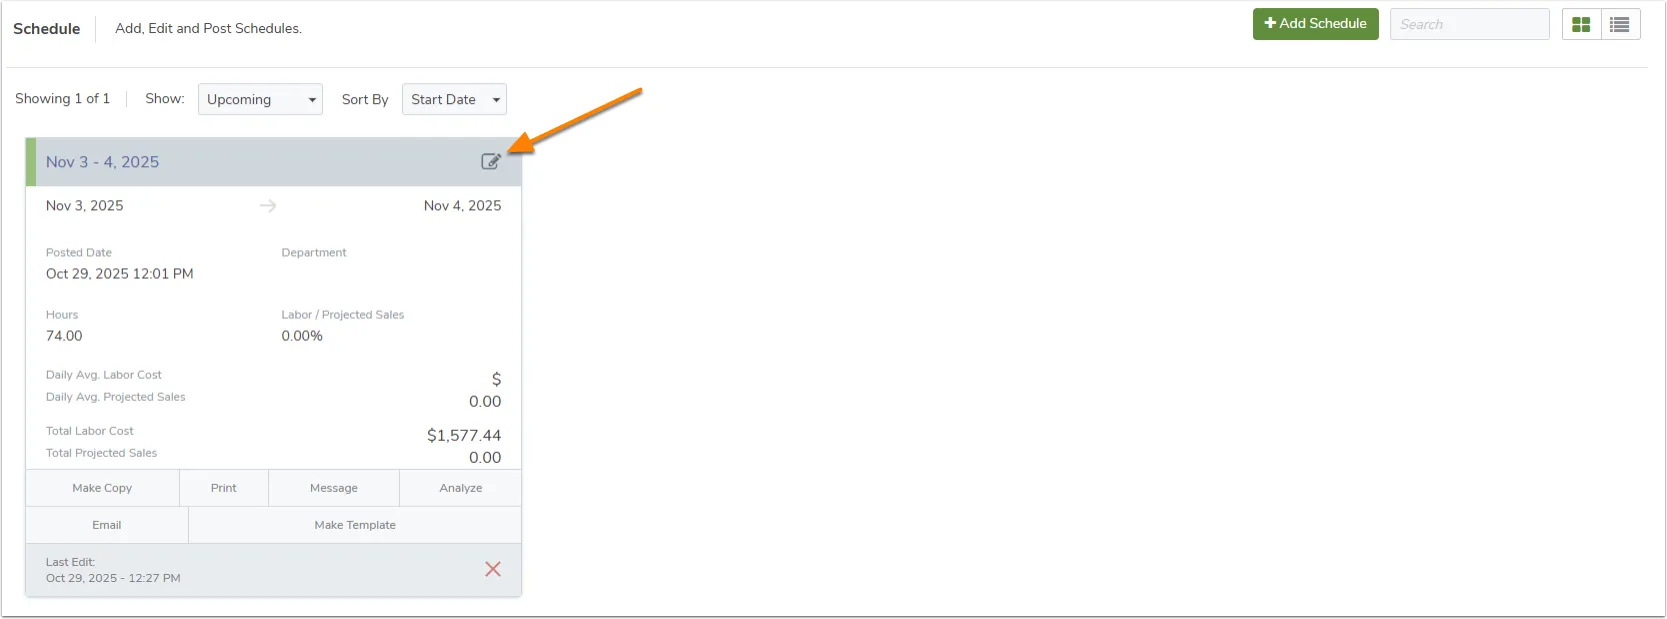
The Schedules page shows upcoming and past schedules, which can be filtered by department and sorted. Each schedule can be copied, modified, deleted, analyzed, printed, or used to create a template.
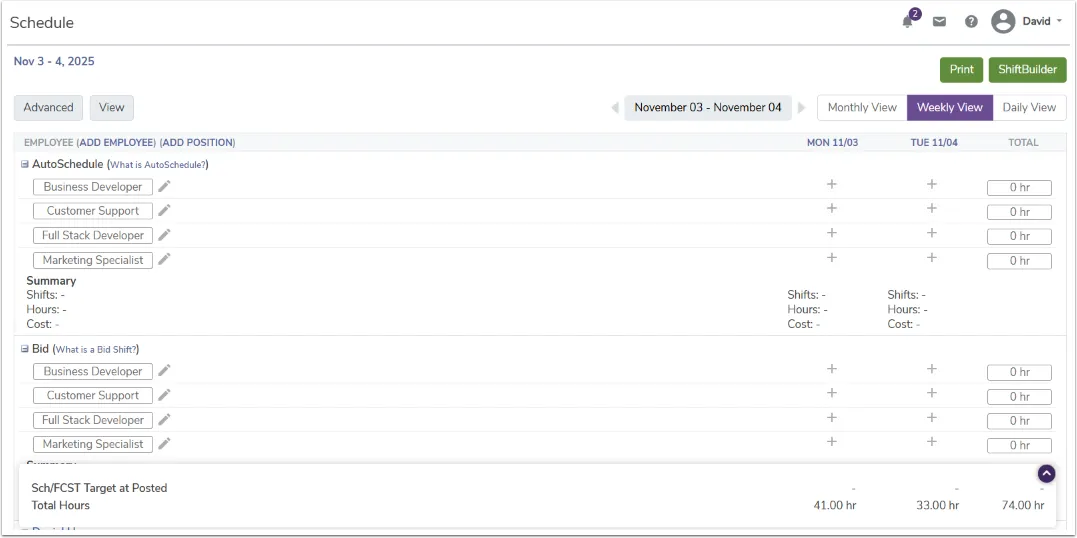
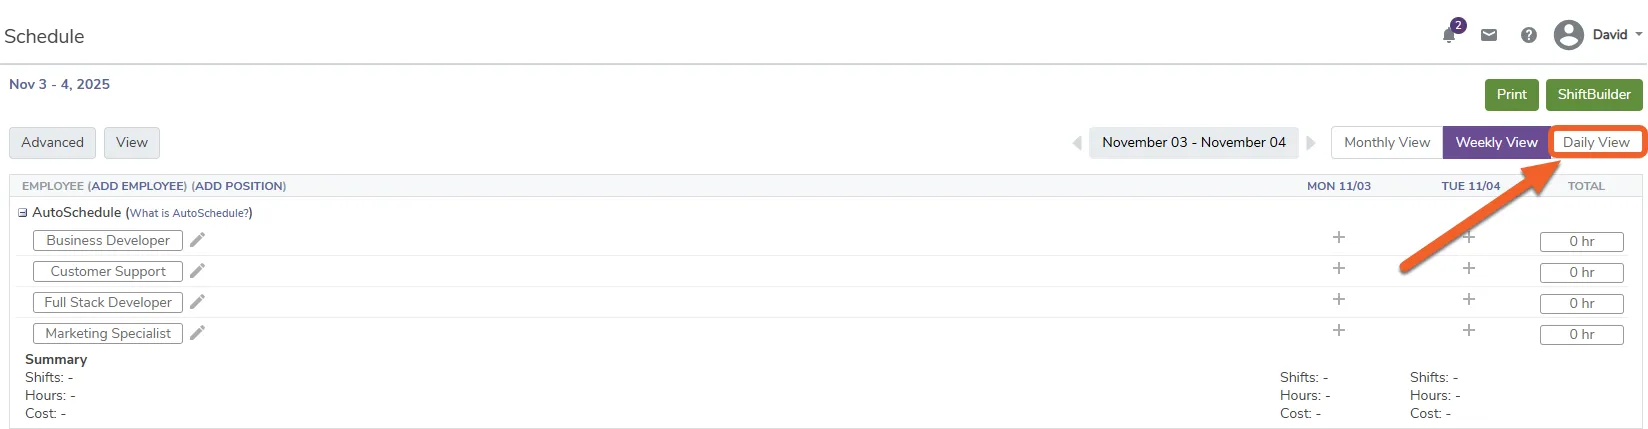
Simply click the Edit button to review the schedule’s details. In the upper right corner, you can swap from Monthly, Weekly, or Daily View.
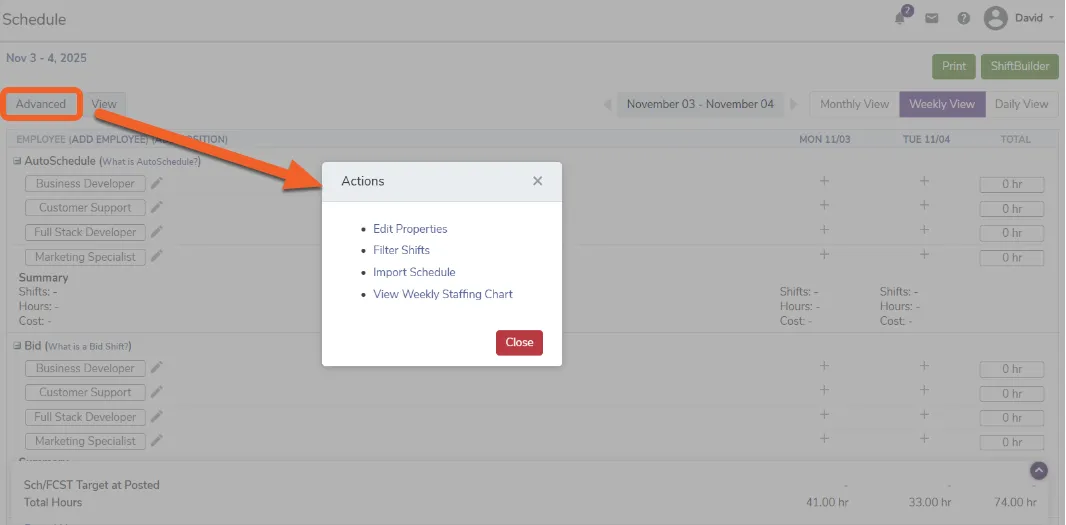
Clicking on the Advanced tab will provide you with a list of additional actions:
View and edit shifts
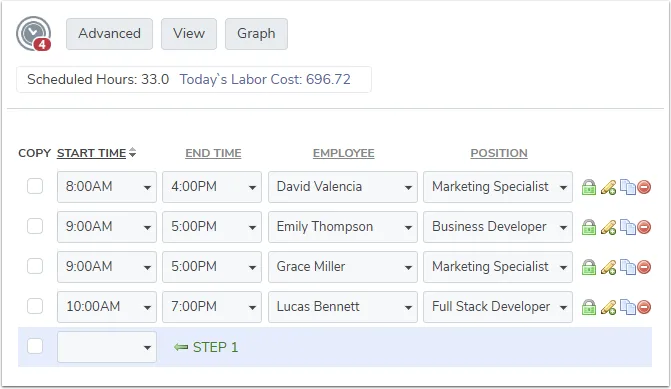
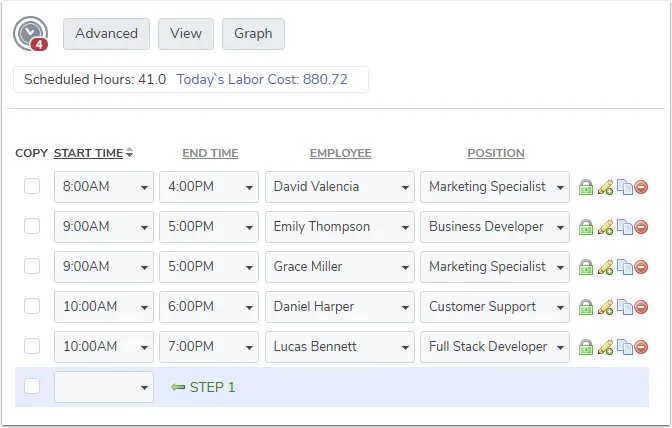
In TimeForge, employee schedules are a collection of many shifts, and each shift is assigned a corresponding start and end time, position or job code, and an employee. Other information can be included with each shift, such as whether the shift is for an “extra” staff member, or the name or number of the section or station being worked by the employee (for more info on schedules, see our article on how to view employee schedules).
Shifts can easily be created for a specific day on the schedule or copied to other days on the schedule. Shifts can also be grouped together into days on the schedule, and then can be used to create a template for future schedules. Additionally, shifts can be reassigned to other employees, and are used by the TimeForge ShiftBuilder to estimate anticipated needs for schedules in the future.
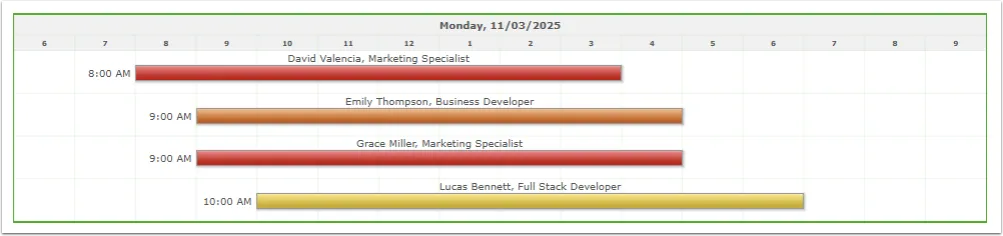
By default, TimeForge will show you the Weekly View for that schedule (unless you change your default setting under your profile!), but you can also get a graphical representation of the staffing load for that day by selecting Daily View in the upper right corner.
Your changes save automatically in real time. If you’d like to return to the Weekly or Monthly View (depending on where you started), just click the Back button in your browser.
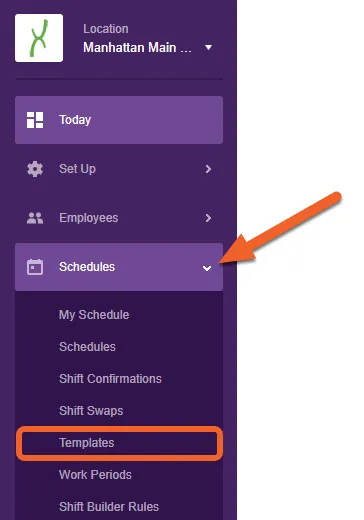
Create schedule templates
To quickly create employee schedules, many managers rely on the TimeForge AutoScheduler and schedule forecasts, or if they’ve got a small crew, they might build schedules manually, one shift at a time. Other managers pre-build days on the schedule using collections of shifts, called templates.
Each TimeForge work schedule template contains one or more shifts, and can be used to quickly generate schedules for staff members. Each location (or store) can have many different schedule templates (as many as are needed), and the schedule templates can be used to build new schedules.
Some examples of employee work schedule templates:
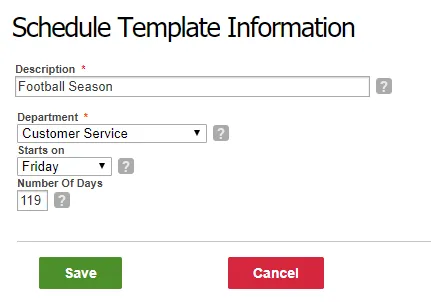
Employee schedule templates can be built one shift at a time, or can be copied from other templates. Additionally, a work schedule template can be created from a pre-existing schedule, and if departments are enabled, each department will have individual schedule templates.
There are no limits to the number of schedule templates that can be created at a location.
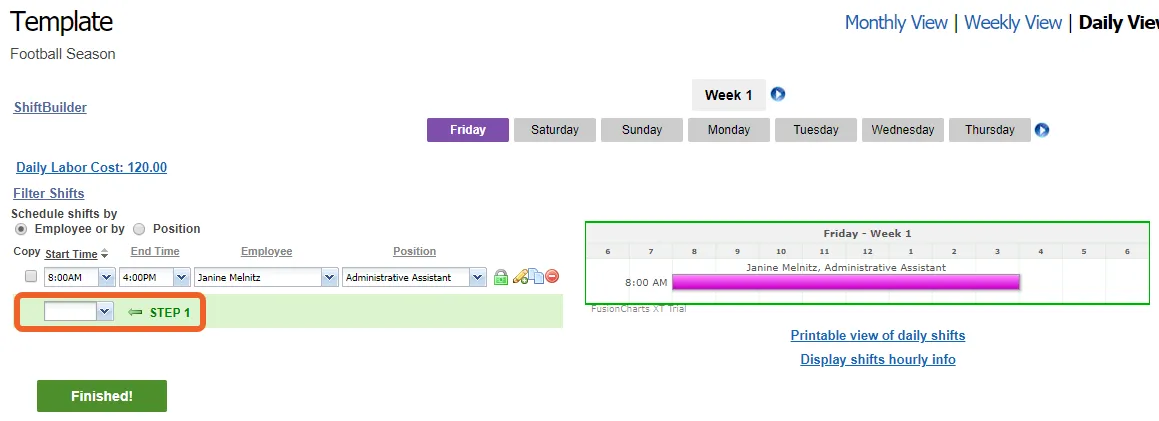
Create your work schedule template just as you would build any employee schedule. TimeForge makes it easy by showing you right where to start: STEP 1.
Be sure to click the Finished! button when you’re done.
Manage employee availability and requests
In many restaurants, retail businesses, and other industries, staff members are required to work with two different concepts for work preferences:
Availability is when employees are normally available to work.
For example, an employee may be available on Monday, Wednesday, or Friday from 8am – 2pm. Perhaps that employee is not available to work on Tuesdays or Thursdays because of school conflicts, or another job. Availability is commonly updated on a continuous basis (school semesters are common), and are filled out by staff members.
Requests are normally one-time changes to your employees’ normal availability.
For example, an employee may be available next Tuesday to work because their professor canceled class. In many businesses, requests are placed in some sort of log book – either an industry specific manager log (such as a Red Book from Red Book Solutions or a Beat Yesterday book) or a simple spiral notebook or binder.
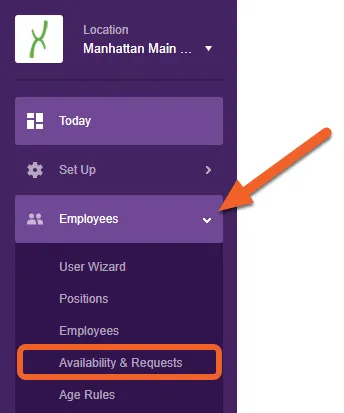
TimeForge supports both types of work preferences from a single Availability & Requests page. Recurring requests can be be made within TimeForge, similar to an Availability sheet, and individual daily Requests can also be made within TimeForge.
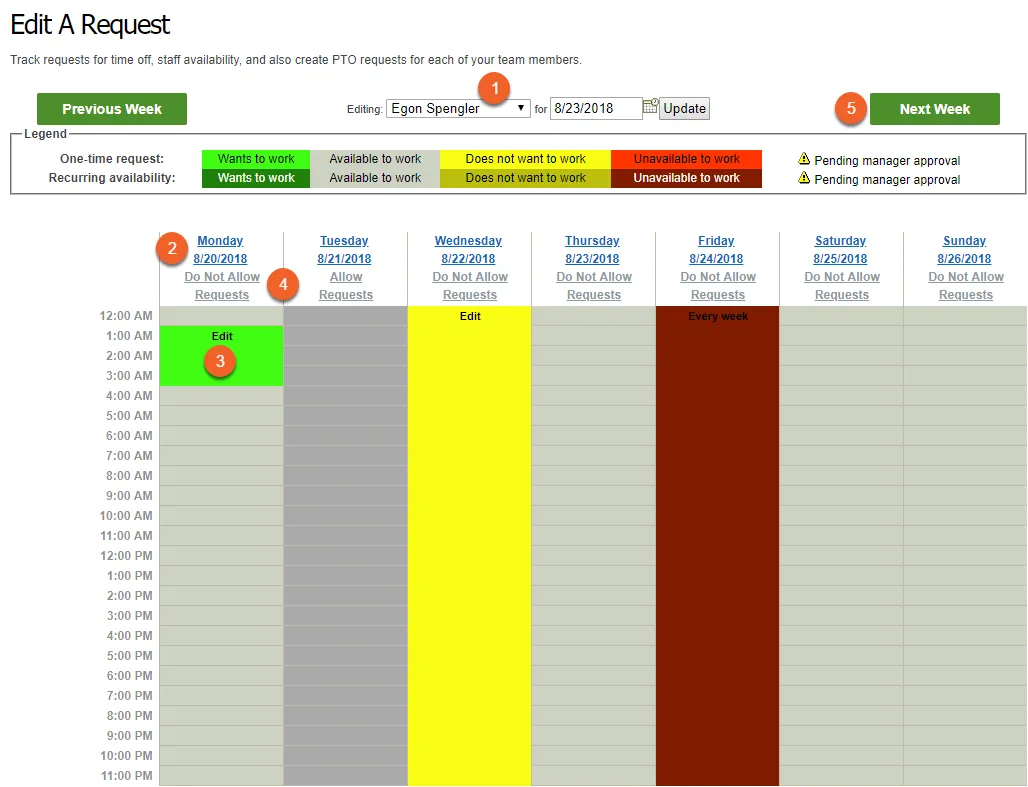
TimeForge supports 4 different types of Availability and Requests to enable staff members to easily customize their work schedule. These are color-coded in TimeForge to make them easier to identify visually:
Wants to work(green)- If an employee would like to work a particular shift, for example on a day that works well with their schedule, they should create a Wants to work request.
Available to work (gray) - By default, employees are always available to work, and can be scheduled to work. They should create either Wants to work, Does not want to work, or Unavailable to work requests to change their availability.
Does not want to work (yellow) - These requests indicate that the employee would prefer to not work, but can work if required.
Unavailable to work (red) - If an employee cannot work, an Unavailable to work request will ensure that they are not placed on the schedule during this time frame.
Staff requests and changes to availability are sent to the management team for approval, and once approved the employee will be notified through TimeForge and by email (if an email account is set up).
Submitting, Editing, and Preventing/Enabling Requests
Click the “Edit” link to edit an existing request.
Click the “Do Not Allow Requests” link to prevent requests for that date (the column will then appear in dark gray) or re-enable requests by clicking the “Allow Requests” link.
Use the Previous and Next buttons to cycle between weeks.
Grid View vs. List View
TimeForge gives you the ability to choose how you want to see employees, schedules, locations, departments, and other lists by switching between a grid with cards and a more traditional table list. Each card in the grid view gives you a focused snapshot of an individual item on your list, while the list view gives you a detailed, customizable list that makes it easier to see everything at once.
This guide will teach you how to easily toggle between the two views, how to filter your lists to see only what you want to see, and how to export your filtered lists for your records.
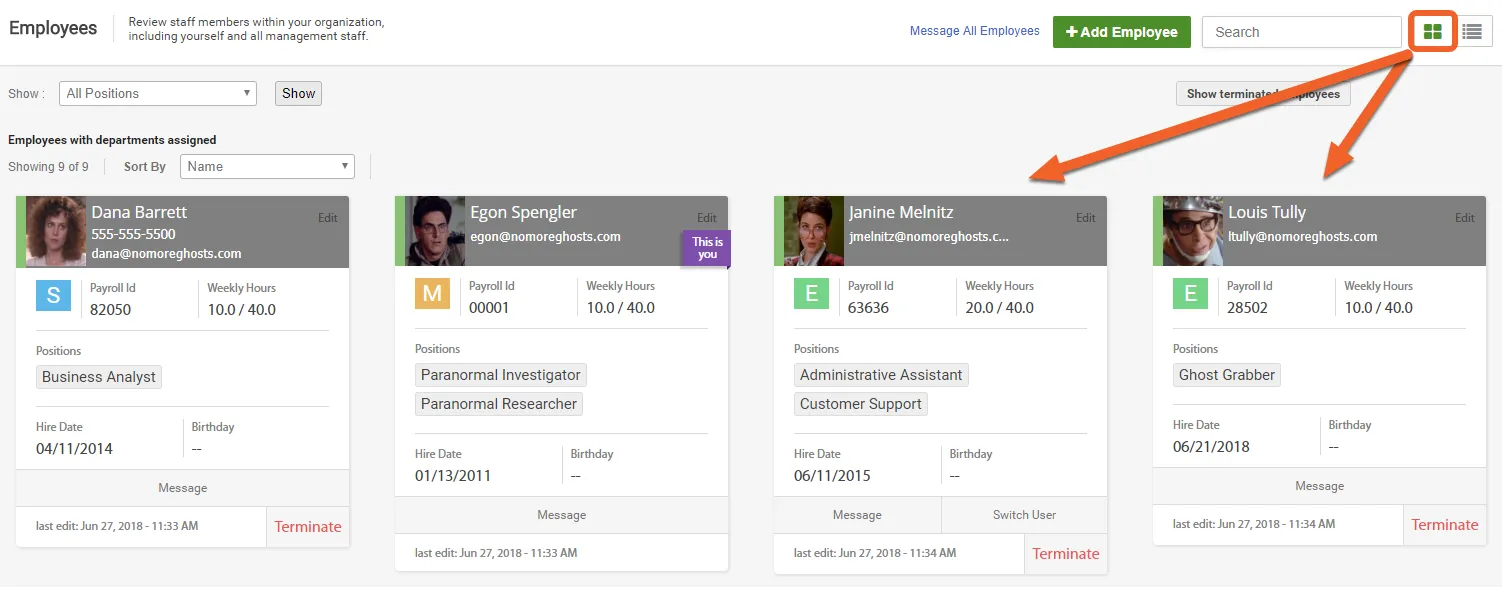
For new accounts, TimeForge uses the Grid View by default. This view groups your data into simple cards. These cards make it easy to focus on the information you need by providing an overview of each item in the list. Because it’s more graphically-oriented, this view is great for small businesses, smaller stores, and new accounts.
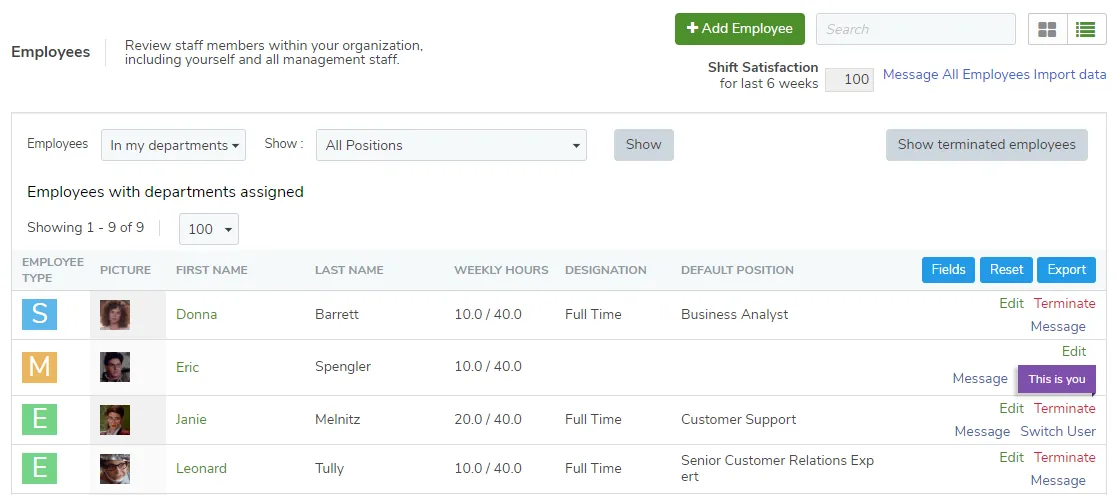
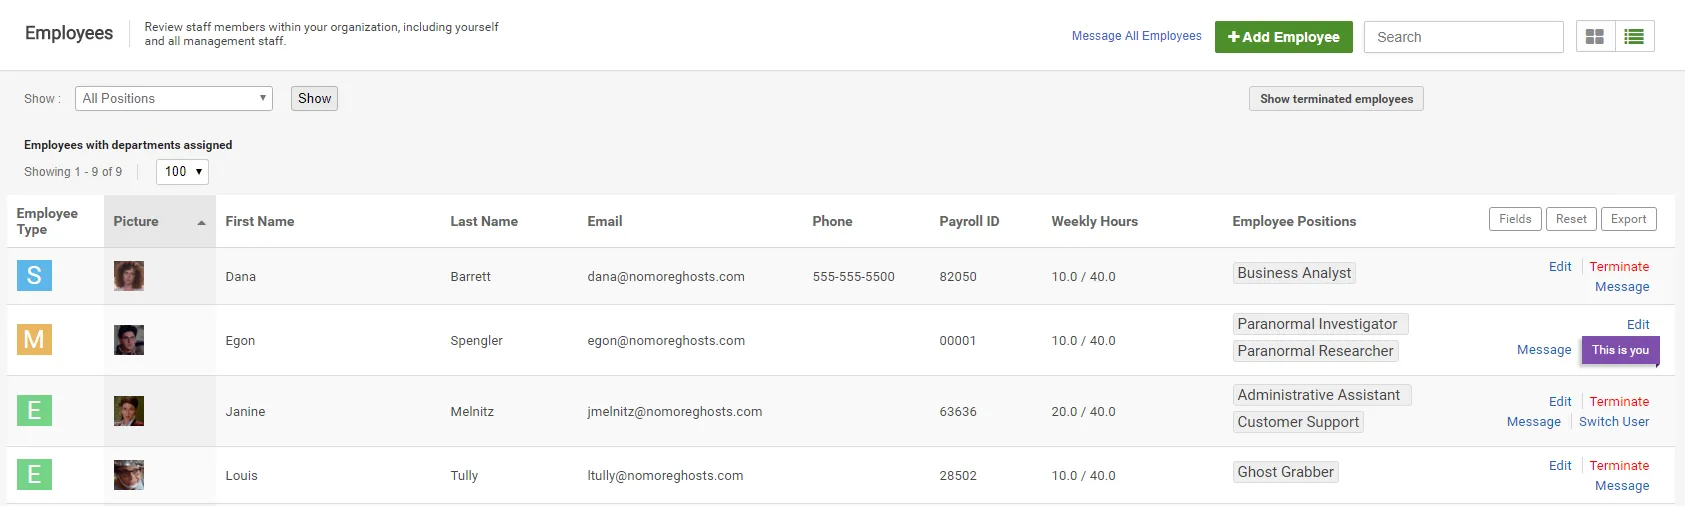
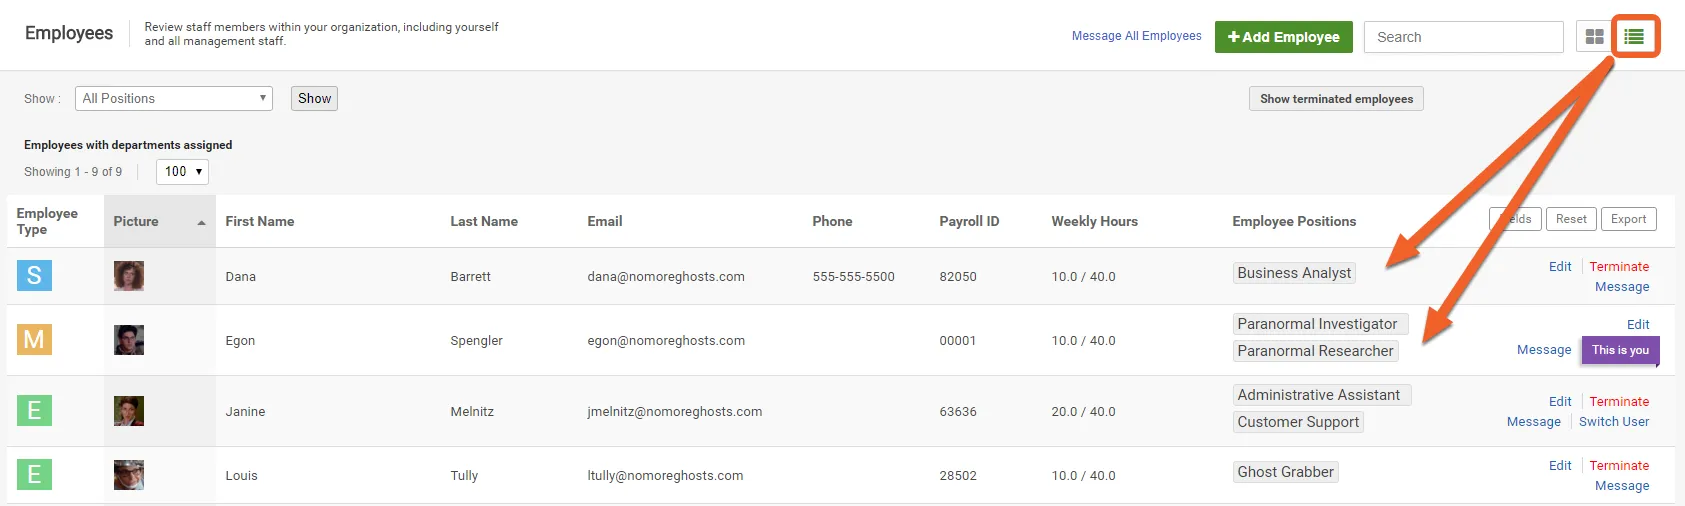
More compact than the Grid View, the List View operates like a traditional list with some nifty upgrades. In this view, you can customize which fields or columns are displayed, as well as export your data, making it a cinch to create your own reports and records.
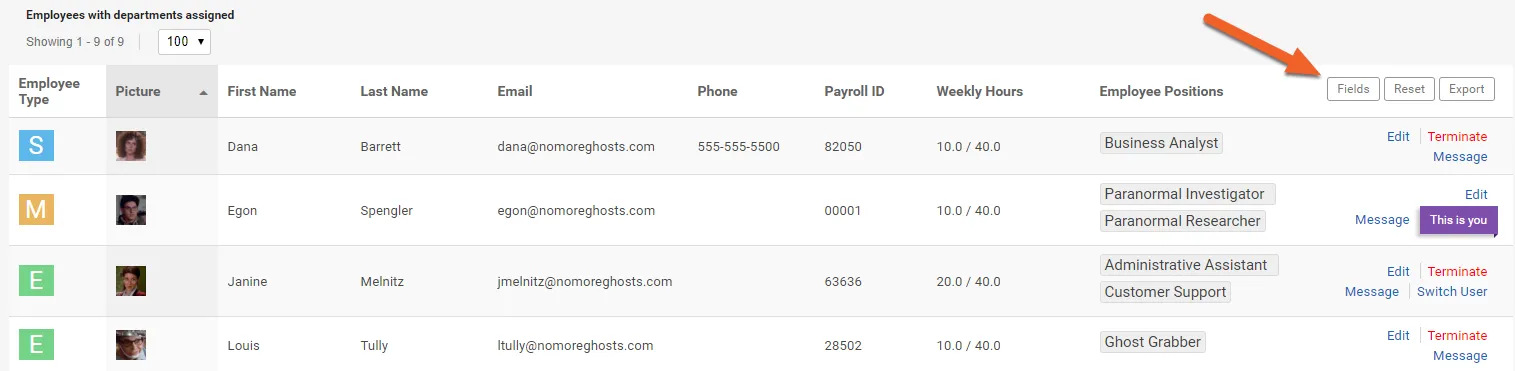
First, make sure you are using the List View. Then, click the Fields button to the upper right of your list.
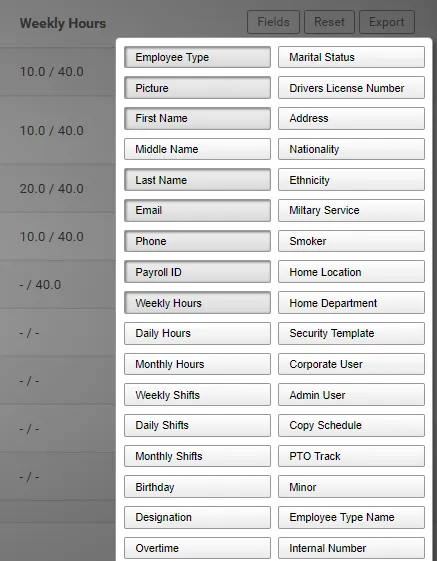
Select the fields you want to add. Selected fields appear beveled, like toggled buttons (e.g. First Name, Last Name below). There are lots of options, so be sure to scroll down to view them all!
When you’re done, simply click anywhere else in the window to return to your list and view your changes.
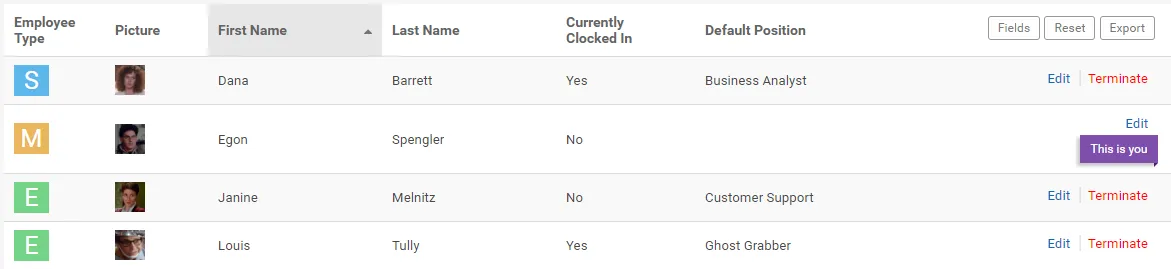
In the example below, we’ve disabled some default fields and added whether or not the employee is clocked in and what their default position is:
How do I export my list?
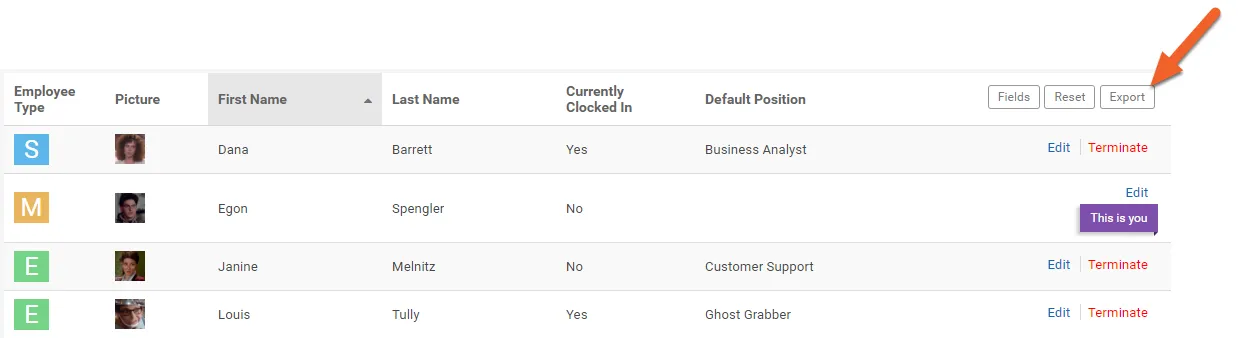
First, follow the steps above to customize your list and get it just the way you want it. Then, select the Export button.
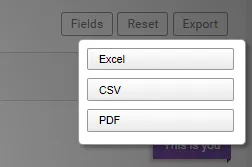
Next, select a file format. You can export your list as an Excel spreadsheet, a CSV file, or PDF.
Once you make a selection, the file will save to your computer. You can then print it, email it, analyze it – whatever you want to do!
Switching between views is incredibly easy! In the upper right corner, you’ll see a toggle button. Simply click the left side to view your information as a grid, or click the right side to view your information as a list.
You can swap back and forth to see what you like best. Your settings are unique to your account, and each area of TimeForge (your employee roster, your list of locations, etc.) will remember whether you prefer to see that set of information as a grid or list.
Get the most out of your Today Page
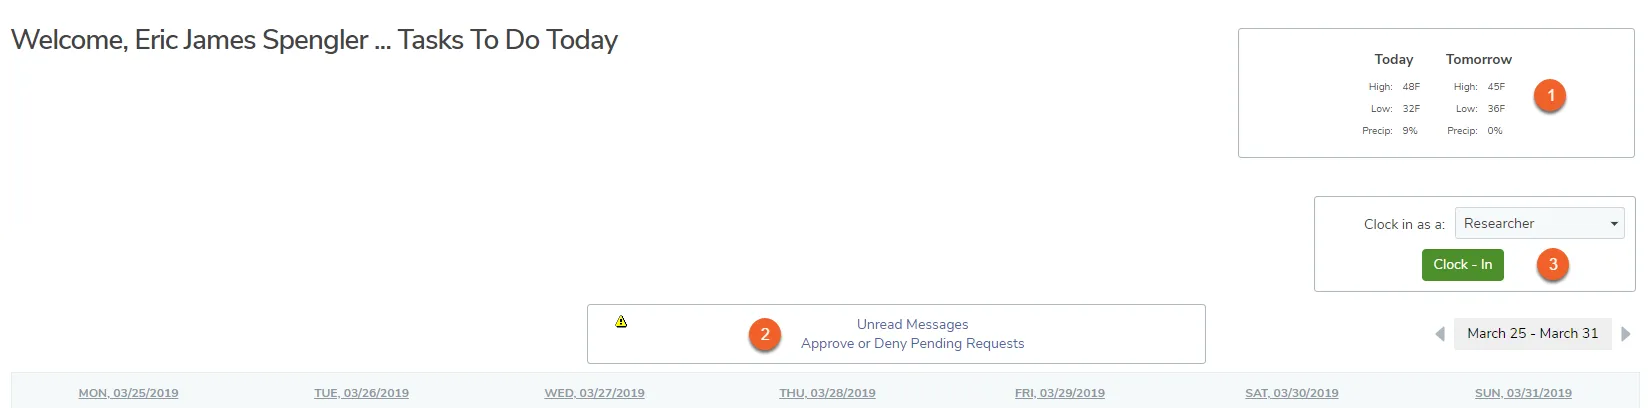
This guide provides an overview of the traditional Today Page from a Manager’s perspective, starting with what you see when you first log in.
a link to go straight to your unread messages, and a link to go straight to the pending Availability & Requests, in order to approve/deny employees’ requests for time off,
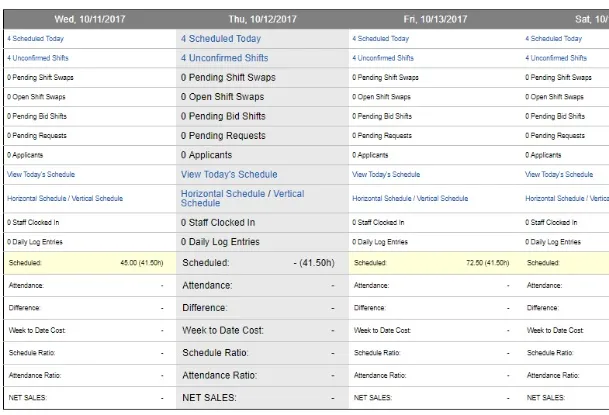
The majority of the Today page is occupied by the labor management dashboard. This dashboard changes in real time to display shift confirmations, open shifts, shift swap requests, scheduled labor costs, actual labor costs, and other helpful information.
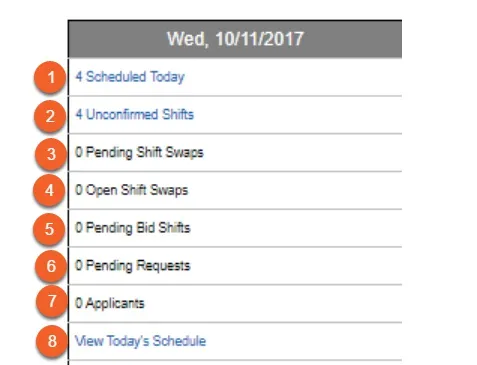
Labor Management Dashboard - Each Day (First 8 Rows)
Each day of the labor management dashboard is broken down into several rows.
The first row of data shows how many employees are scheduled for the day. Click on this link to get a bar chart showing the day’s schedule.
The second row of data shows any unconfirmed shifts from your staff members, providing you with an idea of how many employees have confirmed their scheduled shifts through TimeForge. Clicking on this link will allow you to further examine which shifts have or have not been confirmed.
The third row of data displays how many Pending Shift Swaps need to be approved for that particular day. Clicking on this link will take you to a screen to approve or deny the pending shift swaps.
The fourth row of data displays how many Open Shift Swaps occur on that day. An Open Shift Swap is a shift that has been given up, but not yet picked up. Clicking on this link will take you to a page displaying more detail about the Open Shift Swaps, as well as any Pending Shift Swaps.
The fifth row of data displays the number of Pending Bid Shifts that need to be approved. A bid shift is similar to a shift swap, however, multiple staff members can bid on the shift and management can then choose the best of the employees to work the shift.
The sixth row of data shows how many availability requests are pending. From here you can approve or deny requests.
The seventh row of data displays how many applicants have applied for a posted job. Clicking the link will take you to a page with a list of the applicants where you can view their information.
The eighth row of data displays today’s schedule in a bar chart format, and is somewhat similar to the first row.
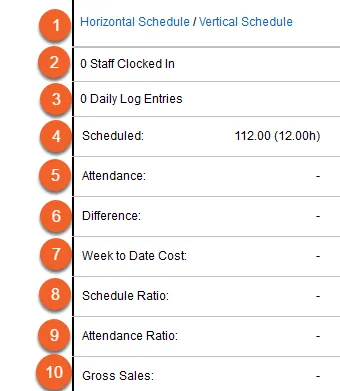
Labor Management Dashboard - Each Day (Last 10 Rows)
The ninth row of data will provide the day’s schedule in a horizontal or vertical format, allowing you to print the schedule and place it in your pocket.
The tenth row of data will allow you to quickly see how many staff members are clocked in, and clicking on the link will send you to the “Clocked In” Employees page.
The eleventh row of data displays the number of Daily Log Entries for the day, and clicking on this link will take you to the Daily Log.
The twelfth row of data displays the day’s scheduled labor costs, if any labor costs have been entered for employees.
The thirteenth row of data displays the actual cost of employees that have clocked in and out for the day, and is the total of the day’s labor.
The fourteenth row of data displays the difference between the scheduled labor costs, and the actual attendance cost. If the number is in green, the actual labor costs for the day are less than what was scheduled (Good job!), if they are in red, then the labor costs are higher than what was scheduled.
The fifteenth row of data displays the weekly labor cost to date and will update throughout the day.
The sixteenth row of data displays your scheduled labor cost ratio or percentage, depending on how you have configured your sales categories. The number will turn red if you have exceeded your target ratio/percentage.
The seventeenth row of data displays your actual labor cost ratio or percentage. The number will turn red if it exceeds either your target ratio/percentage, or your scheduled ratio/percentage.
The last row of data displays your gross sales for the day and updates in real time.
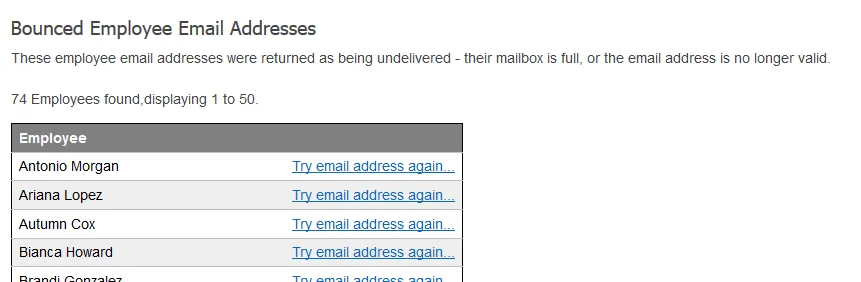
At the bottom of the Today page is a list of employee email addresses that seem to be bouncing, or are incorrectly entered in the software. These staff members may not be getting messages about the schedule.
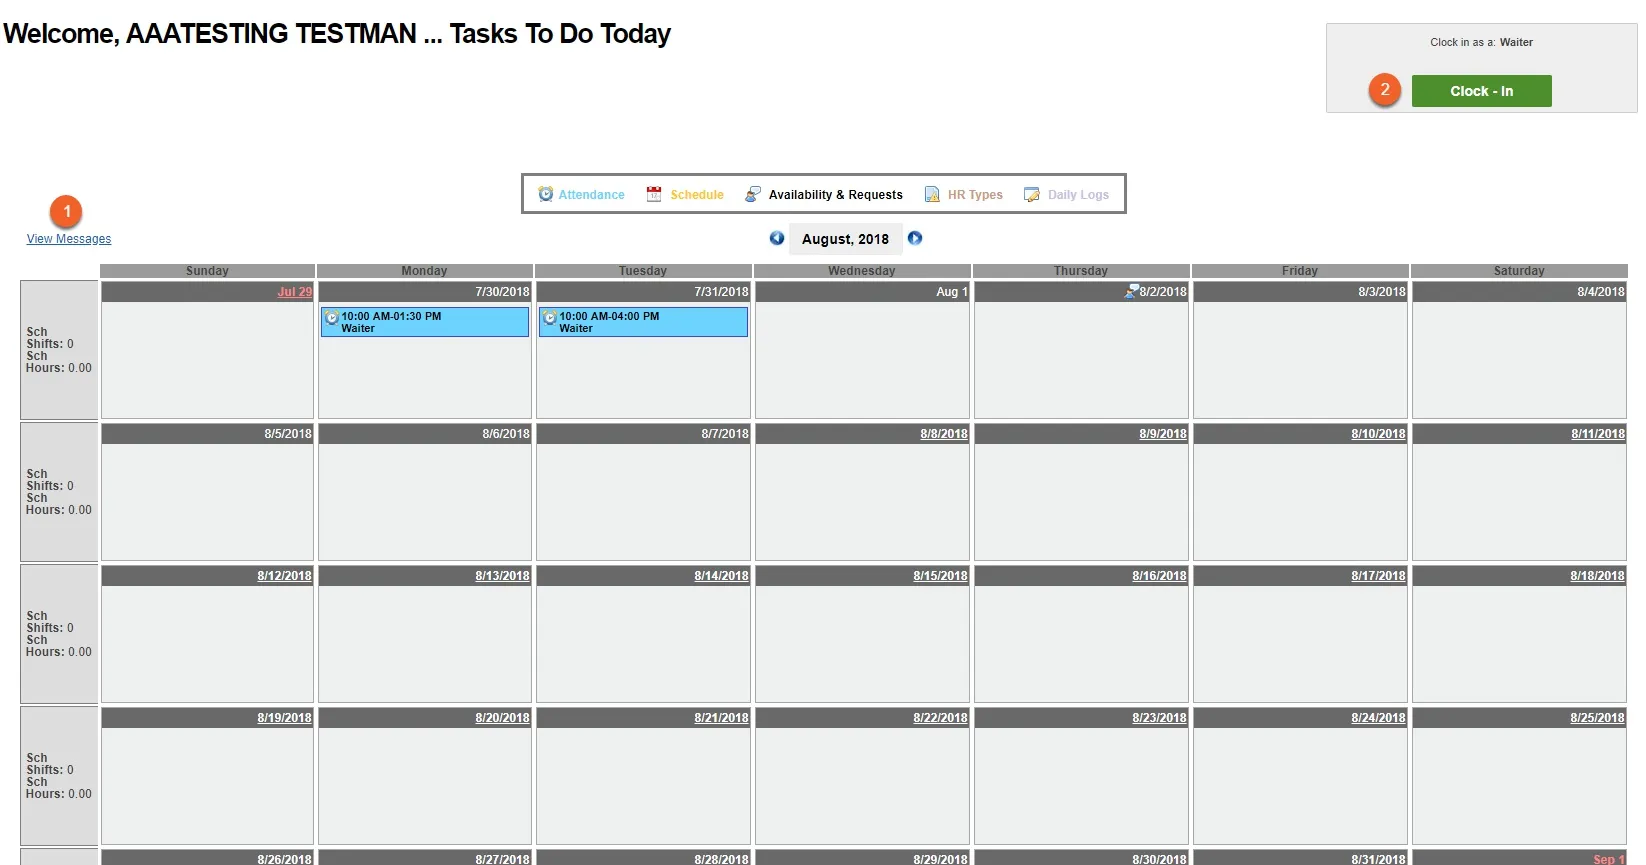
When employees log in to their TimeForge accounts, they will each see a monthly calendar view on their Today pages, including:
a View Messages link
a Clock In/Out box
Choose the widgets on your Location dashboard (Today page)
Using widgets, Managers can customize their Today page dashboard so that they see the content they’re most interested in right when they log into TimeForge. Widgets are interactive: they can be moved around, resized, and selected to best suit your needs. They are designed to provide useful information at-a-glance while also making it easy to navigate to the in-depth details when needed.
There are widgets for both the Location tab (only available to management) and the Personal tab (available to everyone).
Location widgets provide managers with useful information pertaining to that store or location, such as employee schedules, pending shift swaps awaiting manager approval, pending requests, employee birthdays, job applicants, daily log entries, labor costs, weekly sales, and other metrics.
Personal widgets provide employees with helpful reminders, information, and shortcuts, such as my requests, messages, HR documents, clock-in/out button, available shifts, and who else is scheduled to work.
This article provides a brief overview of each widget on the Location dashboard.
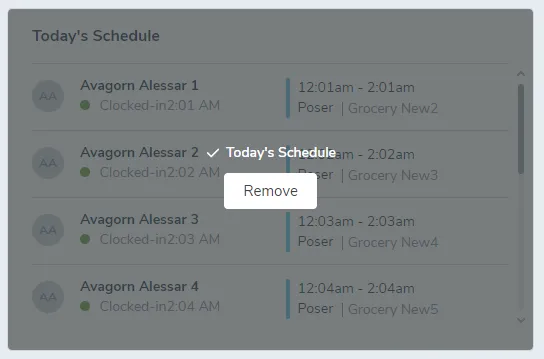
Active widgets (widgets already in use on your dashboard) will be gray with an option to Remove.
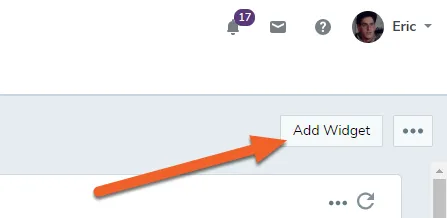
Inactive widgets will be white until you hover over them, which will make the Add Widget button appear.
Location Widgets Overview
As mentioned previously, location widgets are store-based widgets that provide useful information for management. Most are pretty self-explanatory, but we’ve provided a list of options and examples below.
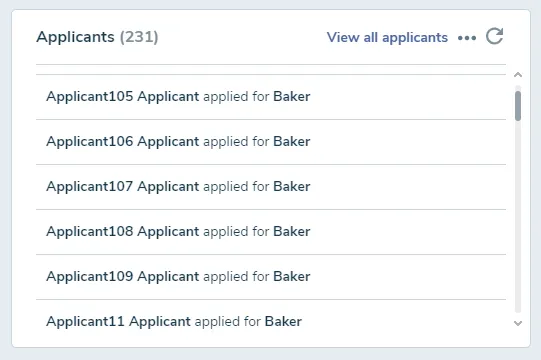
Applicants
Shows job applicants, with a link at the top to “View all applicants.”
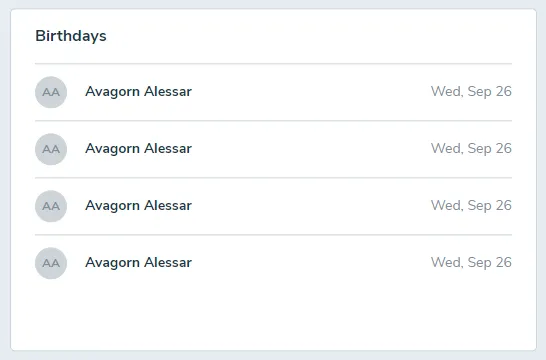
Birthdays
Shows staff members with upcoming birthdays.
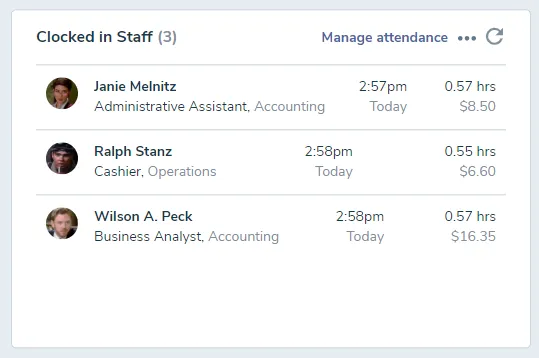
Clocked in Staff
Shows clocked-in staff, including time they clocked in and cost.
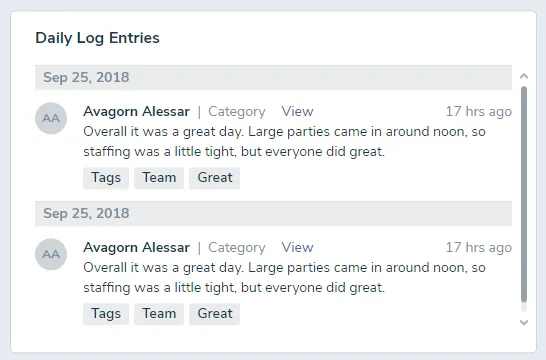
Daily Log Entries
Shows recent daily log entries, including audit and staff log information.
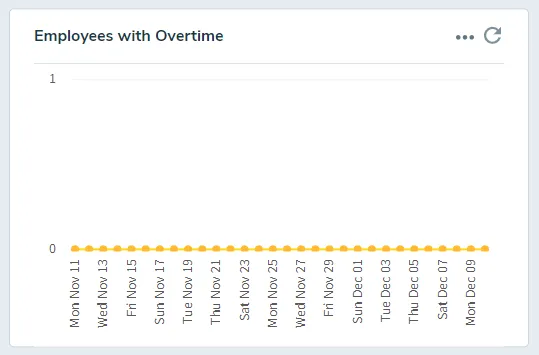
Employees with Overtime
Shows how many employees have accrued overtime, if any.
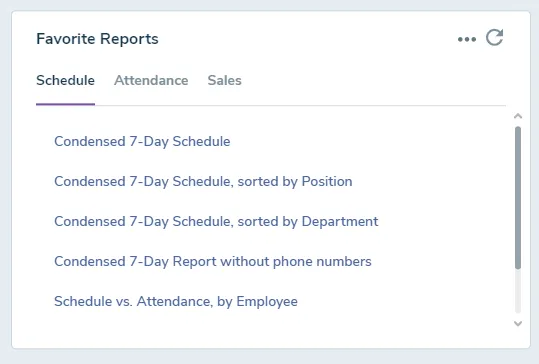
Favorite Reports
Shows your favorite Schedule, Attendance, and Sales reports.
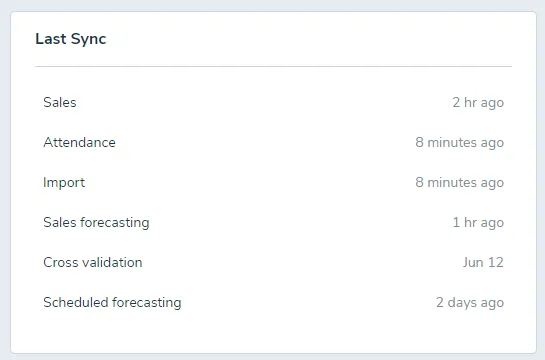
Last Sync
Shows information for the last sync of Sales data.
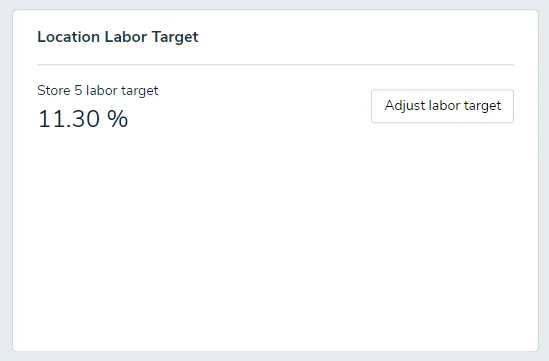
Location Labor Target
Shows the labor target for the selection location, with a button to adjust the target.
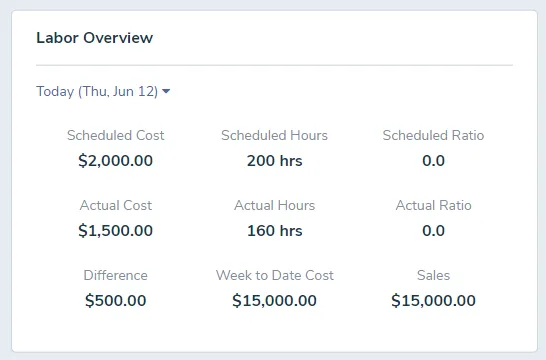
Labor Overview
Shows a labor overview for the selected date, including schedule hours/cost and actual hours/cost, and difference.
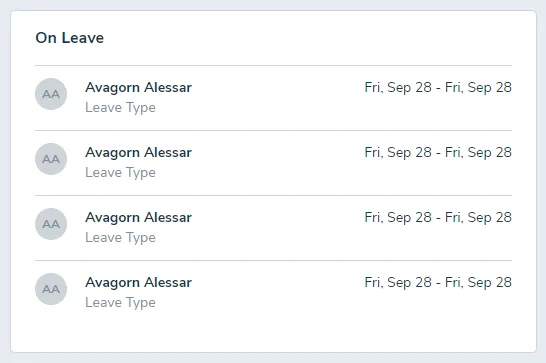
On Leave
Shows a list of employees on leave, including the dates and leave type (e.g. vacation, PTO, sick leave).
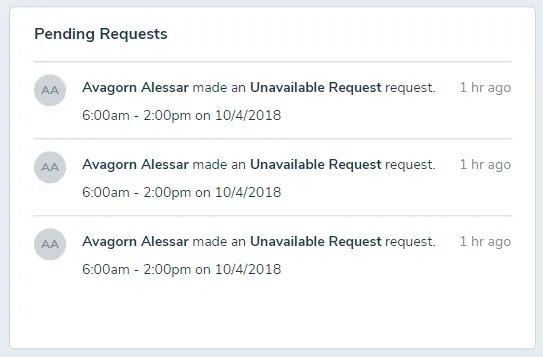
Pending Requests
Shows pending availability and time off requests from employees.
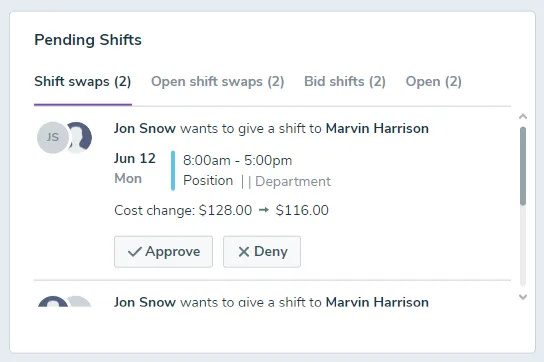
Pending Shifts
Shows pending shifts, including shift swaps, open shift swaps, bid shifts, and open shifts.
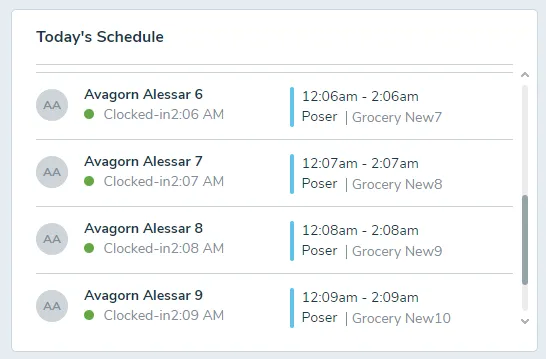
Today's Schedule
Shows a list of scheduled employees, whether and when each employee clocked in, the start and end times of each shift, as well as position and department information.
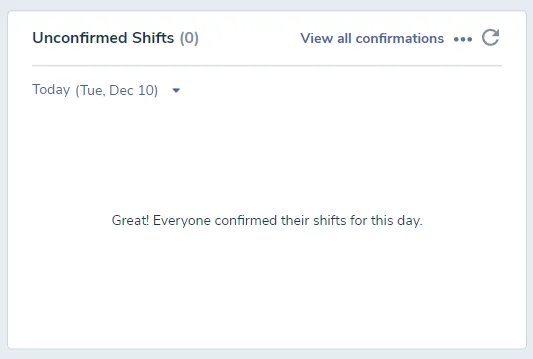
Unconfirmed Shifts
Shows a list of employees with unconfirmed shifts, if any.
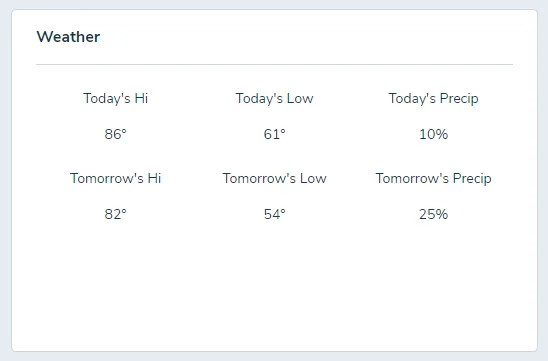
Weather
Shows the weather for that location.
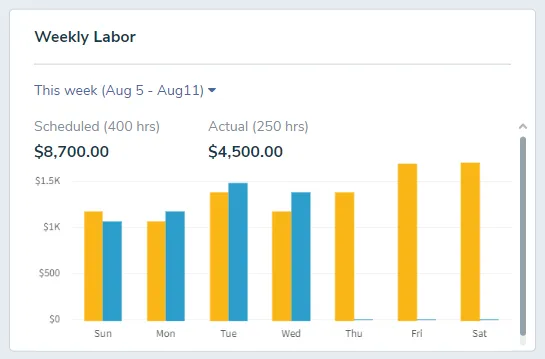
Weekly Labor Cost
Shows weekly labor for the selected week, for this location.
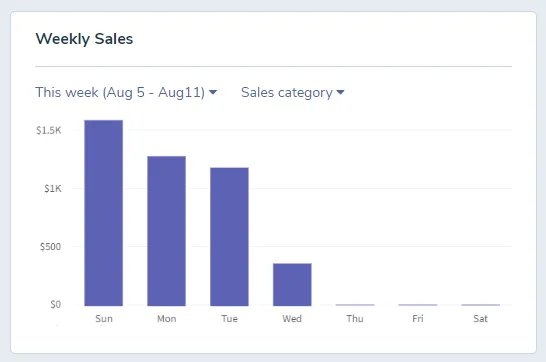
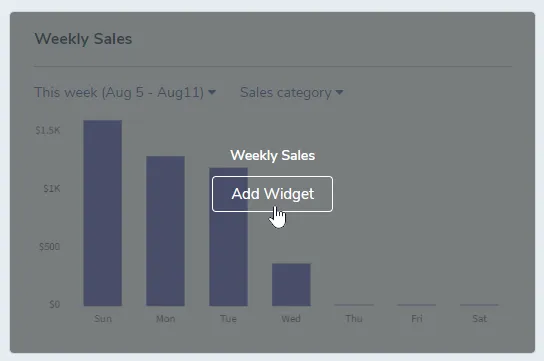
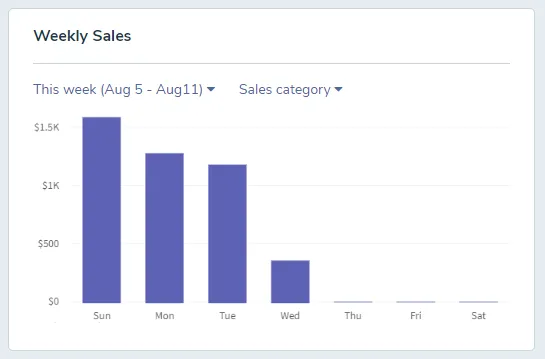
Weekly Sales
Shows weekly sales for the location. Can select a sales category to show sales for that category only.
Once you have added the widgets you want and removed the ones you don’t, simply click the Save button in the upper right to save your changes and return to your dashboard.