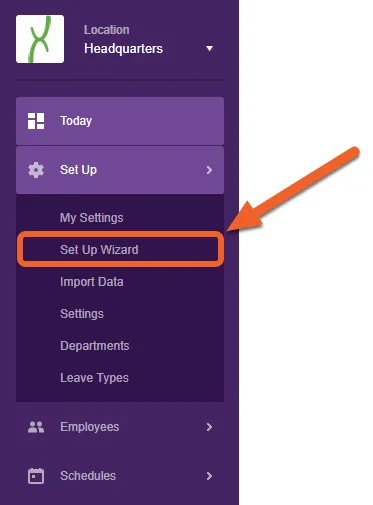
The TimeForge Setup Wizard makes getting started with TimeForge easy.
The wizard is designed to simplify the process of inputting information that TimeForge needs to help you manage your labor.
The Setup Wizard will walk you through setting up basic information about your company and staff, like basic staff information, a list of your positions, etc.
It also captures your location information, which is displayed on reports (printables), so you never need to worry about determining what schedule applies to which location.
How it works:
The Setup Wizard will also ask you some basic questions about how your store is organized. This information helps TimeForge more accurately customize our systems for your maximum convenience and ease of use. You shouldn’t have to re-organize your business just to use our product; TimeForge customizes itself to your business. Our “fill in the blank” format saves you tons of time (money), and makes setting up your account easy and fast.
Information about your employees makes contacting them simple. Just enter their email addresses, and TimeForge automatically emails them with a prompt to set up their account. Once their accounts are set up, TimeForge can notify each employee (according to their preferences) via email, Facebook notification, and/or cell phone message. We make an automatic audit confirming that the employee received notification of the schedule. Never again will you hear, “I didn’t know I was scheduled”!
After supplying position and employee information, your basic setup is complete - you’re ready to start building a schedule!
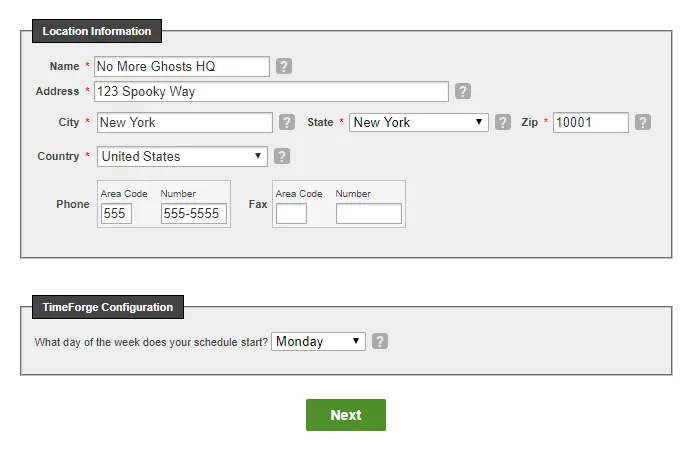
For the first step, enter your basic company and location information, such as the name, address, phone, and fax number for your store. Then, set the day of the week that your schedule starts. If you use bi-weekly or monthly schedules, choose the most appropriate day.
Click the Next button when you’re ready to proceed.
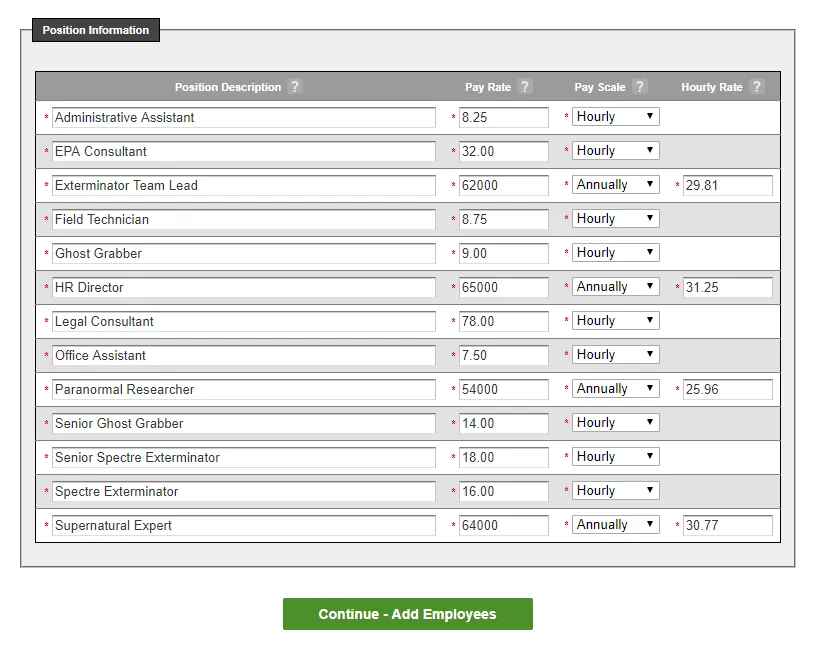
For Step 2, enter the positions or job codes that your business uses to schedule employees. Base pay rates and pay scales can also be entered for each Position (don’t worry, you can override these rates on a per-employee basis if needed).
Pay rates will be useful later to compute schedule costs and determine sales to labor ratios, and if you’re using TimeForge Attendance, they’re also used when employees clock in and clock out.
For example:
A table service restaurant might have positions for: Waiter, Food Runner, Busser, Bartender, Delivery Driver, Cook, Assistant Manager, Bar Manager, etc.
A quick service restaurant might have positions for: Cashier / Register, Drive Through, Cook, Assistant Manager, Manager, etc.
A car wash retail business might have positions for: Cashier, Attendant, Car Wash Detailer, Team Member, Assistant Manager, Manager, etc.
Other retail businesses could have positions for: Register, Security, Carry Out, Delivery Driver, Bagger, Assistant Manager, Manager, Supervisor, etc.
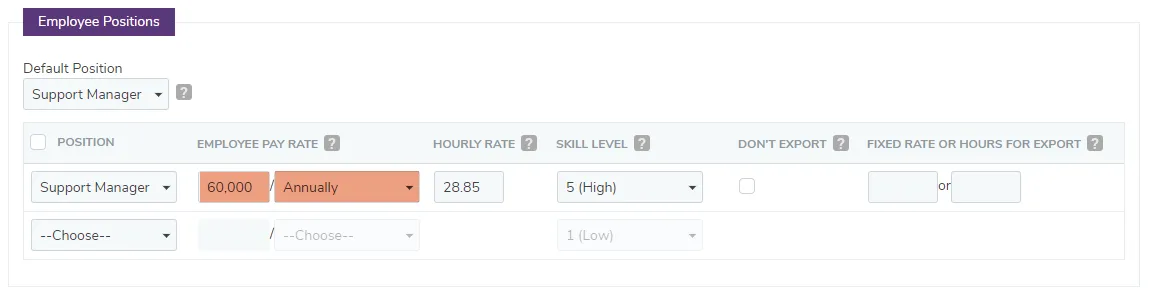
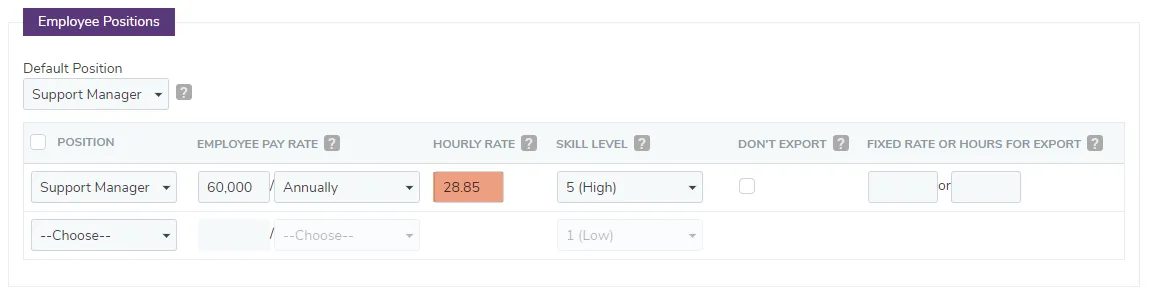
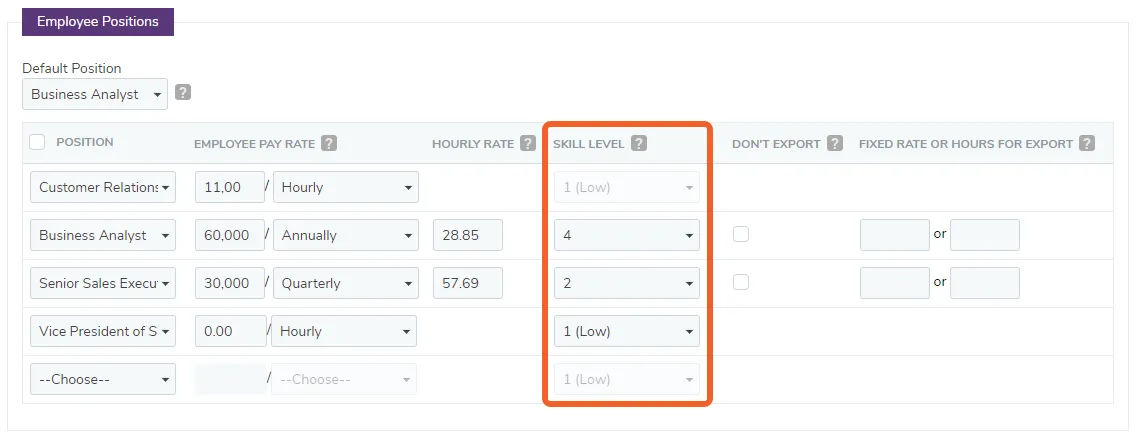
If you set a Pay Scale to “Annually” (for example, a salaried manager), the software will automatically compute an equivalent hourly rate in the “Hourly Rate” column. You may override this field if necessary.
Click Continue - Add Employees when you’re ready to move on.
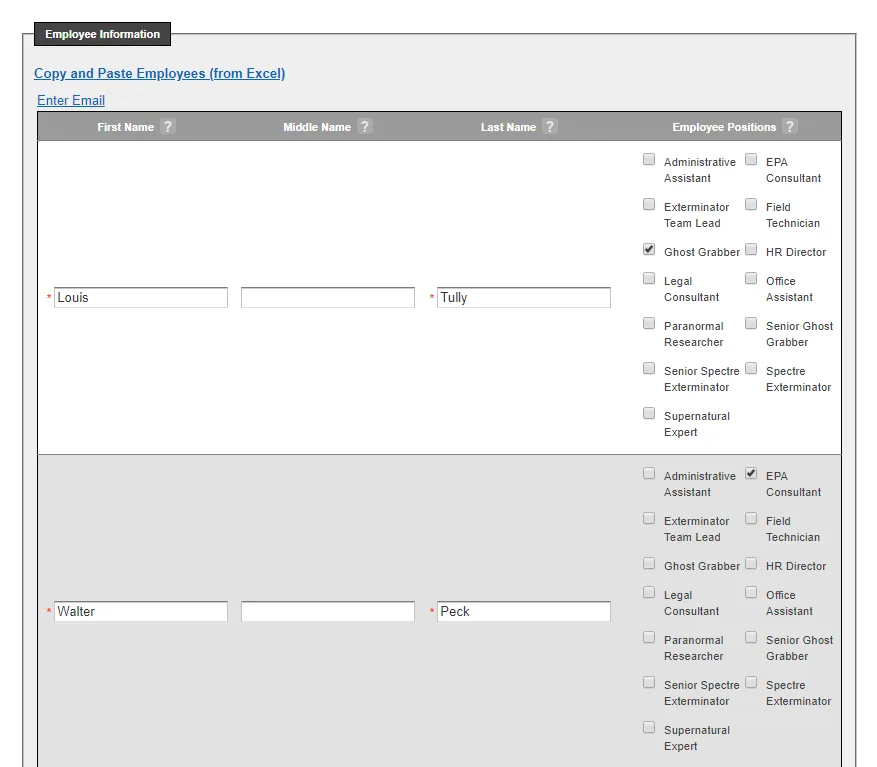
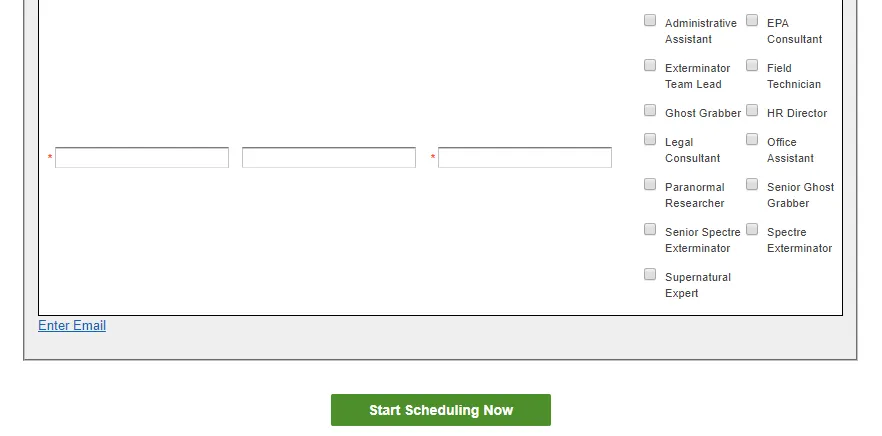
For the last step, enter the employees at your business that will be on the schedule and assign them positions by checking the boxes in the far right column. Each employee will need to have a first and last name in the system, but the middle name or initial is optional.
If you know your employees’ email addresses, you can click the Enter Email link at the top to enter them in. When you complete the wizard, TimeForge will automatically send those employees an email with instructions to access TimeForge.
When you’re done entering employees and assigning positions, click the Start Scheduling Now to save your changes. That’s all there is to it!
Use the Daily Log to stay organized
Keeping track of daily store logs, task lists, to-do items, and sticky notes can be tedious even for a small business. Add to that juggling maintenance visits, training events, human resource tasks, staff meetings, and other necessary items across multiple shifts (where the manager that scheduled the event may not be the manager responsible for the event) and you can quickly have what feels like a second full-time job.
Clear, organized communication among the management team and the rest of the staff is a requirement for every business, in any industry. As your business grows, keeping up with the pile of paperwork will not only become more difficult but also more critical for continued success. Fortunately, the TimeForge Daily Log is here to help you keep your business organized! This article will tell you how.
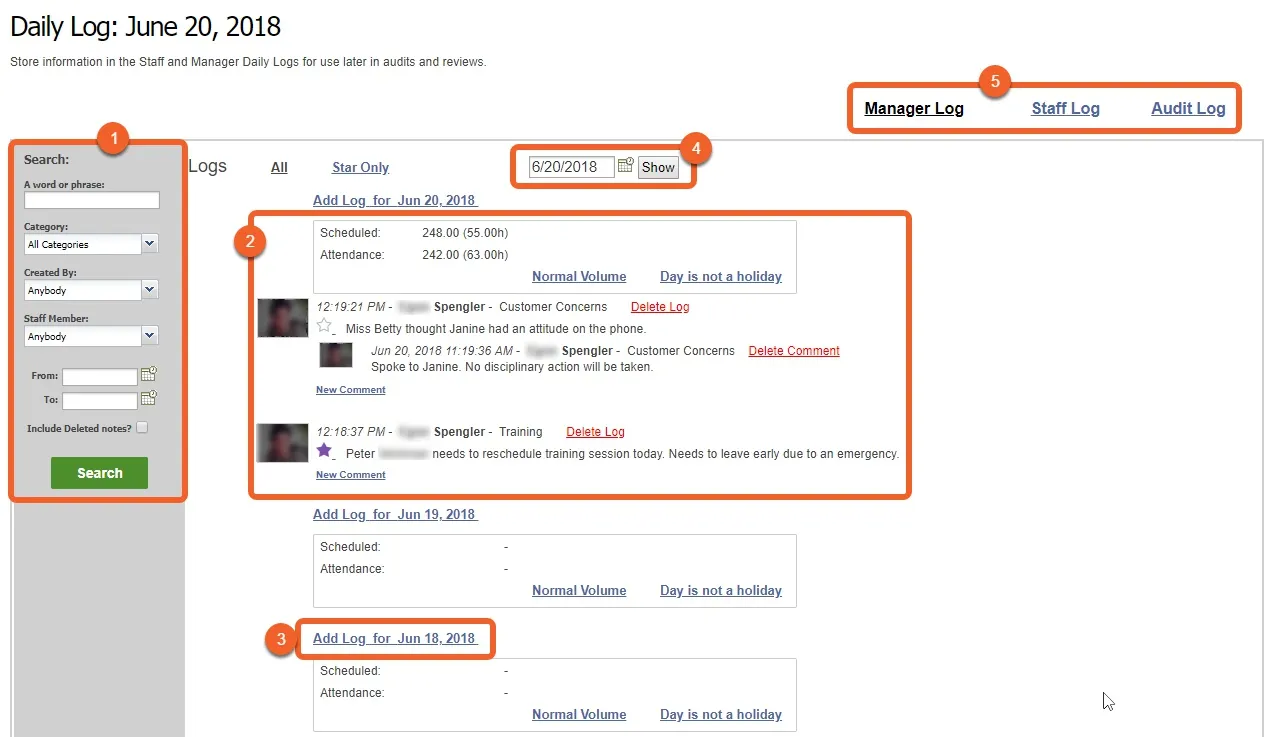
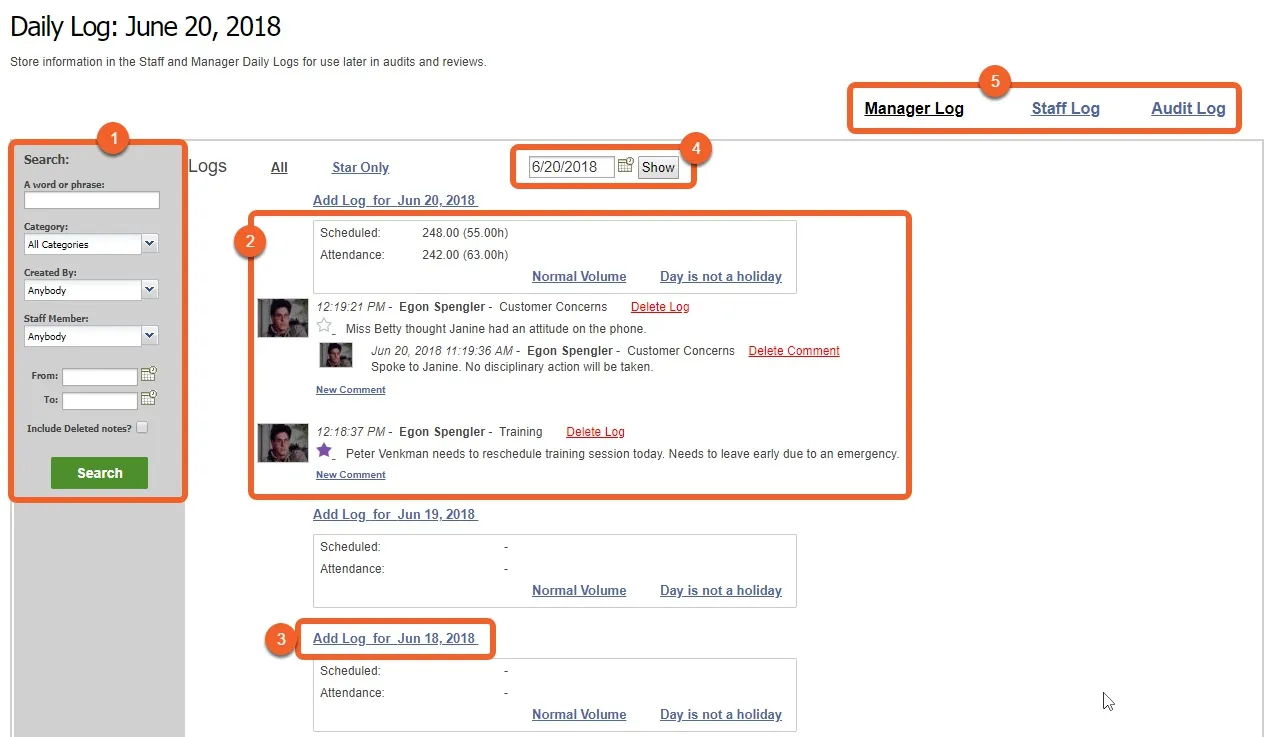
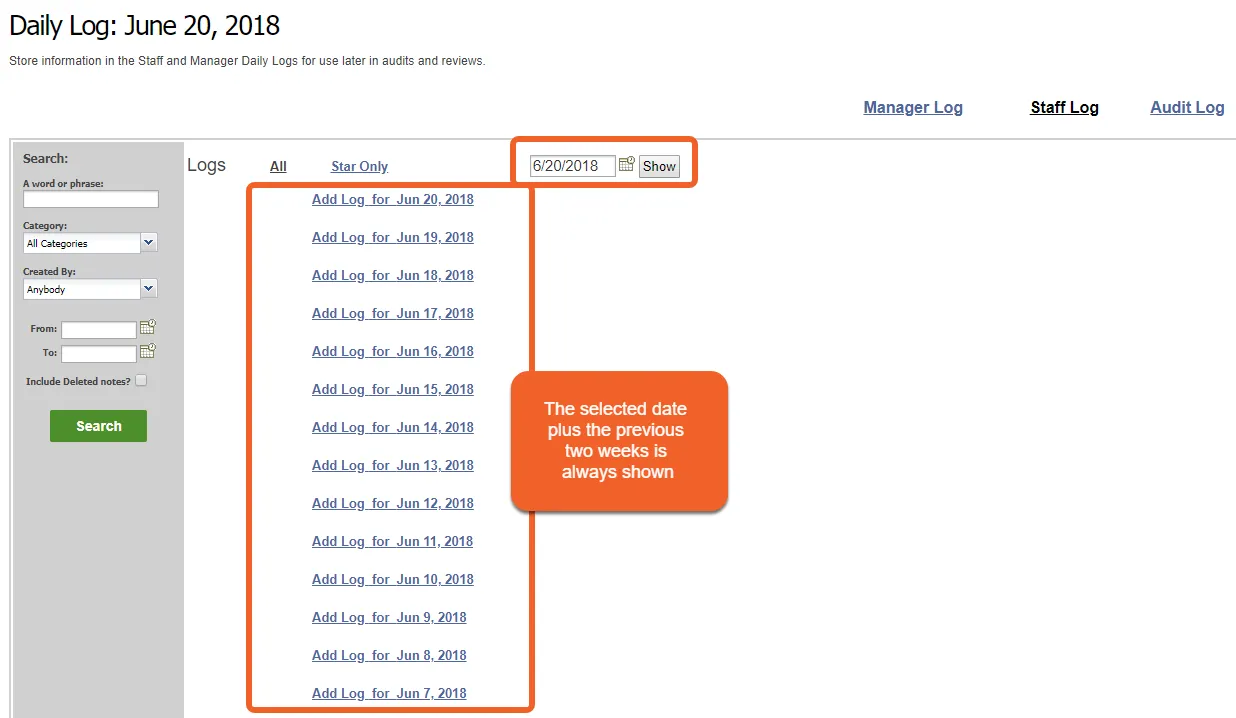
The Daily Log is a powerful yet easy-to-use tool to help keep your business organized. The chart and instructions below will help you get started.
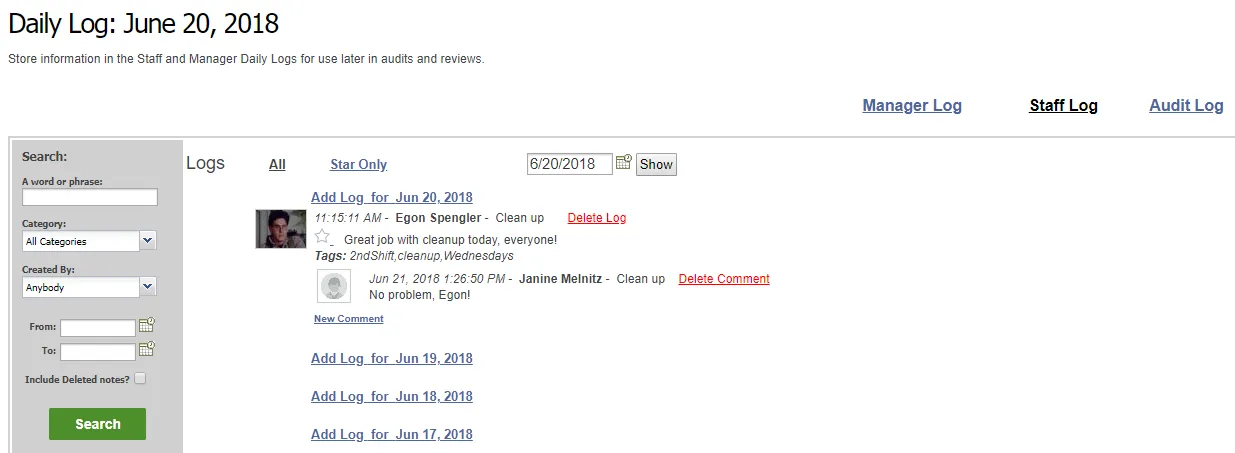
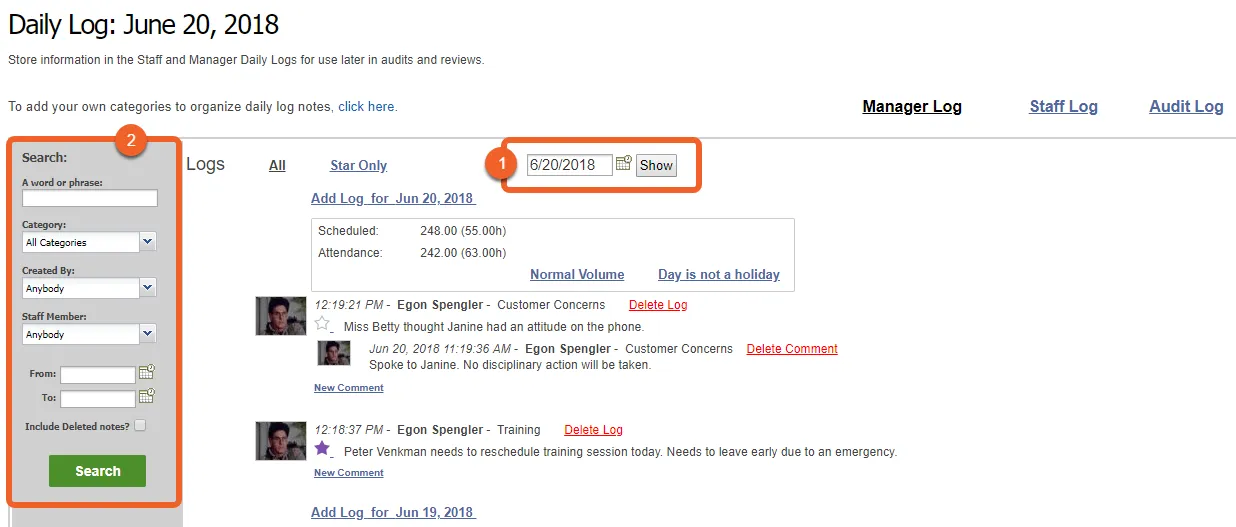
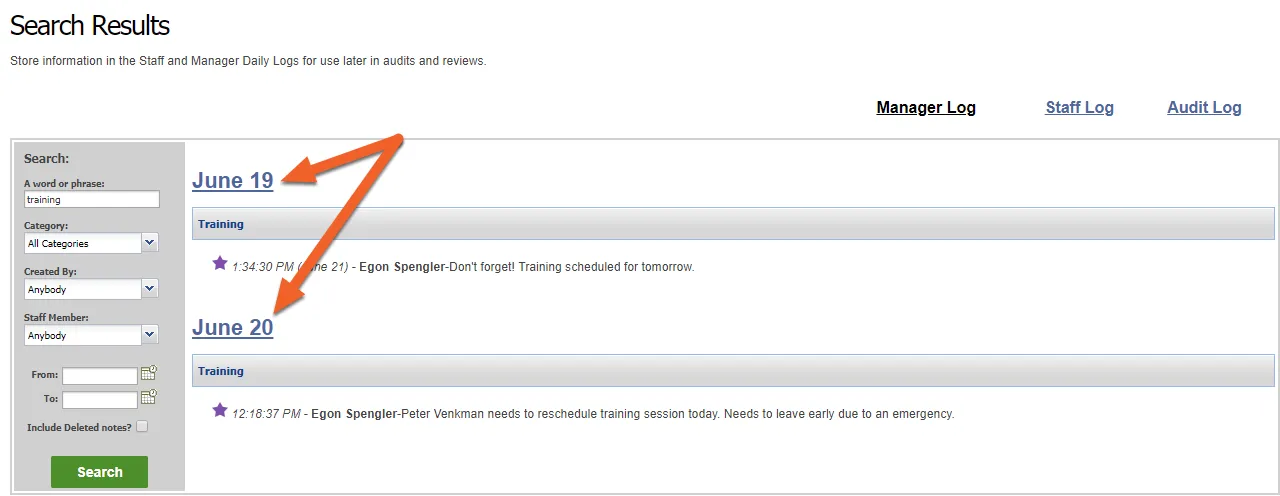
Search the Daily Log by keyword, category, the manager who created the log entry, employee, or date range.
Logs for the day are displayed in an easy to read format, along with information about the number of hours scheduled for that day, attendance, sales, volume, and whether or not the day is a holiday.
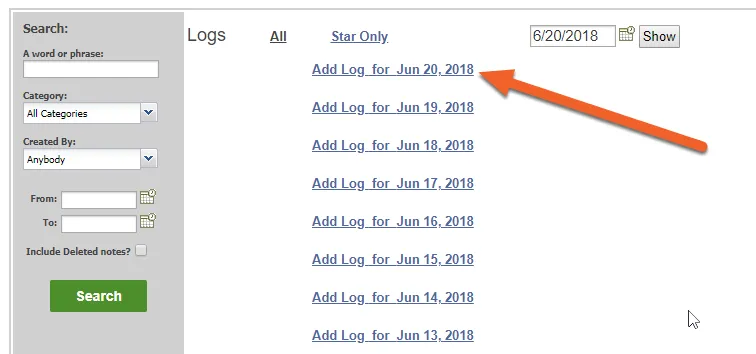
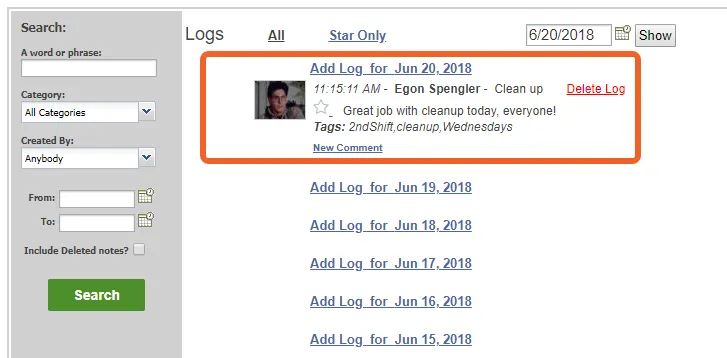
Add a new Daily Log entry with a single click! You can add log entries for the current day (always listed at the top) or previous days, as shown here.
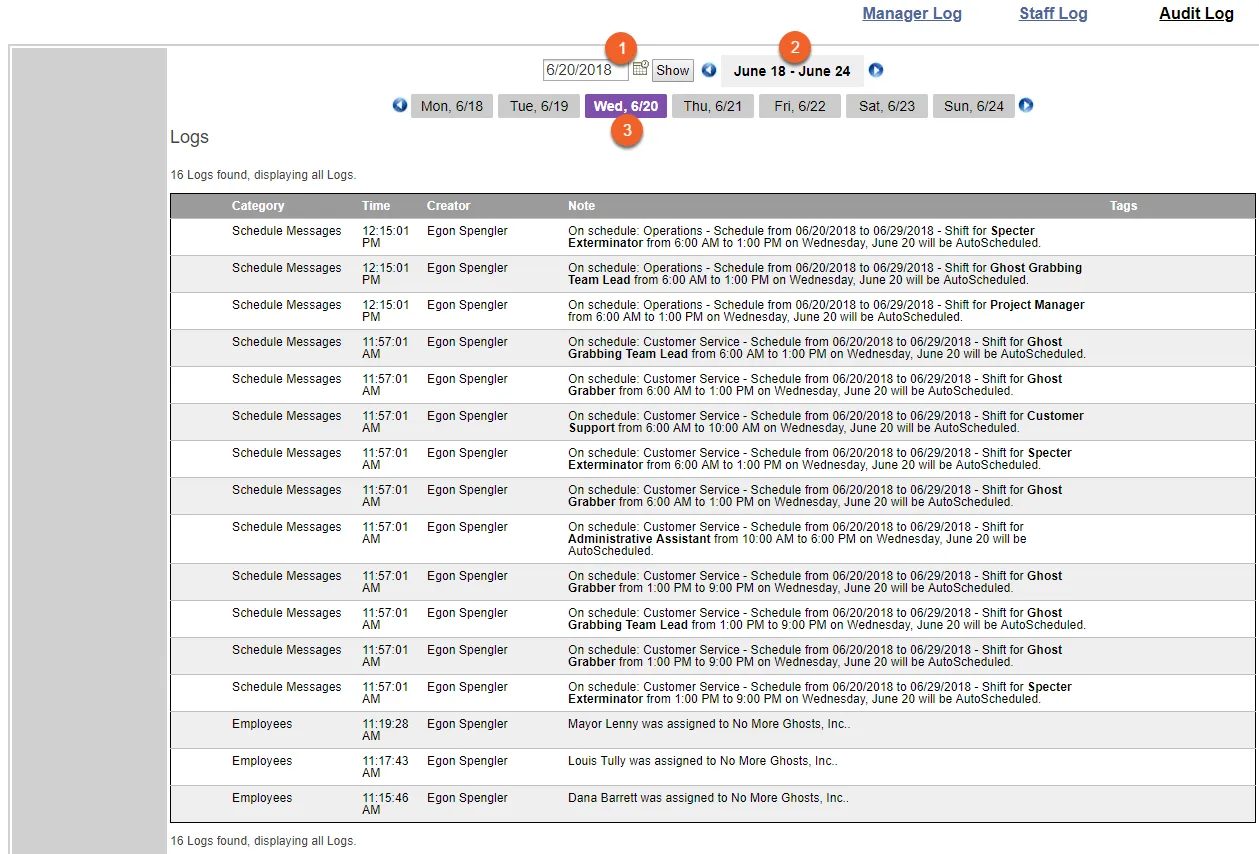
The date picker allows you to jump to a specific day.
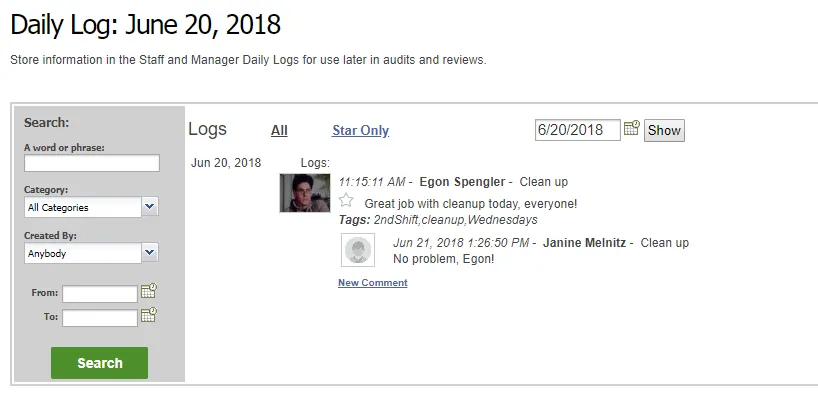
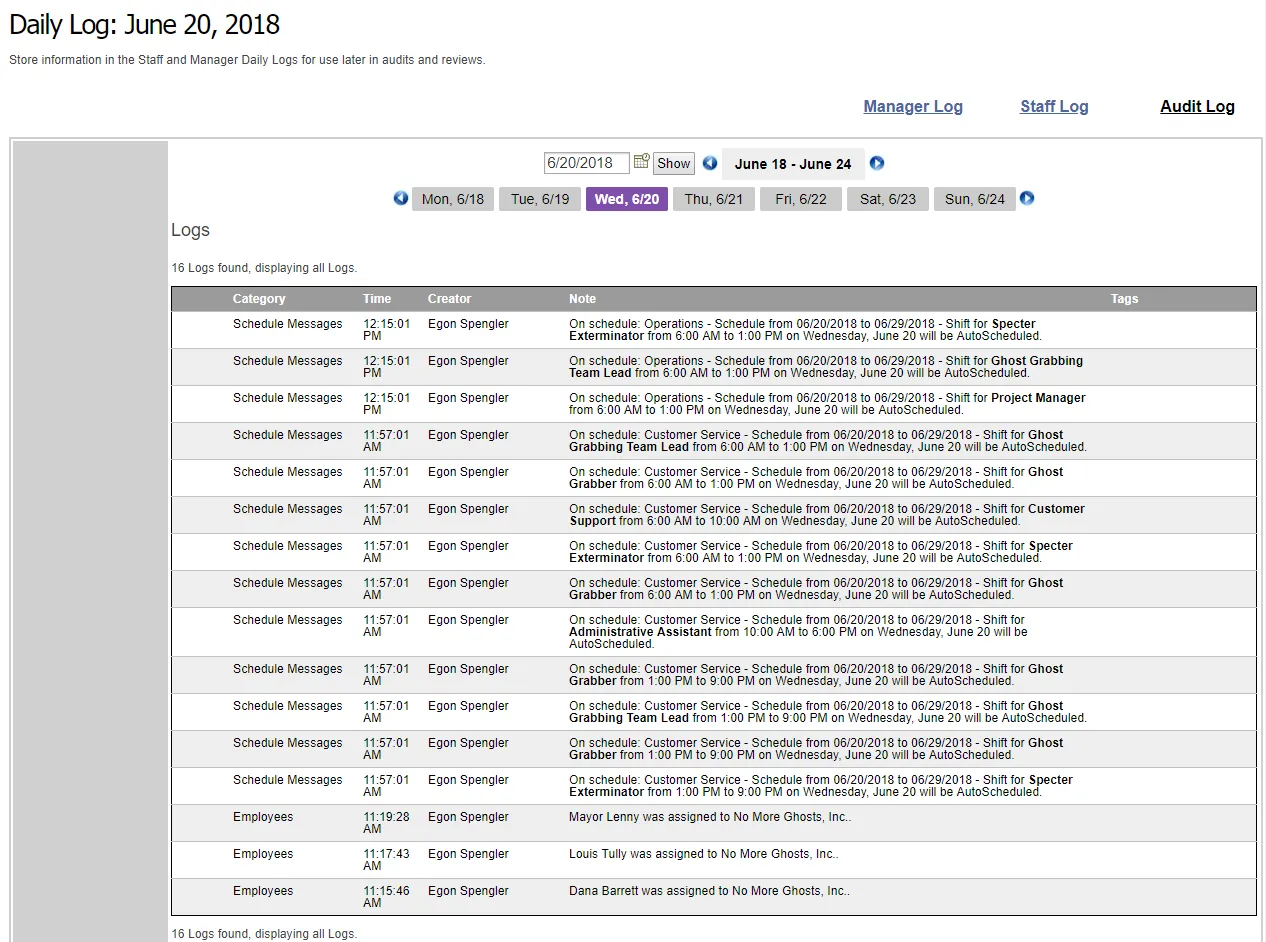
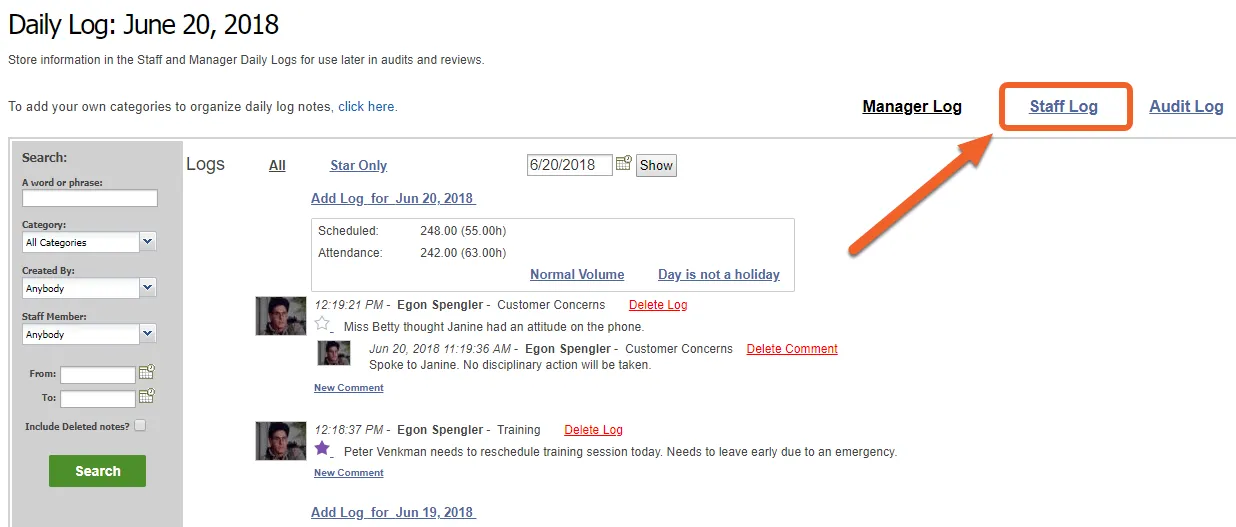
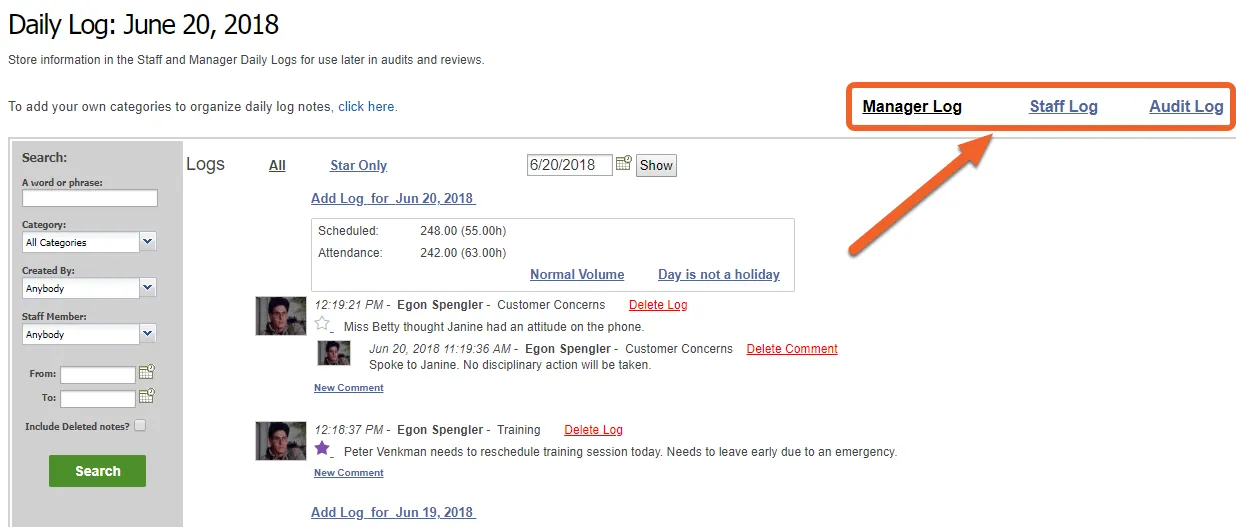
Switch between the three components of the Daily Log: the Manager Log (viewable only by management staff), the Staff Log (viewable by all employees), and the Audit Log (contains audit information about changes made within TimeForge).
Occasionally, there are matters that need to be addressed with your staff (managers or general employees) to keep your operation running smoothly. Businesses in the restaurant, retail, and hospitality industries frequently struggle with relatively negligible problems like minor tardiness and uniform issues. Company guidelines and requirements can be neglected by busy employees and even busier managers.
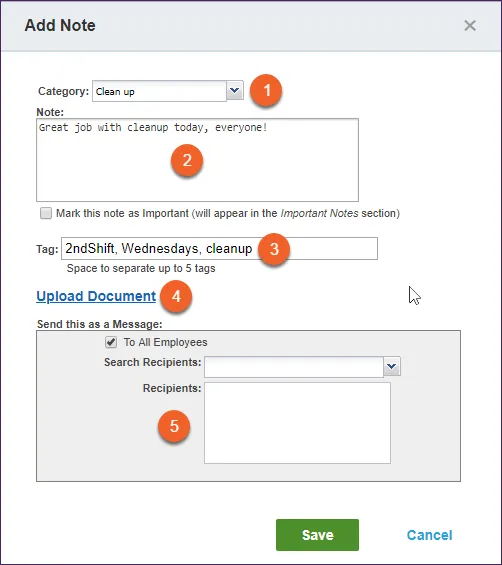
To assist in addressing these labor management issues, TimeForge created Important Notes. You can upload files such as restaurant menus or notices about upcoming training events directly to the and categorize these messages and files as “Important Notes”.
Important Notes will always show up at the top of the page for managers and staff, so you’ll never have to search through the daily logs to find what you’re looking for. When the Important Notes you’ve delegated are no longer pertinent, you can simply delete those notes in order to make room for more timely news.
Important Notes also enables you to broadcast memos to managers, staff, or both, with alerts sent directly to a staff member’s e-mail, mobile phone, or Facebook.
TimeForge is a very sophisticated labor management system that works well for both independently owned and operated businesses, as well as chain concepts and franchises with multiple locations. More than just an employee scheduling system, TimeForge has two separate operating levels that can be customized to match your business hierarchy:
The Corporate (or Corporation) level is used to manage settings that affect multiple locations, such as separate retail stores, hotels, or restaurants.
The Location level is used to manage employee schedules and attendance at a specific location.
When operated by a business with more than one location, some of the functionality of TimeForge is moved to the Corporate level to ensure consistent labor reports and pay rules across all business locations.
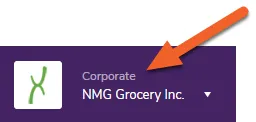
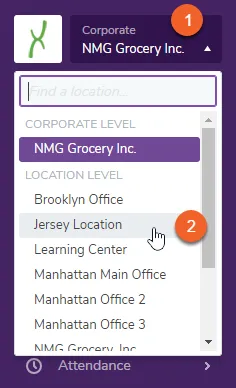
When you have multiple locations (2 or more) in TimeForge and you’re at the Corporate level, you will see the word “Corporate” followed by the name of your business:
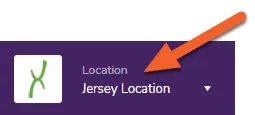
When you’re at the Location level and operating with multiple locations inside of TimeForge, you will see the word “Location” followed by the name of your currently-selected location.
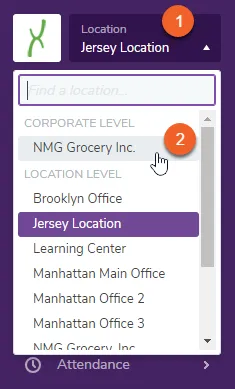
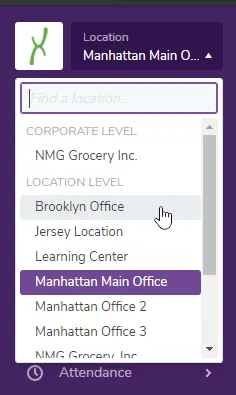
Simply click the top of the navigation pane to open up the menu, then select the name of a location under LOCATION LEVEL.
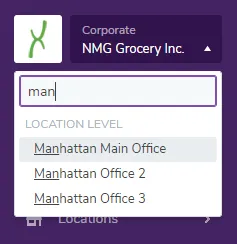
A real-time search box also allows you to quickly search through tens, hundreds, or thousands of store locations by name, store number, address, or zip code:
View your list of employees
All staff members are considered employees in TimeForge. Employees are defined across 3 categories (employee, supervisor, or manager) in the TimeForge system. More specifically, if a staff member can log in to TimeForge, can be scheduled inside of TimeForge, or can clock in on TimeForge (or with a 3rd party plug in), then that staff member is considered an “Employee” by TimeForge.
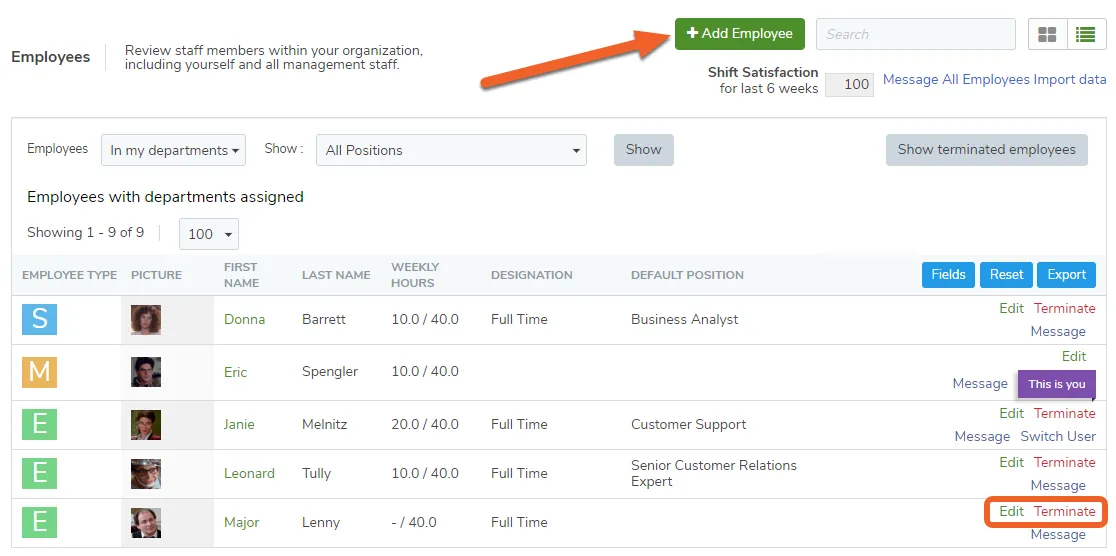
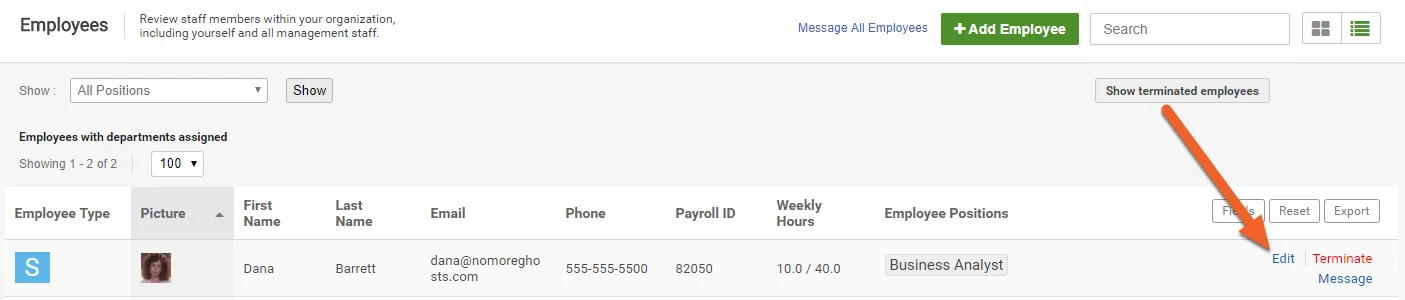
Account owners can add, edit, and terminate employees from the Employee List page.
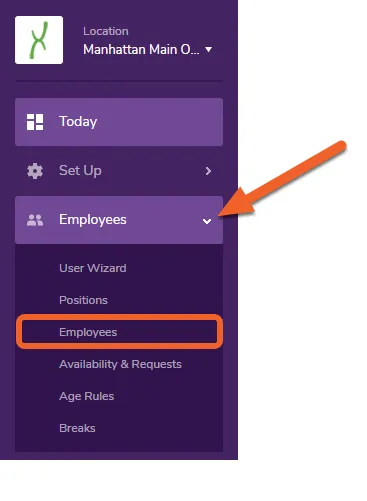
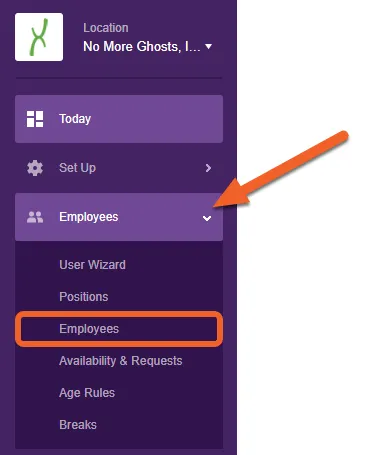
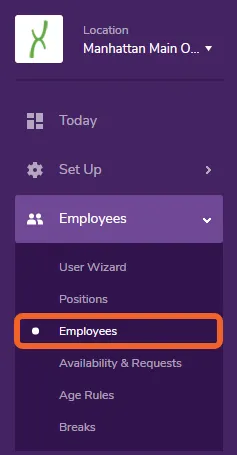
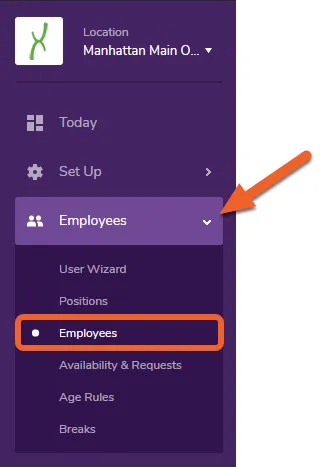
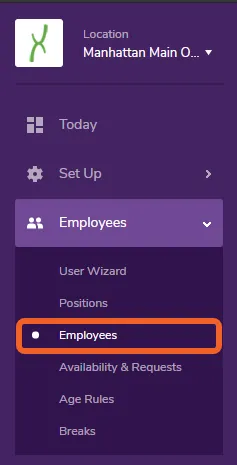
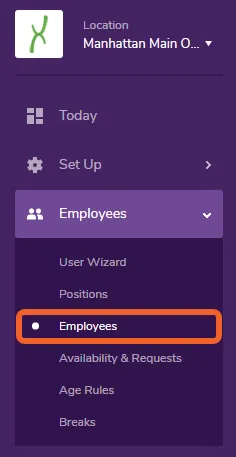
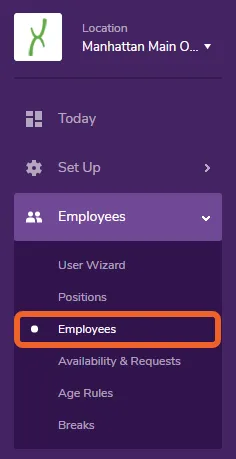
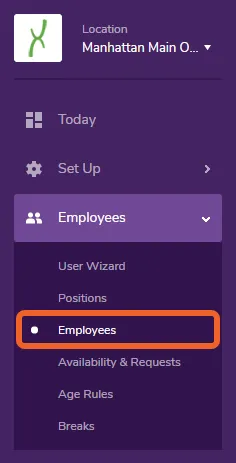
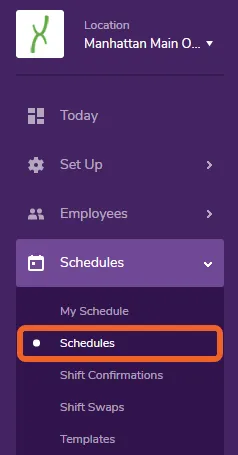
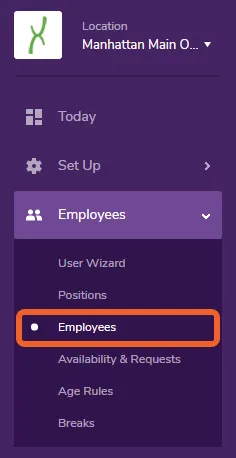
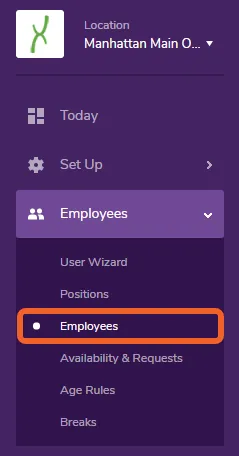
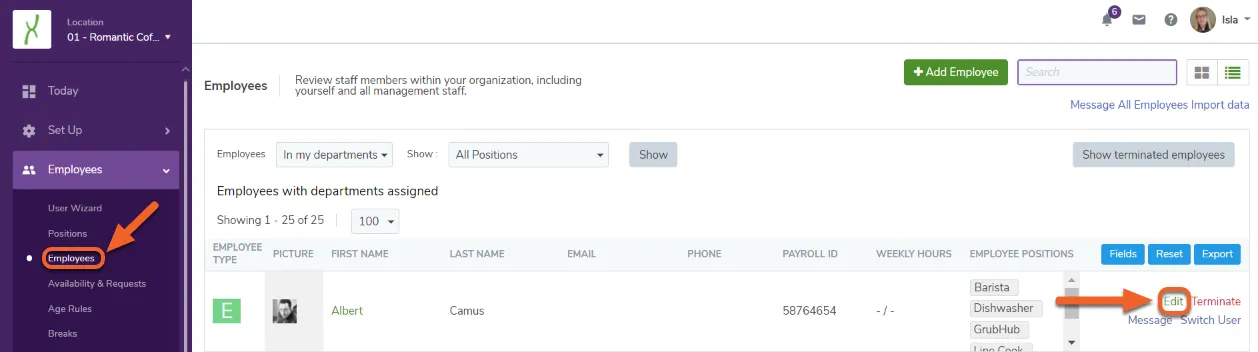
Navigate to the Employees page under the Employee tab
If you have multiple locations, first go to the Location level for a particular store, then open the Employees tab. Select Employees from the sub-menu.
What about from the Corporate level?
You can also view a company-wide employee list from the Corporate level if you have appropriate permissions, but you won’t have access to certain features, such as the ability to message all employees or import data.
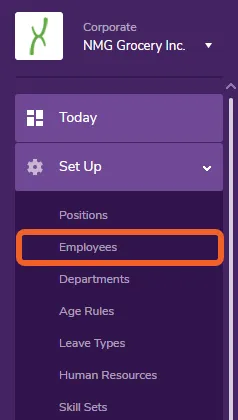
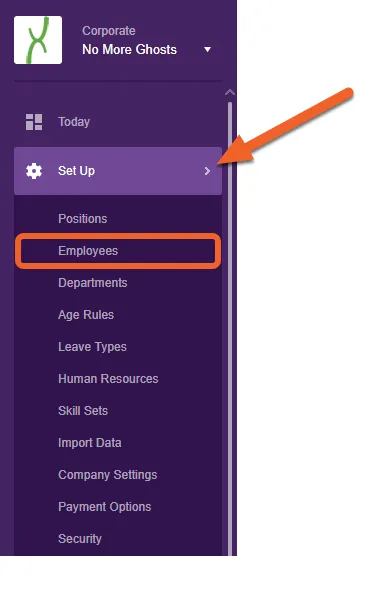
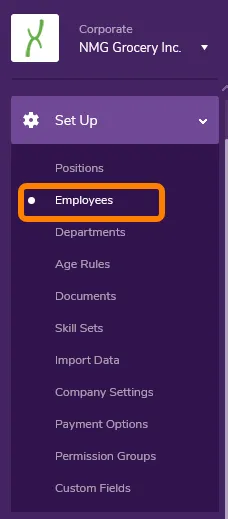
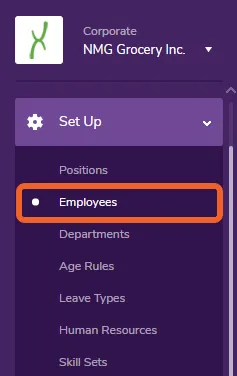
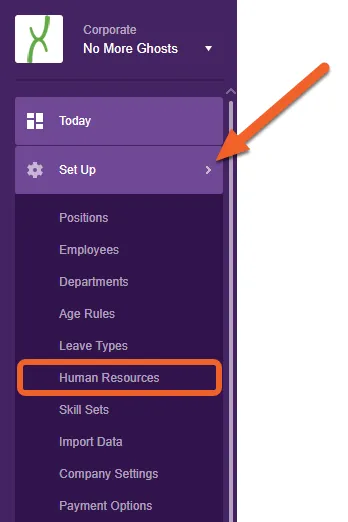
To view your employees from the Corporate level, open the Set Up tab, then select Employees from the sub-menu.
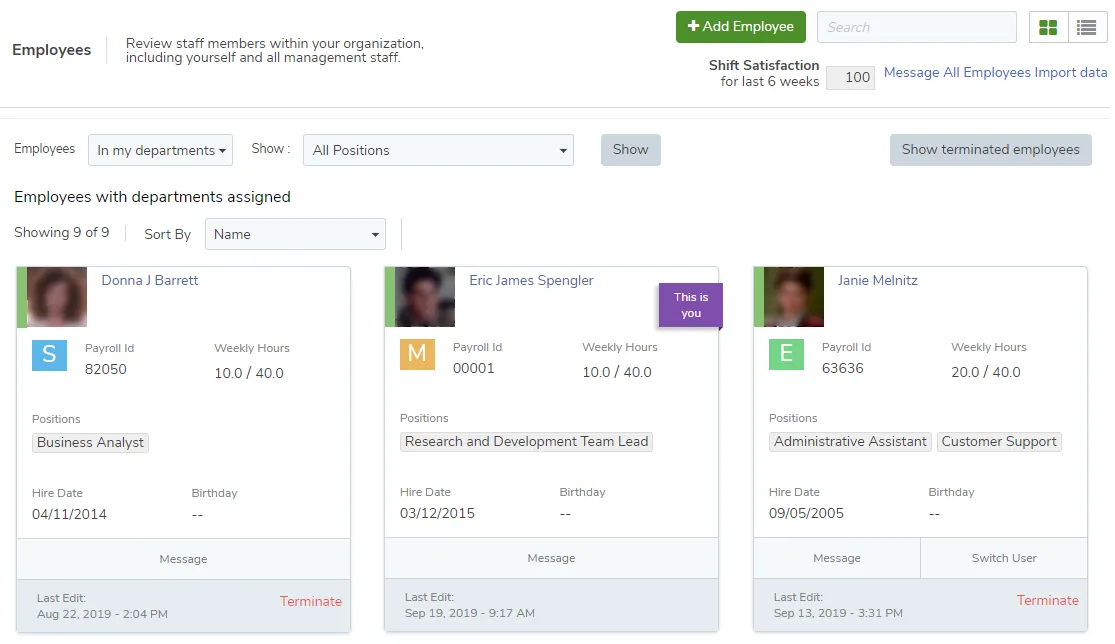
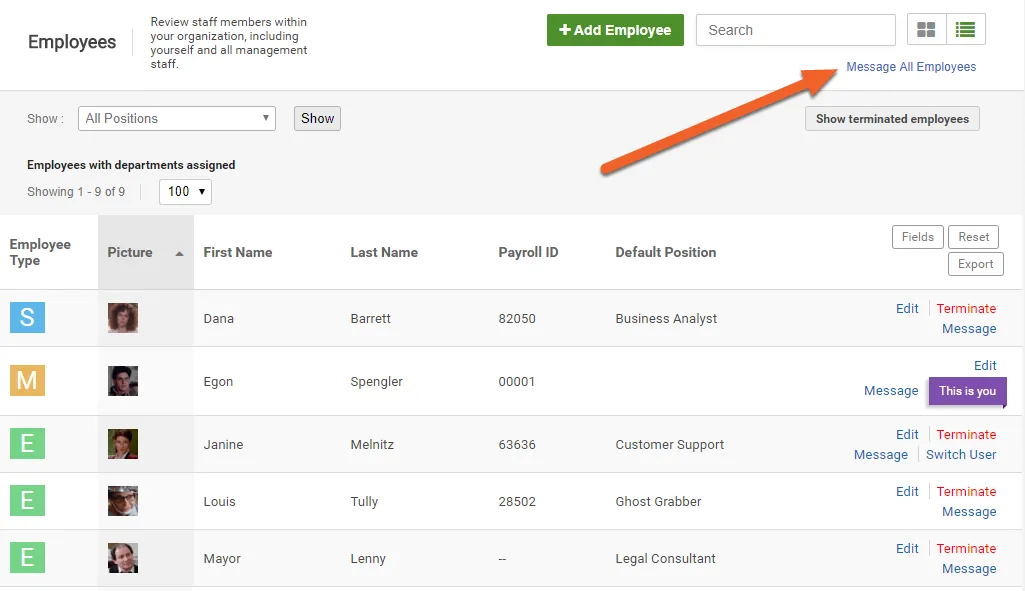
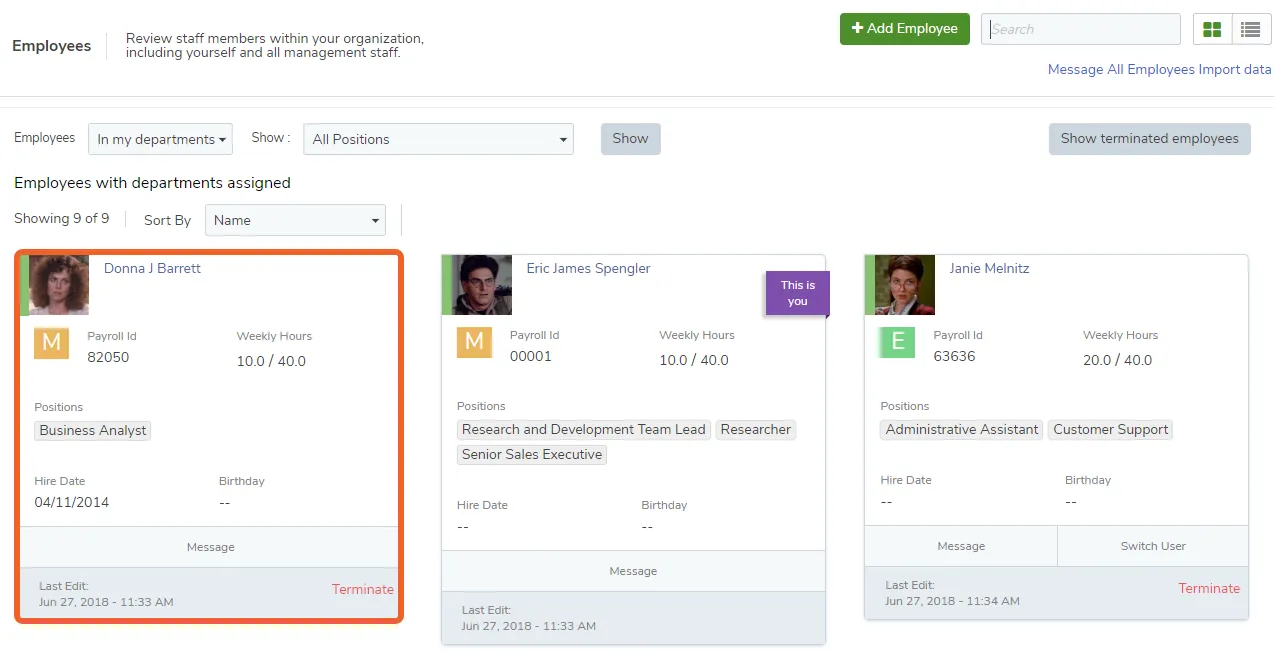
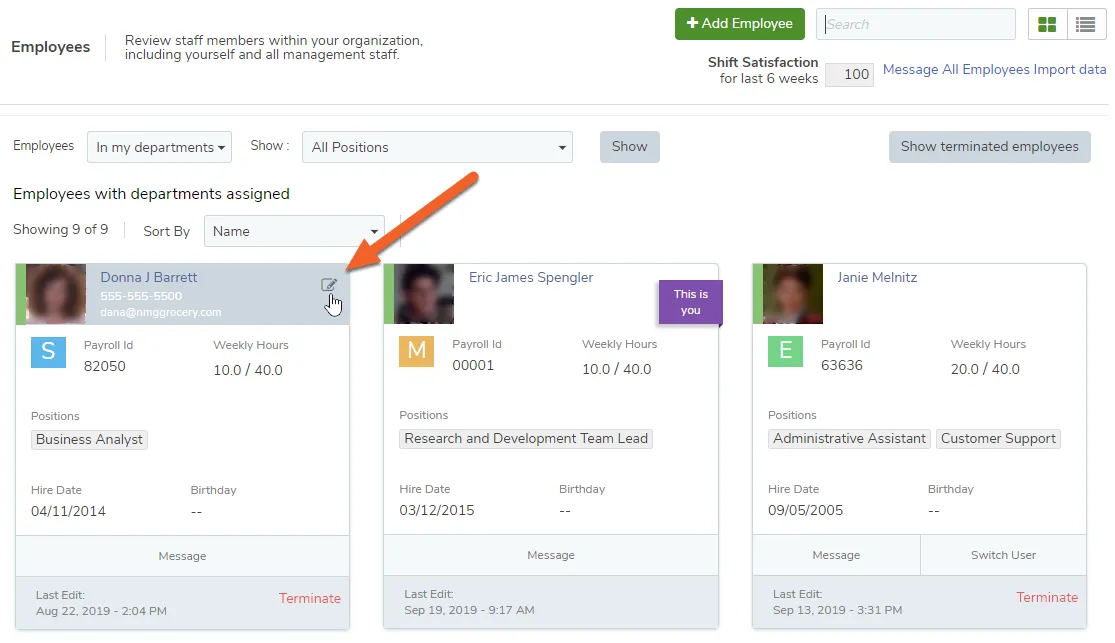
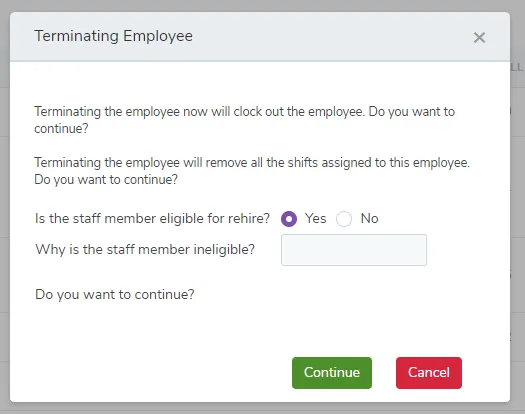
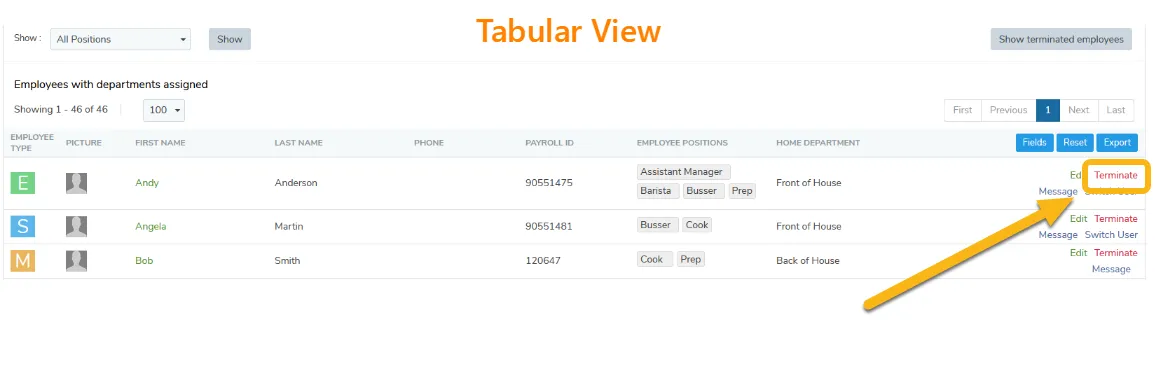
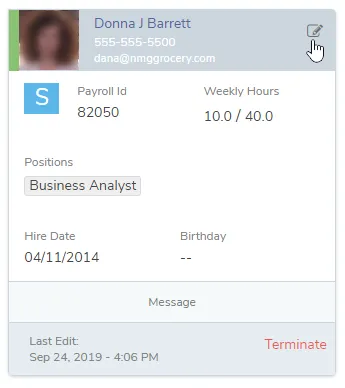
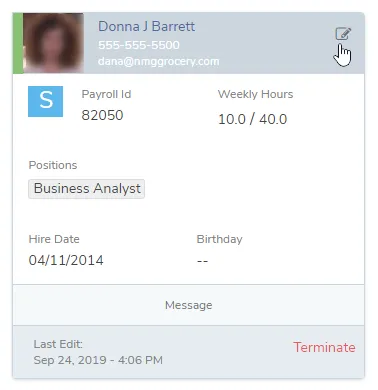
From this page, you can view and edit important details, send individual messages, or even message all employees at this location. If you have the appropriate permissions, you can also Terminate employees, as well.
By default, TimeForge allows both Managers and Supervisors to send messages to employees. (Though, this setting can be customized for Supervisors on per-location basis.) This article will teach you how to send a message to all employees at a given location, which can be handy for sending out reminders, announcing upcoming events or requirements, or providing important alerts about the store.
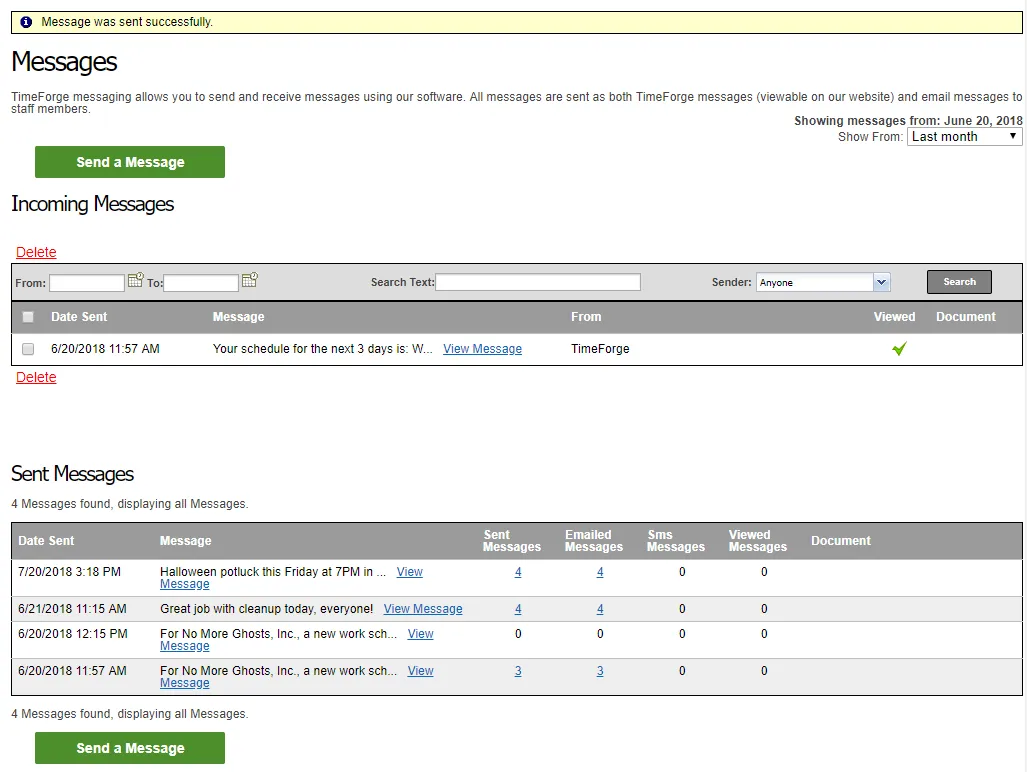
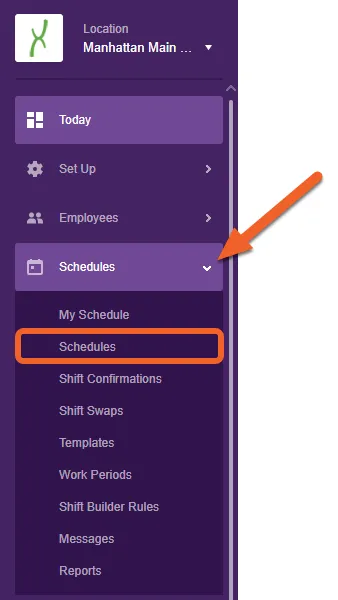
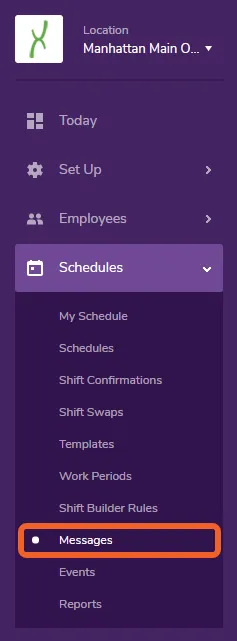
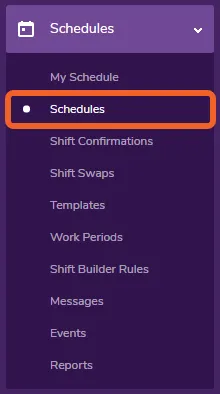
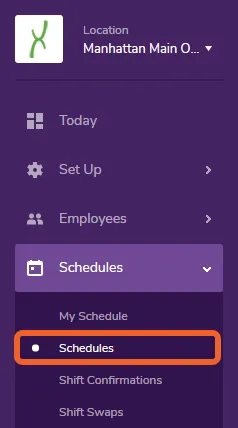
You can also view and send messages at any time by opening the Schedules tab and selecting Messages from the sub-menu.
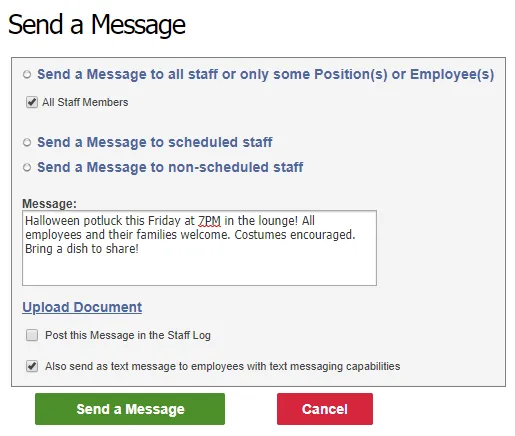
Enter your message into the text box. You can also customize the recipient list at this time, if you do not want to send the message to literally all of your staff members. Simply click on one of the available options (e.g. “Send a Message to scheduled staff”).
Other options include the ability to attach a document to the message, post the message to the Staff Log, and send the message as a text message to employees who can receive them (requires the message to be 140 characters or less).
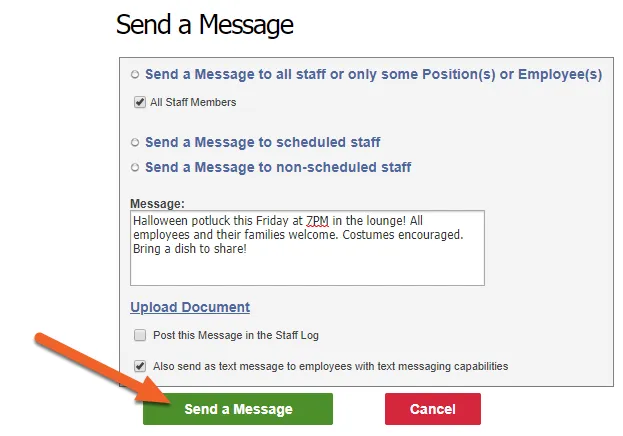
When you’re satisfied with your message, click the Send a Message button to send it to your employees!
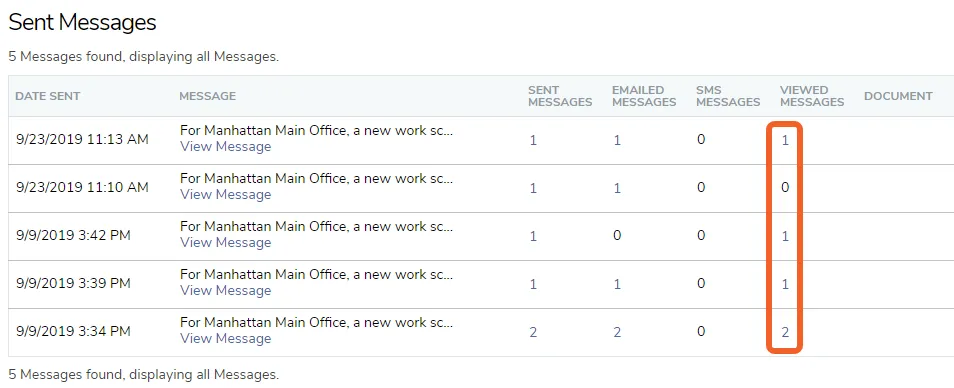
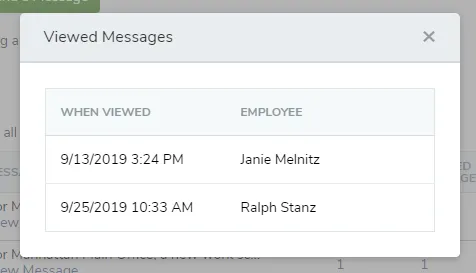
You’ll then be taken to your Messages page under the Schedules tab, where you can review the message in your Sent Messages list or send another one.
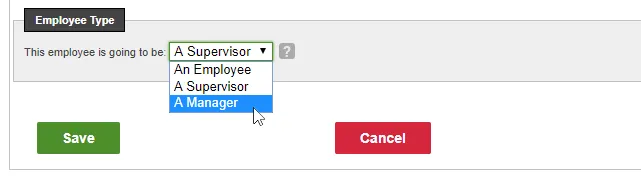
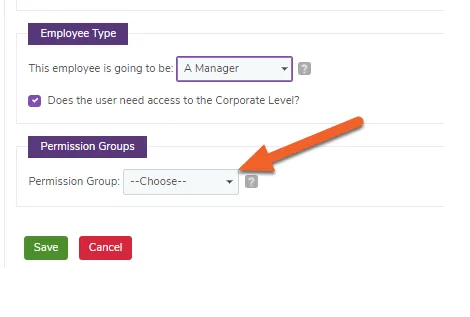
Set a user's security level to Employee, Supervisor, or Manager
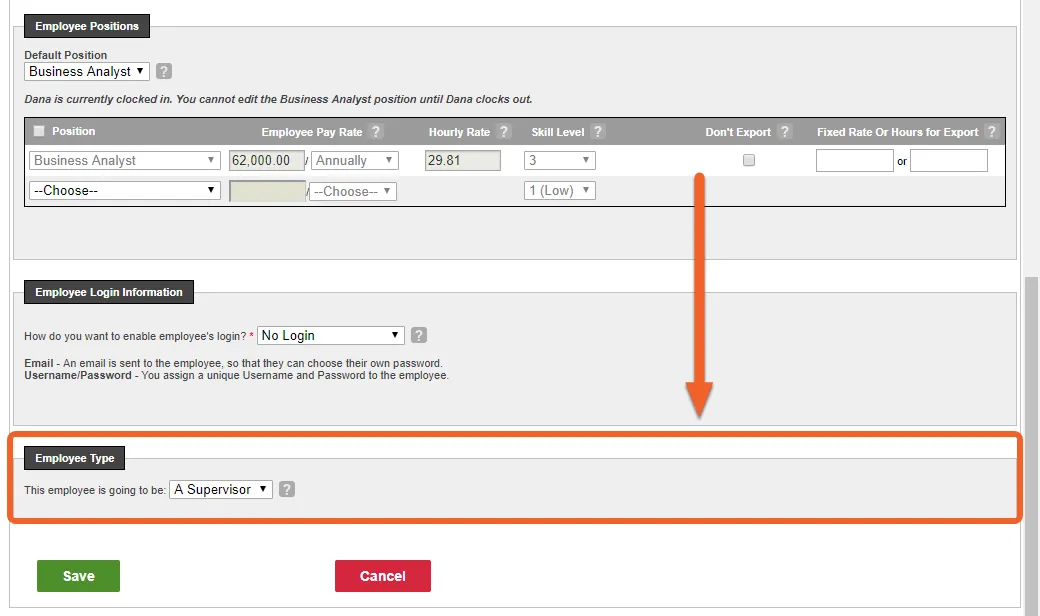
TimeForge has 3 different security levels that determine what each staff member can do within the TimeForge labor management system.
Manager - A TimeForge Manager is able to do anything inside of the TimeForge system, including adding staff members, adding/editing employee schedules, changing sales forecasts, modifying the daily log, and running payroll reports.
Supervisor - A TimeForge Supervisor is intermediate between a TimeForge Employee and a TimeForge Manager. Using security templates, Supervisor permissions can be customized on a location-by-location basis to best fit your business’s needs. By default, supervisors are able to perform every TimeForge function that a TimeForge Manager can. However, Supervisors cannot view the pay rates or salaries of other Supervisors or of any Manager.
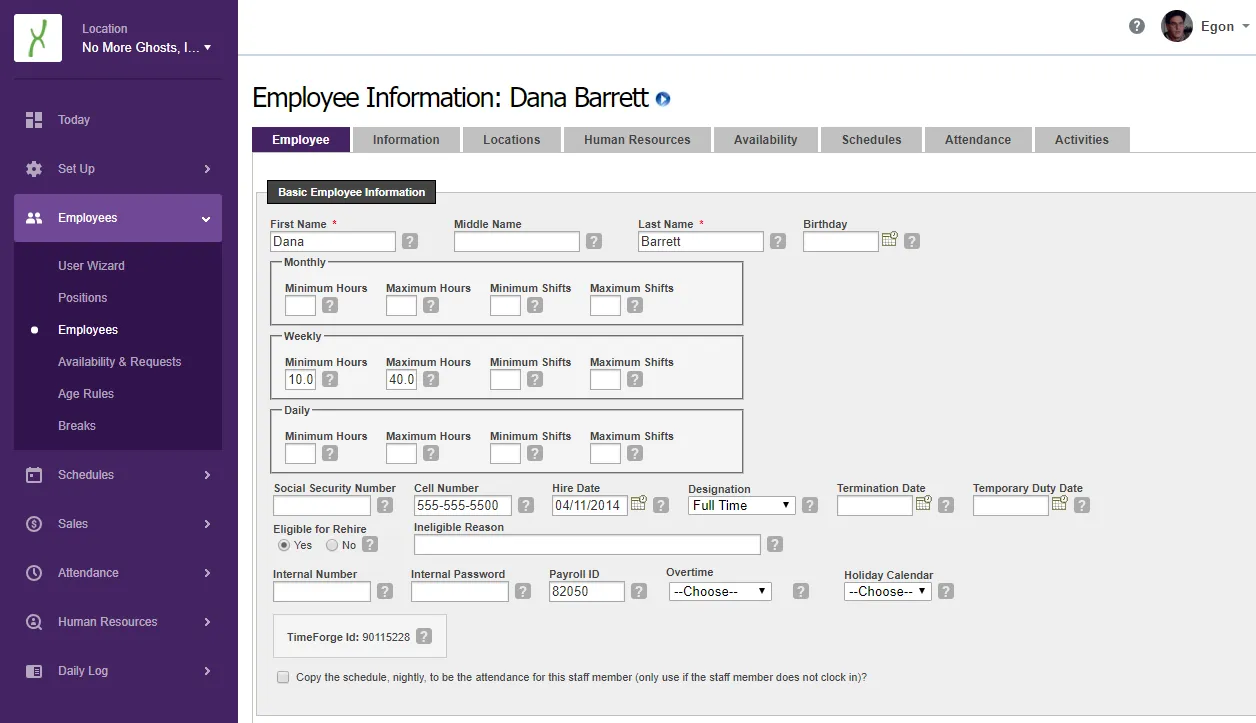
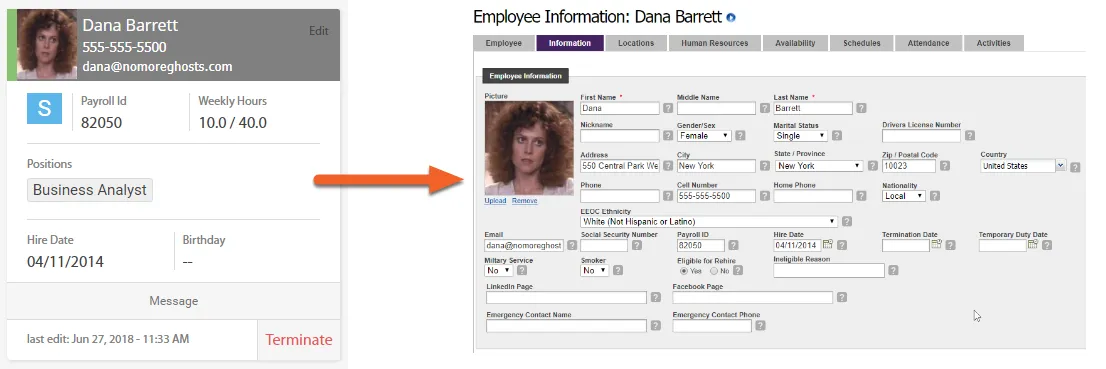
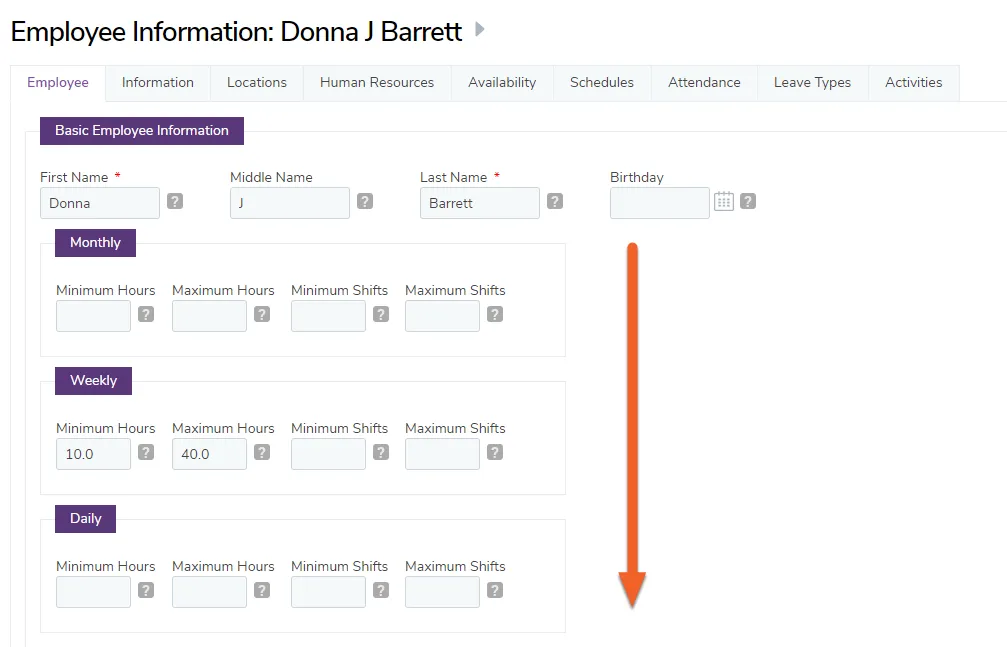
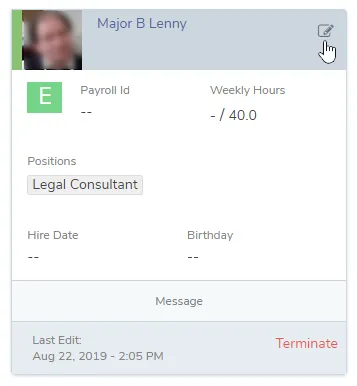
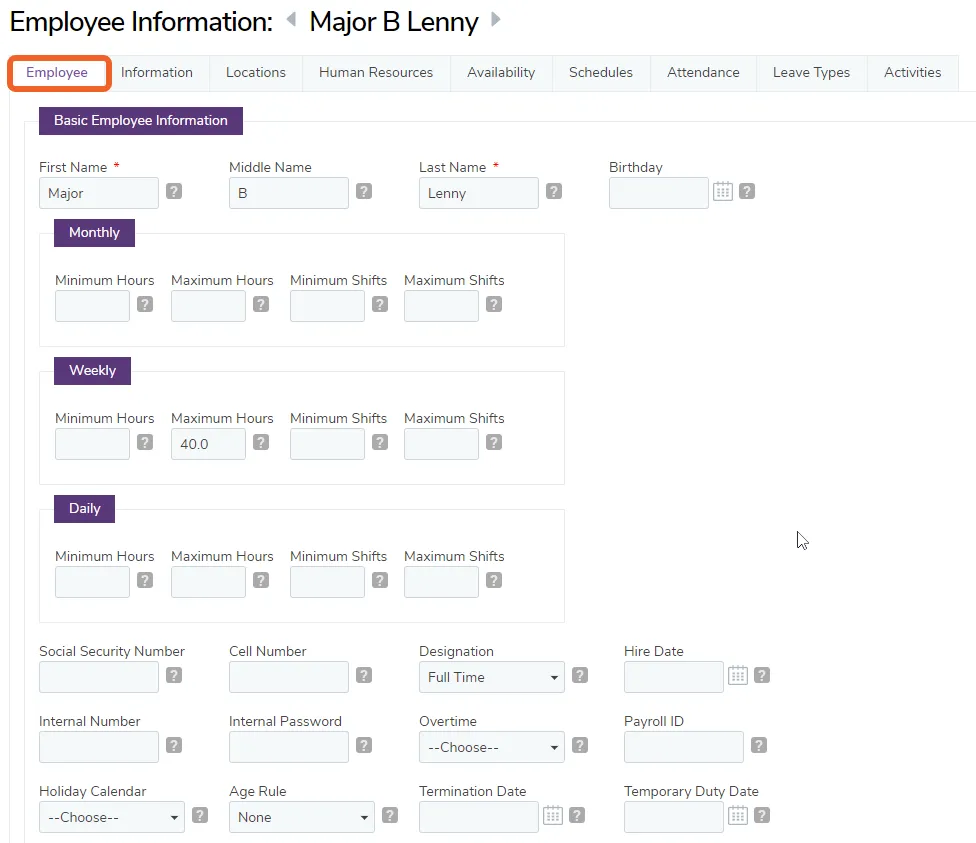
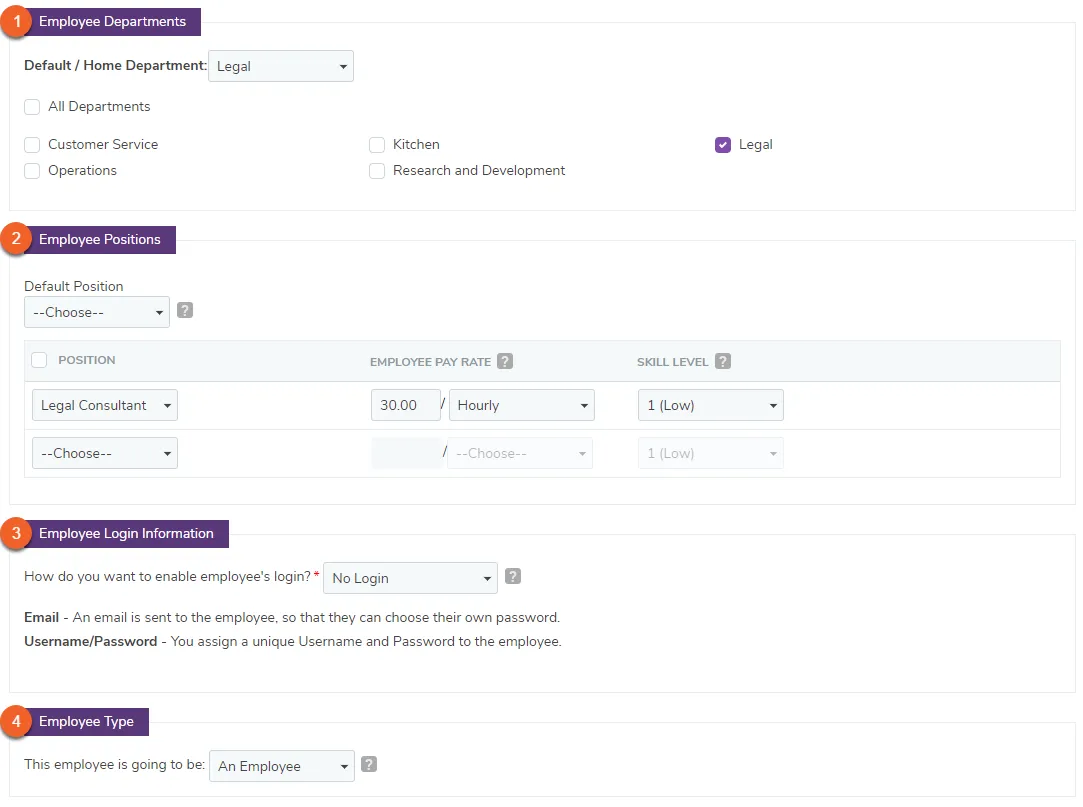
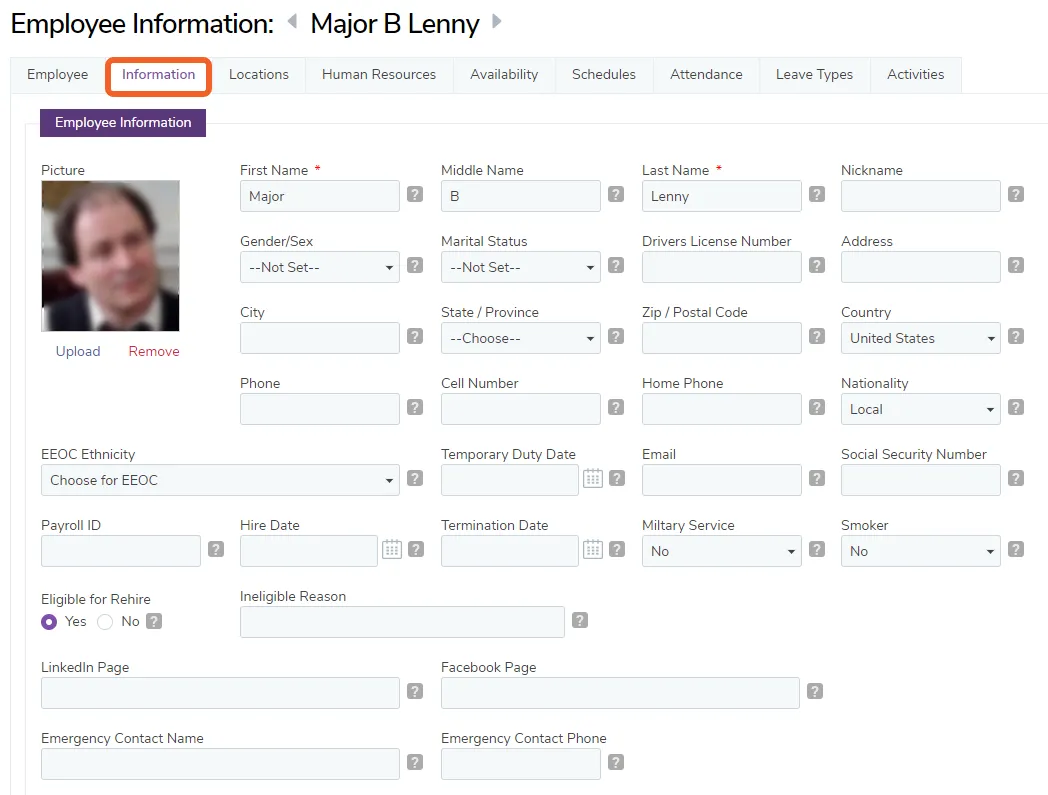
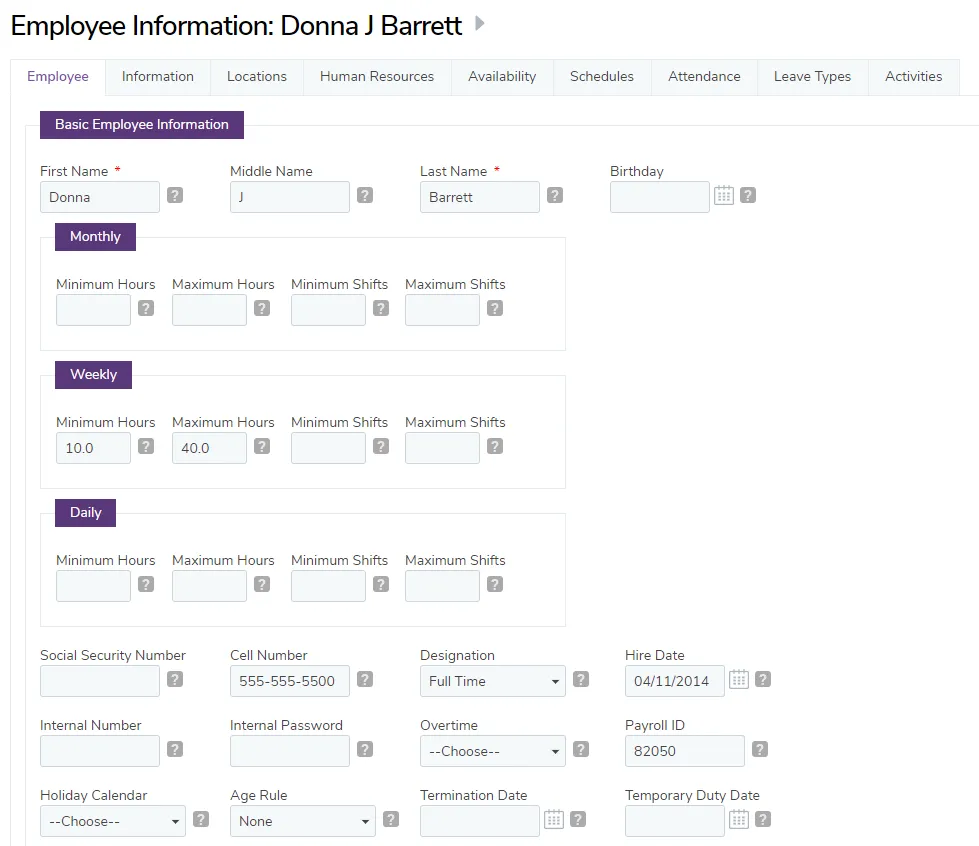
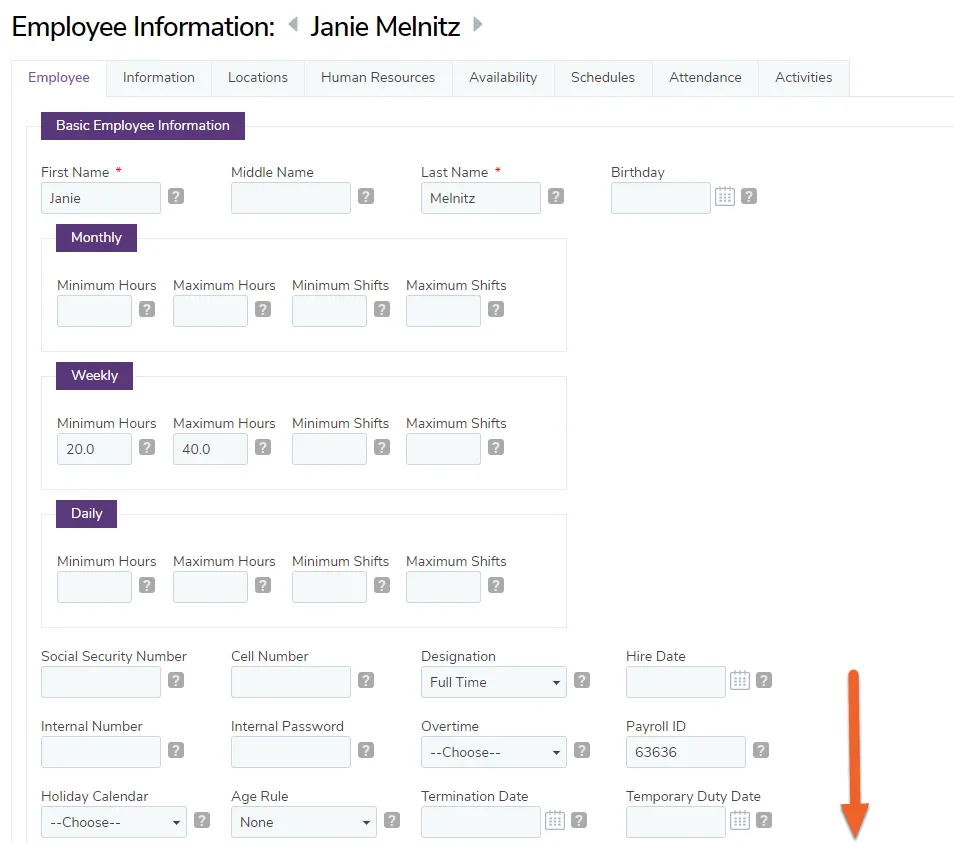
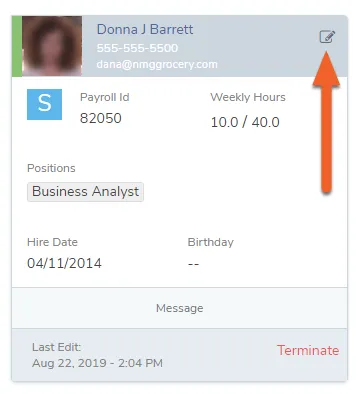
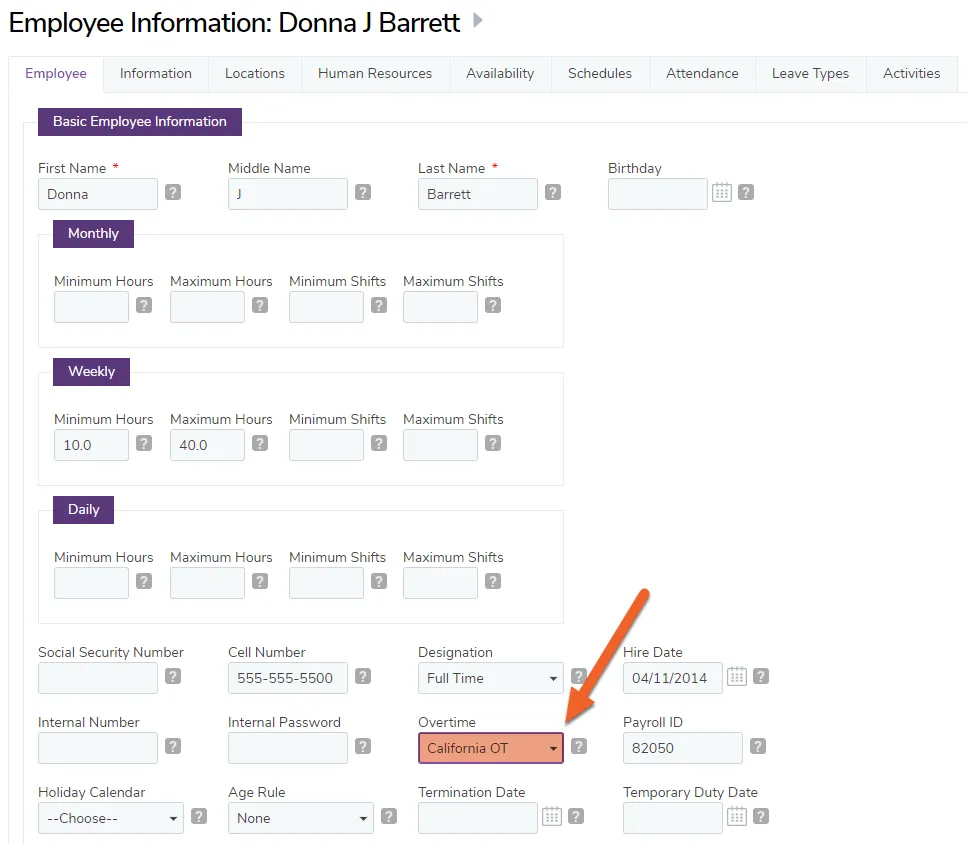
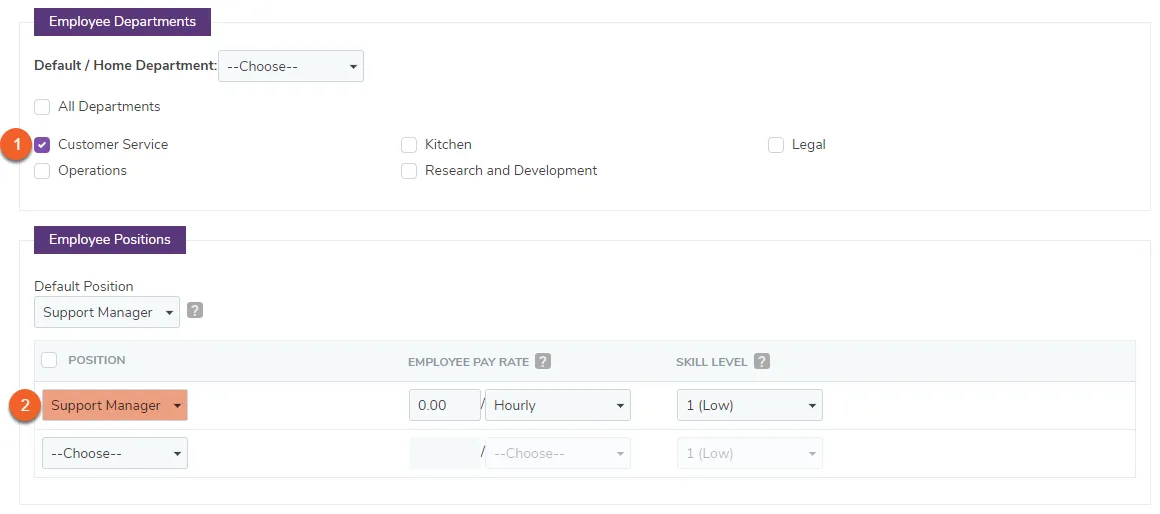
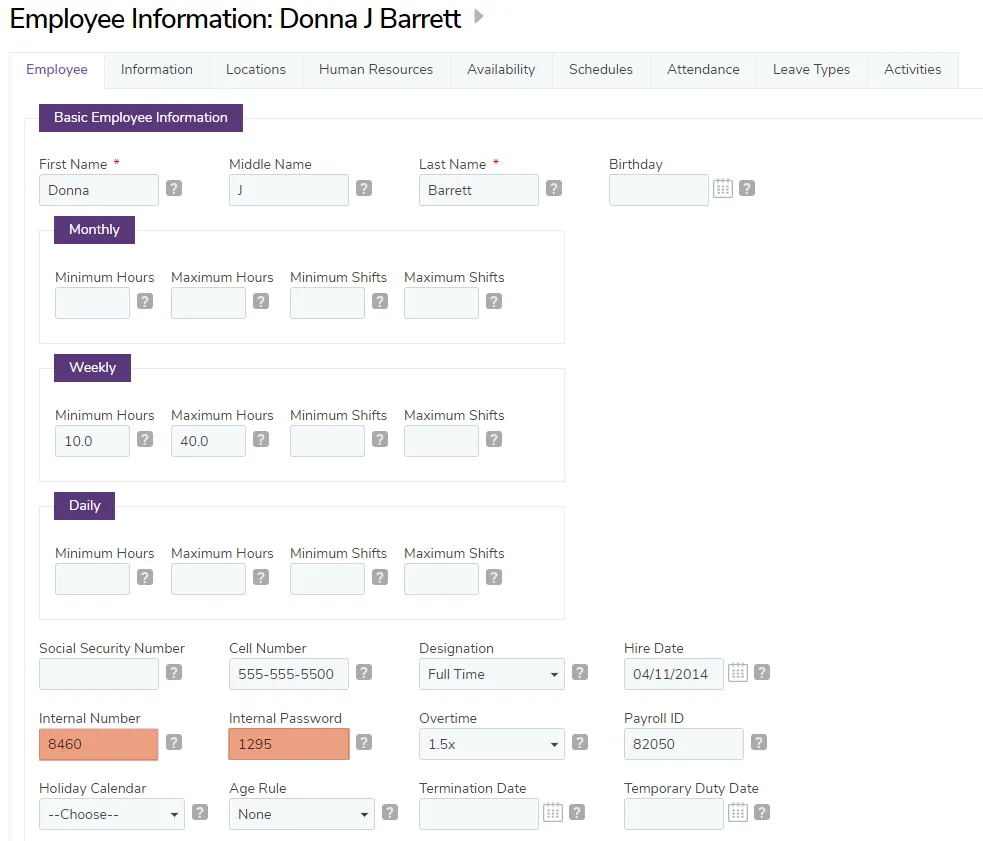
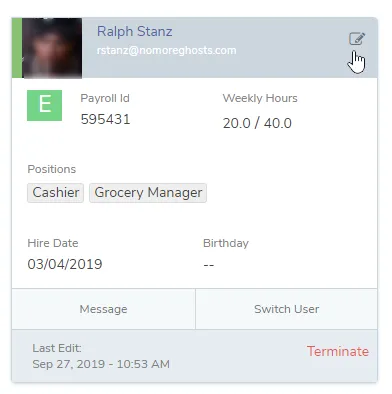
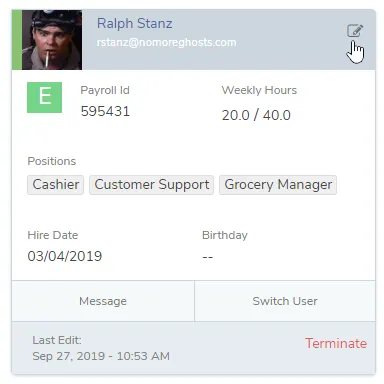
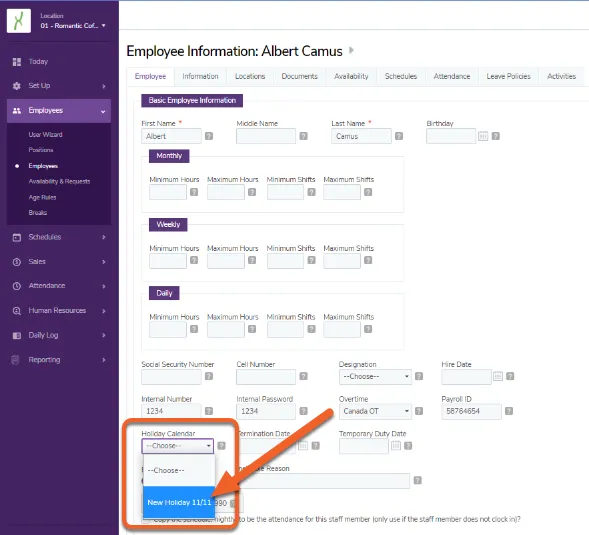
Navigate to your employee list and select an employee. This will open up the employee’s profile (see example below), which includes information about their positions, departments, demographic characteristics, and more.
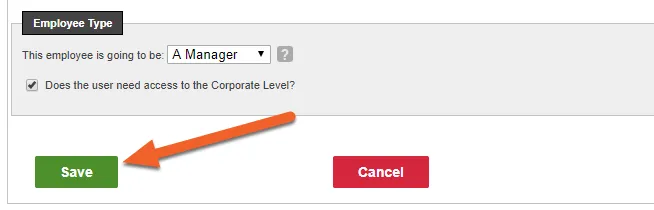
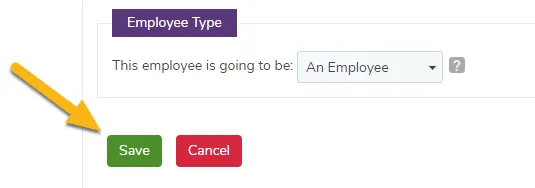
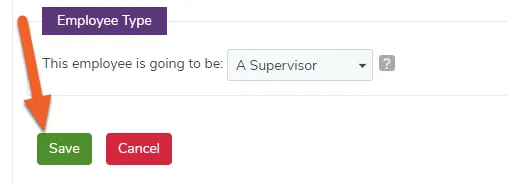
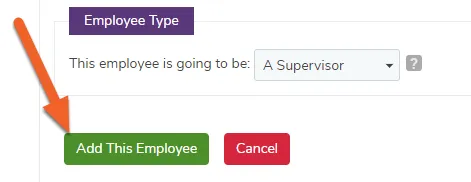
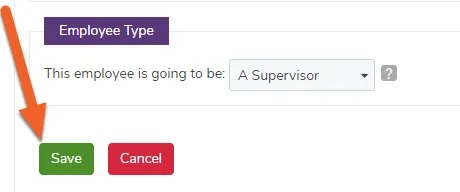
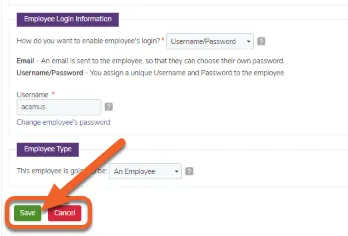
Scroll down to the page to the Employee Type section
TimeForge positions are similar to job descriptions, position codes, or job codes that are available with many Point of Sale systems. In TimeForge, employees can work as many positions as necessary.
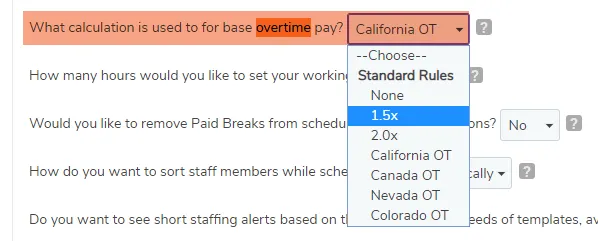
Each position can have its own name and description, pay rate (and pay scale), color (for drawing on graphs), and overtime calculation. In addition, positions can have payroll identifiers (for use in some payroll programs), stations or sections (useful when assigning shifts to employees), and multi-level pay rates.
When used at the Corporate level within TimeForge, positions are available at every location. However, each location can have individual base pay rates, multi-level pay rates, sections/stations, overtime calculations, and colors. This functionality enables businesses with multiple locations to easily perform labor management with a single, simple tool – TimeForge!
Stations/sections are used to identify areas of work for a specific position or job code. For example, a “Waiter” or “Server” position might have several sections that correspond to tables at a restaurant, such as “Section 1”, “Section 2,” etc.
What are multi-level pay rates, and what are they used for?
Multi-level Pay Rates can be used to pay staff members at varied rates throughout the work day. For example, a “Waiter” or “Server” position might receive a normal hourly rate of $2.13 from the hours of 10am and 11pm. However, prior to 10am, employees working as a Server may receive $7.35.
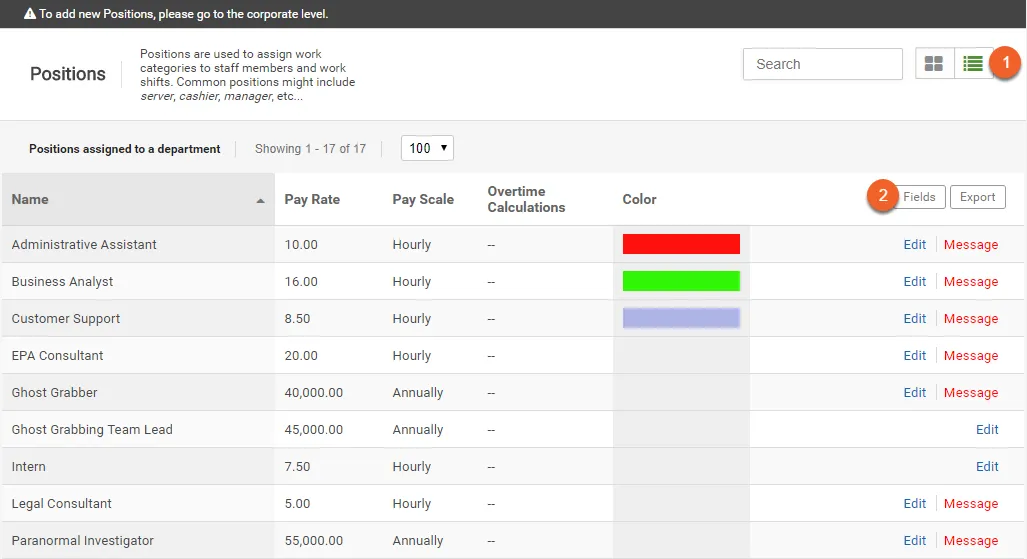
By default, you’ll see information about the name of the position, the pay rate and pay scale, overtime calculations (if any), and the color used in charts (if any). Not finding the info you need? Try these steps:
Click the List view button to view your positions in a column/table format, as shown here.
Click the Fields button to customize which columns are shown.
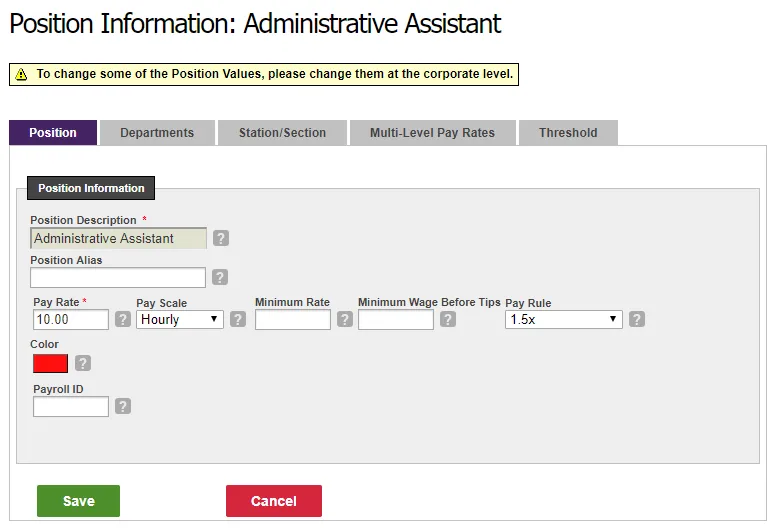
Review and edit the details for a specific position
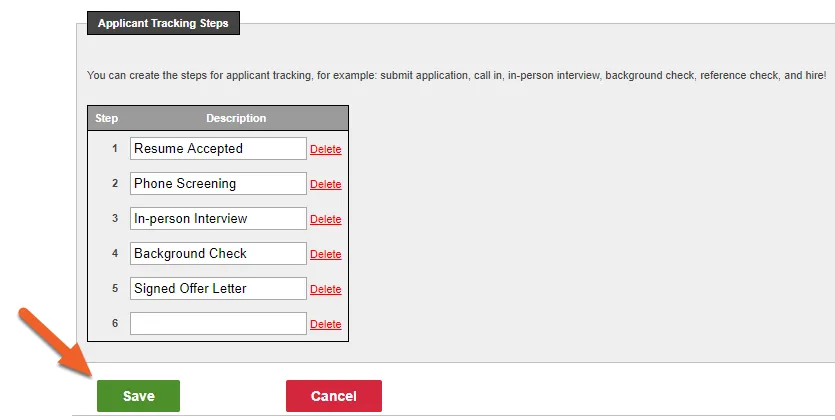
If you make any changes to the information in these tabs, don’t forget to click the Save button!
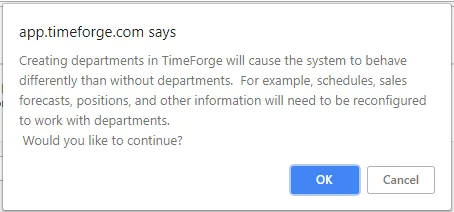
Enable and configure departments
TimeForge Departments provide larger organizations with the ability to assign groups of employees to individual managers.
Each department can have a number of positions, employees, supervisors, and managers. Employees may belong to more than one department, if necessary, and positions can even span multiple departments.
Examples of departments include:
Front of house, back of house, and bar (restaurants)
Cashier, meat counter, bakery, etc. (grocery stores)
Ticket counter, concessions, and floor (movie theater or cinema)
Departments are created at the Corporate Level - all locations (or stores) within a single corporation share departments.
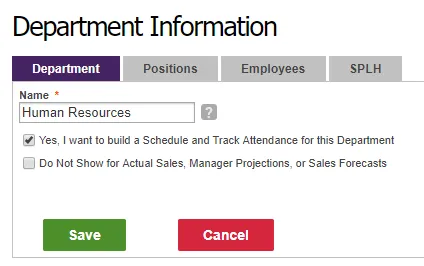
Fill out the form. Fields marked with a red asterisk (*) are required.
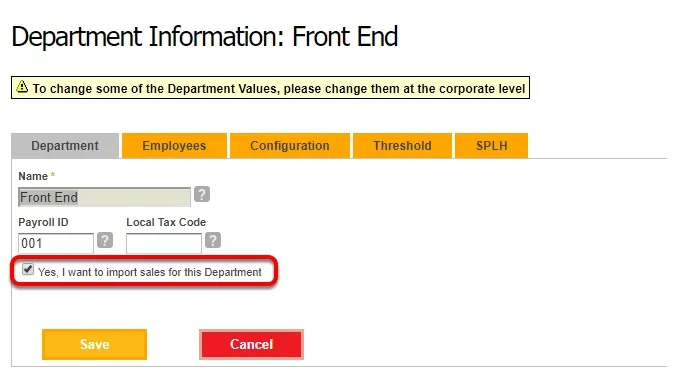
If you’d like to schedule and track employee hours for this department, be sure to check the appropriate box.
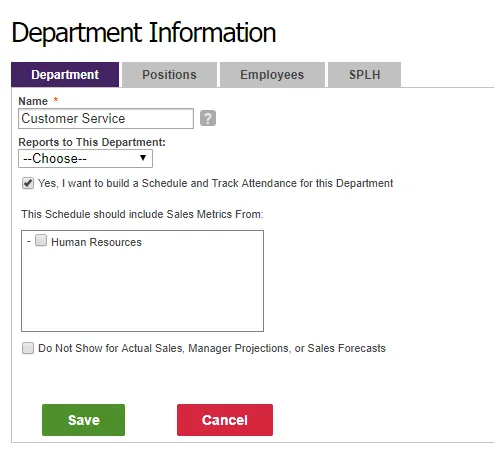
Additional departments can be created the same way. Once you have at least one department, the form for additional departments will include more fields to account for this:
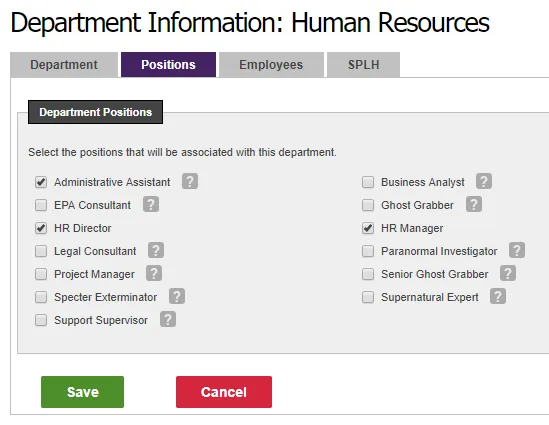
Each Department can have one, or more, positions assigned to it. Assigning positions will ensure that staff members, supervisors, and managers are not distracted or confused by other departments that are using TimeForge.
To assign positions to this department, click the Positions tab and check the boxes next to the positions you’d like to associate with this new department.
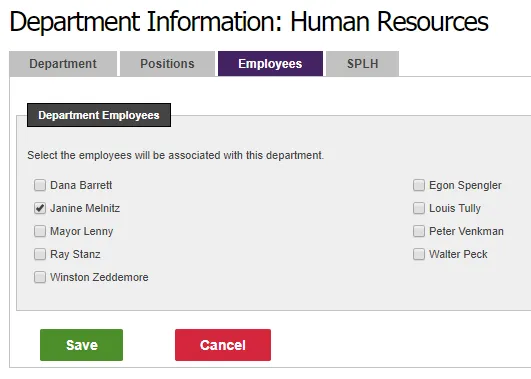
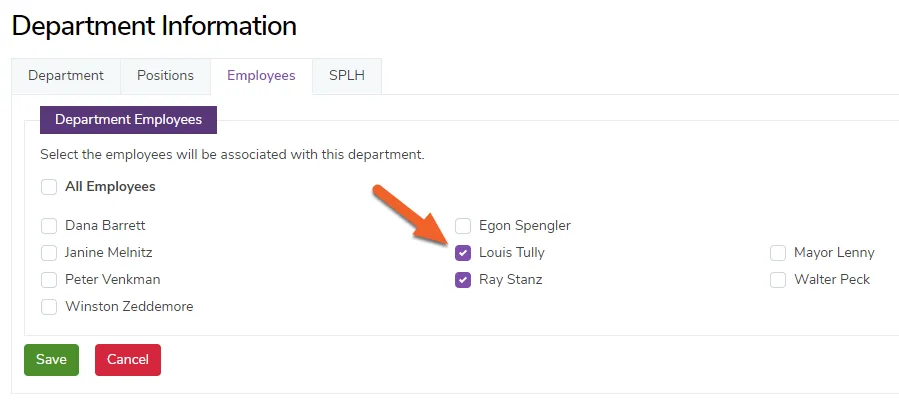
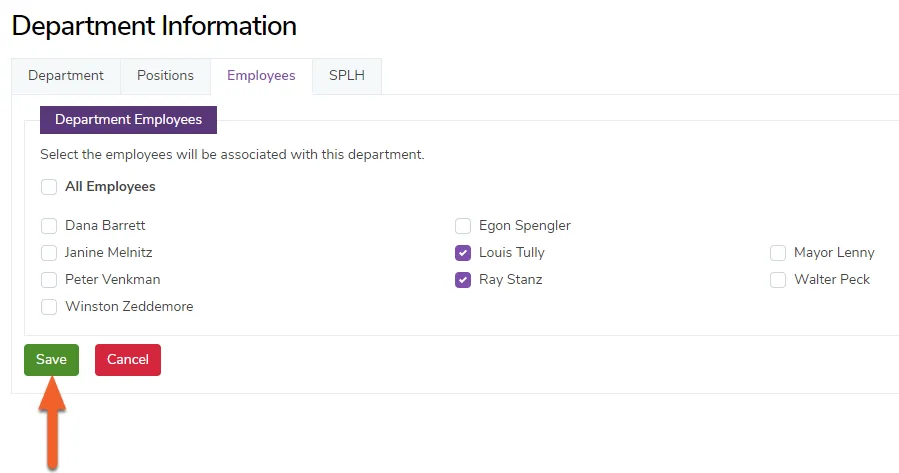
Assigning Employees to your Department is done exactly like assigning positions to it. Navigate to the employees tab of your Department and click the checkbox for the employee you want to add.
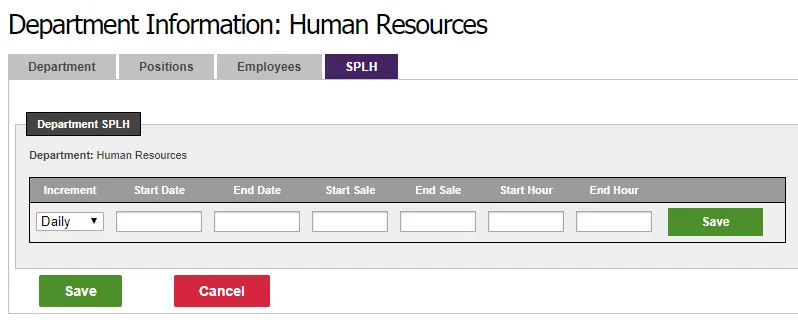
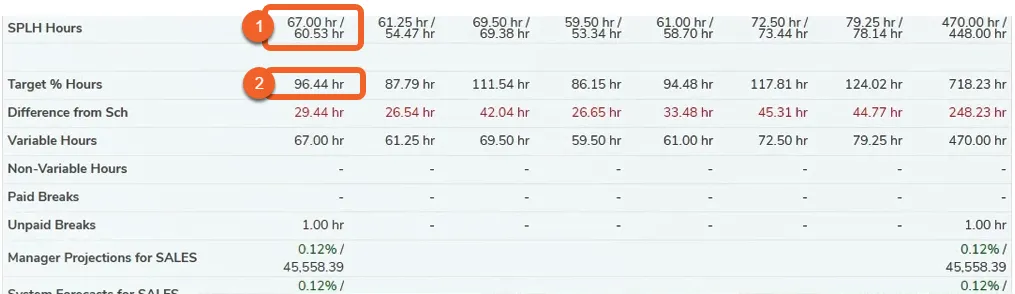
The SPLH (Sales Per Labor Hour) tab lets you choose how many labor hours you want to schedule and for what amount of sales. The SPLH grid is mainly used for the ShiftBuilder to calculate how many hours to schedule and is especially handy for retail departments and restaurant staff.
The SPLH tab lets you choose start and end dates, weekly or daily recording, and how many sales you want per labor hour. If you do not need to schedule this department, you can simply leave the SPLH grid blank.
Increment covers the range (weekly, daily, or hourly) for making calculations based on Sales data.
Start date is the first effective date of the grid, while End Date is the last effective date of the grid.
Start/EndSales represent the range for this particular section of the sales curve, in integers. For example, 3000 and 8000.
Start/End Hour represent the bottom range of hours (when your sales equal the start sales) and the top range of hours (when your sales are equal to the end hour).
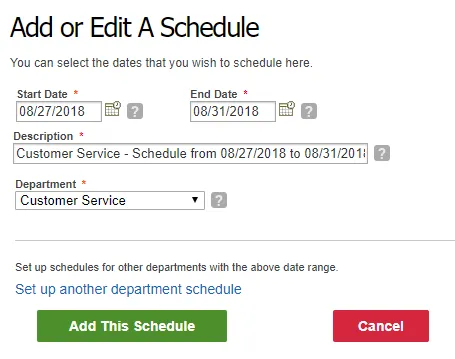
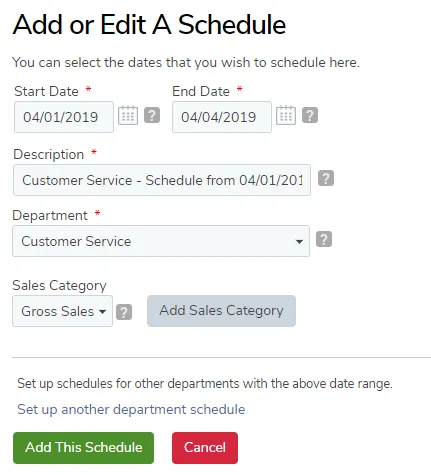
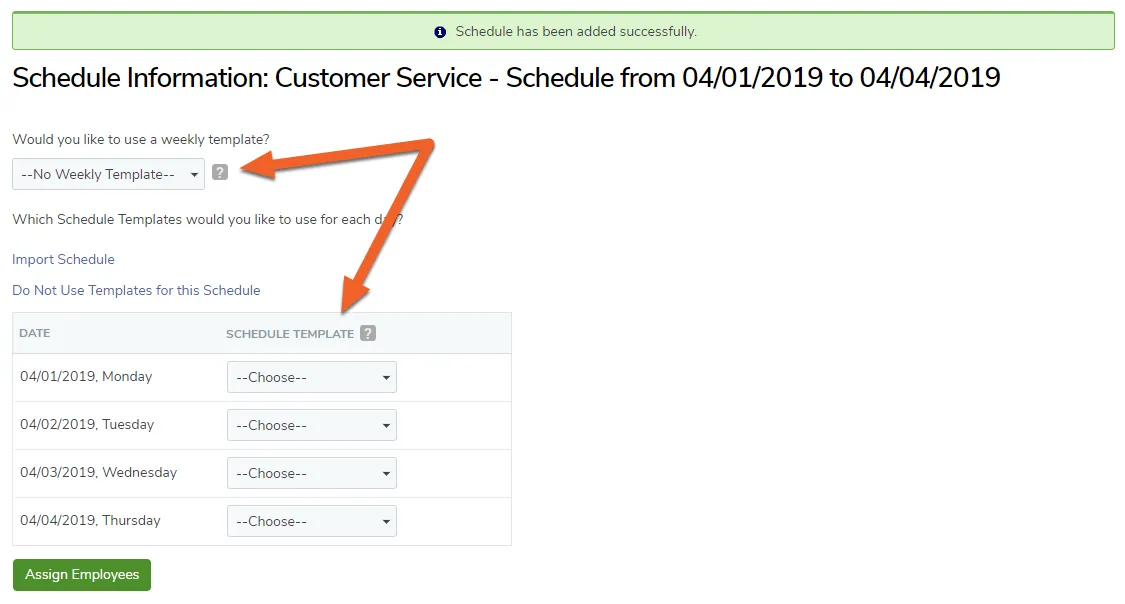
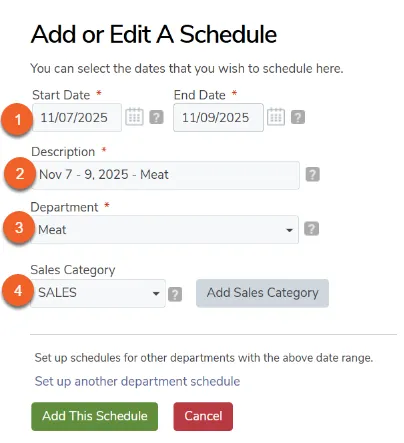
You’re now ready to start creating schedules for departments! Each schedule can be assigned to a specific department, providing very fast reporting and schedule building on a per-department basis. Additionally, Schedule Templates provide one-click scheduling for each department.
Import employees from a CSV file
At TimeForge, we understand that many of our customers switch to us from old-fashioned spreadsheets. That’s why we offer the ability to import employees directly from a CSV file. Most spreadsheets can easily be saved as a CSV, which makes the transition over to TimeForge smooth and painless.
TimeForge is a complete labor management tool that is great for making things like tracking attendance and creating employee schedules quick and easy. Plus, from the employee profile page, you can keep track of information like cell phone numbers, social security numbers, passwords, payrates, and much more.
You can import employees with just a few clicks! Here’s how:
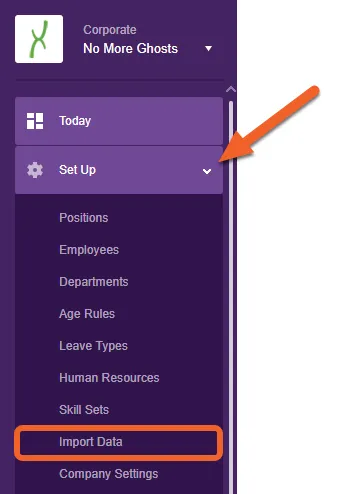
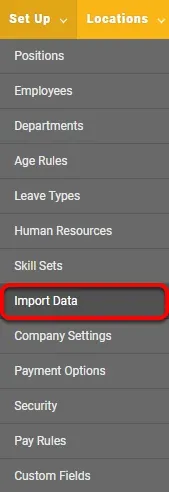
Open up the Set Up tab, then select Import Data from the sub-menu. (The screenshot below shows this at the Corporate level, but you can also do it from the Location level, depending on your needs.)
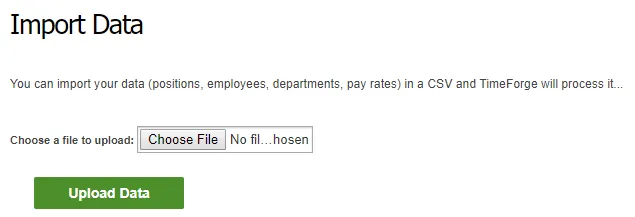
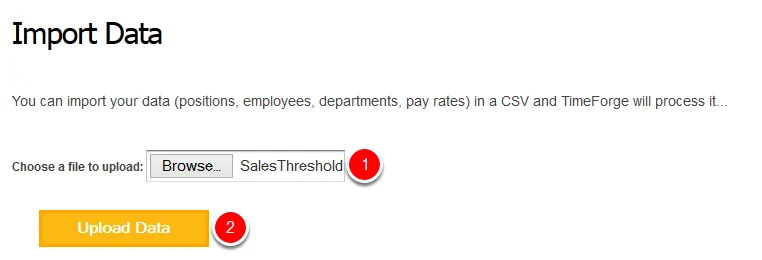
If your file is currently saved as an .xls or .xlsx, you’ll need to first open up Microsoft Excel, then go to File > Save As and export it a CSV. You can then select this .csv in TimeForge.
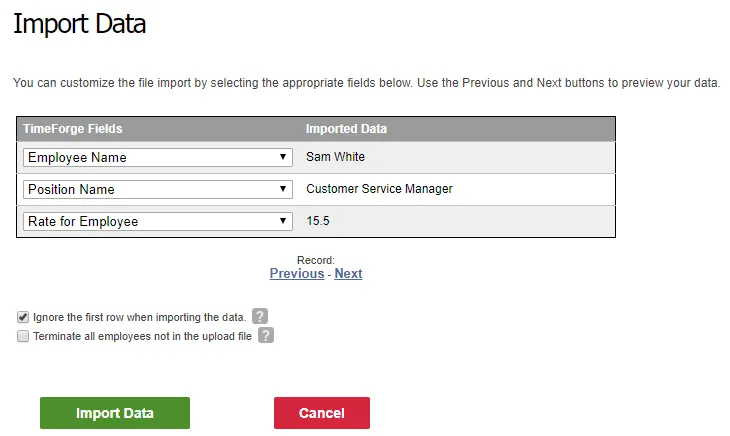
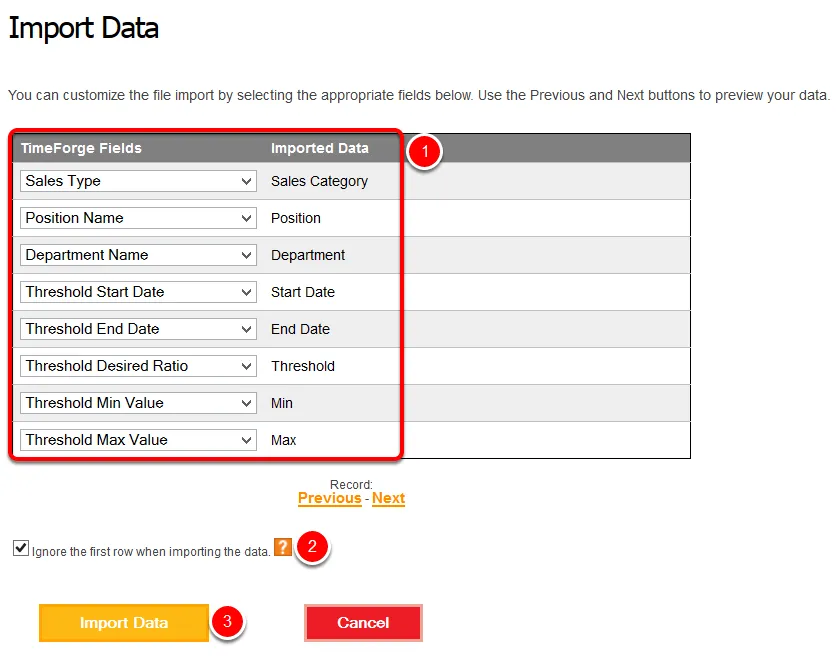
TimeForge will automatically attempt to match the header of each column with a field in TimeForge, such as “Employee Name” and “Position,” and will show you a preview of the import, starting with the first row in your sheet.
Click the Next link to review each subsequent row (employee) in the file.
If satisfied, click the Import Data button to import the file. If your first row was a header row, leave the box checked to ignore that row when importing.
View employee schedules
Accurate and correct employee scheduling is a powerful labor cost control measure. With TimeForge, supervisors and managers can quickly and accurately create employee schedules while considering the needs of their business, as well as the desires of other staff members.
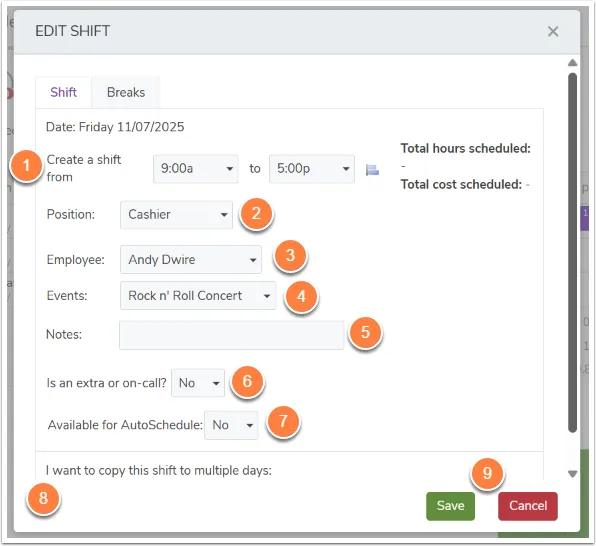
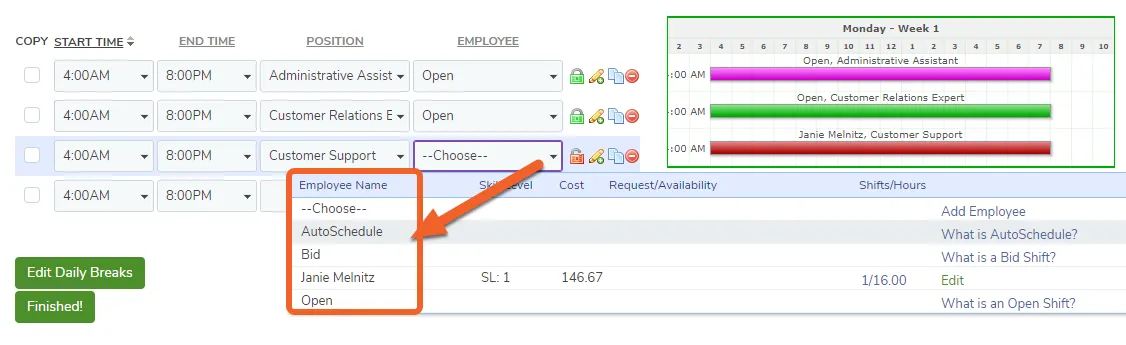
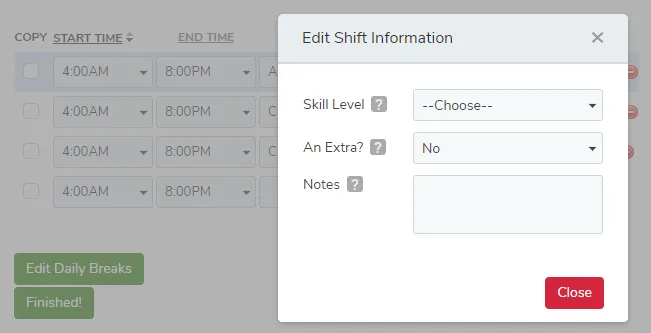
Each TimeForge employee schedule is a collection of many shifts, and each shift is assigned a corresponding start and end time, as well as position (or job), and employee. Other information can be included with each shift, including whether the shift is for an “extra” staff member, the section or station being worked, and other pertinent information.
TimeForge employee schedules can be of any usable business length - some businesses prefer one-week, two-week, or one-month schedules. Other businesses prefer a mix of schedules, and may have differing schedules based on departments or store requirements.
In the event of a scheduling conflict, TimeForge automatically notifies managers and supervisors responsible for creating schedules.
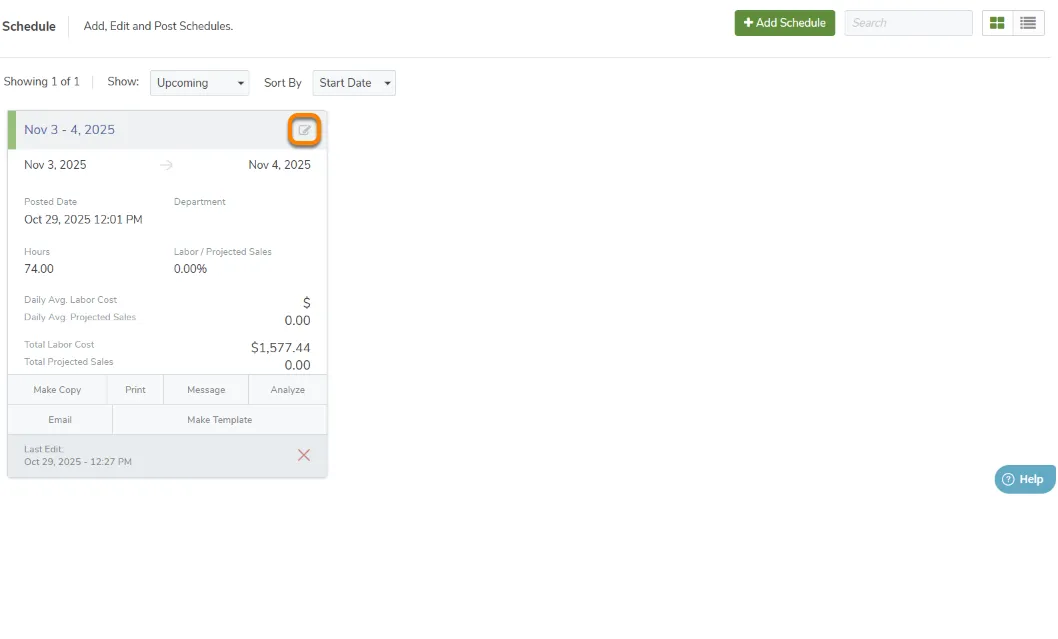
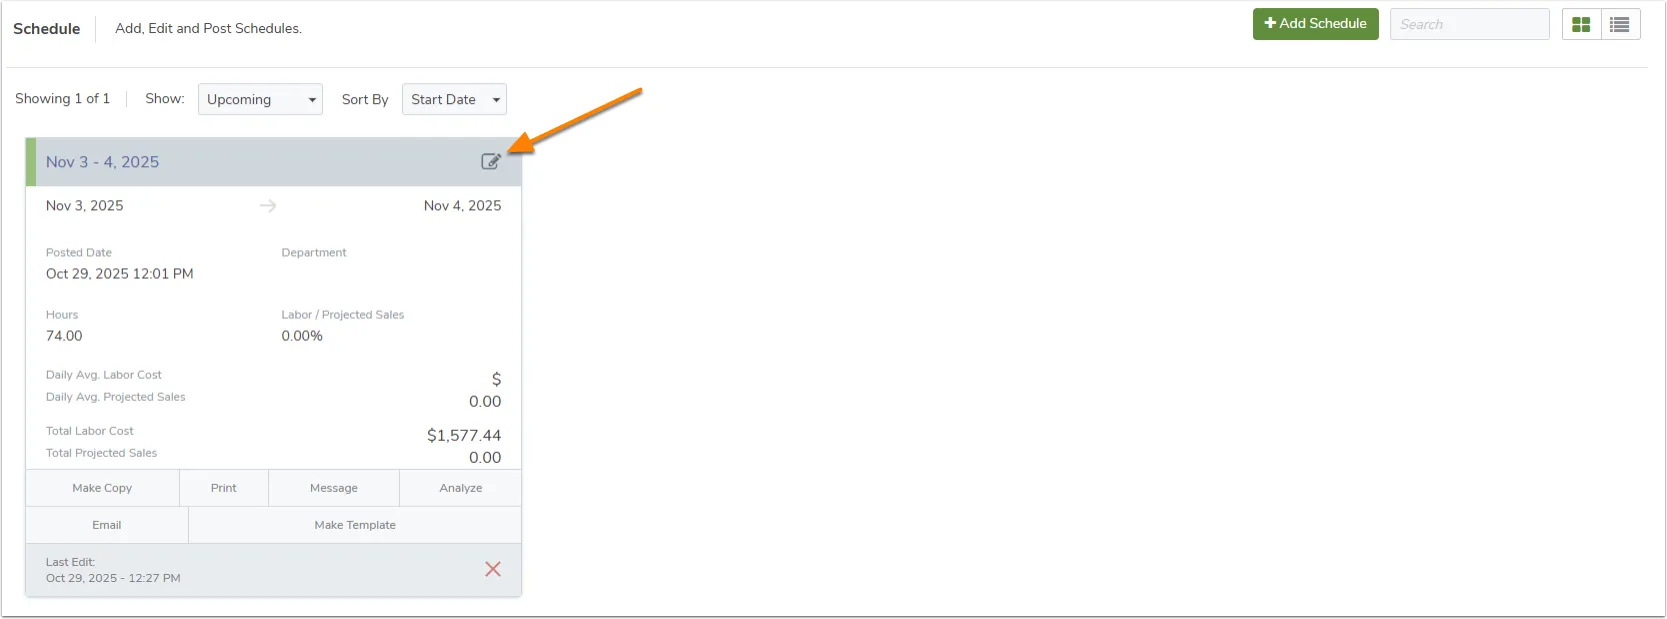
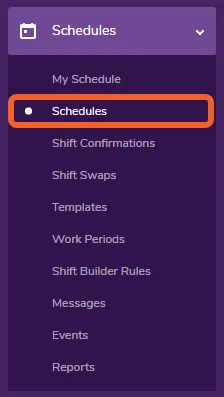
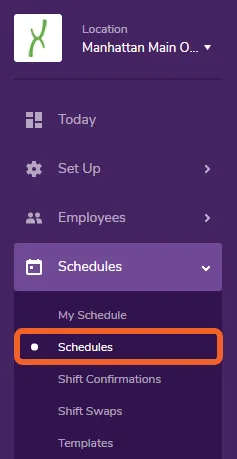
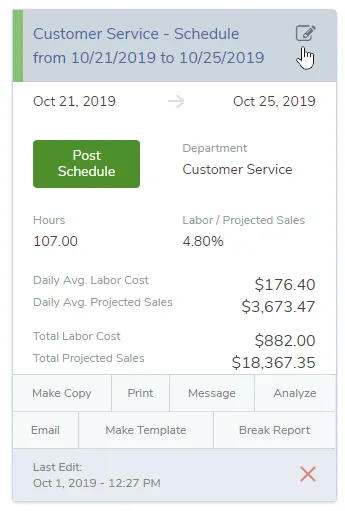
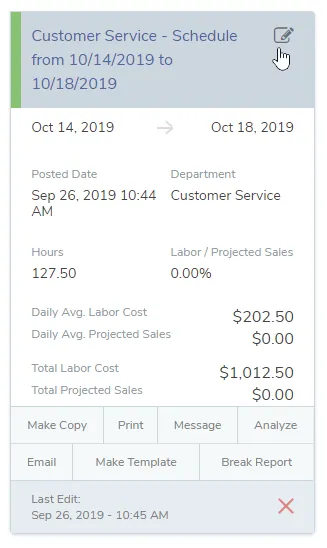
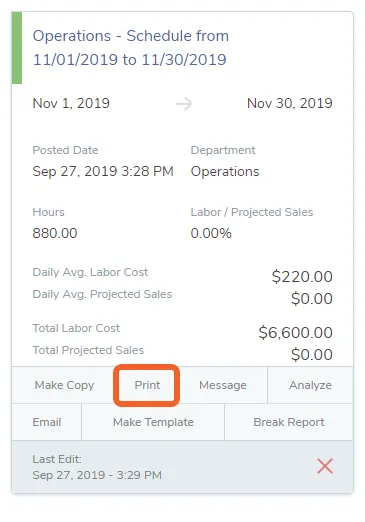
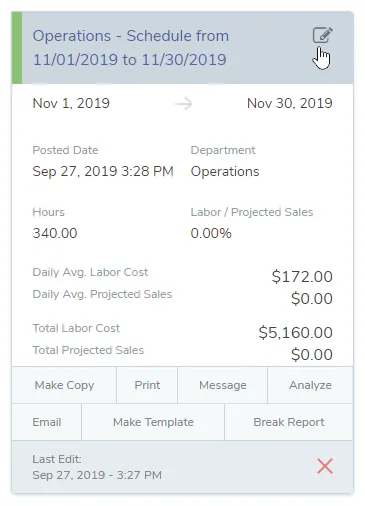
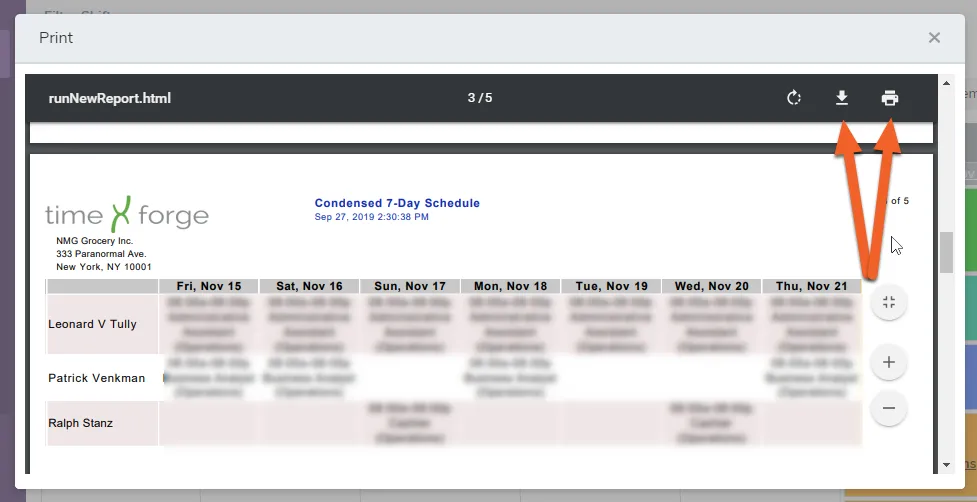
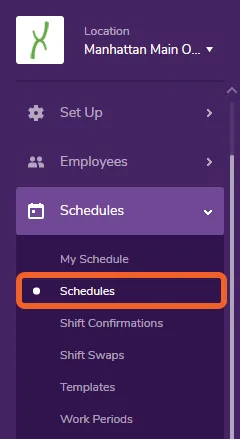
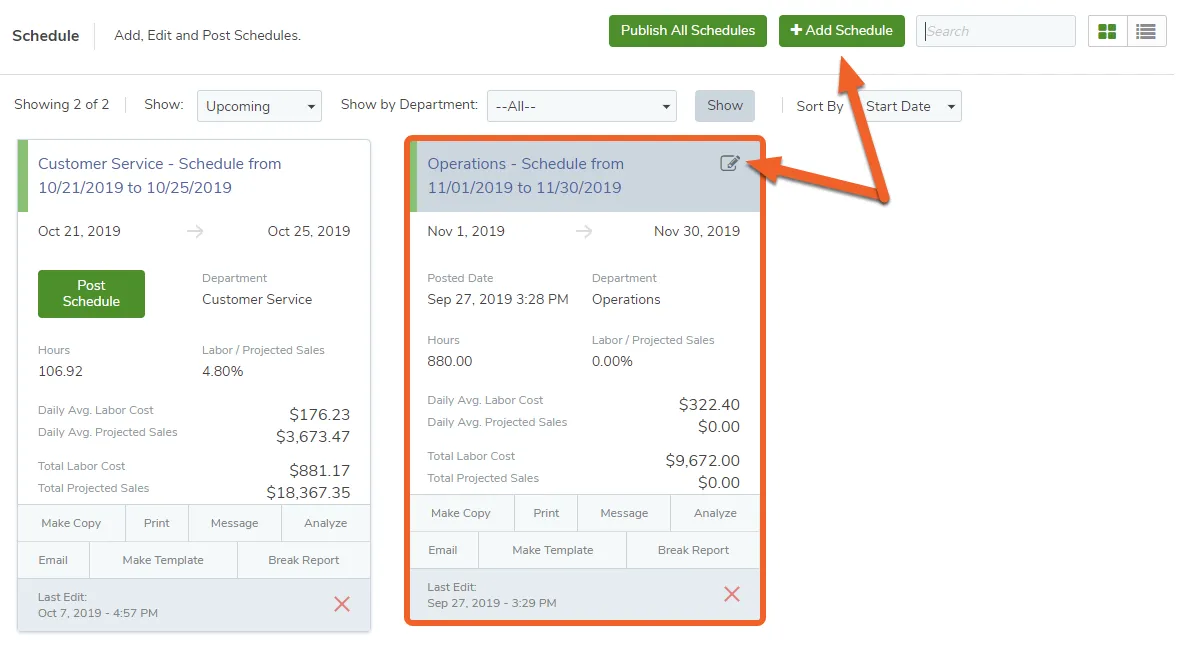
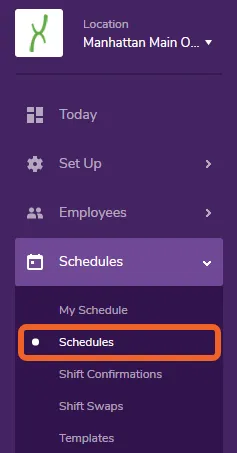
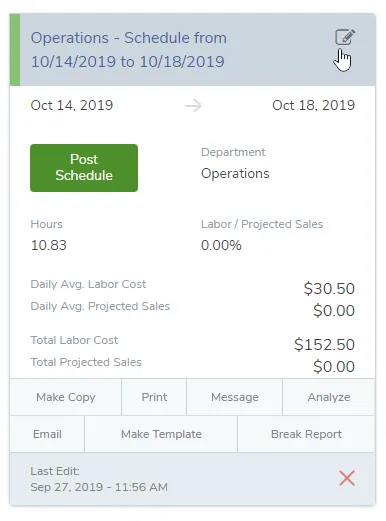
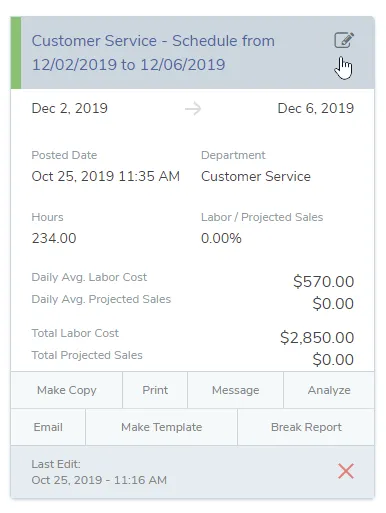
The Schedules page shows upcoming and past schedules, which can be filtered by department and sorted. Each schedule can be copied, modified, deleted, analyzed, printed, or used to create a template.
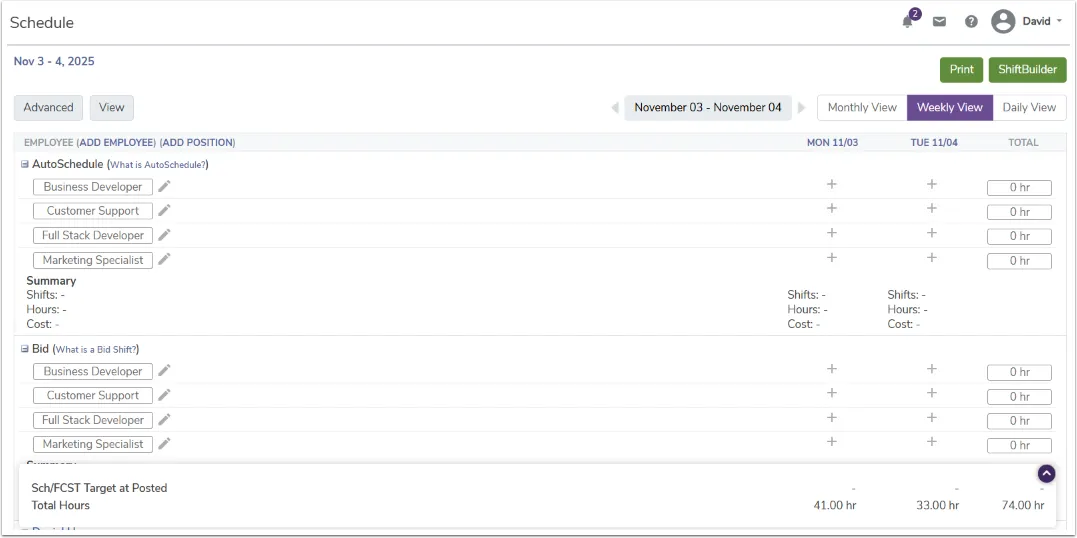
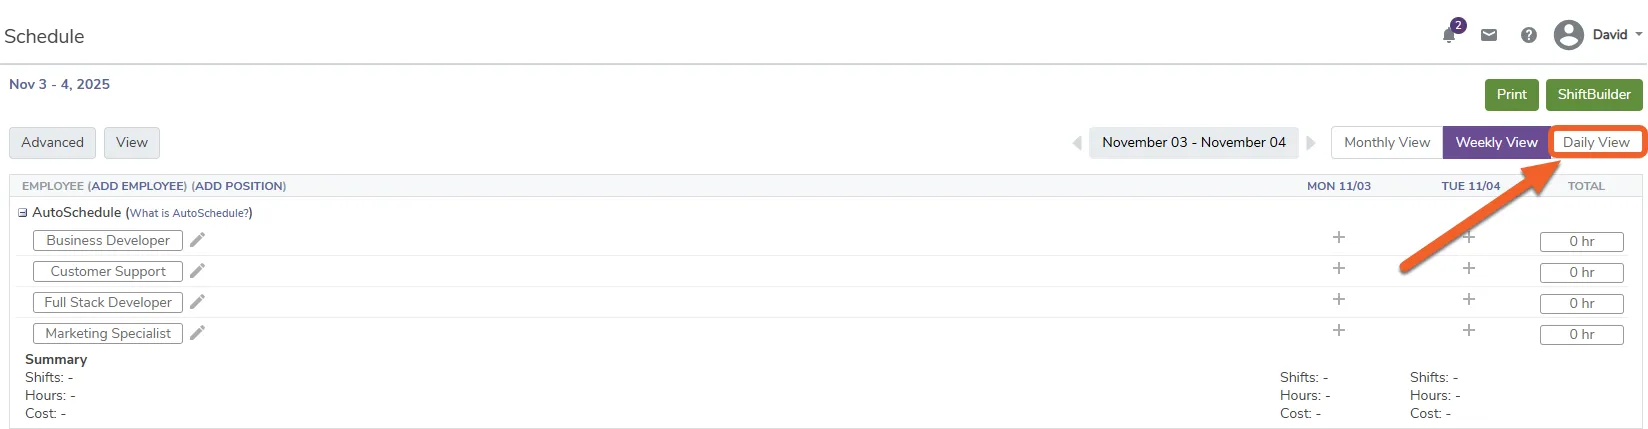
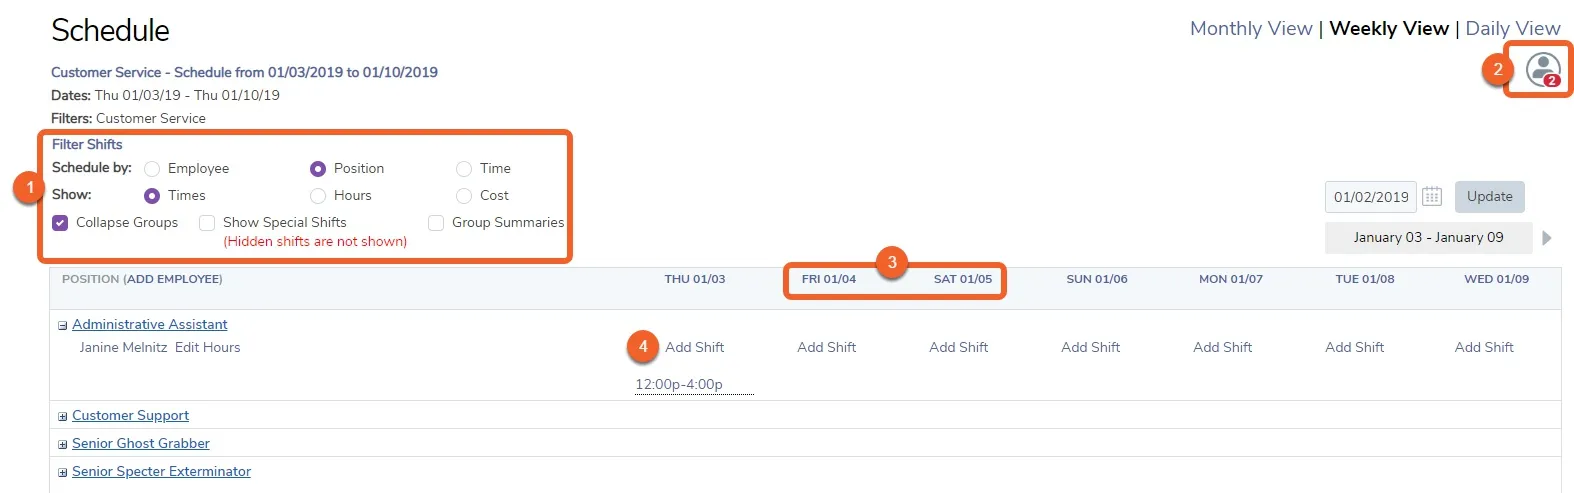
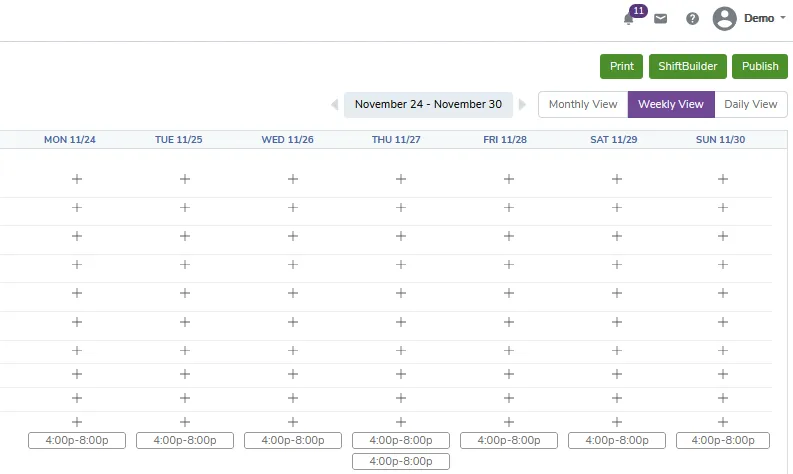
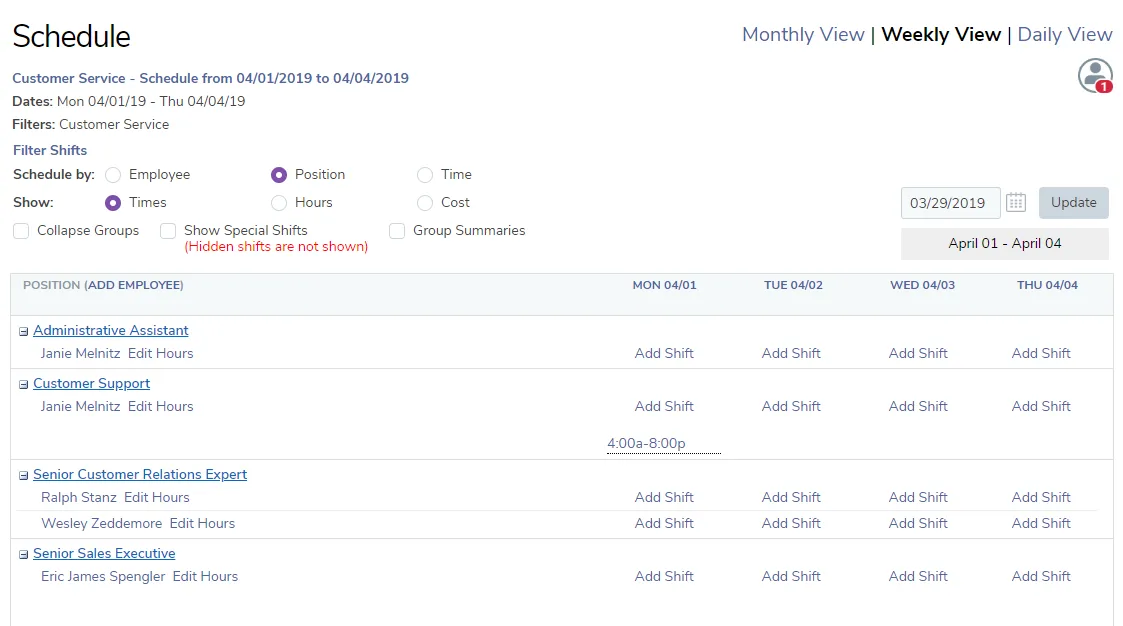
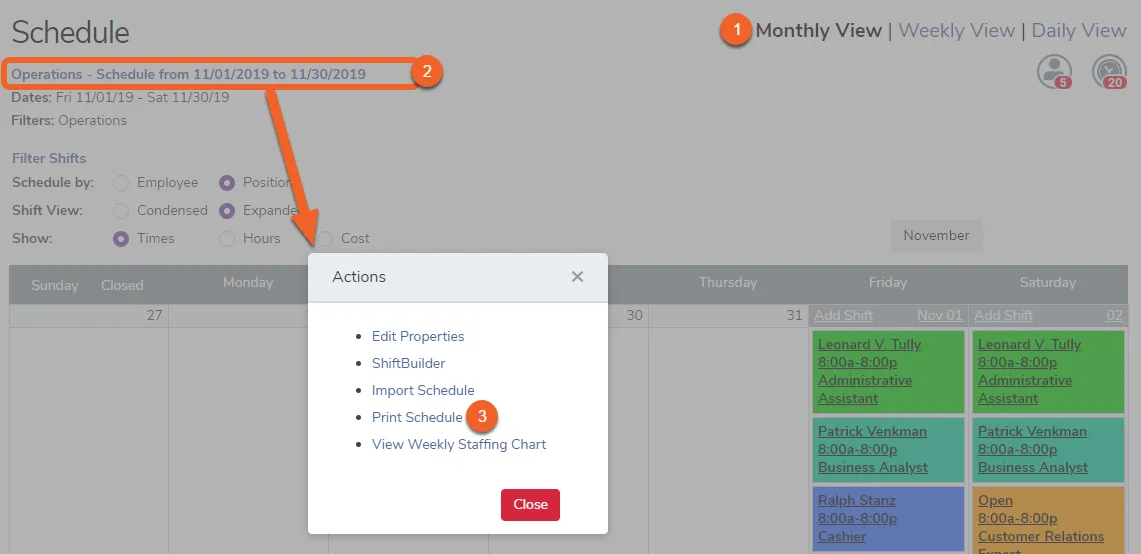
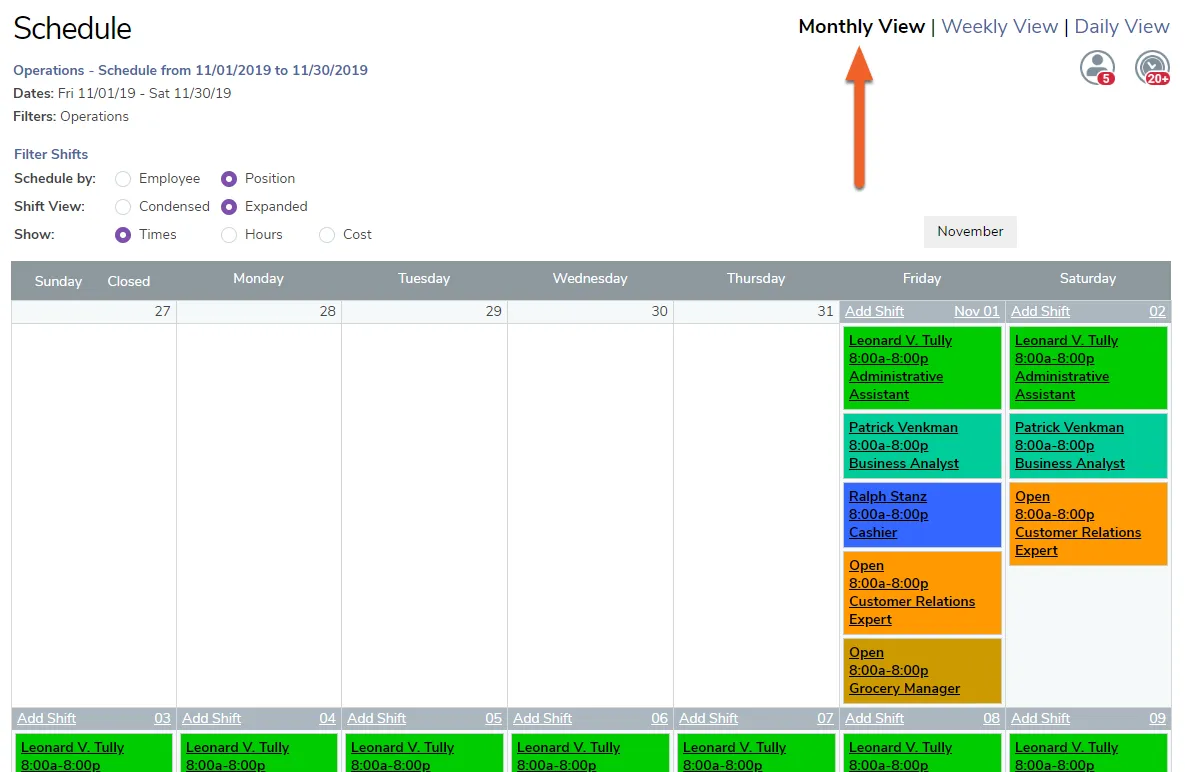
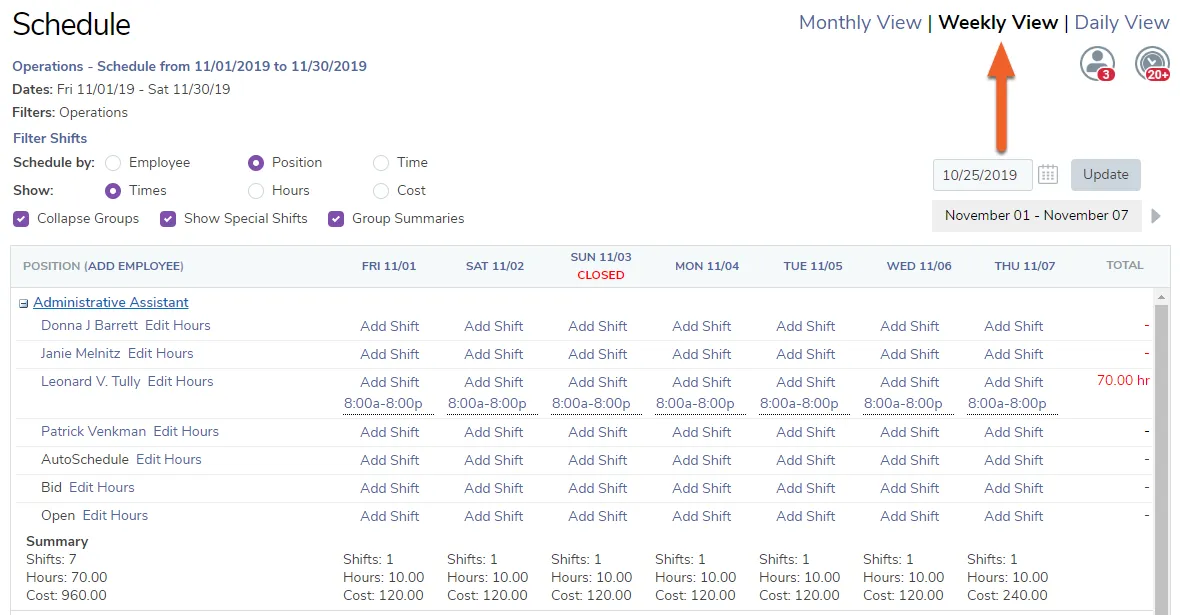
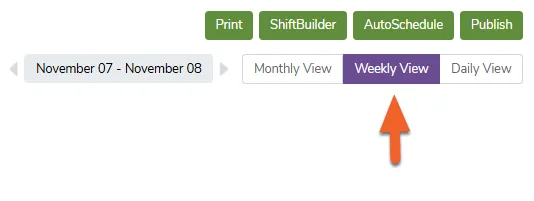
Simply click the Edit button to review the schedule’s details. In the upper right corner, you can swap from Monthly, Weekly, or Daily View.
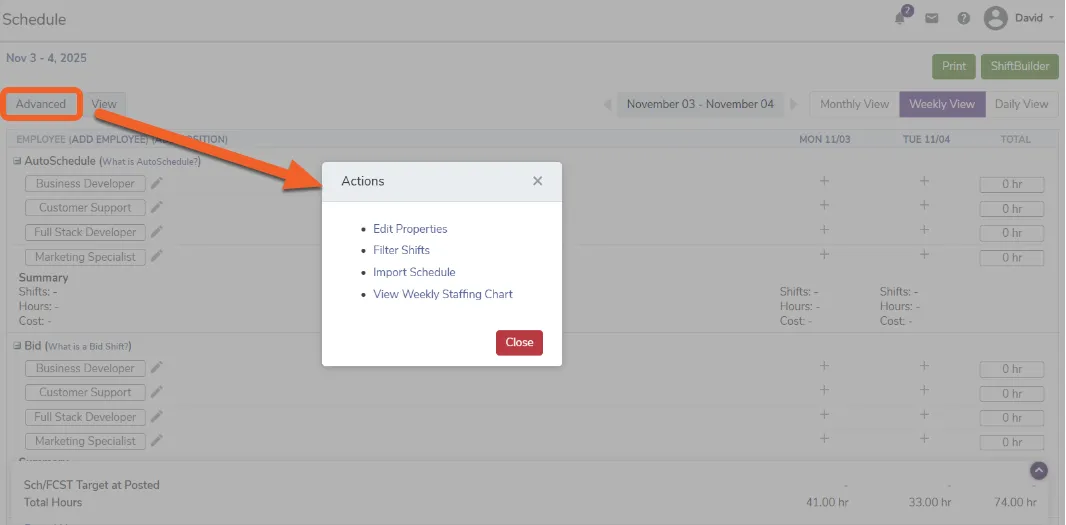
Clicking on the Advanced tab will provide you with a list of additional actions:
View and edit shifts
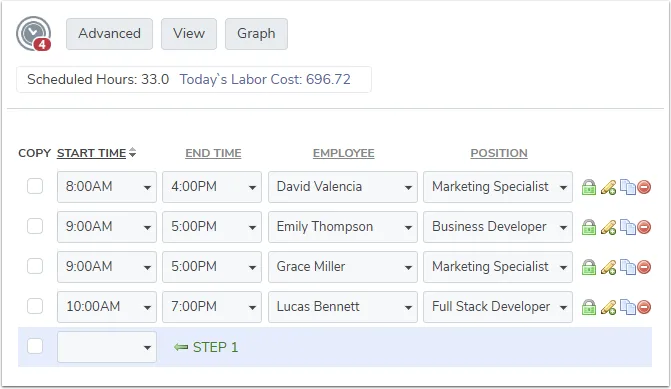
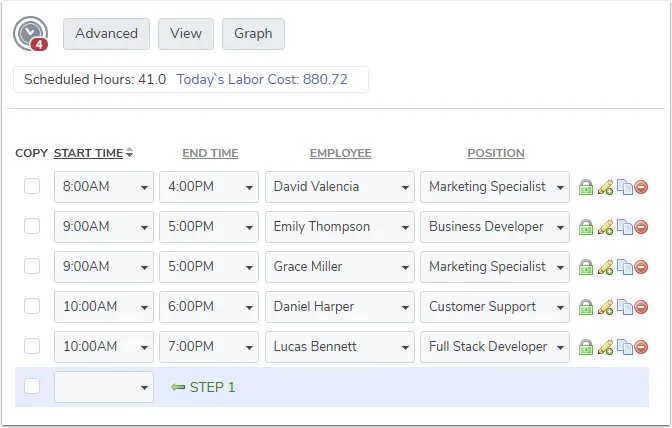
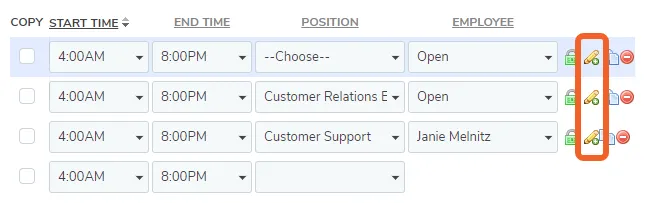
In TimeForge, employee schedules are a collection of many shifts, and each shift is assigned a corresponding start and end time, position or job code, and an employee. Other information can be included with each shift, such as whether the shift is for an “extra” staff member, or the name or number of the section or station being worked by the employee (for more info on schedules, see our article on how to view employee schedules).
Shifts can easily be created for a specific day on the schedule or copied to other days on the schedule. Shifts can also be grouped together into days on the schedule, and then can be used to create a template for future schedules. Additionally, shifts can be reassigned to other employees, and are used by the TimeForge ShiftBuilder to estimate anticipated needs for schedules in the future.
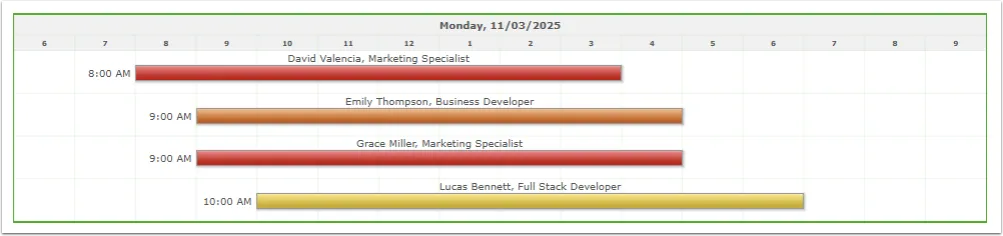
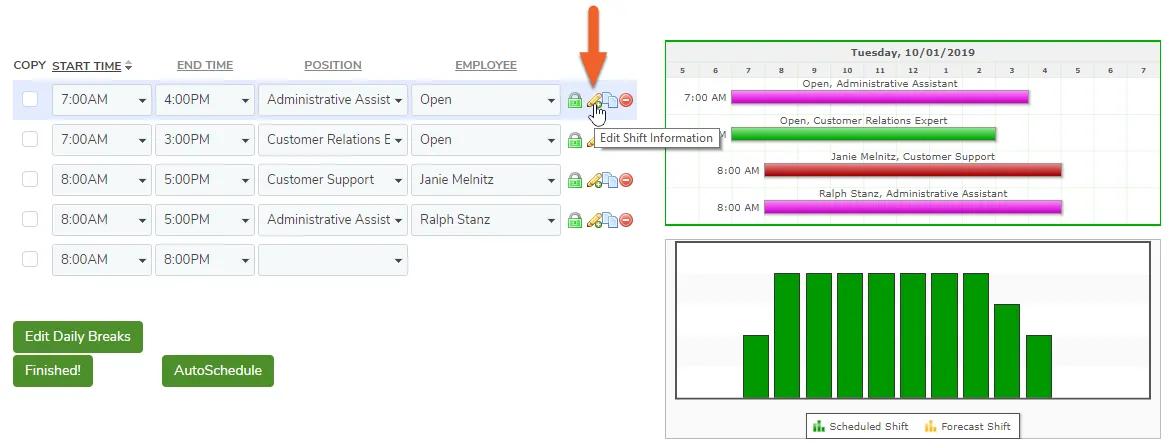
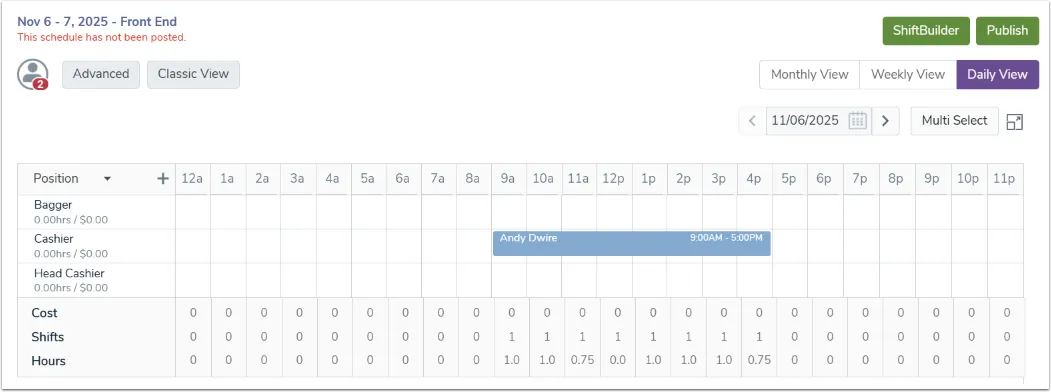
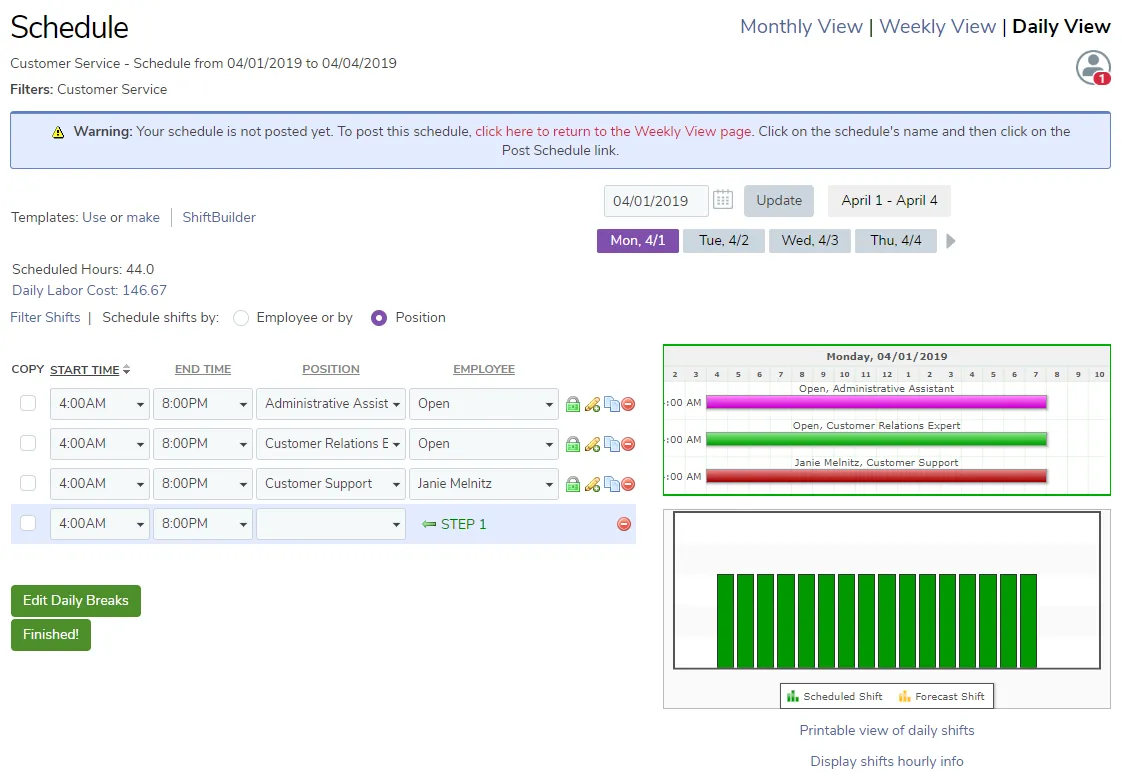
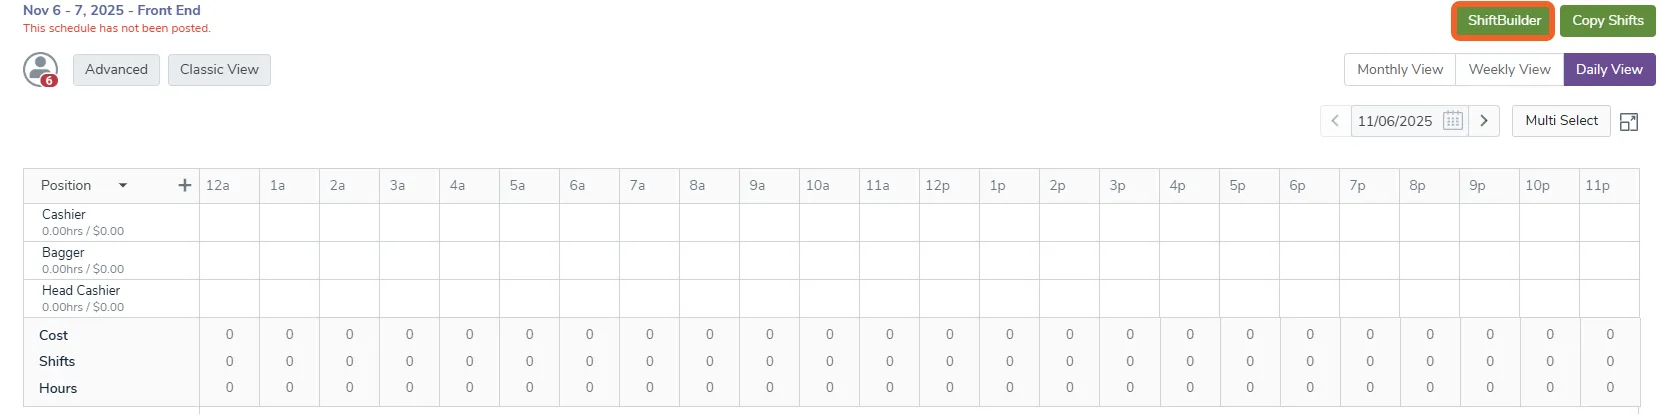
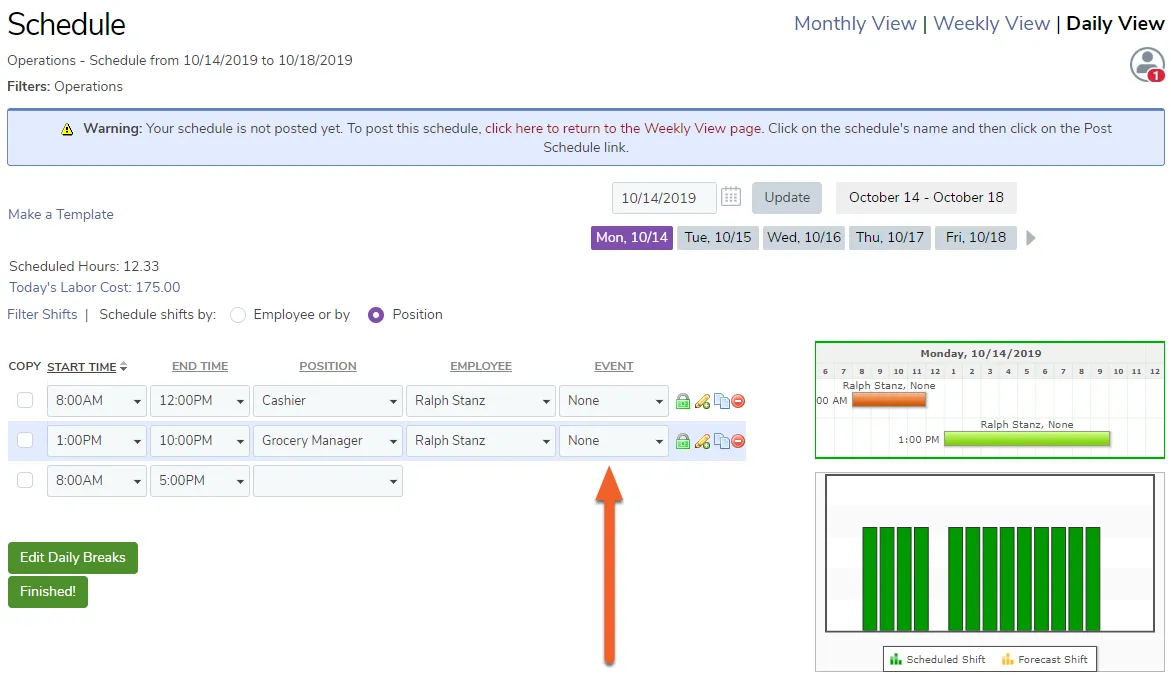
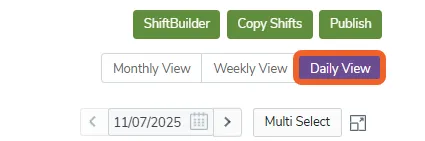
By default, TimeForge will show you the Weekly View for that schedule (unless you change your default setting under your profile!), but you can also get a graphical representation of the staffing load for that day by selecting Daily View in the upper right corner.
Your changes save automatically in real time. If you’d like to return to the Weekly or Monthly View (depending on where you started), just click the Back button in your browser.
Create schedule templates
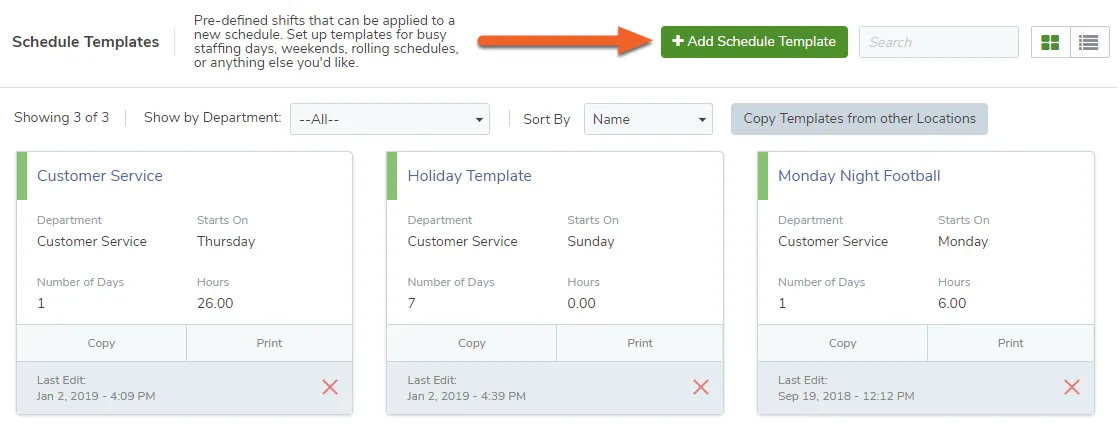
To quickly create employee schedules, many managers rely on the TimeForge AutoScheduler and schedule forecasts, or if they’ve got a small crew, they might build schedules manually, one shift at a time. Other managers pre-build days on the schedule using collections of shifts, called templates.
Each TimeForge work schedule template contains one or more shifts, and can be used to quickly generate schedules for staff members. Each location (or store) can have many different schedule templates (as many as are needed), and the schedule templates can be used to build new schedules.
Some examples of employee work schedule templates:
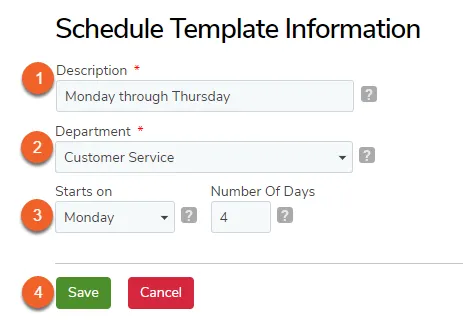
Employee schedule templates can be built one shift at a time, or can be copied from other templates. Additionally, a work schedule template can be created from a pre-existing schedule, and if departments are enabled, each department will have individual schedule templates.
There are no limits to the number of schedule templates that can be created at a location.
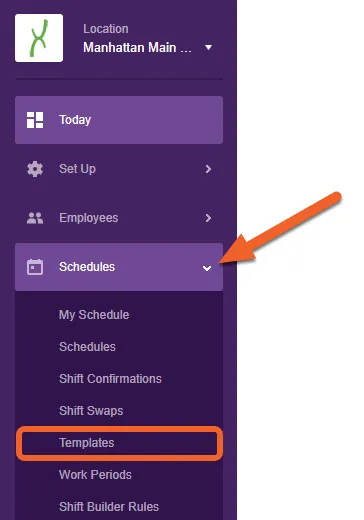
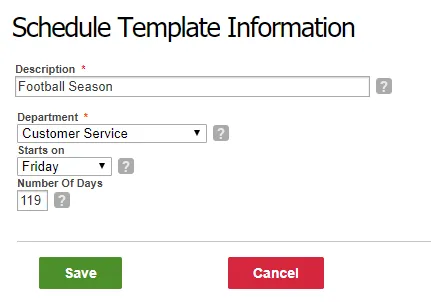
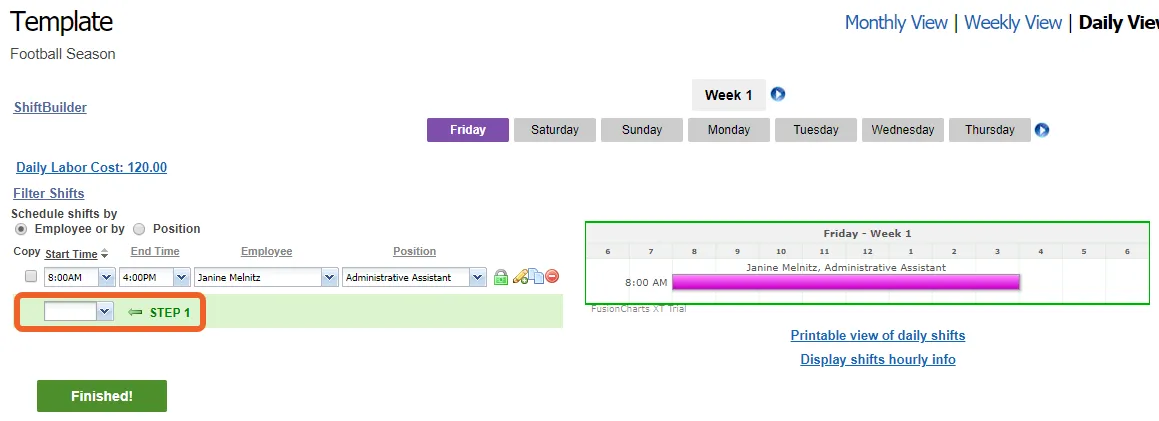
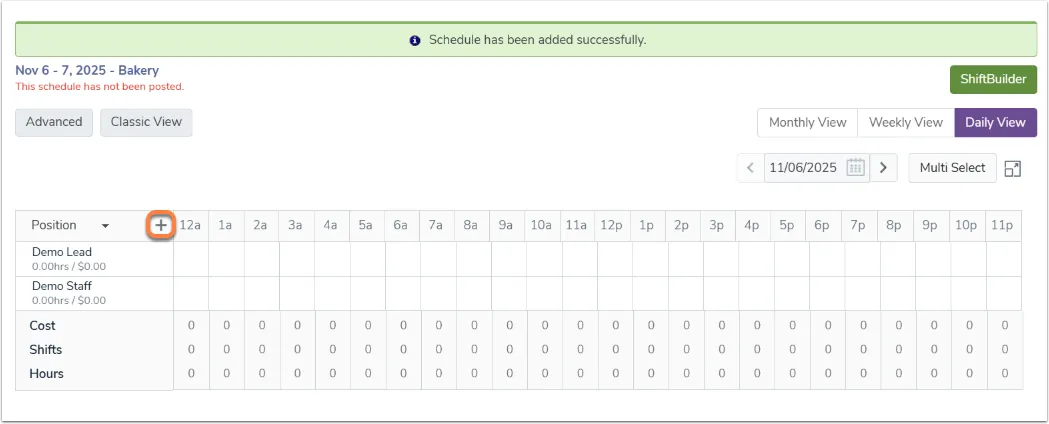
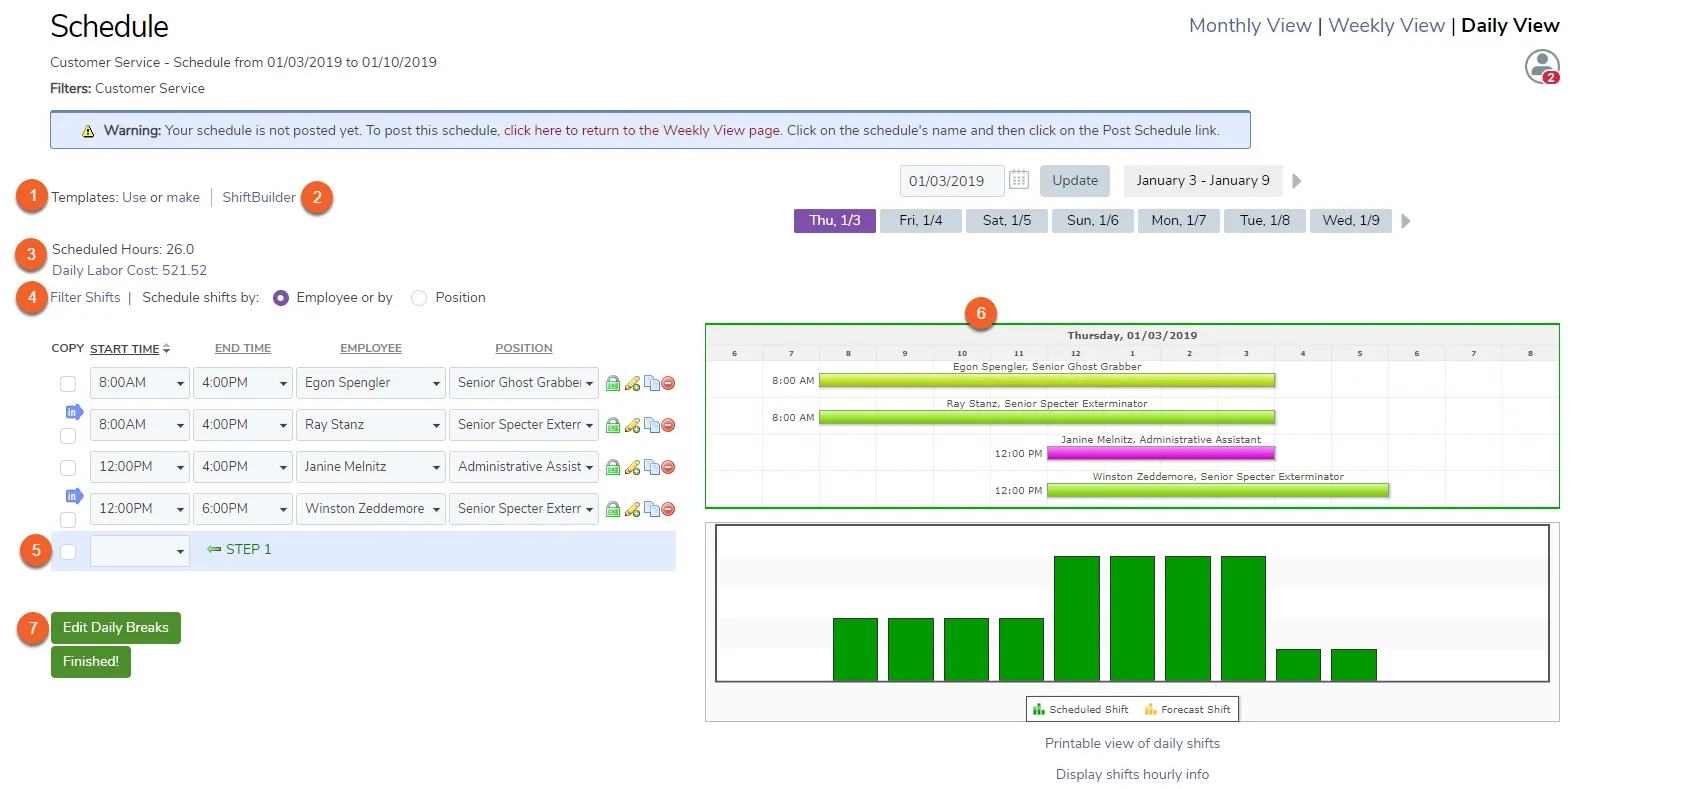
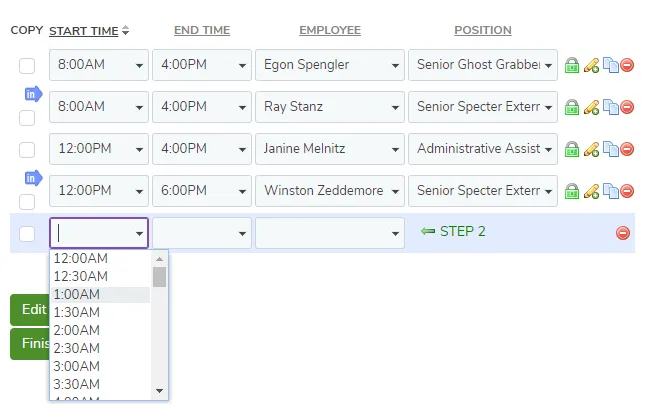
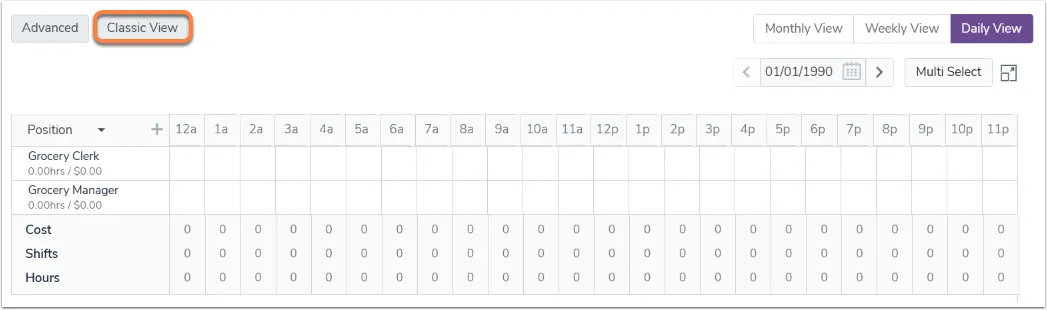
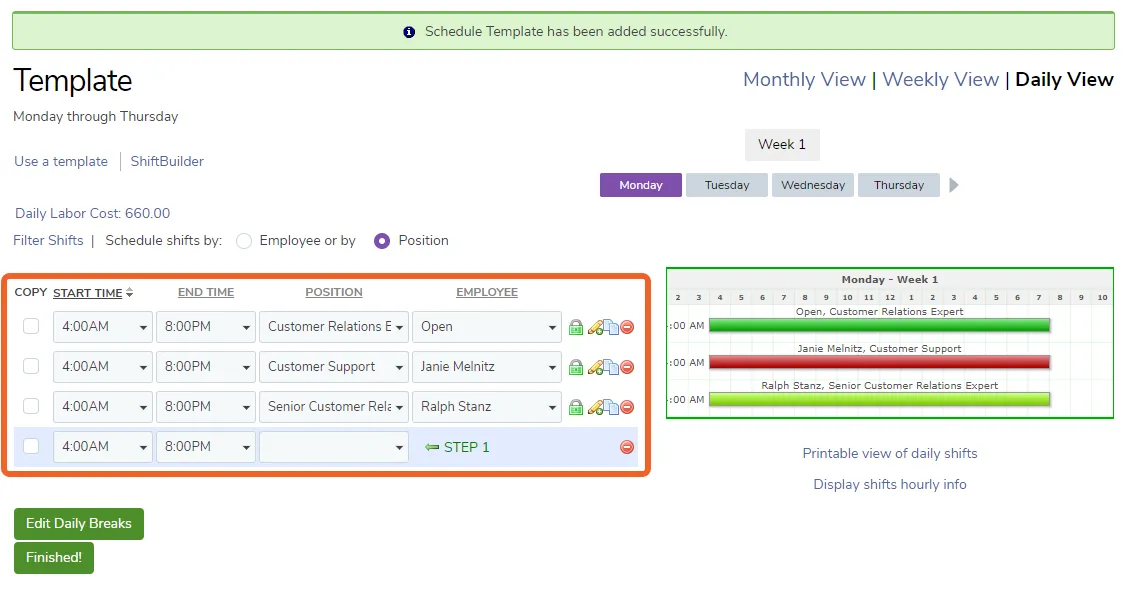
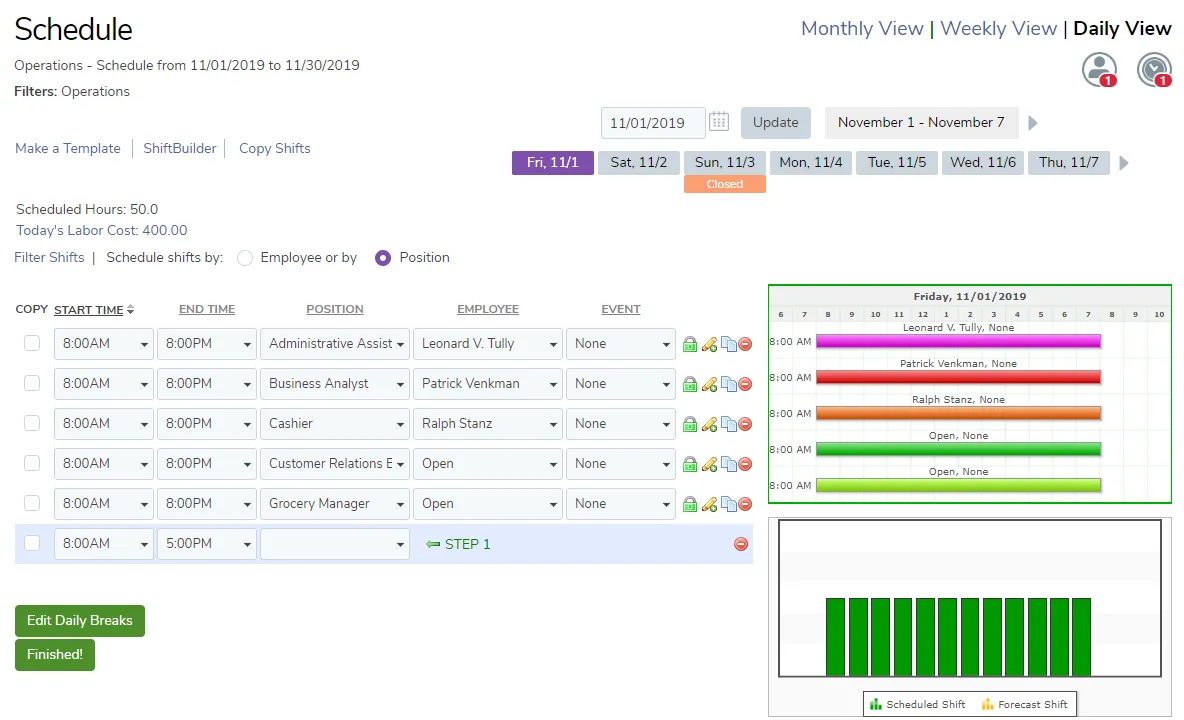
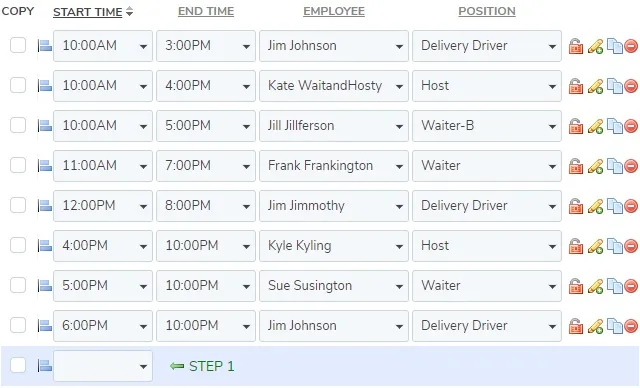
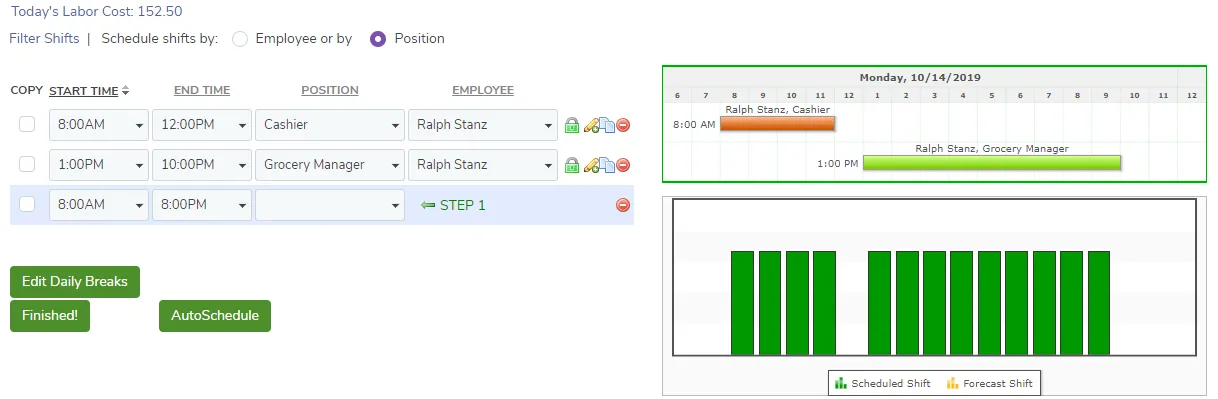
Create your work schedule template just as you would build any employee schedule. TimeForge makes it easy by showing you right where to start: STEP 1.
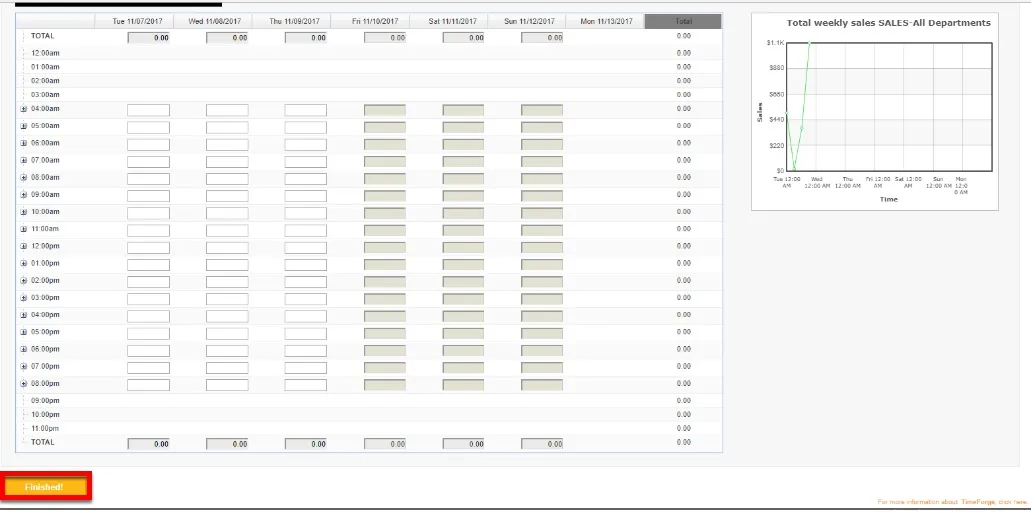
Be sure to click the Finished! button when you’re done.
Manage employee availability and requests
In many restaurants, retail businesses, and other industries, staff members are required to work with two different concepts for work preferences:
Availability is when employees are normally available to work.
For example, an employee may be available on Monday, Wednesday, or Friday from 8am – 2pm. Perhaps that employee is not available to work on Tuesdays or Thursdays because of school conflicts, or another job. Availability is commonly updated on a continuous basis (school semesters are common), and are filled out by staff members.
Requests are normally one-time changes to your employees’ normal availability.
For example, an employee may be available next Tuesday to work because their professor canceled class. In many businesses, requests are placed in some sort of log book – either an industry specific manager log (such as a Red Book from Red Book Solutions or a Beat Yesterday book) or a simple spiral notebook or binder.
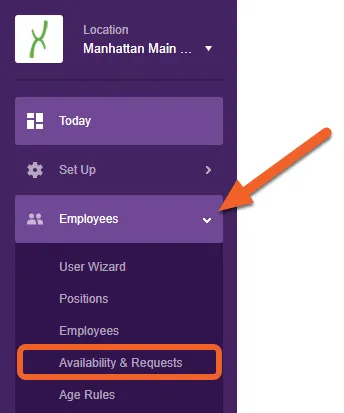
TimeForge supports both types of work preferences from a single Availability & Requests page. Recurring requests can be be made within TimeForge, similar to an Availability sheet, and individual daily Requests can also be made within TimeForge.
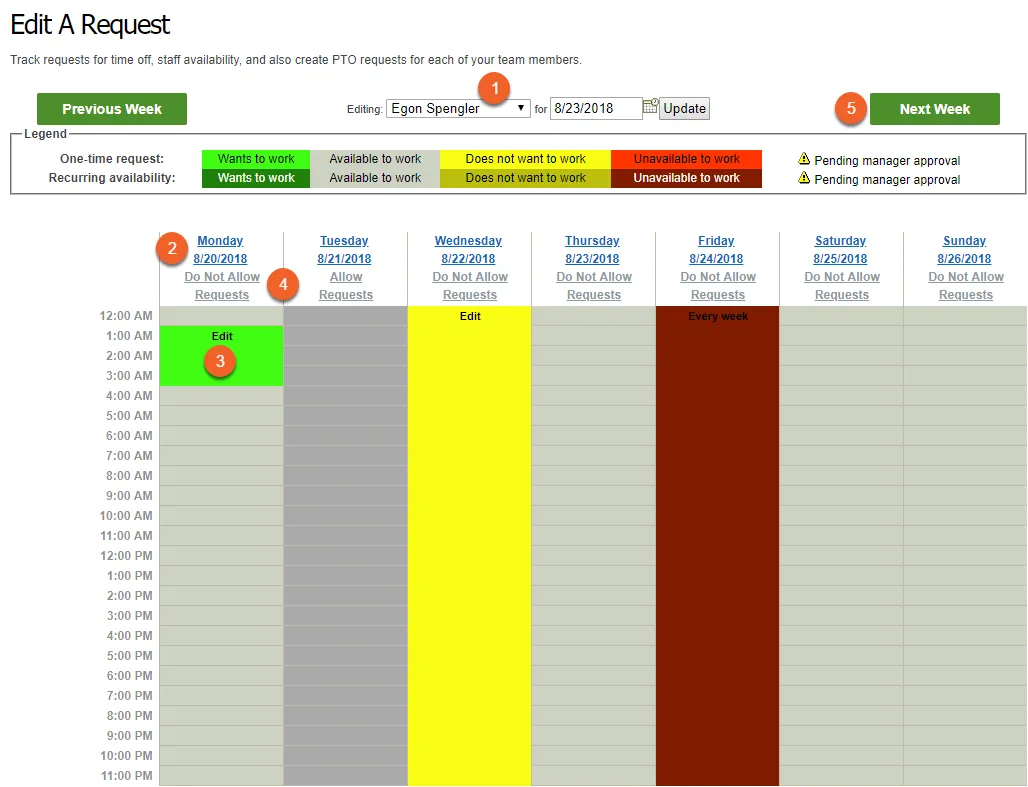
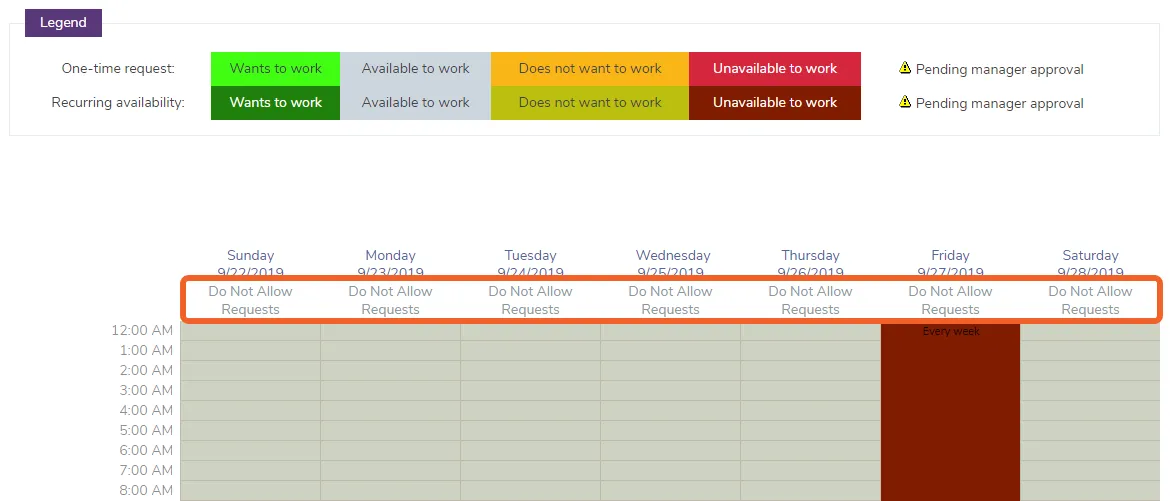
TimeForge supports 4 different types of Availability and Requests to enable staff members to easily customize their work schedule. These are color-coded in TimeForge to make them easier to identify visually:
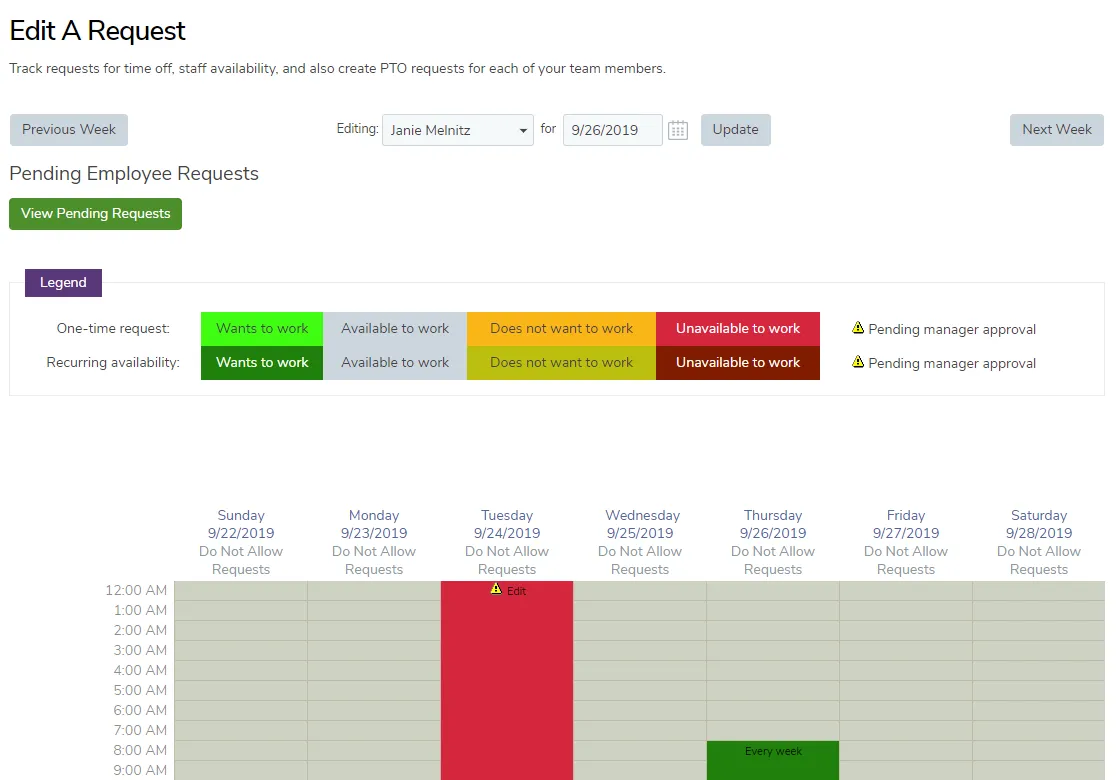
Wants to work(green)- If an employee would like to work a particular shift, for example on a day that works well with their schedule, they should create a Wants to work request.
Available to work (gray) - By default, employees are always available to work, and can be scheduled to work. They should create either Wants to work, Does not want to work, or Unavailable to work requests to change their availability.
Does not want to work (yellow) - These requests indicate that the employee would prefer to not work, but can work if required.
Unavailable to work (red) - If an employee cannot work, an Unavailable to work request will ensure that they are not placed on the schedule during this time frame.
Staff requests and changes to availability are sent to the management team for approval, and once approved the employee will be notified through TimeForge and by email (if an email account is set up).
Submitting, Editing, and Preventing/Enabling Requests
Click the “Edit” link to edit an existing request.
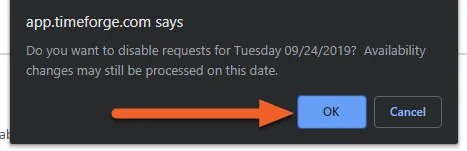
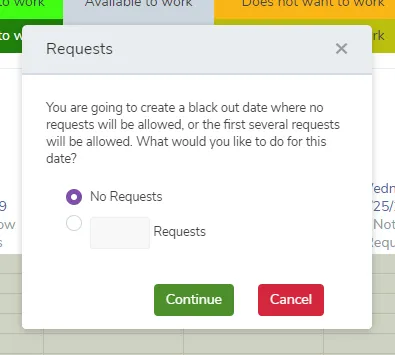
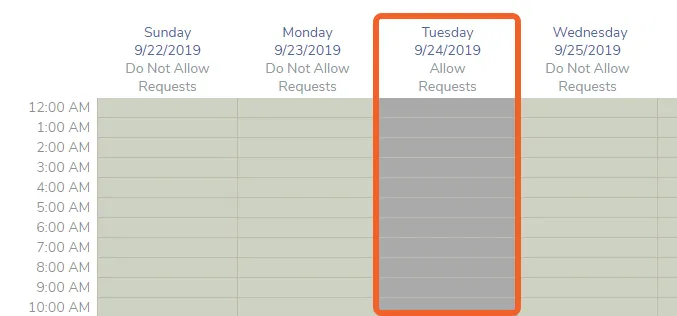
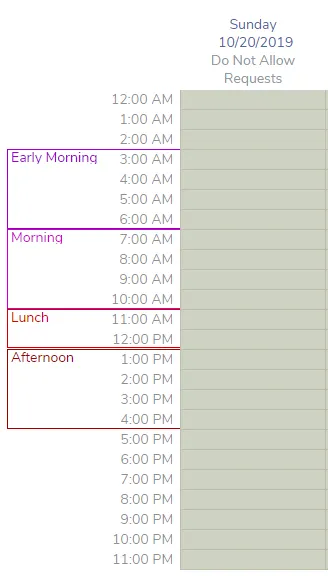
Click the “Do Not Allow Requests” link to prevent requests for that date (the column will then appear in dark gray) or re-enable requests by clicking the “Allow Requests” link.
Use the Previous and Next buttons to cycle between weeks.
Grid View vs. List View
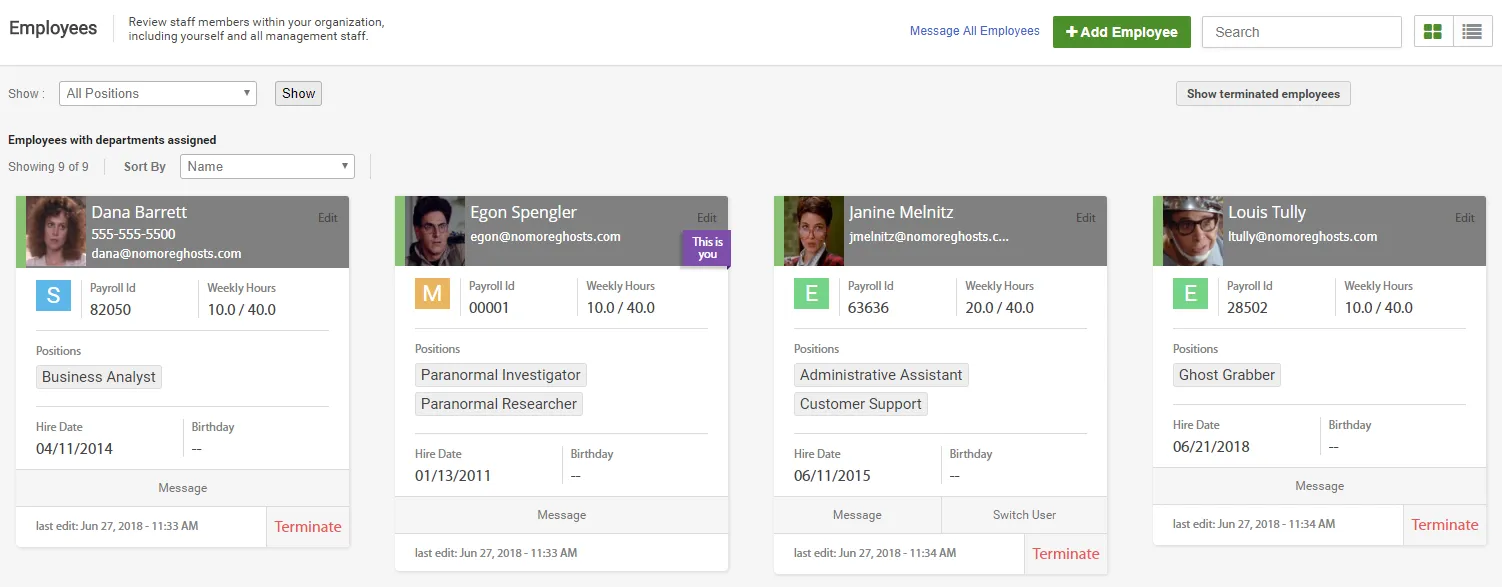
TimeForge gives you the ability to choose how you want to see employees, schedules, locations, departments, and other lists by switching between a grid with cards and a more traditional table list. Each card in the grid view gives you a focused snapshot of an individual item on your list, while the list view gives you a detailed, customizable list that makes it easier to see everything at once.
This guide will teach you how to easily toggle between the two views, how to filter your lists to see only what you want to see, and how to export your filtered lists for your records.
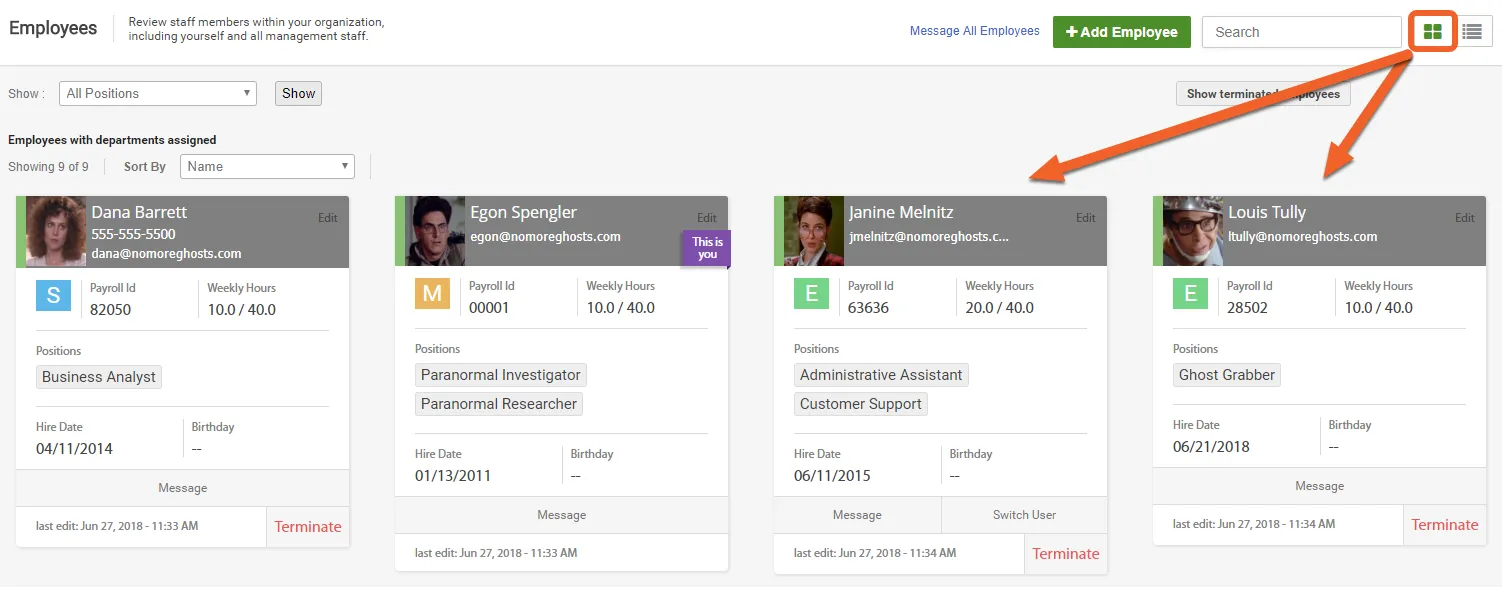
For new accounts, TimeForge uses the Grid View by default. This view groups your data into simple cards. These cards make it easy to focus on the information you need by providing an overview of each item in the list. Because it’s more graphically-oriented, this view is great for small businesses, smaller stores, and new accounts.
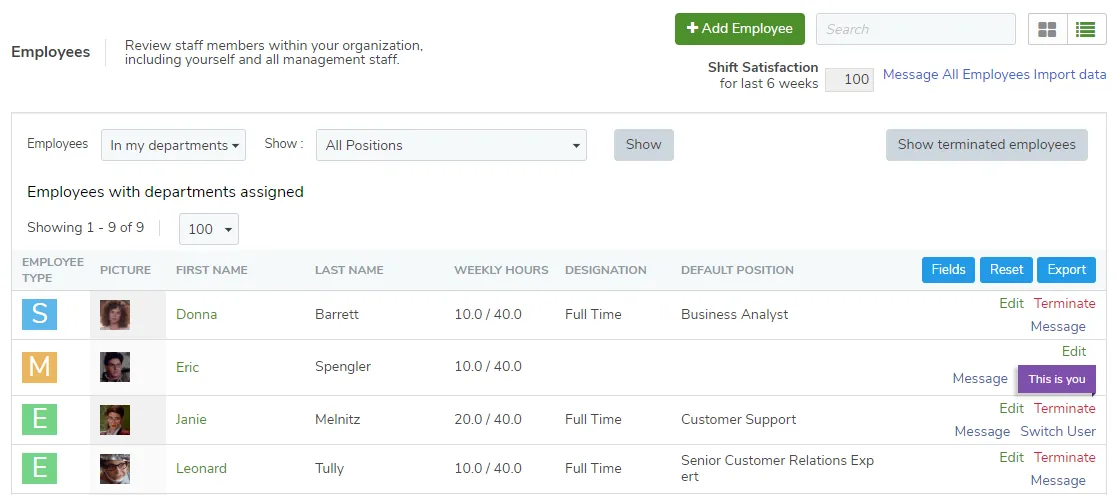
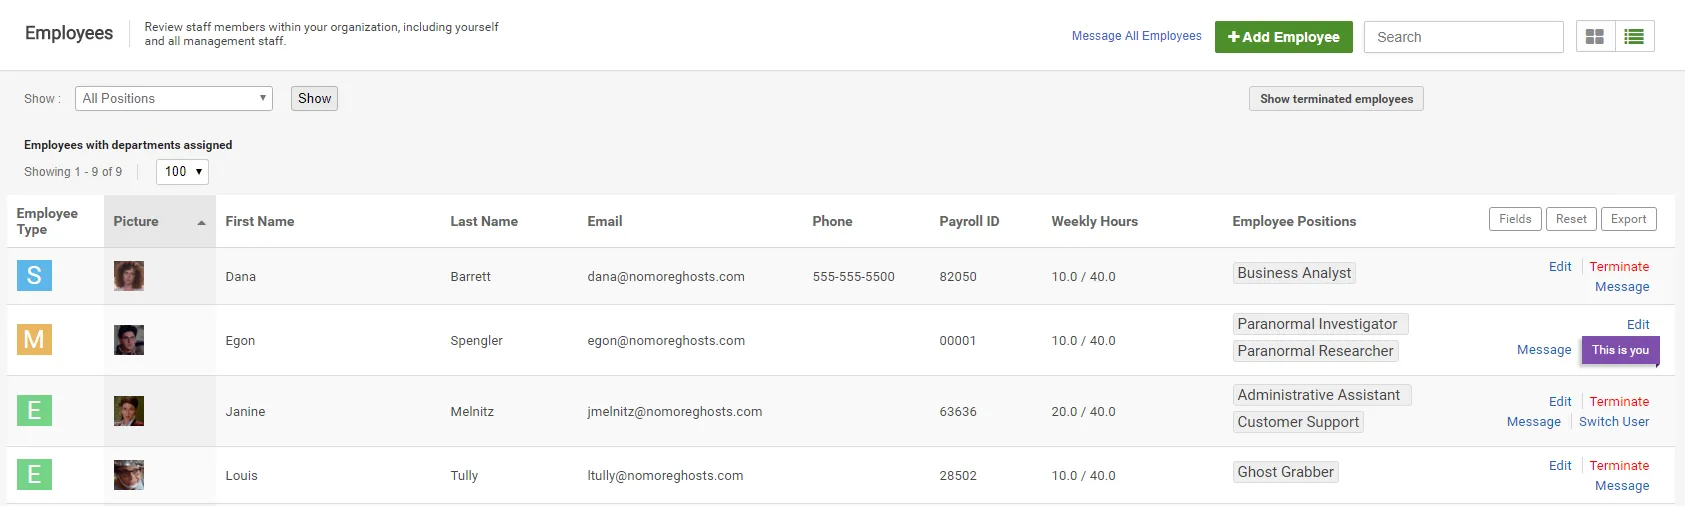
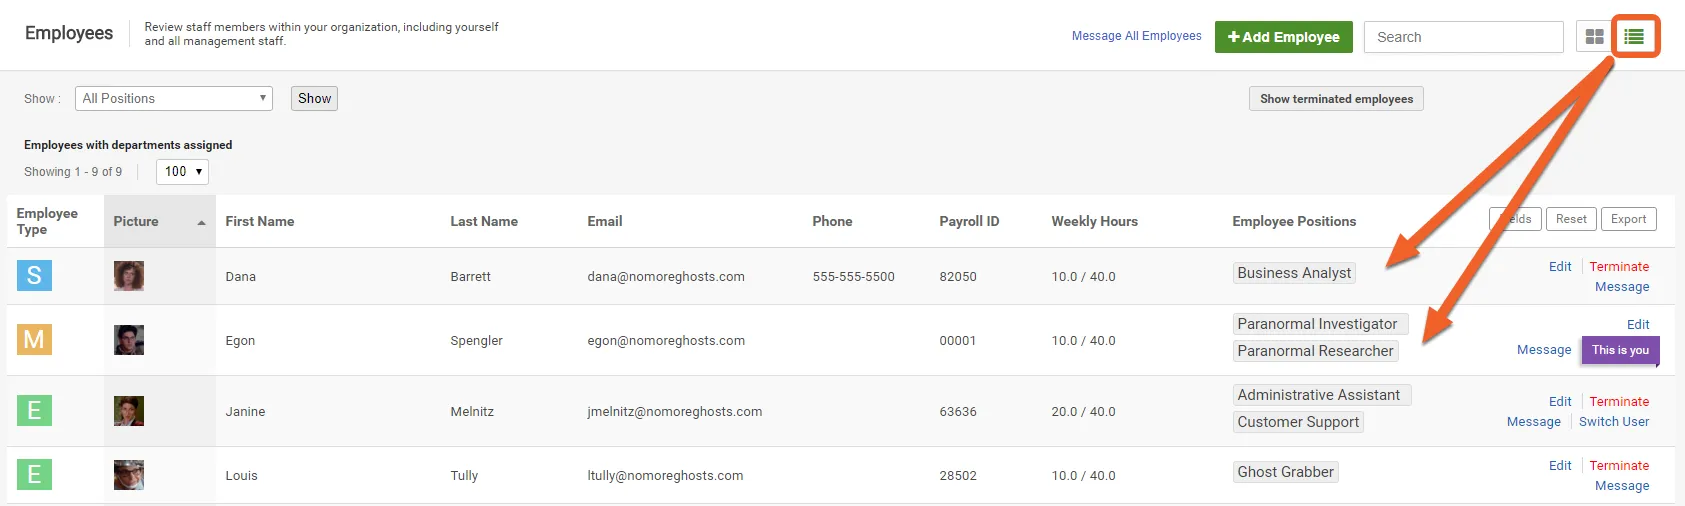
More compact than the Grid View, the List View operates like a traditional list with some nifty upgrades. In this view, you can customize which fields or columns are displayed, as well as export your data, making it a cinch to create your own reports and records.
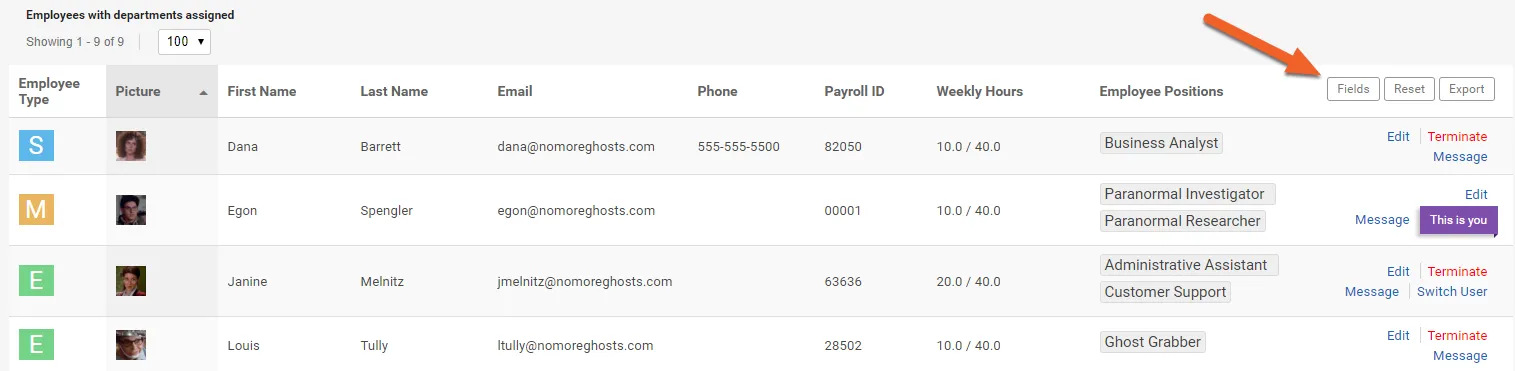
First, make sure you are using the List View. Then, click the Fields button to the upper right of your list.
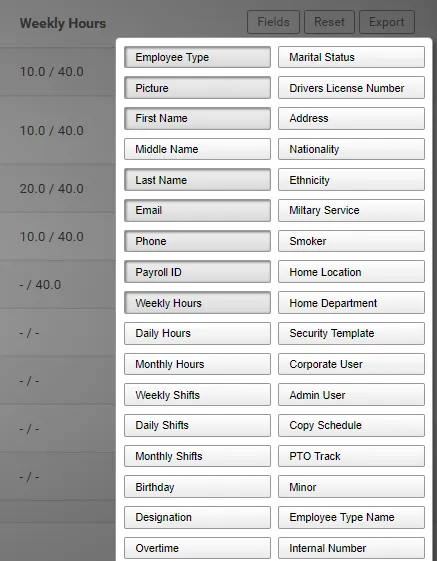
Select the fields you want to add. Selected fields appear beveled, like toggled buttons (e.g. First Name, Last Name below). There are lots of options, so be sure to scroll down to view them all!
When you’re done, simply click anywhere else in the window to return to your list and view your changes.
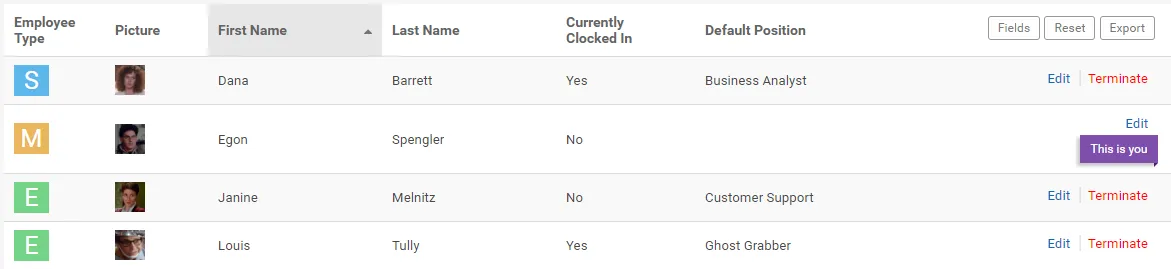
In the example below, we’ve disabled some default fields and added whether or not the employee is clocked in and what their default position is:
How do I export my list?
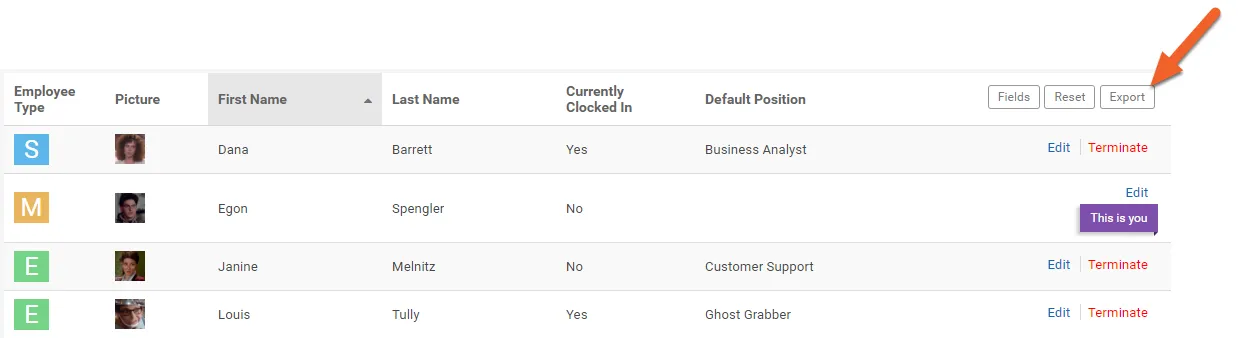
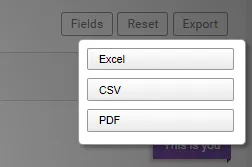
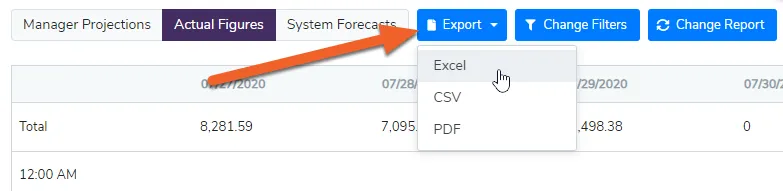
First, follow the steps above to customize your list and get it just the way you want it. Then, select the Export button.
Next, select a file format. You can export your list as an Excel spreadsheet, a CSV file, or PDF.
Once you make a selection, the file will save to your computer. You can then print it, email it, analyze it – whatever you want to do!
Switching between views is incredibly easy! In the upper right corner, you’ll see a toggle button. Simply click the left side to view your information as a grid, or click the right side to view your information as a list.
You can swap back and forth to see what you like best. Your settings are unique to your account, and each area of TimeForge (your employee roster, your list of locations, etc.) will remember whether you prefer to see that set of information as a grid or list.
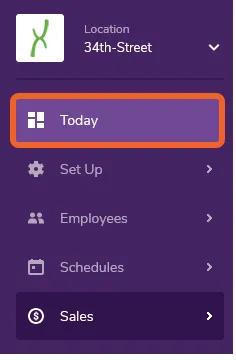
Get the most out of your Today Page
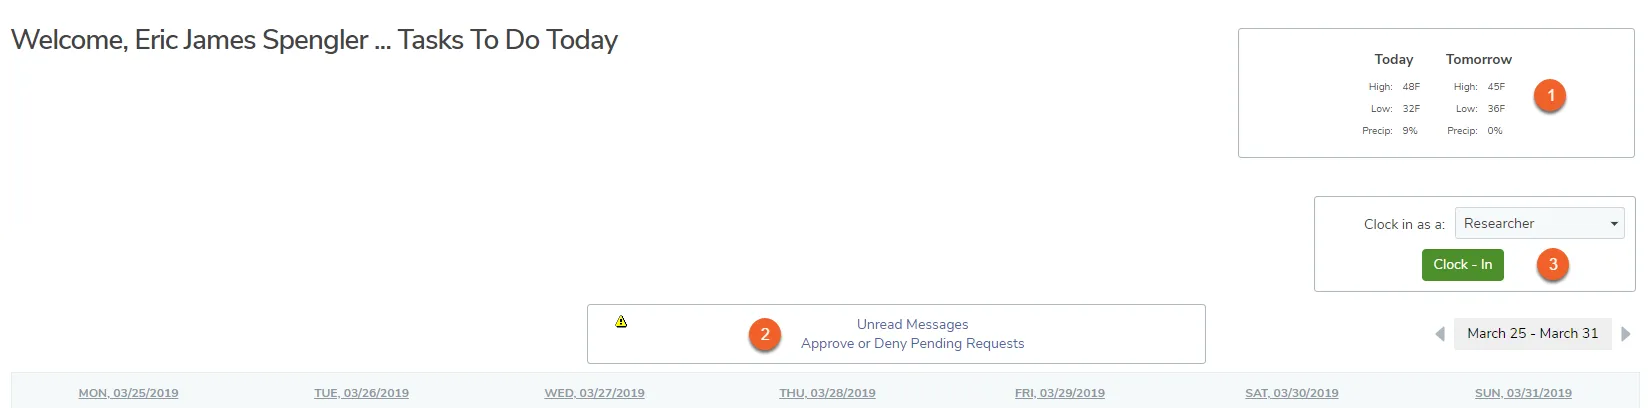
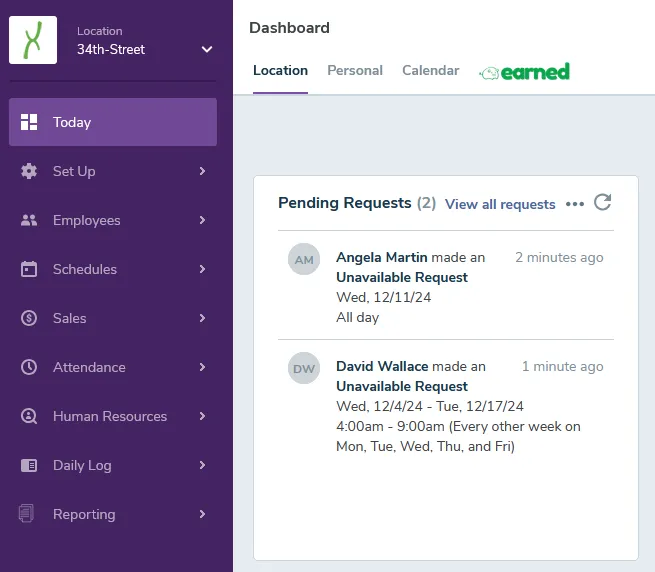
This guide provides an overview of the traditional Today Page from a Manager’s perspective, starting with what you see when you first log in.
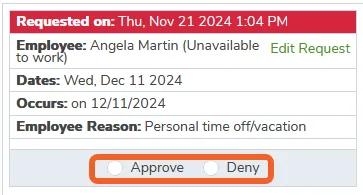
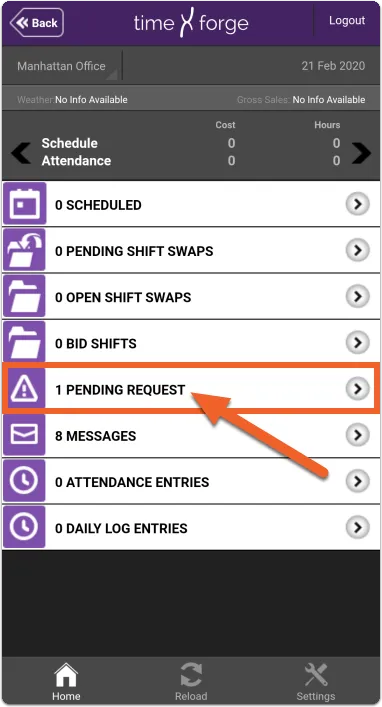
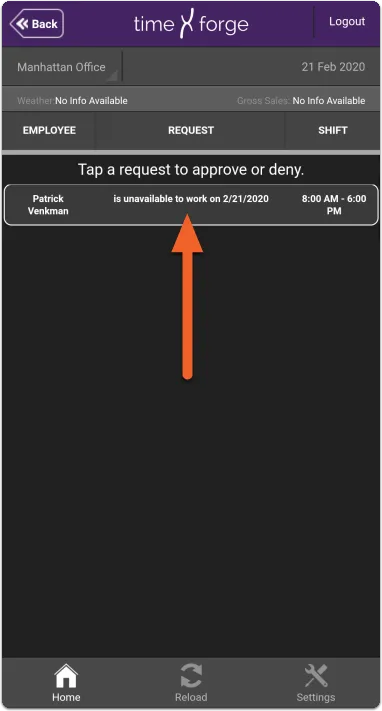
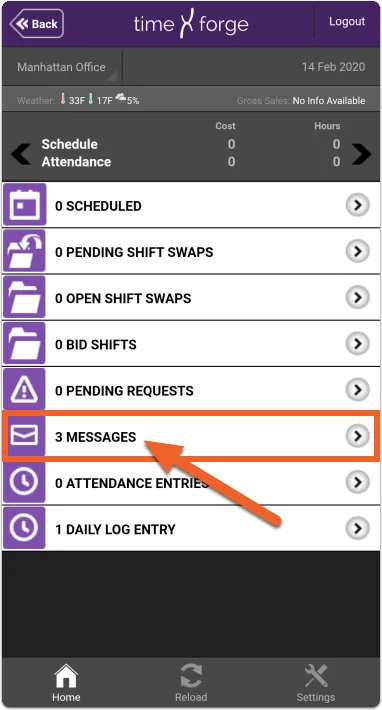
a link to go straight to your unread messages, and a link to go straight to the pending Availability & Requests, in order to approve/deny employees’ requests for time off,
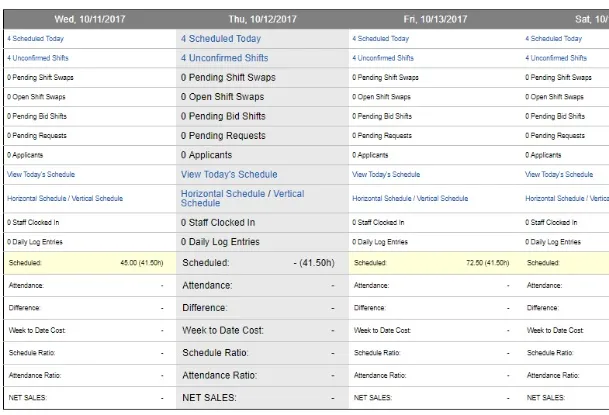
The majority of the Today page is occupied by the labor management dashboard. This dashboard changes in real time to display shift confirmations, open shifts, shift swap requests, scheduled labor costs, actual labor costs, and other helpful information.
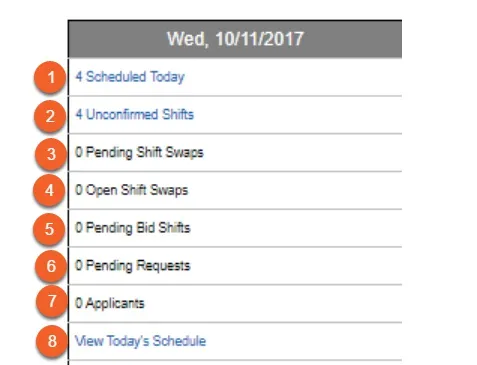
Labor Management Dashboard - Each Day (First 8 Rows)
Each day of the labor management dashboard is broken down into several rows.
The first row of data shows how many employees are scheduled for the day. Click on this link to get a bar chart showing the day’s schedule.
The second row of data shows any unconfirmed shifts from your staff members, providing you with an idea of how many employees have confirmed their scheduled shifts through TimeForge. Clicking on this link will allow you to further examine which shifts have or have not been confirmed.
The third row of data displays how many Pending Shift Swaps need to be approved for that particular day. Clicking on this link will take you to a screen to approve or deny the pending shift swaps.
The fourth row of data displays how many Open Shift Swaps occur on that day. An Open Shift Swap is a shift that has been given up, but not yet picked up. Clicking on this link will take you to a page displaying more detail about the Open Shift Swaps, as well as any Pending Shift Swaps.
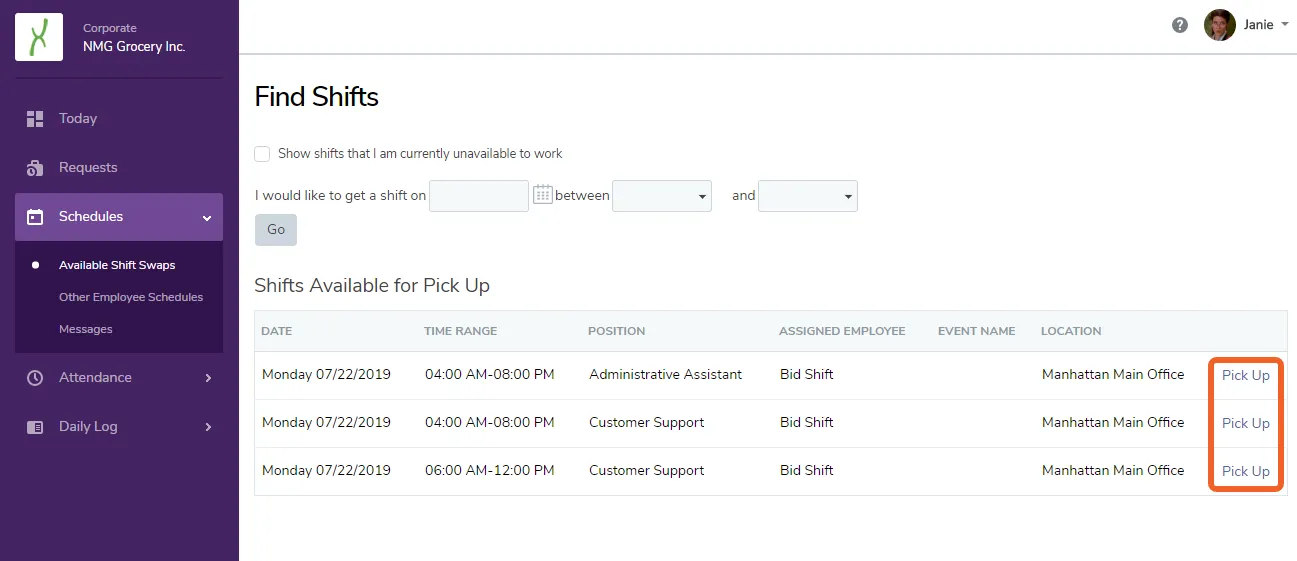
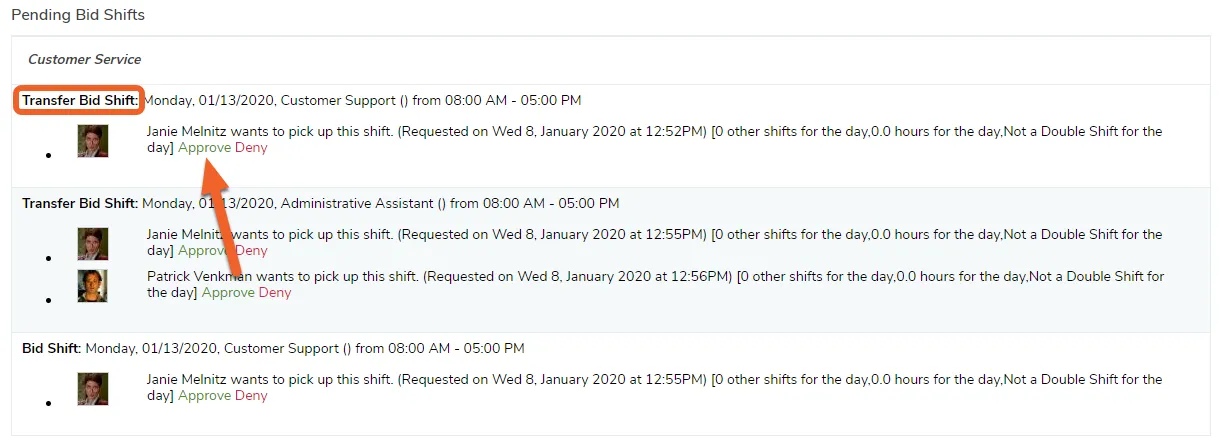
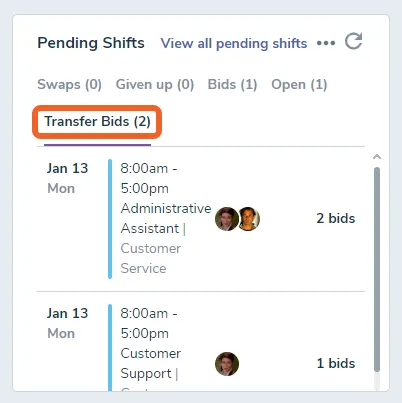
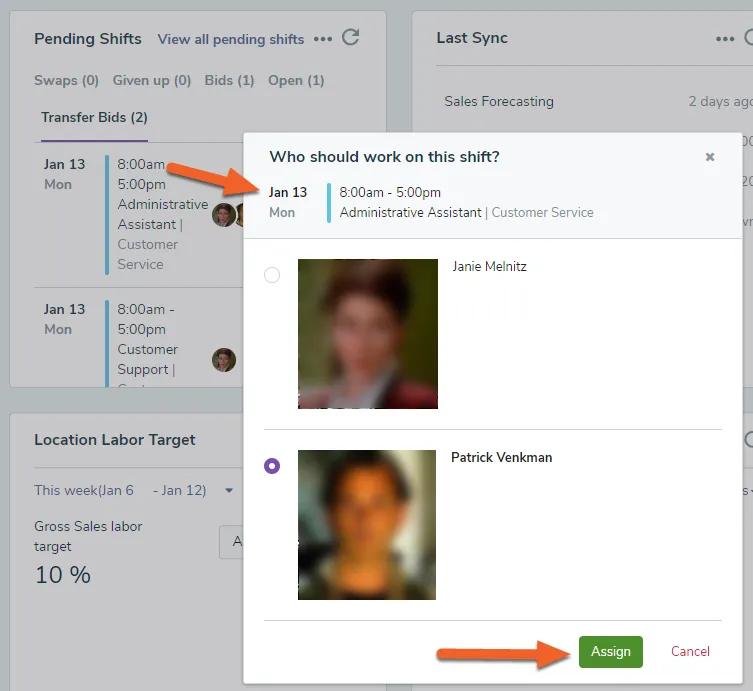
The fifth row of data displays the number of Pending Bid Shifts that need to be approved. A bid shift is similar to a shift swap, however, multiple staff members can bid on the shift and management can then choose the best of the employees to work the shift.
The sixth row of data shows how many availability requests are pending. From here you can approve or deny requests.
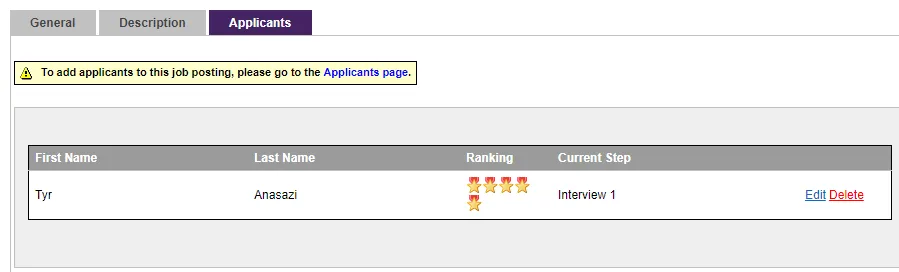
The seventh row of data displays how many applicants have applied for a posted job. Clicking the link will take you to a page with a list of the applicants where you can view their information.
The eighth row of data displays today’s schedule in a bar chart format, and is somewhat similar to the first row.
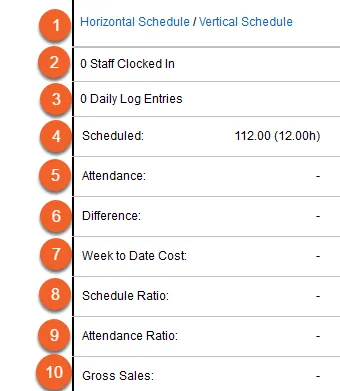
Labor Management Dashboard - Each Day (Last 10 Rows)
The ninth row of data will provide the day’s schedule in a horizontal or vertical format, allowing you to print the schedule and place it in your pocket.
The tenth row of data will allow you to quickly see how many staff members are clocked in, and clicking on the link will send you to the “Clocked In” Employees page.
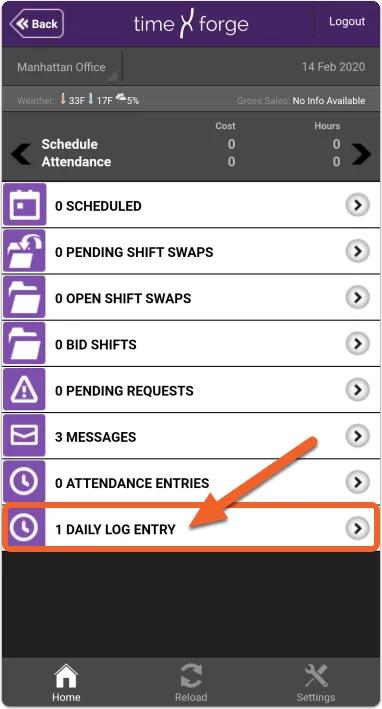
The eleventh row of data displays the number of Daily Log Entries for the day, and clicking on this link will take you to the Daily Log.
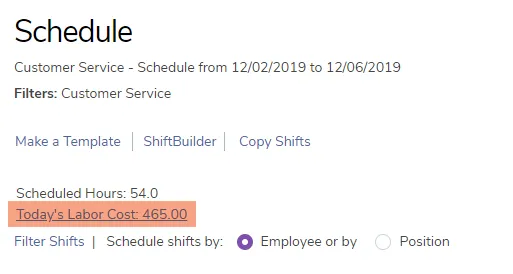
The twelfth row of data displays the day’s scheduled labor costs, if any labor costs have been entered for employees.
The thirteenth row of data displays the actual cost of employees that have clocked in and out for the day, and is the total of the day’s labor.
The fourteenth row of data displays the difference between the scheduled labor costs, and the actual attendance cost. If the number is in green, the actual labor costs for the day are less than what was scheduled (Good job!), if they are in red, then the labor costs are higher than what was scheduled.
The fifteenth row of data displays the weekly labor cost to date and will update throughout the day.
The sixteenth row of data displays your scheduled labor cost ratio or percentage, depending on how you have configured your sales categories. The number will turn red if you have exceeded your target ratio/percentage.
The seventeenth row of data displays your actual labor cost ratio or percentage. The number will turn red if it exceeds either your target ratio/percentage, or your scheduled ratio/percentage.
The last row of data displays your gross sales for the day and updates in real time.
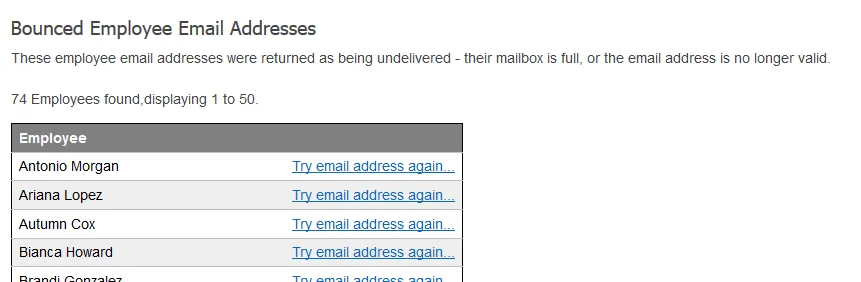
At the bottom of the Today page is a list of employee email addresses that seem to be bouncing, or are incorrectly entered in the software. These staff members may not be getting messages about the schedule.
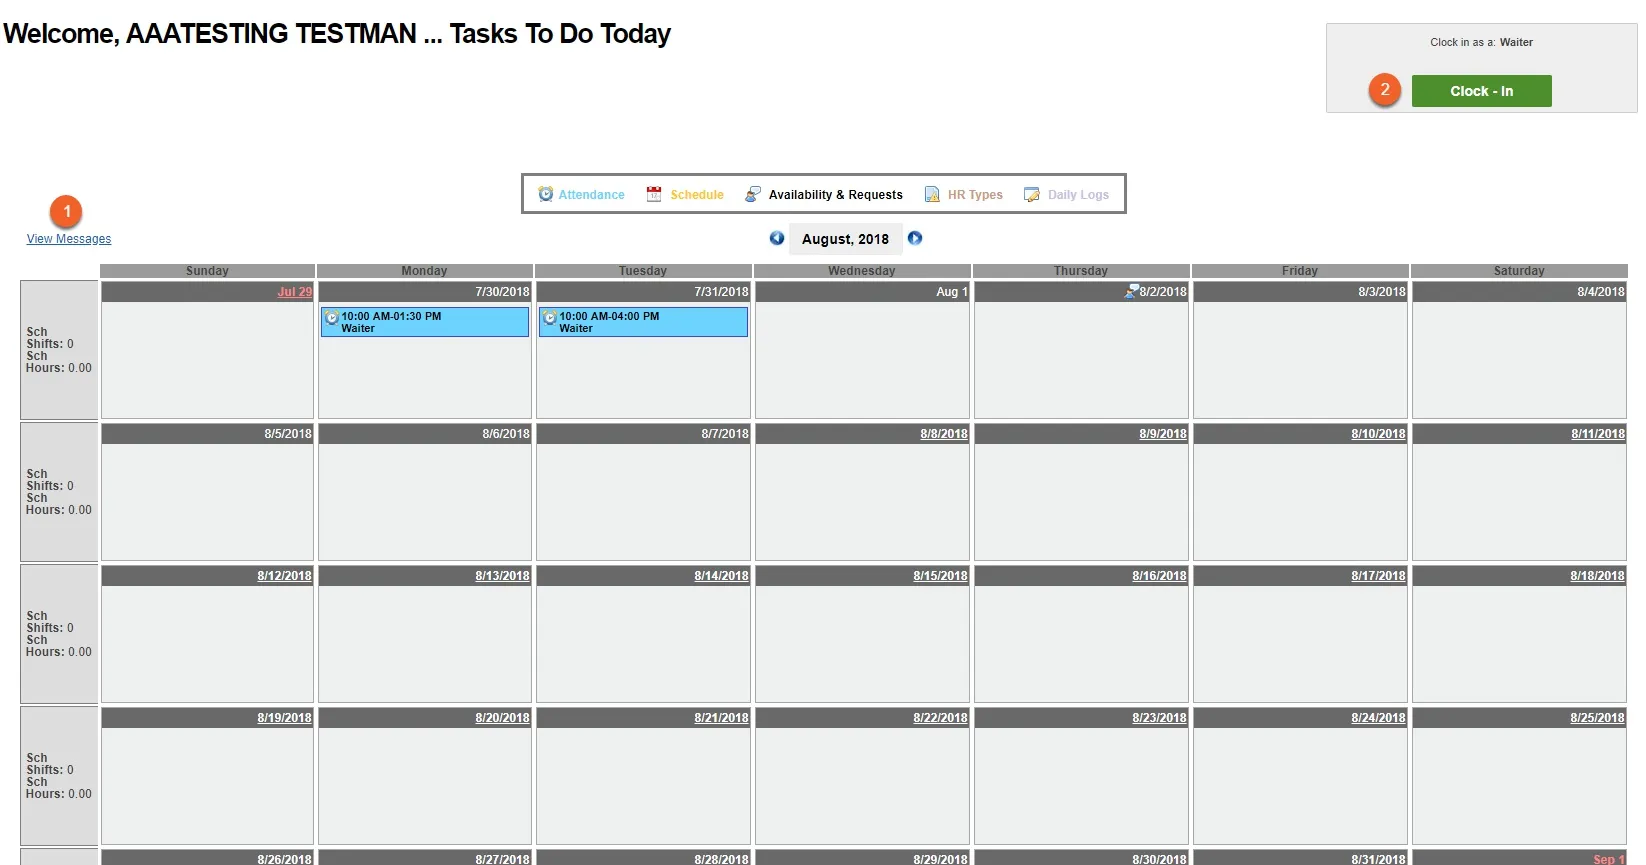
When employees log in to their TimeForge accounts, they will each see a monthly calendar view on their Today pages, including:
a View Messages link
a Clock In/Out box
Choose the widgets on your Location dashboard (Today page)
Using widgets, Managers can customize their Today page dashboard so that they see the content they’re most interested in right when they log into TimeForge. Widgets are interactive: they can be moved around, resized, and selected to best suit your needs. They are designed to provide useful information at-a-glance while also making it easy to navigate to the in-depth details when needed.
There are widgets for both the Location tab (only available to management) and the Personal tab (available to everyone).
Location widgets provide managers with useful information pertaining to that store or location, such as employee schedules, pending shift swaps awaiting manager approval, pending requests, employee birthdays, job applicants, daily log entries, labor costs, weekly sales, and other metrics.
Personal widgets provide employees with helpful reminders, information, and shortcuts, such as my requests, messages, HR documents, clock-in/out button, available shifts, and who else is scheduled to work.
This article provides a brief overview of each widget on the Location dashboard.
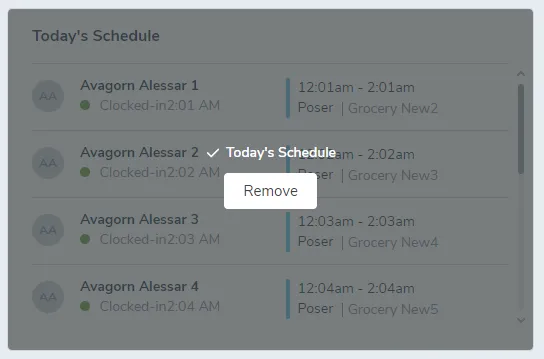
Active widgets (widgets already in use on your dashboard) will be gray with an option to Remove.
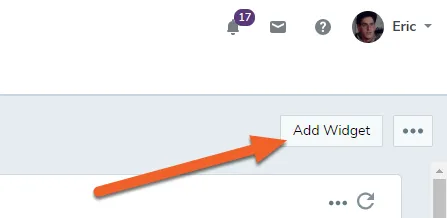
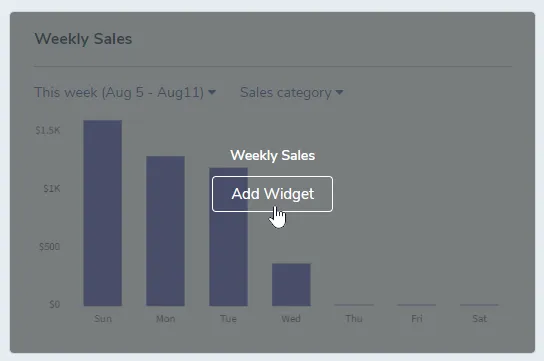
Inactive widgets will be white until you hover over them, which will make the Add Widget button appear.
Location Widgets Overview
As mentioned previously, location widgets are store-based widgets that provide useful information for management. Most are pretty self-explanatory, but we’ve provided a list of options and examples below.
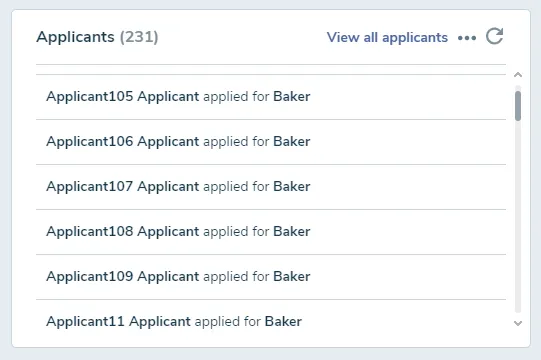
Applicants
Shows job applicants, with a link at the top to “View all applicants.”
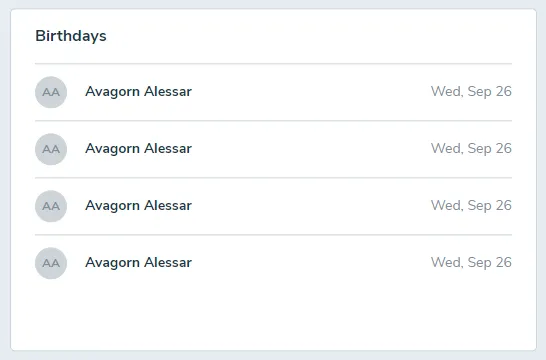
Birthdays
Shows staff members with upcoming birthdays.
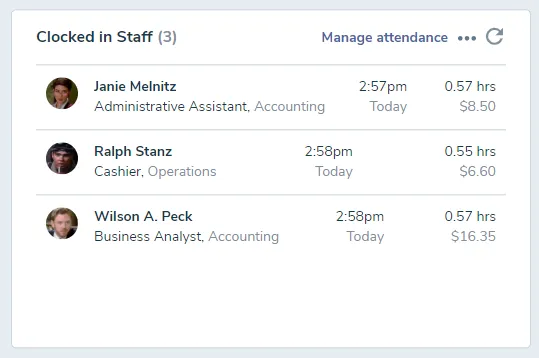
Clocked in Staff
Shows clocked-in staff, including time they clocked in and cost.
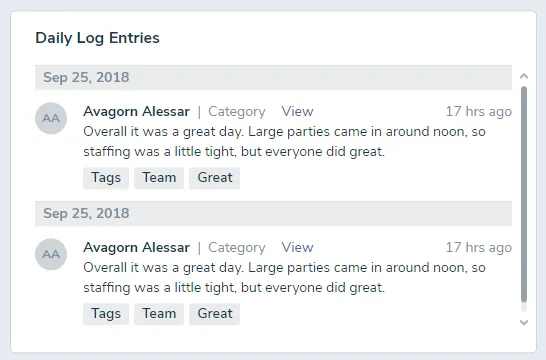
Daily Log Entries
Shows recent daily log entries, including audit and staff log information.
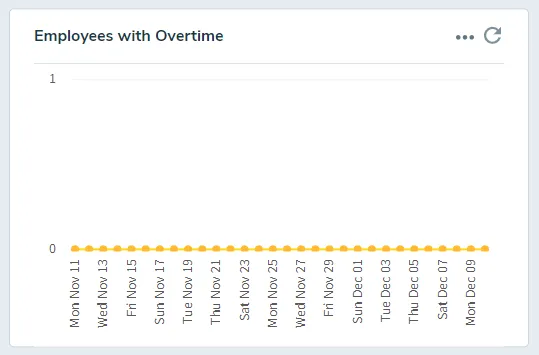
Employees with Overtime
Shows how many employees have accrued overtime, if any.
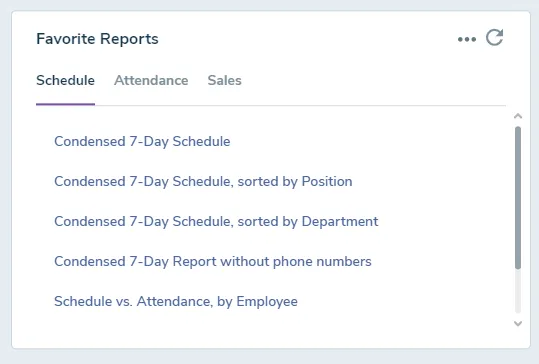
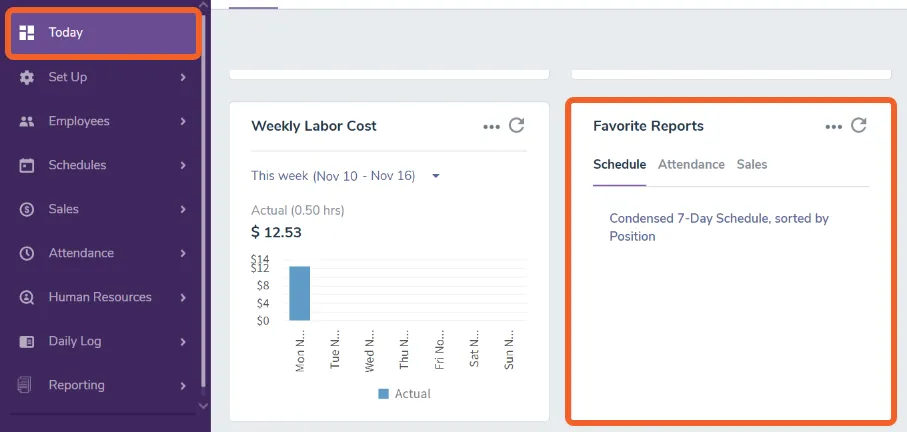
Favorite Reports
Shows your favorite Schedule, Attendance, and Sales reports.
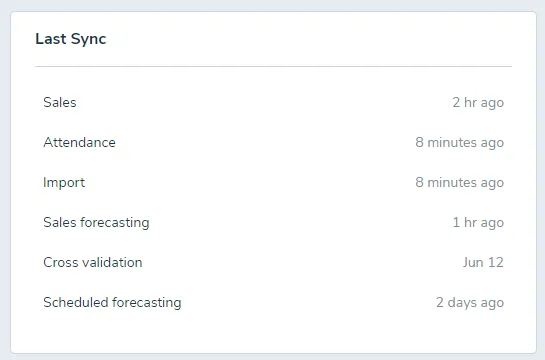
Last Sync
Shows information for the last sync of Sales data.
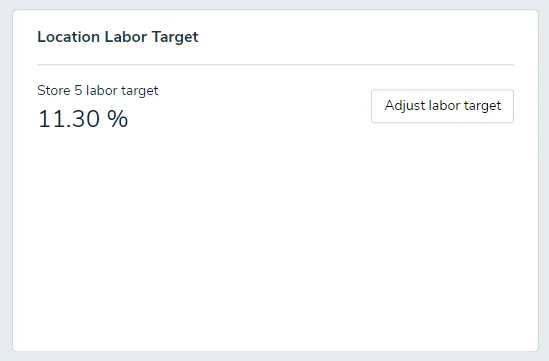
Location Labor Target
Shows the labor target for the selection location, with a button to adjust the target.
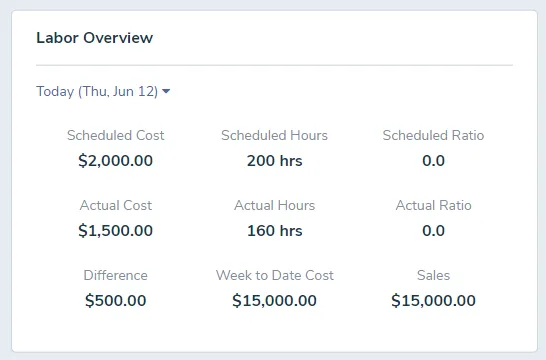
Labor Overview
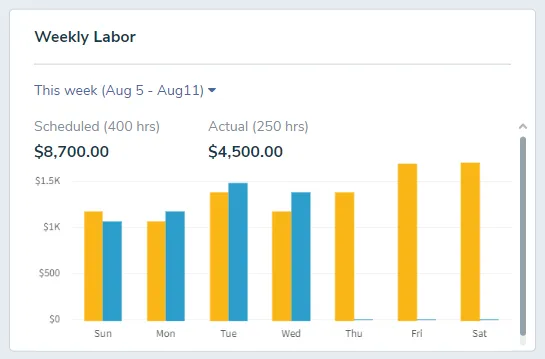
Shows a labor overview for the selected date, including schedule hours/cost and actual hours/cost, and difference.
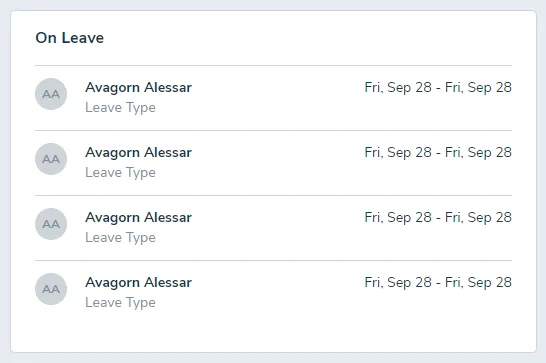
On Leave
Shows a list of employees on leave, including the dates and leave type (e.g. vacation, PTO, sick leave).
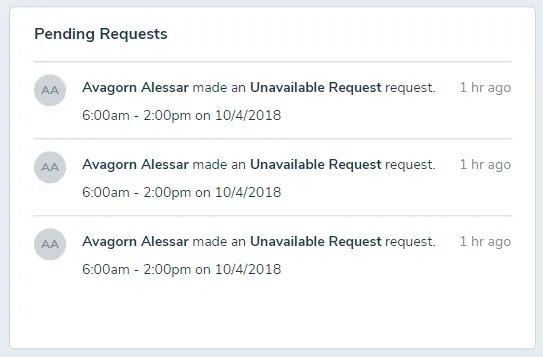
Pending Requests
Shows pending availability and time off requests from employees.
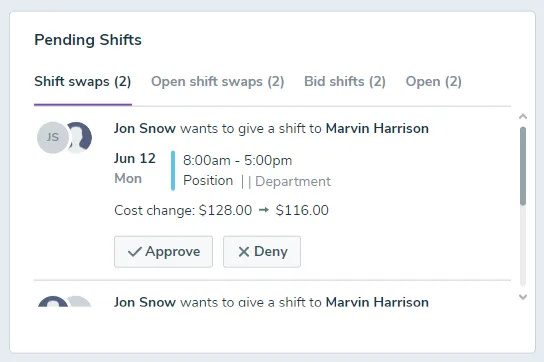
Pending Shifts
Shows pending shifts, including shift swaps, open shift swaps, bid shifts, and open shifts.
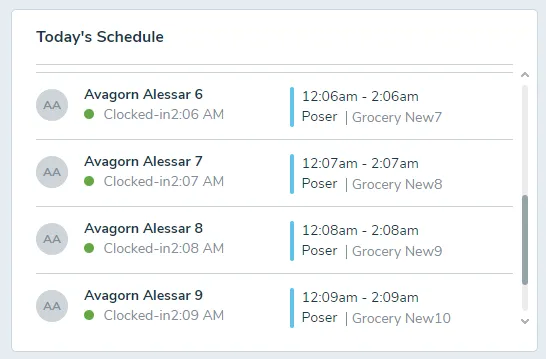
Today's Schedule
Shows a list of scheduled employees, whether and when each employee clocked in, the start and end times of each shift, as well as position and department information.
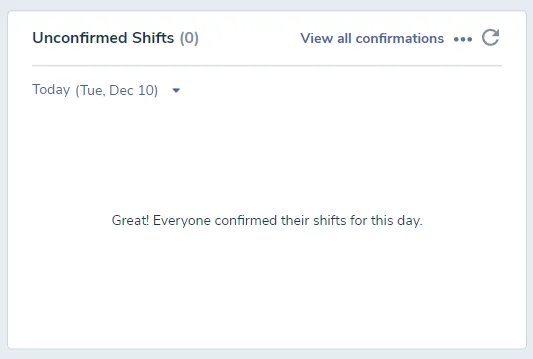
Unconfirmed Shifts
Shows a list of employees with unconfirmed shifts, if any.
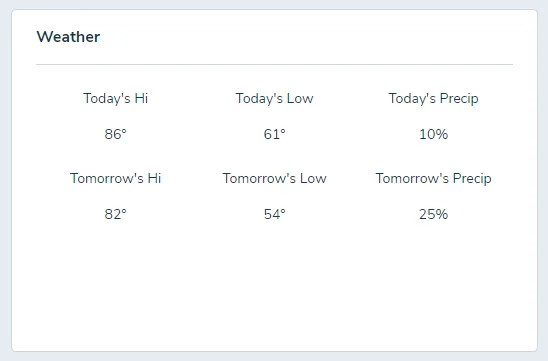
Weather
Shows the weather for that location.
Weekly Labor Cost
Shows weekly labor for the selected week, for this location.
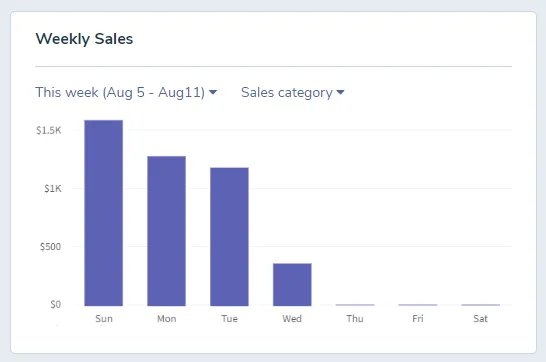
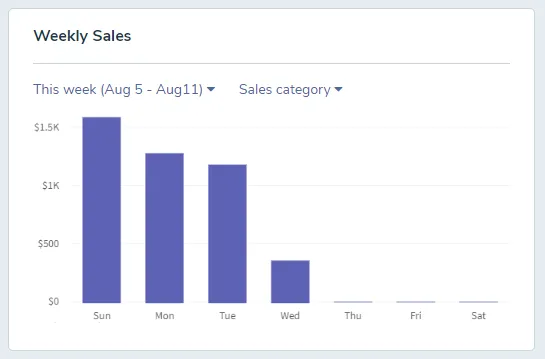
Weekly Sales
Shows weekly sales for the location. Can select a sales category to show sales for that category only.
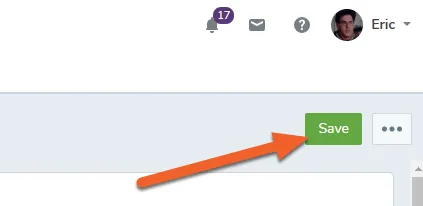
Once you have added the widgets you want and removed the ones you don’t, simply click the Save button in the upper right to save your changes and return to your dashboard.
Manager Guides › Profile Settings
Update your profile and contact information
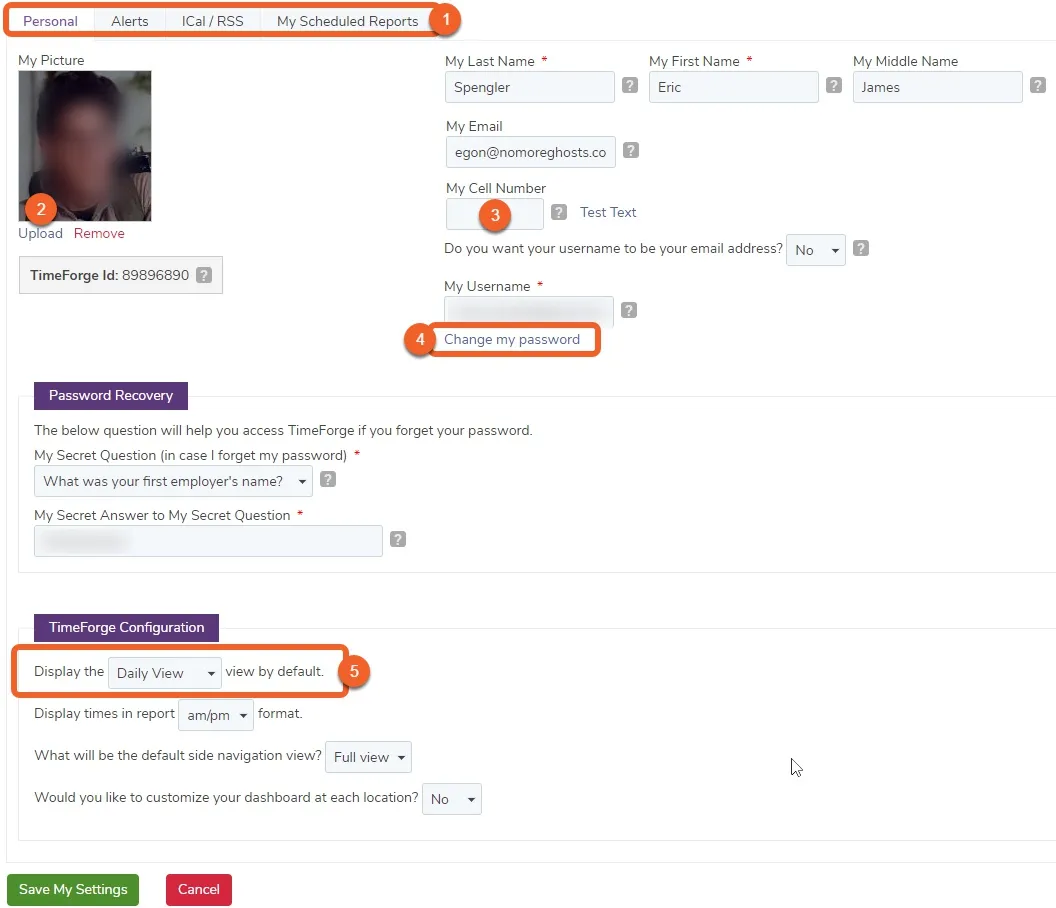
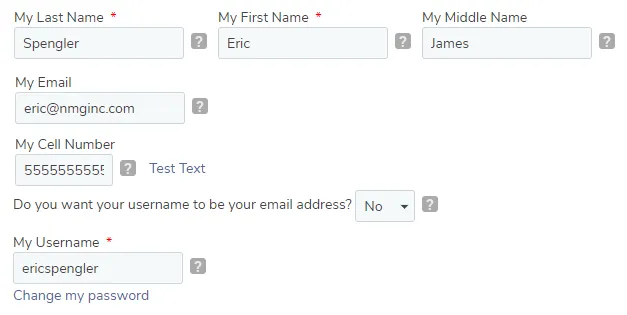
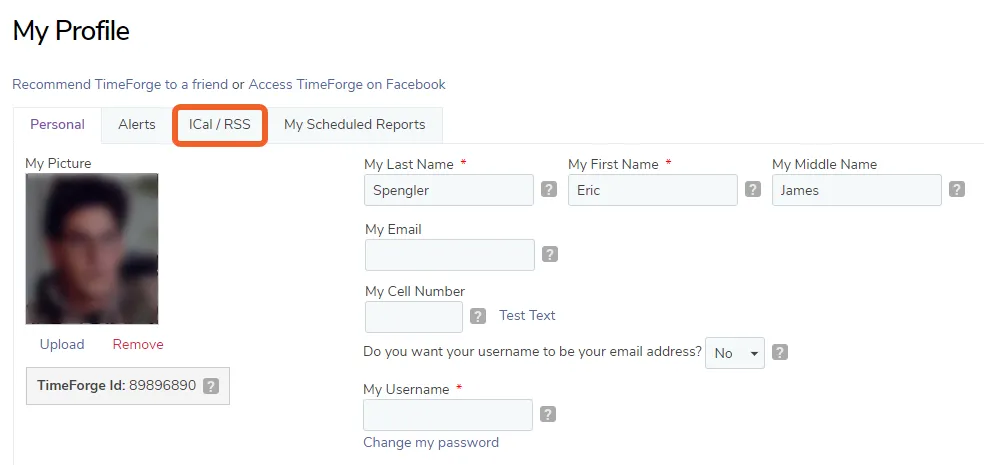
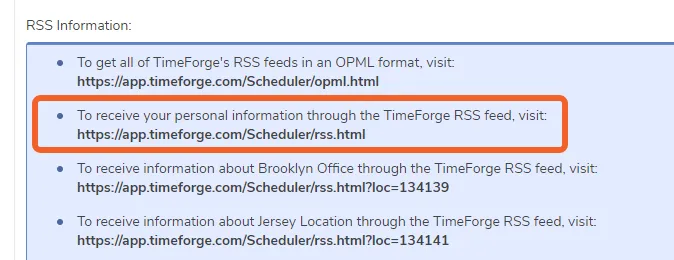
TimeForge provides each user with access to customize and update personal contact information and other useful settings. For managers, these settings include not only the ability to update their personal contact information, but also to decide which email notifications they would like to receive, to choose if they would like to view information in ICal or RSS form, and to view which reports they have scheduled. Having all of these settings customizable for each manager and located on one page is convenient and helps ensure that TimeForge is working optimally for each user.
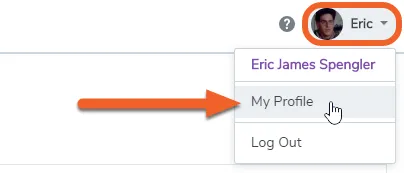
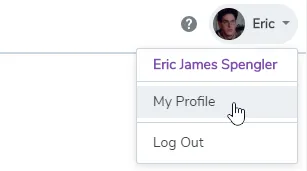
Changing your personal profile settings is easy, so make TimeForge unique for you! Just follow the steps below.
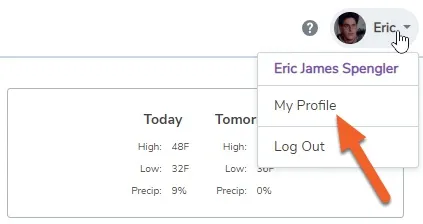
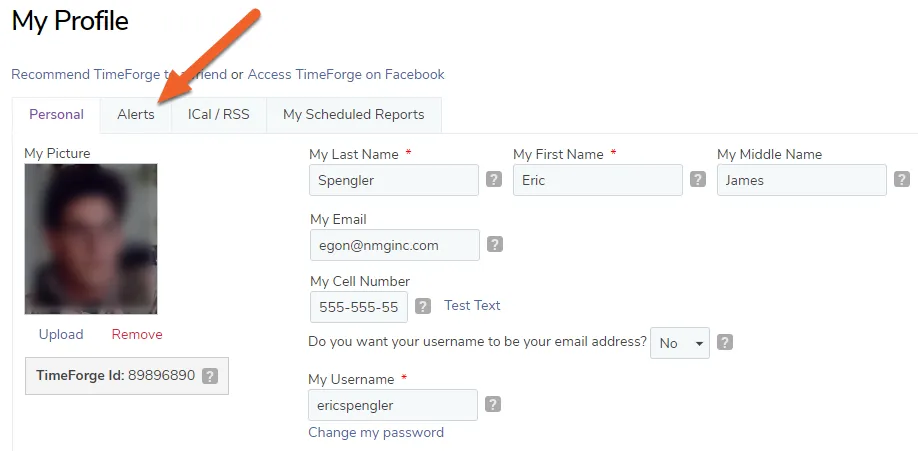
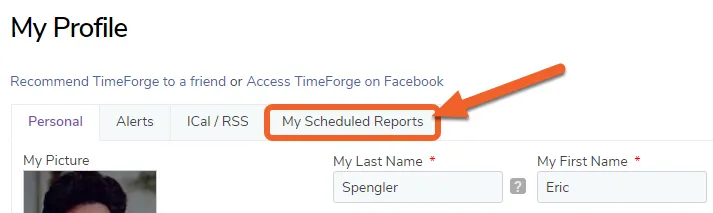
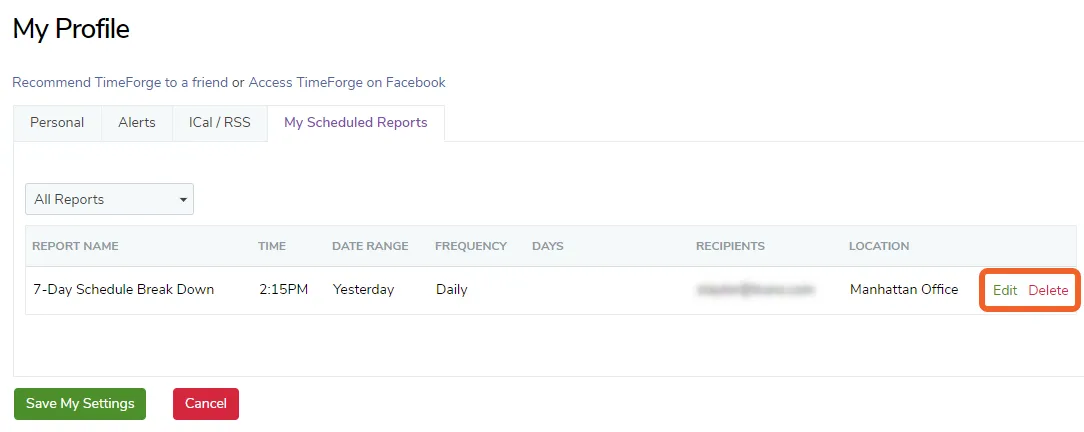
The tabs on the My Profile page allow managers to navigate between their personal contact information, alerts they would like to receive, ICal and RSS options, and any scheduled reports. To update personal contact information, make sure you are on the “Personal” page.
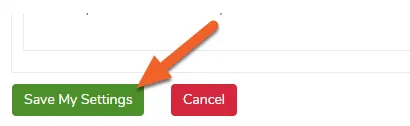
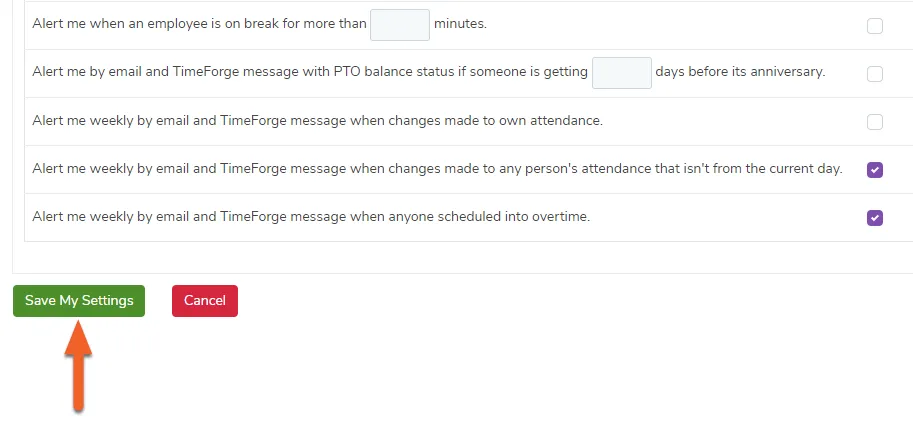
Don’t forget to save! Scroll to the bottom of the page and click the green Save My Settings button.
Set up and receive email alerts
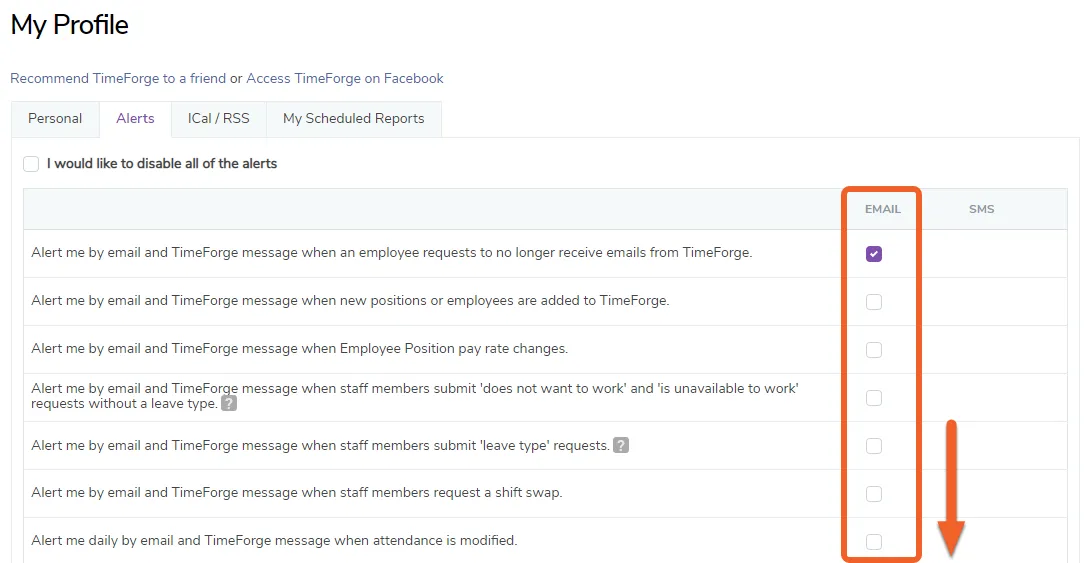
With its many communication features, TimeForge offers the ability to receive text message or email alerts for a variety of scenarios. You can have TimeForge notify you about things like when an employee clocks in early, before an employee reaches overtime, or when an employee schedule has been posted. You could even have any of your reports emailed to you at a certain time.
When setting up your TimeForge account, you can use the Set Up Wizard to guide you through the process of entering your employee information.
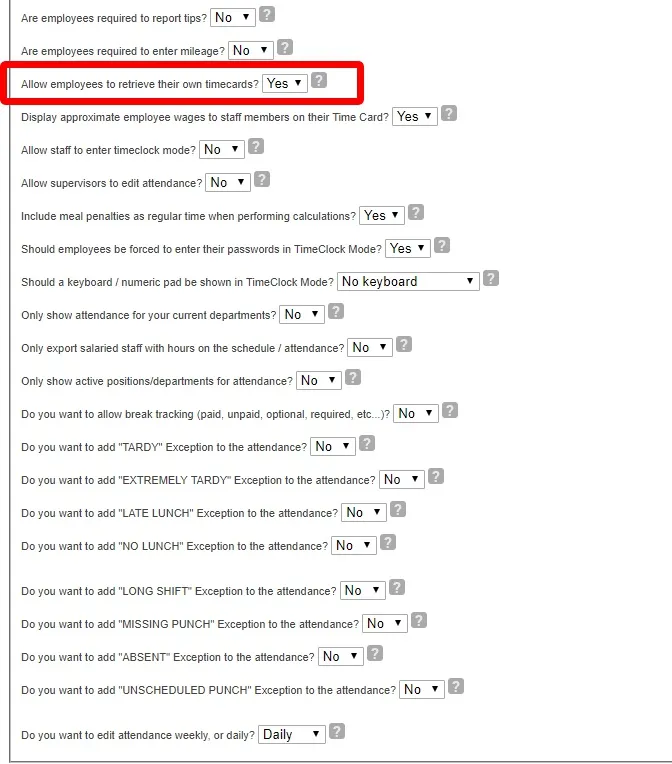
Input contact information for your employees, and TimeForge will automatically email them with information about creating and logging in to their own TimeForge account. Through their TimeForge account, your staff can make schedule requests, receive messages (like memos) from you, view upcoming schedules, and check on their time sheets / attendance. Of course, if you want to limit their access to any of these features, you can do that in the “Settings” menu for each of your business locations.
Additionally, employees can provide their contact information (like cell phone number and Facebook information), and we will automatically notify them about any upcoming schedules you post that might affect them. When we notify your employees, we record the notification, so that you can run an audit report - ensuring that staff members are receiving and responding to schedule updates. This completely eliminates the “I never got the schedule / memo / note” excuse!
Through our automatic notification system, your employees will always be up to date on the latest schedule, eliminating any confusion about schedule information, improving your staff’s tardiness, and ultimately improving your bottom line!
Example: Receive clock-in and clock-out alerts
Are you tired of sitting in front of the time clock to see when your staff members show up to clock in, or clock out for their shift? Monitoring time clocks is a time consuming way to manage employees and while it can often be an effective way to reduce payroll expenses, it also increases frustration and costs among managers and supervisors.
TimeForge already supports a number of ways to manage staff members without sitting in front of the time clock including:
Online employee work scheduling accessible over the Internet,
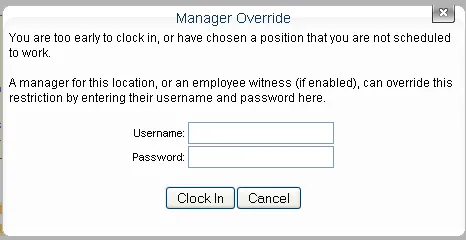
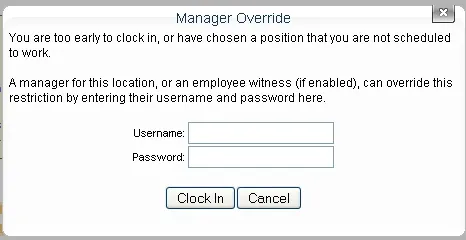
Allowing other staff members to act as a witness when employees show up before they are scheduled to work
TimeForge can notify managers or supervisors when employees show up early or late, and when clocking in or clocking out.
For example, you can receive email and TimeForge notifications when staff members show up more than 10 minutes early for their scheduled shift. To configure these Alerts, log into TimeForge, go to your Settings page, and configure the applicable Alerts.
After you customize all of your settings, make sure you click Save My Settings so that your changes will take effect.
Manager Guides › Corporation Settings
Organize your locations in the Company Hierarchy
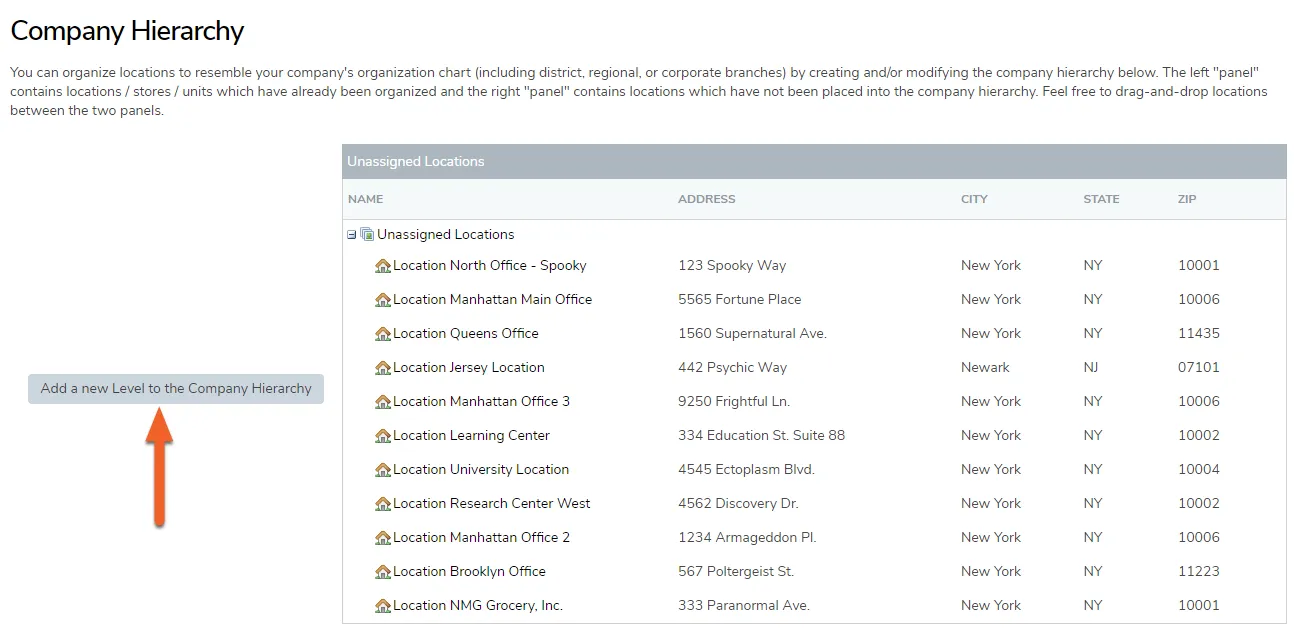
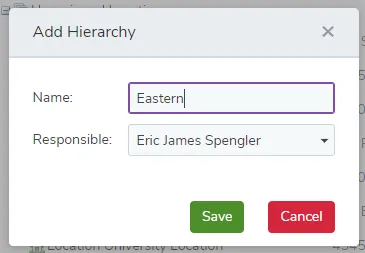
TimeForge enables you to set up multiple locations in the TimeForge system to represent the physical locations of your stores. If you run a corporation or a company with multiple businesses, with each business having multiple locations, this can quickly become complicated. Organizing the levels of hierarchy in your operation will help make things run smoothly.
For example, your company is Joe’s Confections. Joe’s Confections owns Joe’s Bakery and Joe’s Candy. There are two Joe’s Candy stores. The hierarchy would be (top to bottom): Confections at the top, then Bakery and Candy Store in the middle, then Bakery, Candy store #1 and Candy store #2 at the bottom.
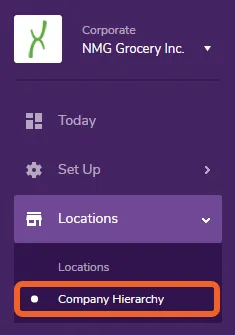
Go to the Company Hierarchy page under the Locations tab
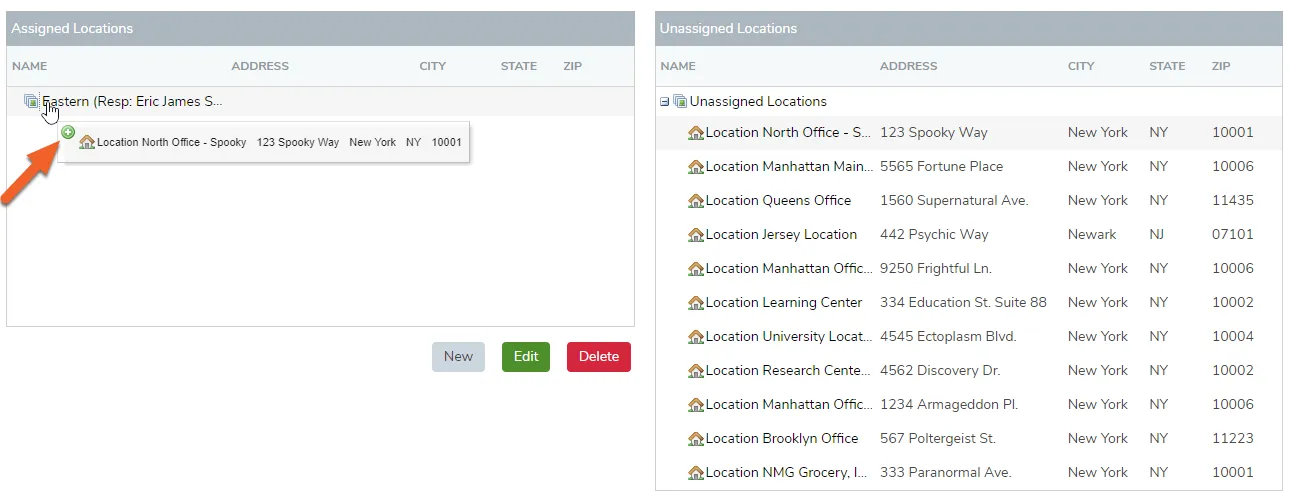
Next, drag and drop locations from the Unassigned list into your new grouping on the left. The green (+) indicates that the location is ready to be “dropped.” Release the mouse button, and your location will be added.
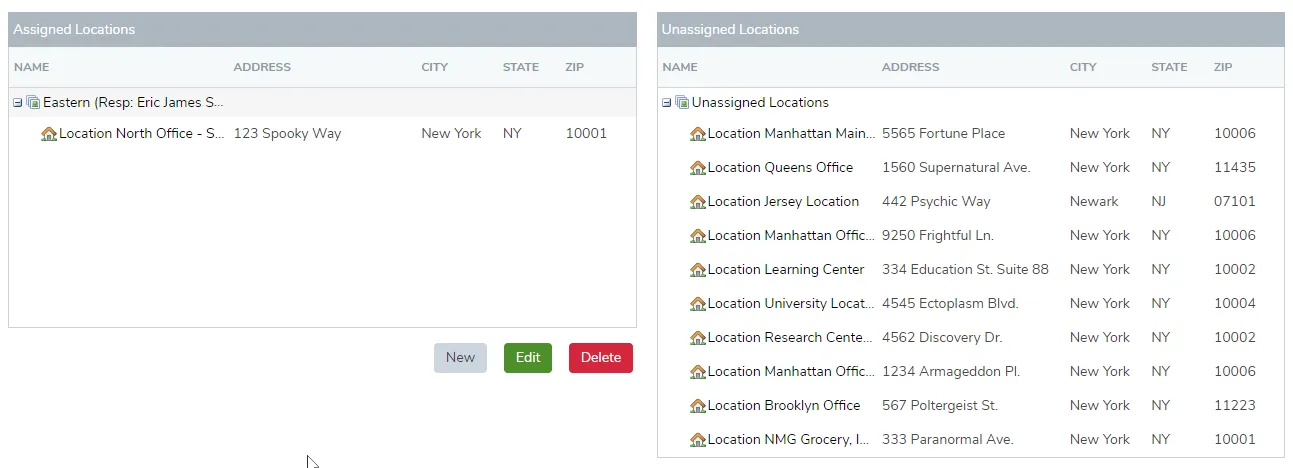
The location should now appear in the list and will no longer be “unassigned.”
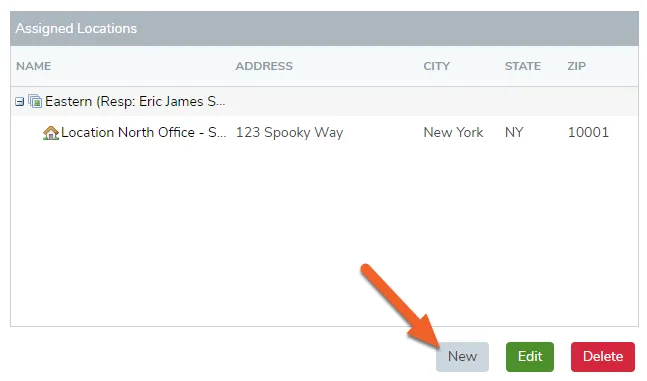
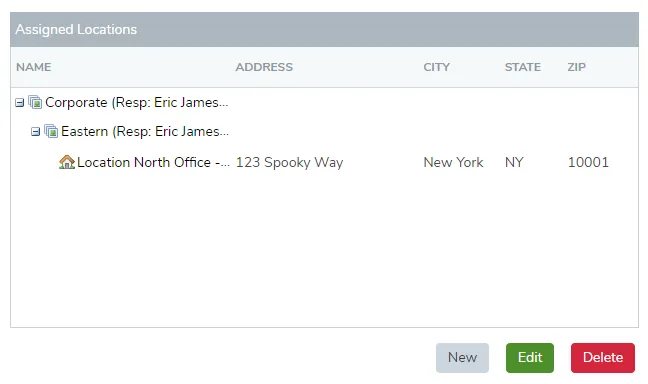
To add new hierarchy levels after the first, use the New button.
Drag and drop hierarchy levels to nest them.
Add, edit, or delete departments
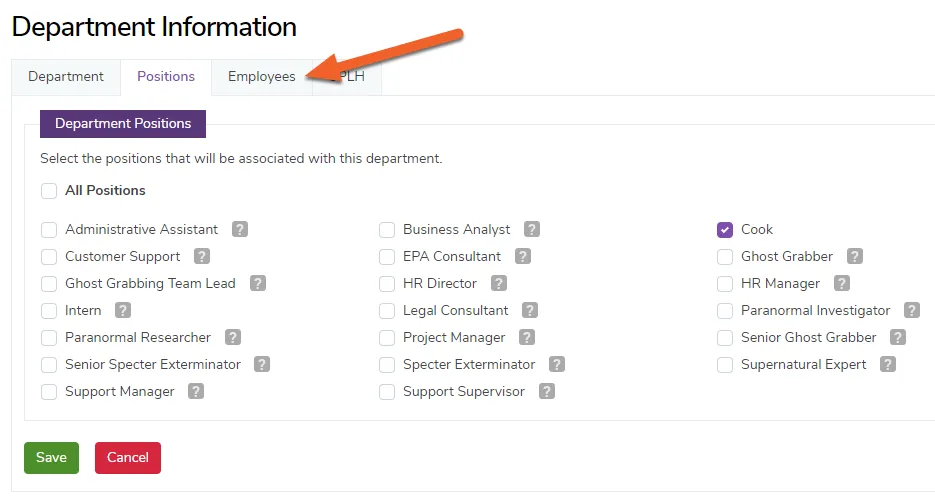
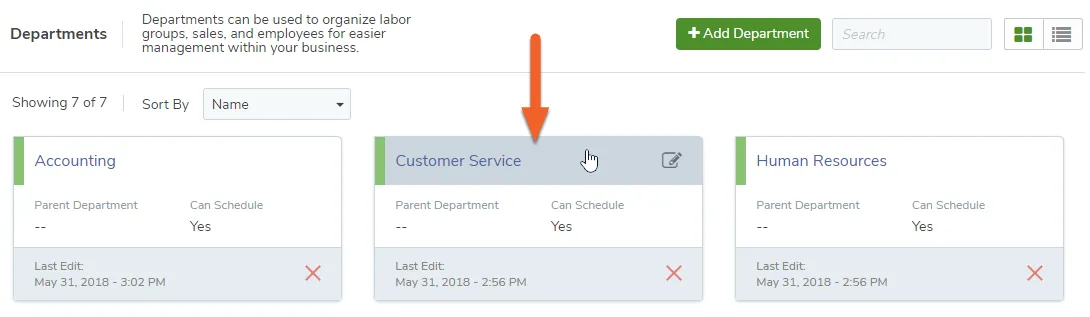
TimeForge enables you to set up multiple departments in the TimeForge system to represent the departments in your store or business. When editing a department, you can select which position(s) and employees will be associated with that department, as well as set some configuration settings, such as whether the department is a sub-department.
Here’s how you can add and edit departments to match the needs of your business:
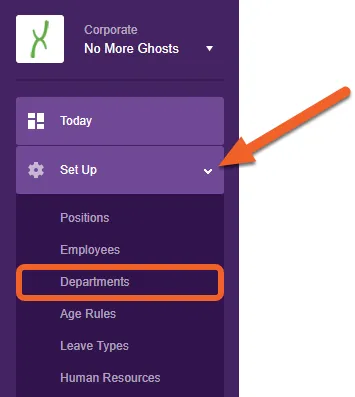
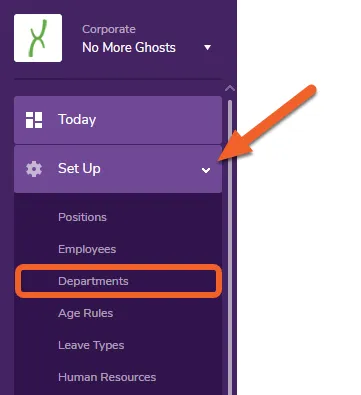
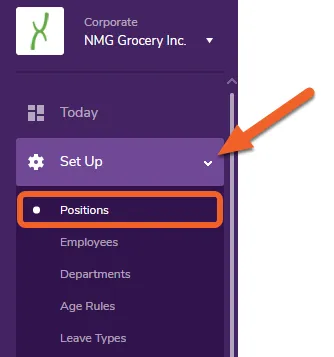
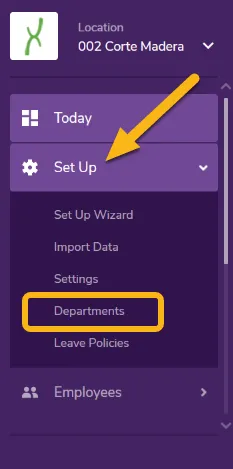
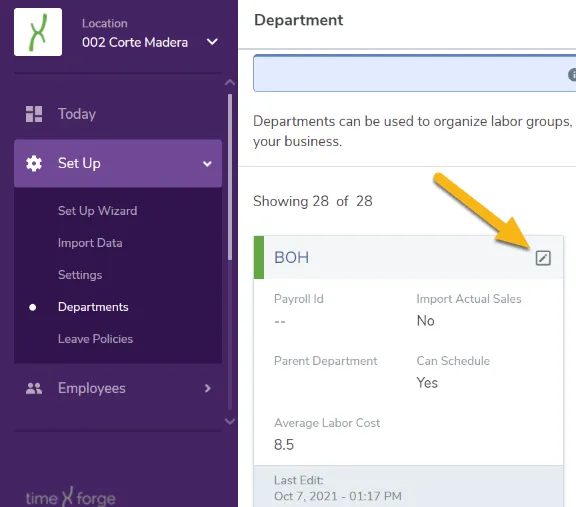
Navigate to the Departments page under the Set Up tab
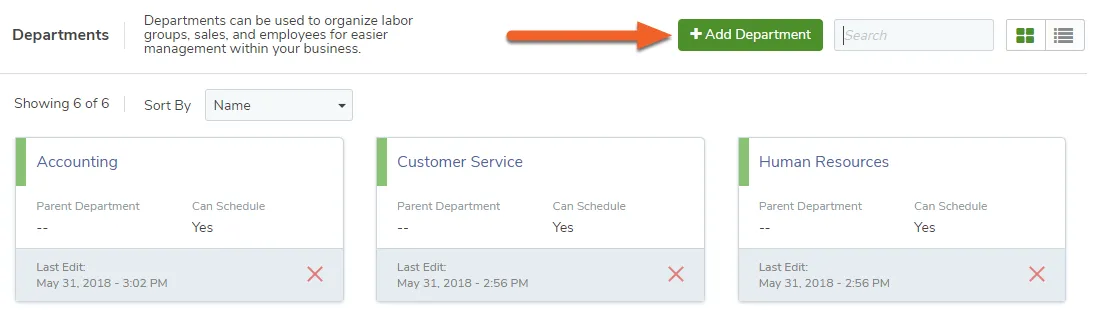
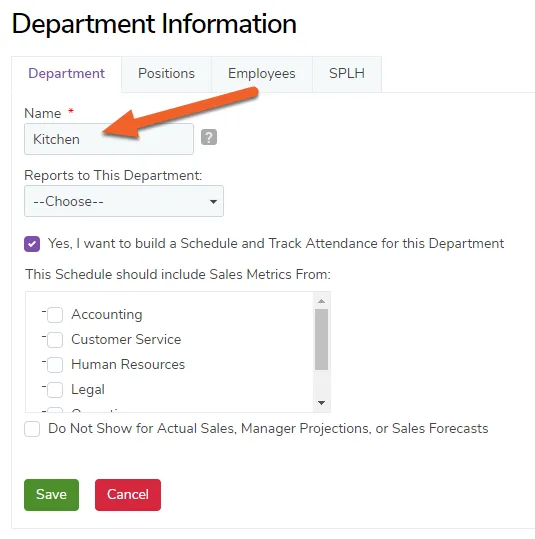
Choose a name, a parent department if this is a sub-department, and whether you want to schedule and track attendance for this department.
For example, if your business is a grocery store, you might have departments such as Produce, Dairy, Bakery, and Deli. Restaurants might have Front of House and Back of House departments. A hospitality business might have Housekeeping, Kitchen, and Front Office.
For this guide, we’ll create a department called Kitchen.
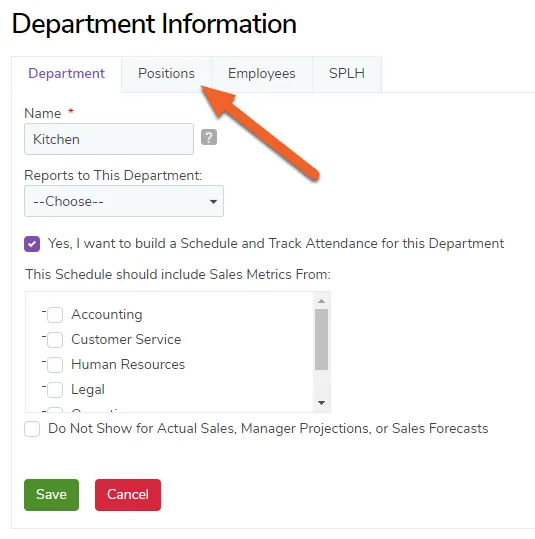
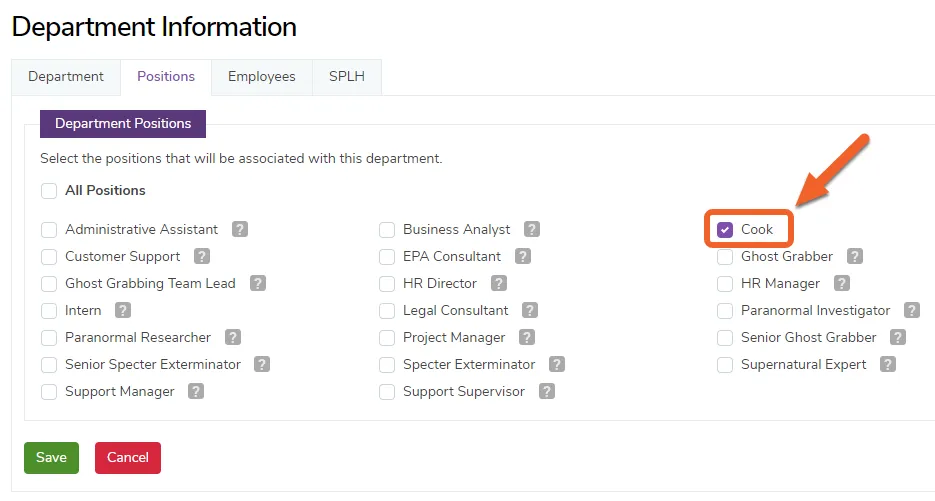
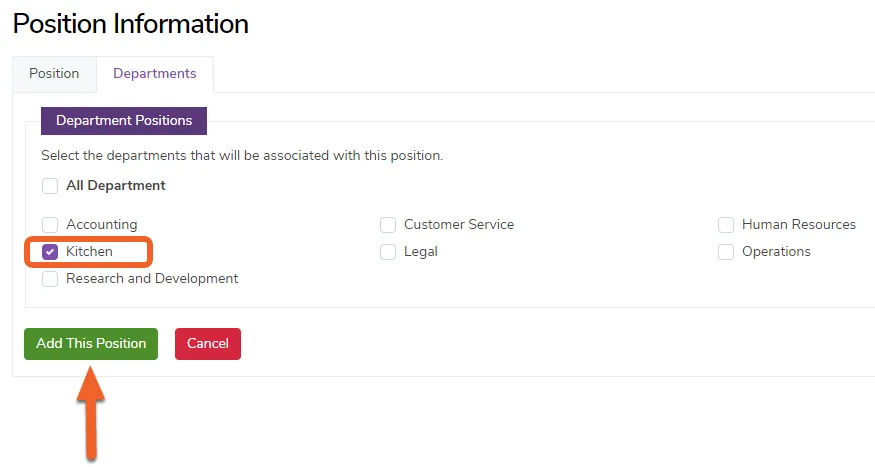
Check the box next to each position you would like to appear in this department. Hovering over the [?] will tell you what other departments the position is already assigned to.
For the new Kitchen department we just created, we’ll add the position Cook, which hasn’t been assigned to any other departments yet:
The fourth tab, SPLH, allows Managers to run Sales projections and build shifts based on projected sales. To learn more about how to add SPLH calculations to your departments, contact our Support team!
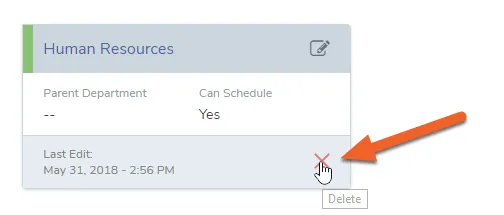
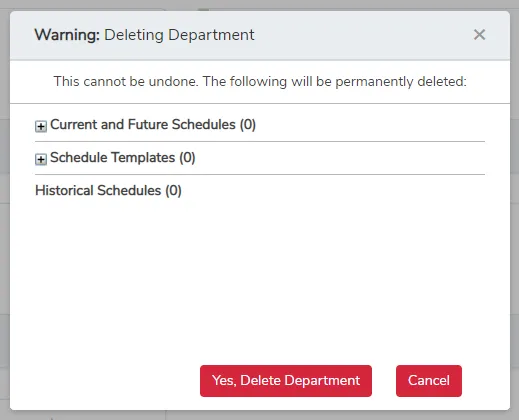
While in grid view, to delete a department you’ve already created, click the red X button on the card. (In tabular/list view, you’ll see a red Delete link.)
You will see warnings about any past, current, and future schedules and schedule templates that will be affected. Deleting a department cannot be undone, so you should make sure your employees are properly reassigned before deleting!
Add, edit, or delete positions
TimeForge is a complete labor management suite that helps with difficult tasks such as scheduling, attendance tracking, and watching labor costs. In order to build an employee schedule, you will need to enter in employees’ job positions. Don’t worry though, adding, editing, and removing positions (also known as job codes in some industries) from within TimeForge is simple!
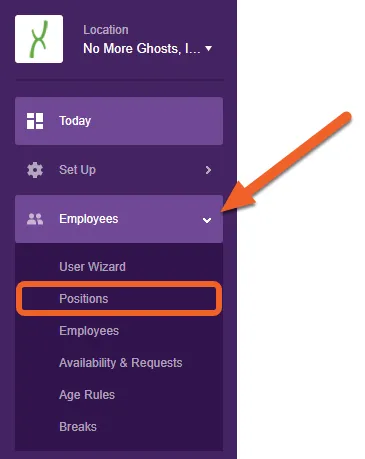
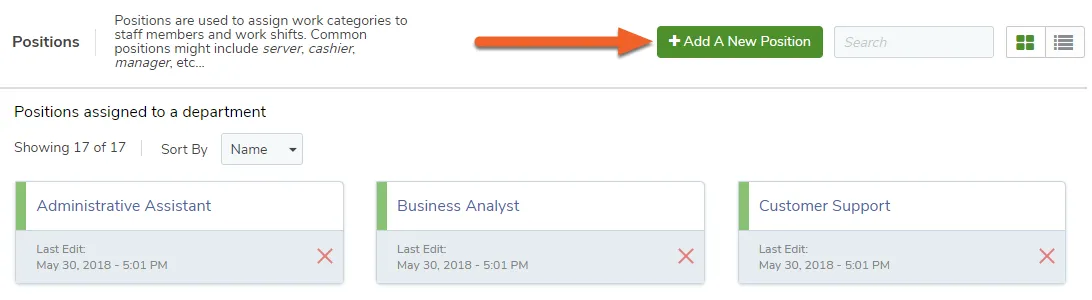
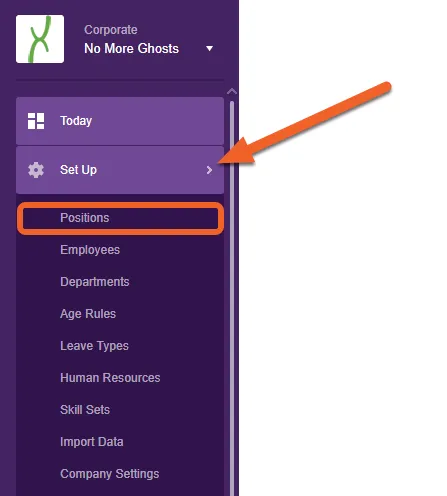
Navigate to the Positions page under the Set Up tab
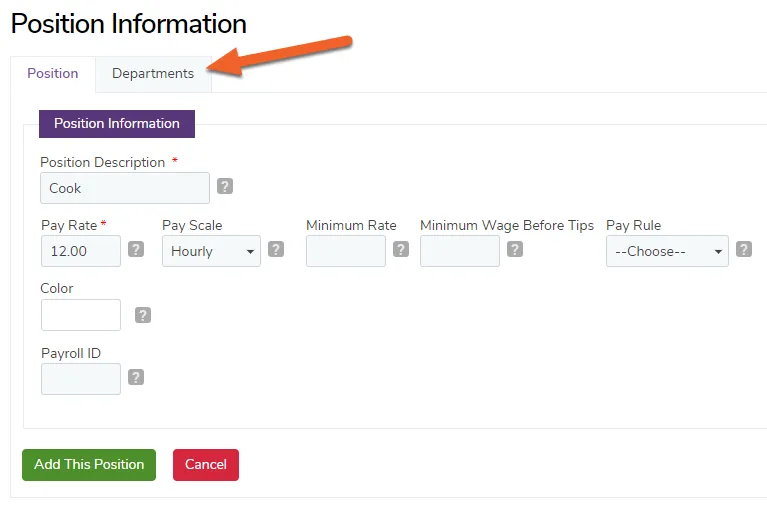
Required fields are marked with a red asterisk(*).
Each position must have a unique description, e.g. Line Cook 1, Line Cook 2, Line Cook 3.
The Color option allows you to choose a color for this position on the schedule.
Other fields include the base pay rate and pay scale, which can include hourly or salaried, bi-weekly pay periods, and even one-time payments, such as a live band or other entertainment. Choose an appropriate overtime calculation if desired.
If you are exporting payroll to a payroll system, you may need to include a Payroll identifier for the payroll company. Include this in the “Payroll ID” section as well.
When finished, click the Departments tab if you have enabled departments in TimeForge, otherwise click Add This Position.
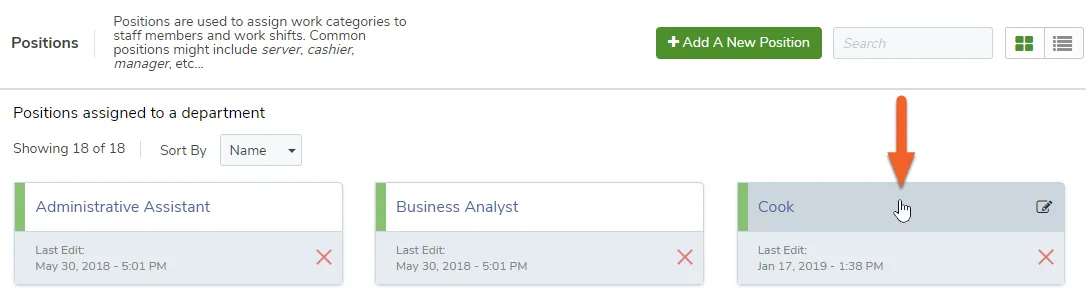
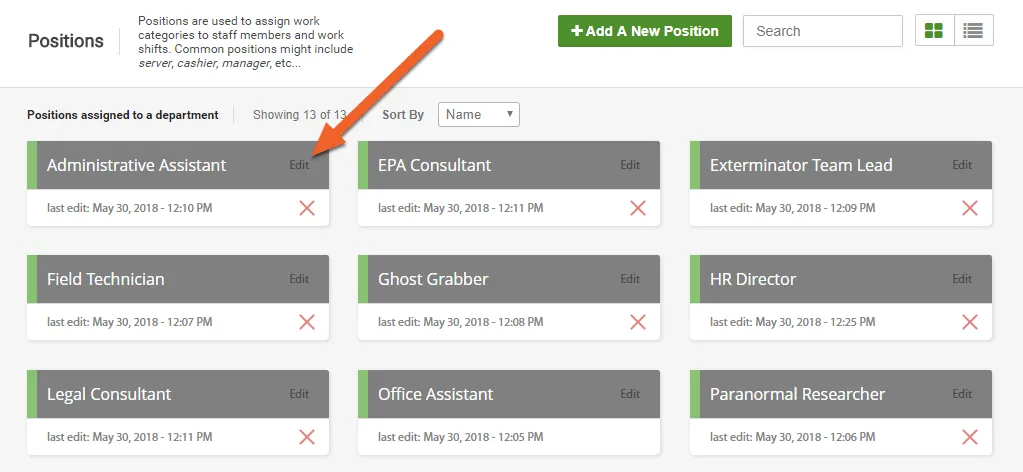
To edit (or delete) a position at the Corporate level, you must first assign it to a department to which you have access. While in grid view, click anywhere on a Position to edit its details.
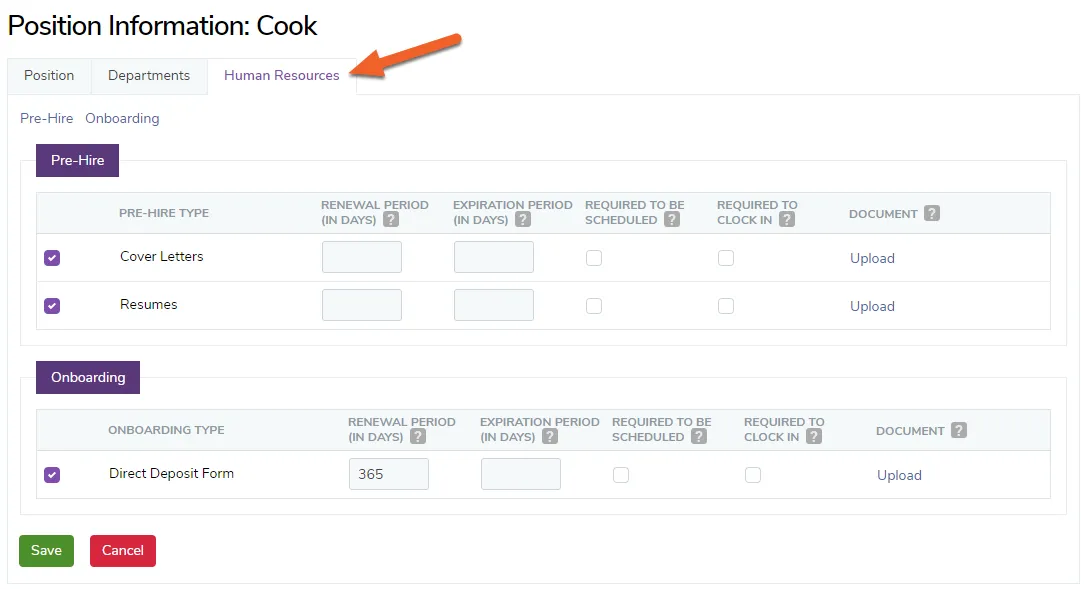
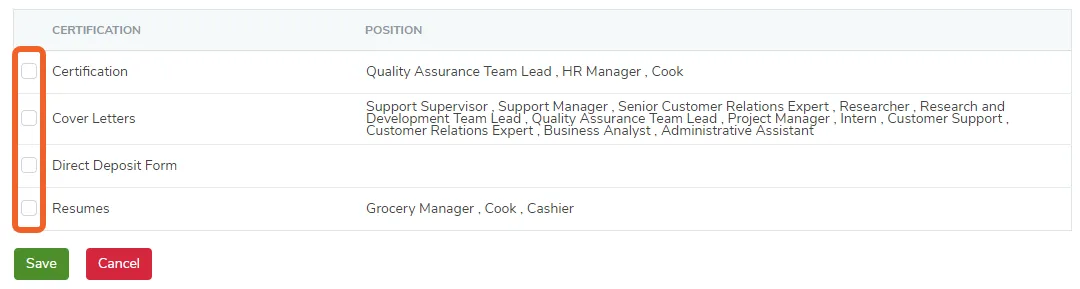
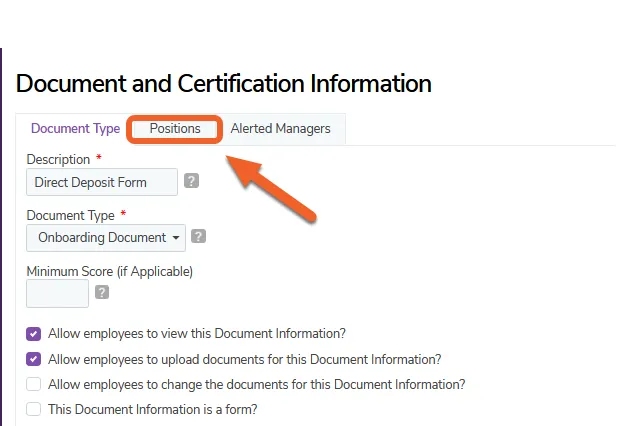
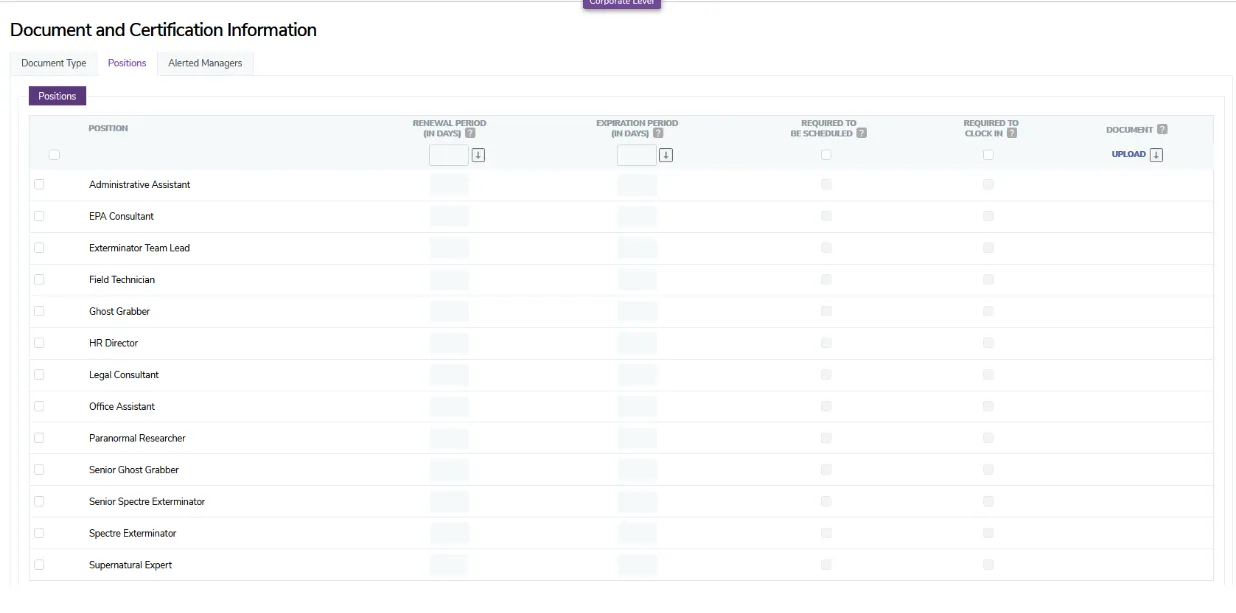
When you edit a position from the Corporate level, you may notice additional tabs, such as the Human Resources tab, which will allow you to specify the HR documents required for this position:
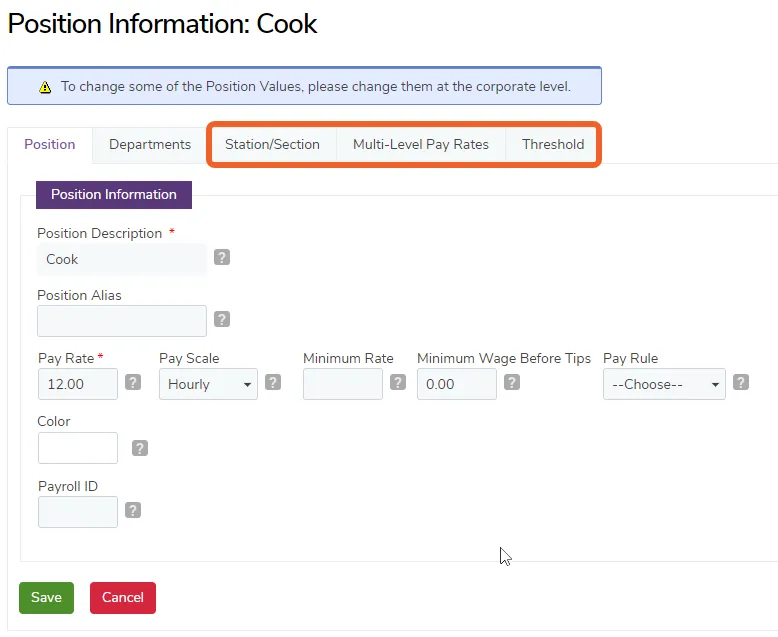
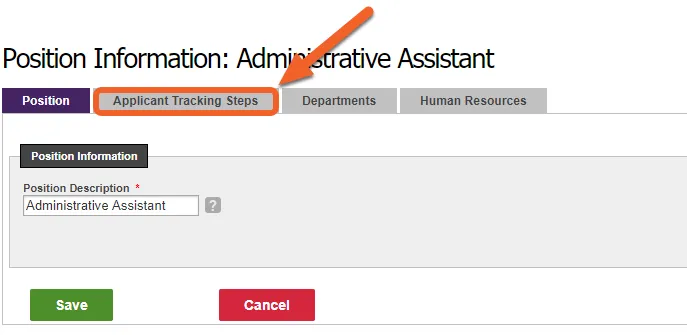
When you edit a position at the Location level, you may see additional tabs for Applicant Tracking Steps (if you have TimeForge HR), Station/Section, Multi-Level Pay Rates, and Threshold:
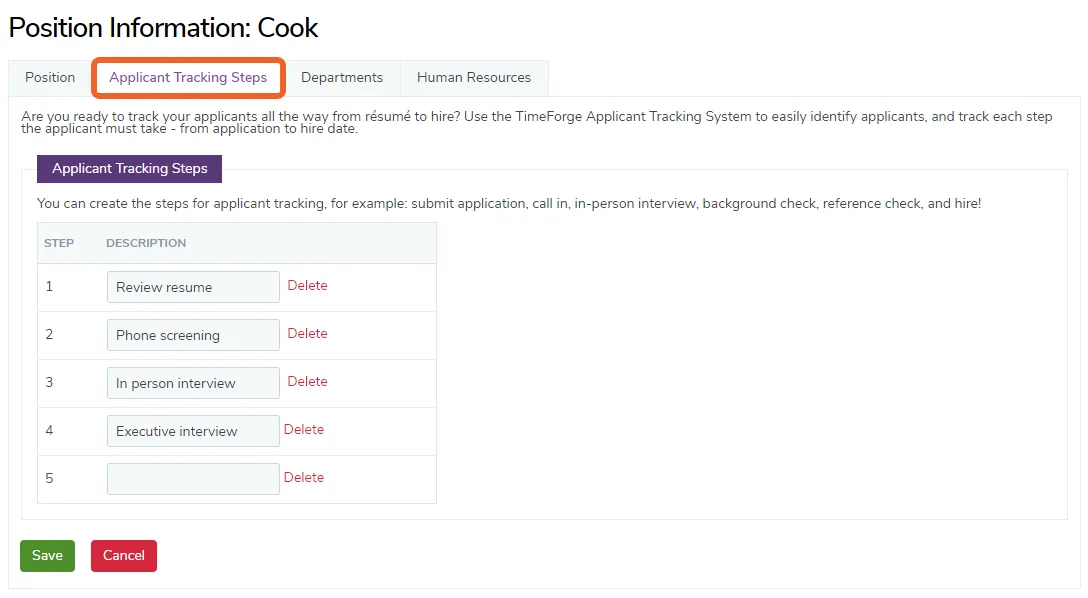
Applicant Tracking Steps
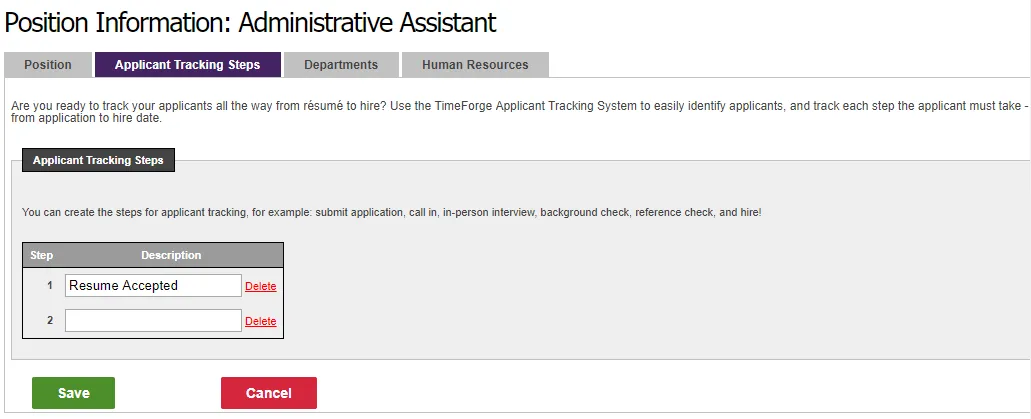
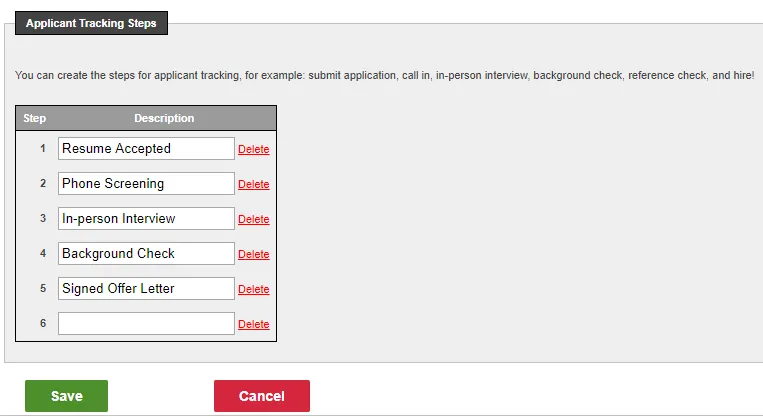
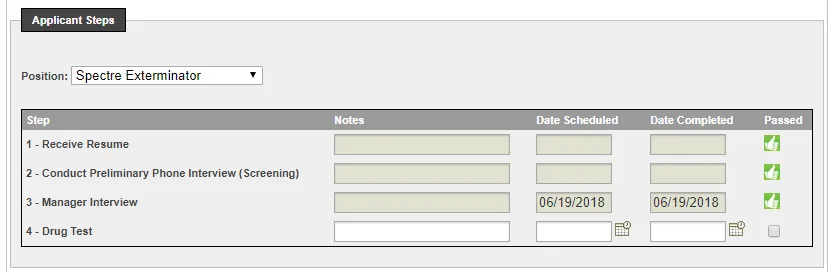
Applicant Tracking is available with the TimeForge Human Resources package and can be used to keep track of applicants through each step of the review and hiring process, such as interviews, paperwork, and drug test reports. This tab will appear at both the Corporate and Location levels.
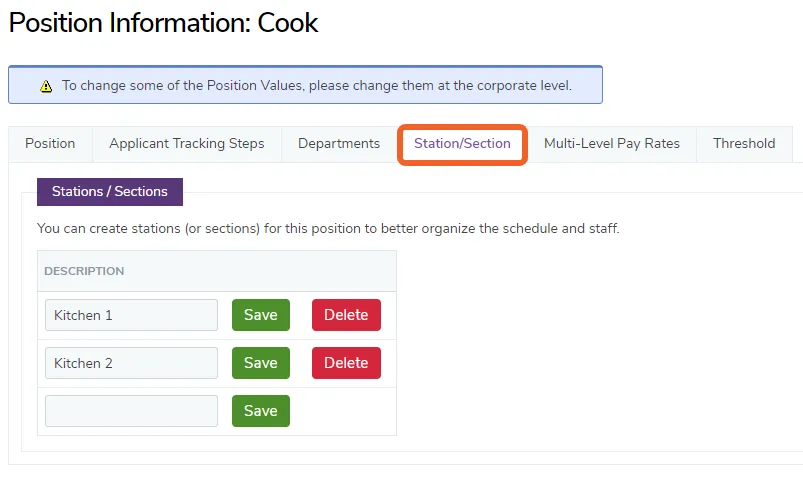
Each position can have a number of sections or stations associated with it, which are specified for each location. This will allow you to schedule very specifically, if necessary.
A few examples of where this might be helpful:
A Server position might have stations or sections for each grouping of tables, such as Section 1, Section 2, Section 3, etc.
A Lifeguard position might have stations or sections for each lifeguard tower or chair, such as Dive Chair, Kiddie Pool, Lap Pool, etc.
A Cook position might have stations or sections for each cooking position, such as Prep, Pizza, Grill, etc.
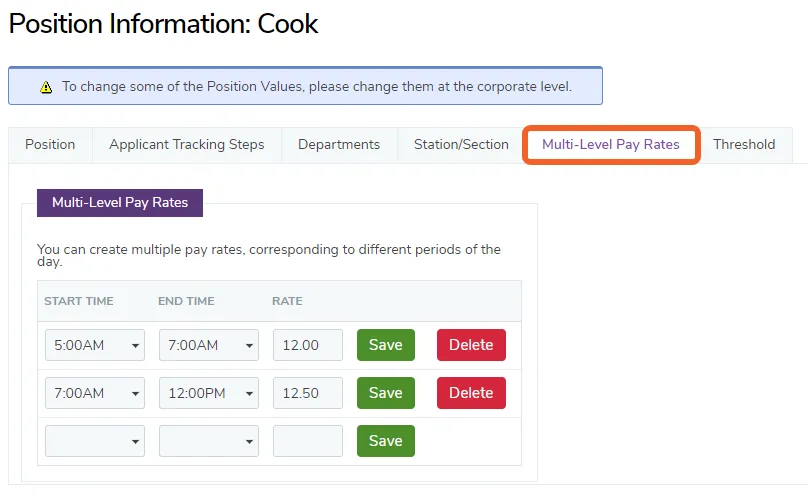
Multi-Level Pay Rates
In some states and municipalities, staff members are paid different rates based on the time they arrive. TimeForge supports this by allowing you to enter different rates during different time periods throughout the day.
For example, if a Server shows up before your restaurant opens, the pay rate may be lower than when the restaurant is operating.
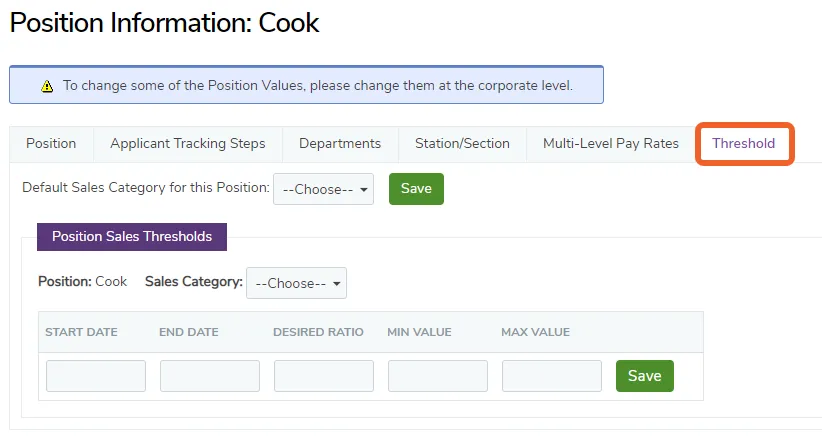
Threshold
The ability to set a sales threshold is available with TimeForge BI Lite (also referred to as TimeForge Sales). Here, you can assign a maximum labor cost to a specific job position.
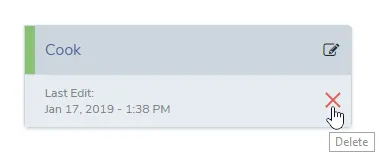
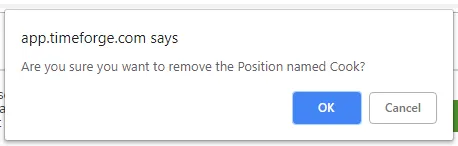
To remove a position, simply click on the red X or Delete link for that position. TimeForge will prompt for verification before removing the position.
Create permission groups to restrict access to certain features and settings
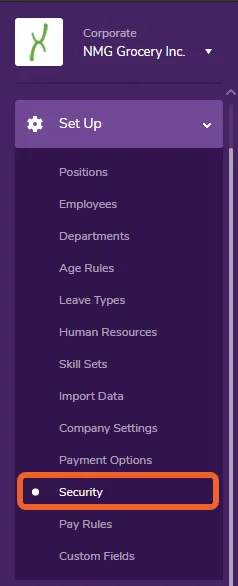
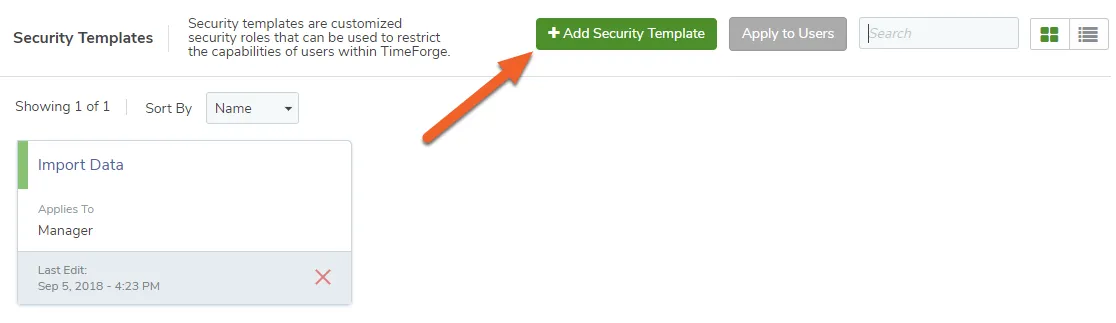
TimeForge Security Templates allow you to choose which Supervisors and Managers have access to view and change specific settings and data in TimeForge. Templates may be applied to individuals or entire Positions in TimeForge. This article will show you how to create and configure Security Templates.
Because Security Templates offer so much power and flexibility in customizing TimeForge to work just the way you want it to, there are many options to consider. Please feel free to contact our Support team at any time if you’d like a walkthrough or demo of these options.
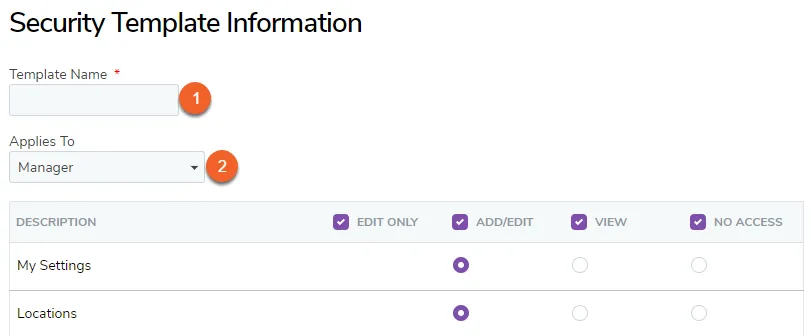
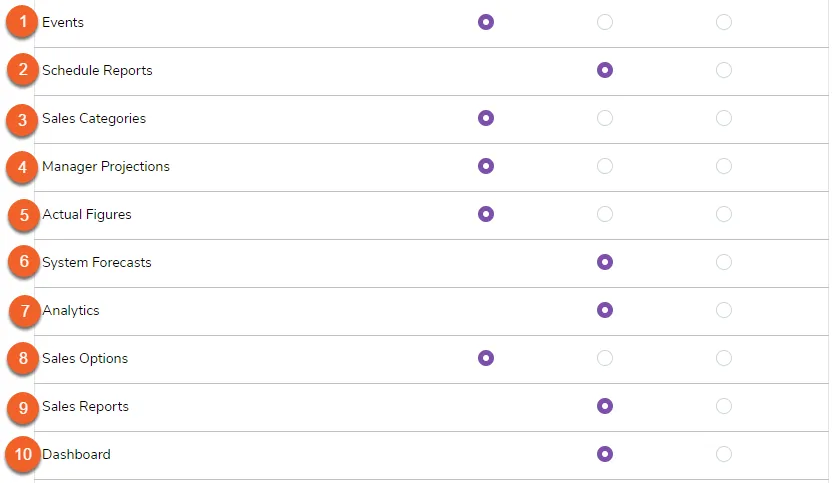
Click on this drop-down menu to select whether the Security Template should apply to Managers or Supervisors. Some options can only be applied to Managers, not Supervisors. These are:
Locations
Departments
Leave Types
Payment Options
Corporation Hierarchy
Company Settings
Security Templates
Positions
Own Employee Account
Unassigned Locations
Add/Edit Work Periods
Sales Categories
Sales Options
Dashboard
Edit Attendance
Attendance Reports (unless selected from box at bottom)
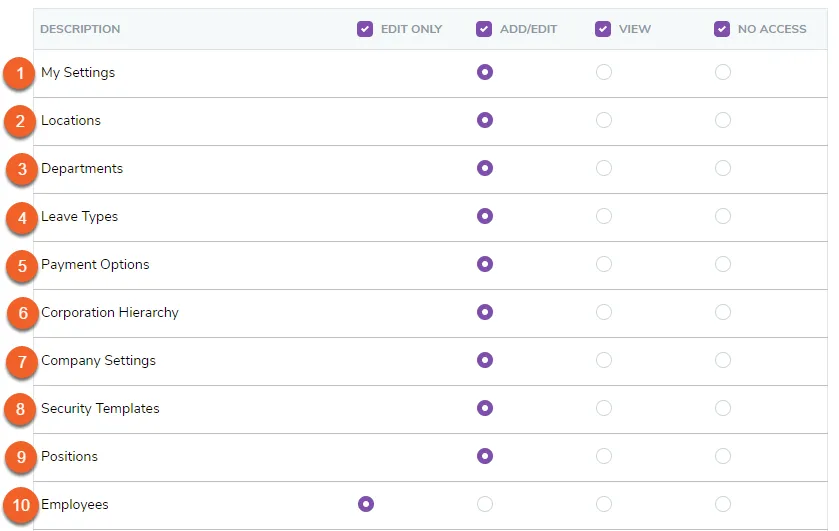
These are the options that correspond with each item in the Description column. You can choose to have each item either be Add/Edit, where the user will actually be able to alter the information, View, where users can only see that information, and No Access, where users won’t be able to access the information at all.
My Settings - allows users to change or view their own personal settings, including usernames, passwords and alerts, in TimeForge.
Locations - allows users to change or view information related to multiple Locations within TimeForge. Managers and Supervisors with Add/Edit access can add additional locations. Supervisors and Managers with access to View or Add/Edit can see information regarding any location in the corporation.
Departments - allows users to change or view the Departments page in TimeForge. Managers and Supervisors with Add/Edit access can add and edit department information. Managers and Supervisors with access to View or Add/Edit can see department information on the Departments page. Managers and Supervisors with access only to View departments will be unable to edit department information.
Leave Types - allows users to change or view information related to Leave Types (e.g. sick or vacation time) in TimeForge. Managers and Supervisors with Add/Edit access can add and edit Leave Types. Managers and Supervisors with access to View or Add/Edit Leave Types can see information regarding existing Leave Types.
Payment Options - allows users to change or view the Payment Options page. Managers and Supervisors with Add/Edit access can change payment methods and the company’s TimeForge plan details. Managers and Supervisors with access to View or Add/Edit Payment Options can see information regarding payment to and the cost of TimeForge on the Payment Options page. Users with access only to View Payment Options cannot see options to “Cancel TimeForge” accounts, “Change Payment Methods”, select email addresses that TimeForge will automatically “Send payment emails” to, or “View Previous Invoices”.***
Corporation Hierarchy - allows users to change or view the corporate structure of the company in TimeForge, including the regional or district groupings of locations. The Corporation Hierarchy also restricts access of Managers to only locations that they are assigned to. Managers and Supervisors with Add/Edit access can see, create and organize groupings of locations into the Corporation Heirarchy. Managers and Supervisors with access to View the Company Hierarchy can see the existing Corporation Hierarchy, but cannot see options to add “New” groupings, or “Edit”/“Delete” existing groupings.
Company Settings - allows users to change or view settings for all locations in the corporation within TimeForge. Managers and Supervisors with Add/Edit access can see and alter Company Settings. Managers and Supervisors with access to View Company Settings can see the company’s settings, but cannot see the option to “Save” changes.
Security Templates - allows users to change or view Security Templates within TimeForge. Managers and Supervisors with Add/Edit access can add or alter Security Templates. Managers and Supervisors with access to View or Add/Edit Security Templates can view existing Security Templates.
Positions - allows users to change or view Positions within TimeForge. Managers and Supervisors with Add/Edit access can add or alter Positions. Managers and Supervisors with access to View or Add/Edit Positions can view existing Positions.
Employees - allows users to change or view Employees and employee information in TimeForge. Managers and Supervisors with Add/Edit access can view, add new employees, and edit existing employee information. Managers and Supervisors with access to View can see employee information, but cannot see the option to “Save” changes or new Employees.
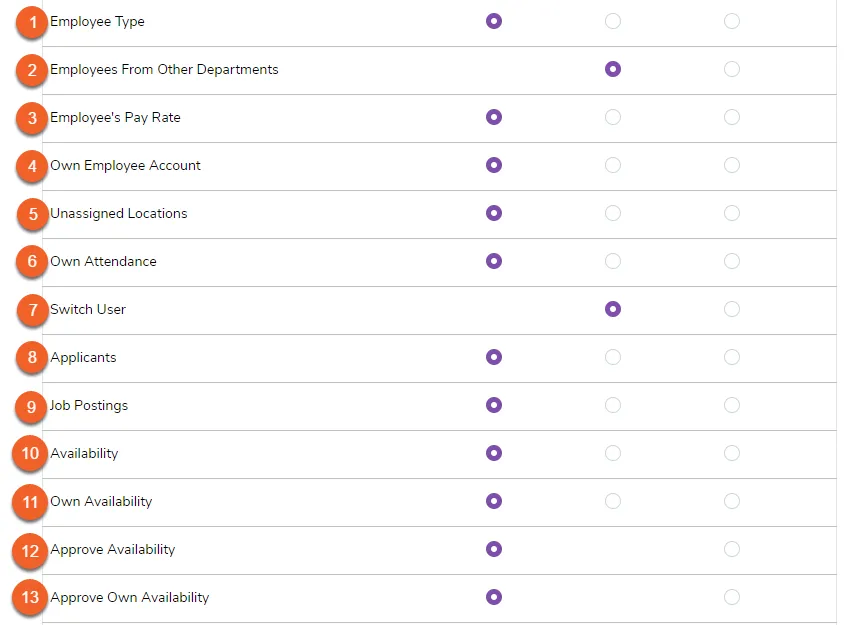
Employee Type - allows users to view or edit a staff member’s Employee Type. Staff members can be set as Employees, Supervisors, or Managers in TimeForge.
Employees From Other Departments - allows users to view employee information, including attendance, for employees in Departments the user is not assigned to. Managers and Supervisors with access to View can view employee information for employees in other Departments.
Employee’s Pay Rate - allows users to change or view employee Pay Rates. Managers and Supervisors with Add/Edit access can change and view employee Pay Rates. Managers and Supervisors with access to View can view employee Pay Rates, but cannot “Save” changes.
Own Employee Account - allows users to view and edit their own account information, including assigned Positions, Departments, and Locations. Managers and Supervisors with Add/Edit access can view and edit their own account information. Managers and Supervisors with access to View can view their own account information, but cannot “Save” changes.
Unassigned Locations - allows users to view and edit Locations that the user is not assigned to. Managers and Supervisors with Add/Edit access can view and edit Unassigned Locations. Managers and Supervisors with access to View can view Unassigned Locations, but cannot “Save” changes.
Own Attendance - allows users to view and edit their own attendance. Managers and Supervisors with Add/Edit access can view and edit their own attendance records. Managers and Supervisors with access to View can view their own attendance records, but cannot “Save” changes.
Switch User - allows users to switch into another user’s account. Managers and Supervisors with access to View can Switch User and access other users’ accounts.
Applicants - allows users to view or edit Applicant information, including employment applications and hiring information. Managers and Supervisors with Add/Edit access can view, edit, and add hiring information. Managers and Supervisors with access to View Applicants can view hiring information, but cannot “Save” changes.
Job Postings - allows users to view or edit Job Postings in TimeForge.
Availability - allows users to view or edit employee Availability. Managers and Supervisors with Add/Edit access can view, add, and edit Availability. Managers and Supervisors with access to View can view Availability, but cannot “Save” changes or new Availability.
Own Availability - allows users to view or edit their own availability. Managers and Supervisors with Add/Edit access can view, add, and edit their Own Availability. Managers and Supervisors with access to View can view their Own Availability, but cannot “Save” changes.
Approve Availability - allows users to approve availability requests from other staff members.
Approve Own Availability - allows users to approve their own availability requests.
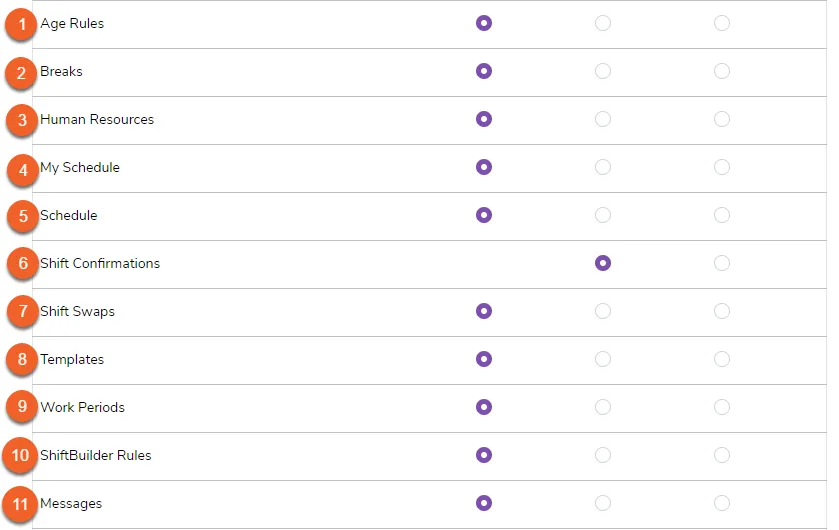
Age Rules - allows users to view or edit Age Rules, including the number of hours and particular times that minor employees may work. Managers and Supervisors with Add/Edit access can view, add, and edit Age Rules. Managers and Supervisors with access to View can view Age Rules, but cannot “Save” changes.
Breaks - allows users to view or edit the Breaks page, including adding Break Rules. Managers and Supervisors with Add/Edit access can view, create, and change Break Rules. Managers and Supervisors with access to “View” Breaks can see existing Break Rules, but cannot “Save” changes.
Human Resources - allows users to change or view the available Human Resource types, including employee certifications and onboarding documents. Managers and Supervisors with Add/Edit access can view, upload, and edit Human Resource types. Managers and Supervisors with access to View Human Resources can view existing Human Resource types, but cannot “Save” changes.
My Schedule - allows users to view or edit their own Schedules. Managers and Supervisors with Add/Edit access can view and edit their own Schedules. Managers and Supervisors with access to View can view their own Schedules, but cannot make changes.
Schedule - allows users to view or edit employees’ schedules. Managers and Supervisors with Add/Edit access can view, add, and edit employee schedules. Managers and Supervisors with access to View schedules can view employee schedules.
Shift Confirmations - allows users to view or edit Shift Confirmations, including shifts that employees have confirmed or have not confirmed. Managers and Supervisors with access to “View” can view Shift Confirmations.
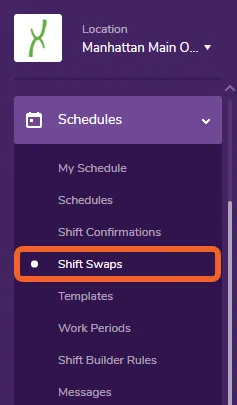
Shift Swaps - allows users to view or edit Shift Swaps, including shifts that employees have given up and picked up. Managers and Supervisors with Add/Edit access can view, add, and edit Shift Swaps. Managers and Supervisors with access to View can view Shift Swaps.
Templates - allows users to view or edit Schedule Templates. Managers and Supervisors with Add/Edit access can create, edit, and use schedule Templates. Managers and Supervisors with access to View can view schedule Templates.
Work Periods - allows users to view or edit Work Periods, including defining day shifts or night shifts. Managers and Supervisors with Add/Edit access can view, add, and edit Work Periods. Managers and Supervisors with access to View can view defined Work Periods.
ShiftBuilder Rules - allows users to view or edit ShiftBuilder Rules, which ensure that ShiftBuilder creates shifts that are the appropriate duration. Managers and Supervisors with Add/Edit access can view, add, and edit ShiftBuilder Rules. Managers and Supervisors with access to View can view defined ShiftBuilder Rules.
Messages - allows users to view or send Messages in TimeForge. Managers and Supervisors with Add/Edit access can send and receive Messages. Managers and Supervisors with access to View can receive Messages.
Events - allows users to view or edit Events in TimeForge.
Schedule Reports - allows users to view and run Schedule Reports. Managers and Supervisors with access to View can run and view Schedule Reports.
Sales Categories - allows users to view, edit, or add Sales Categories, such as “Net Sales” or “Total Sales”. Managers and Supervisors with Add/Edit access can view, create, and edit Sales Categories. Managers and Supervisors with access to View can view existing Sales Categories.
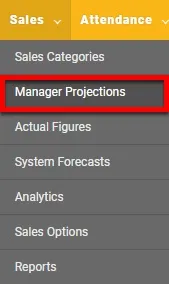
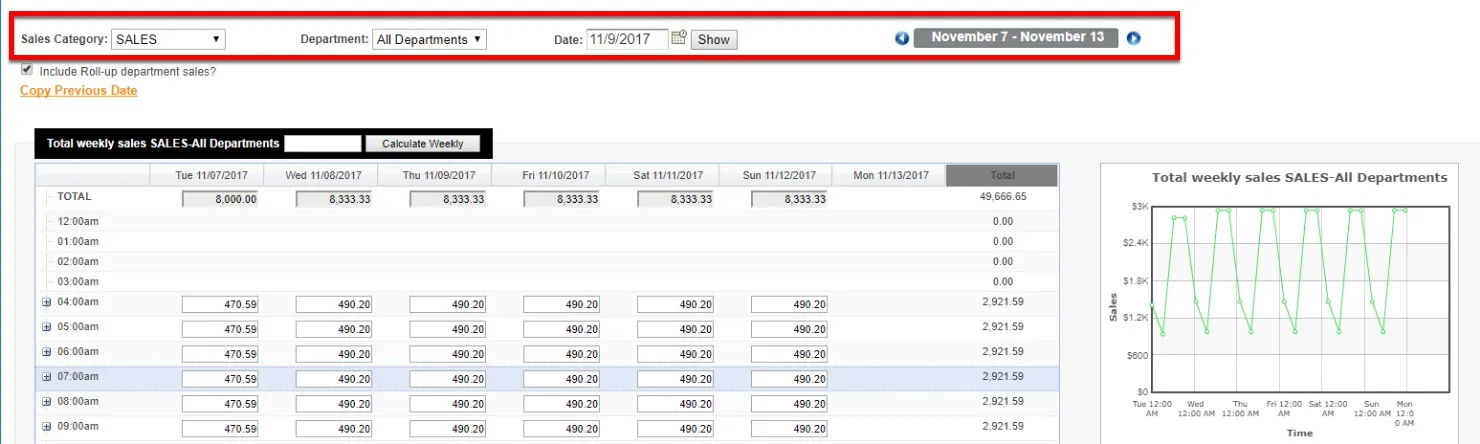
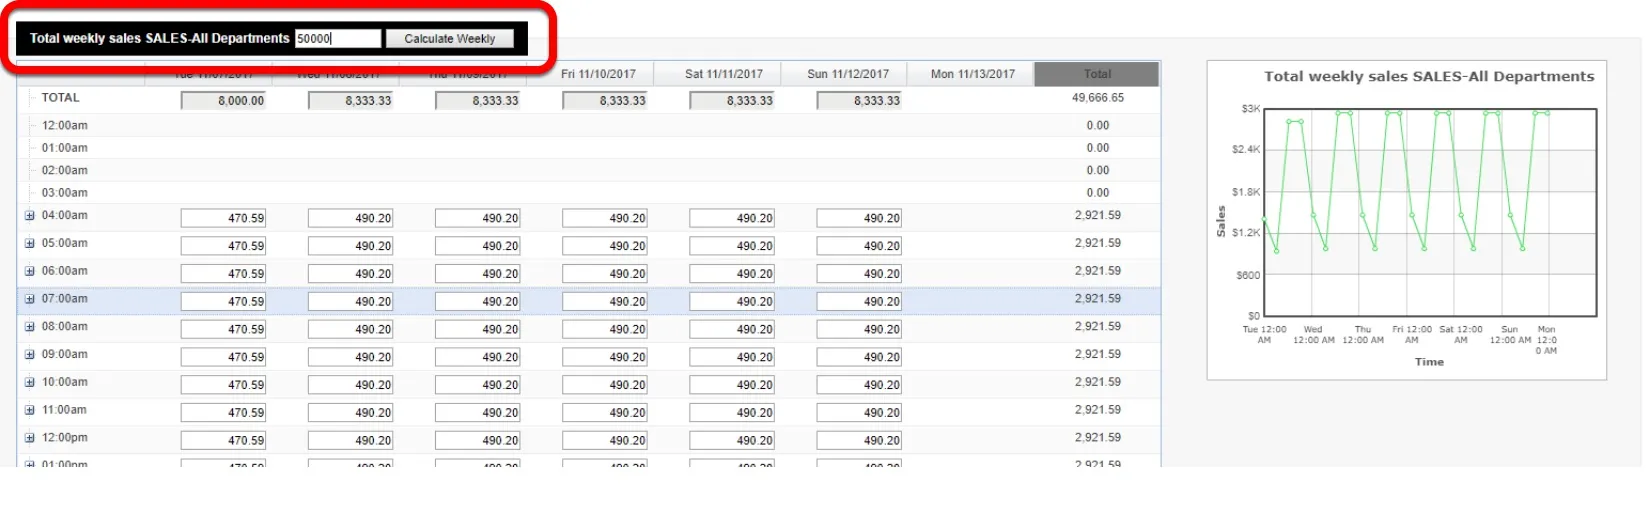
Manager Projections - allows users to view or edit Manager Projections for Sales Categories. Managers and Supervisors with Add/Edit access can view, add, and edit Manager Projections. Managers and Supervisors with access to View can view Manager Projections.
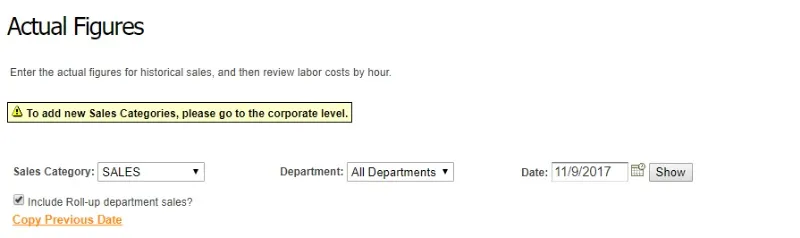
Actual Figures - allows users to view or edit Actual Figures for Sales Categories. Managers and Supervisors with Add/Edit access can view, add, and edit Actual Figures. Managers and Supervisors with access to View can view Actual Figures.
System Forecasts - allows users to view System Forecasts for Sales Categories. Managers and Supervisors with access to View can view Sales Forecasts.
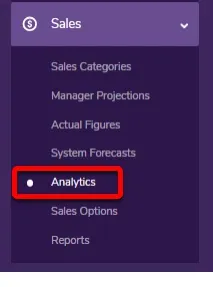
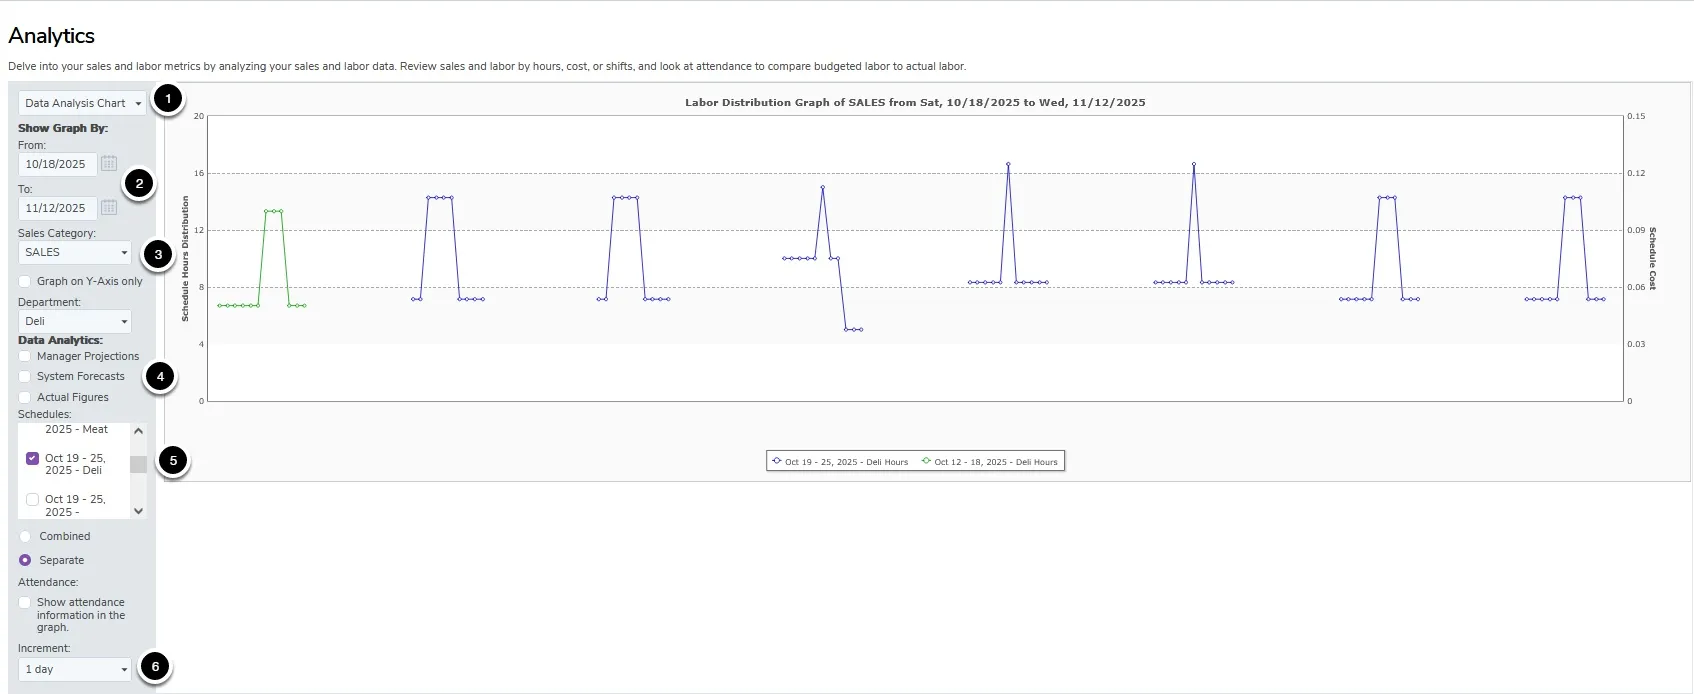
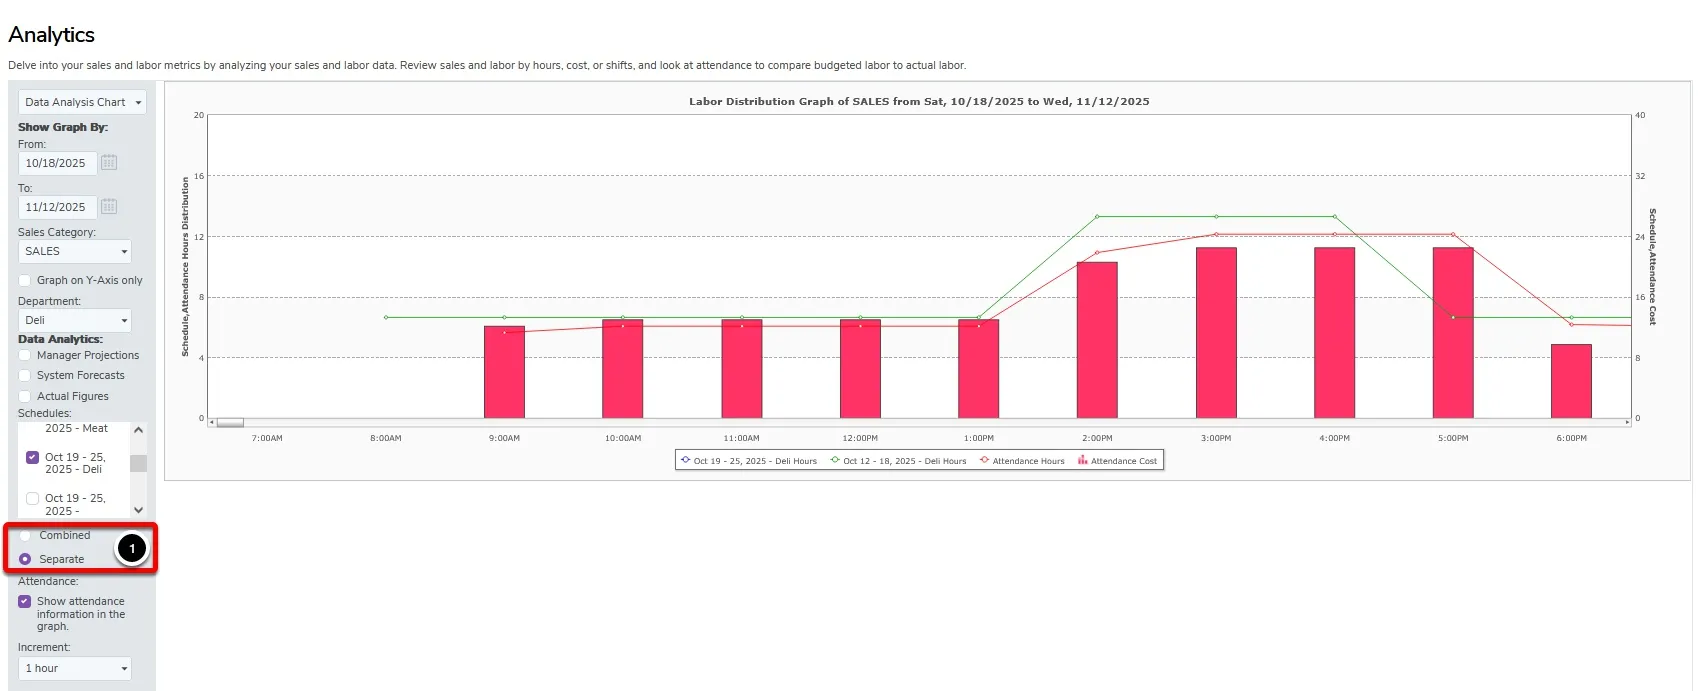
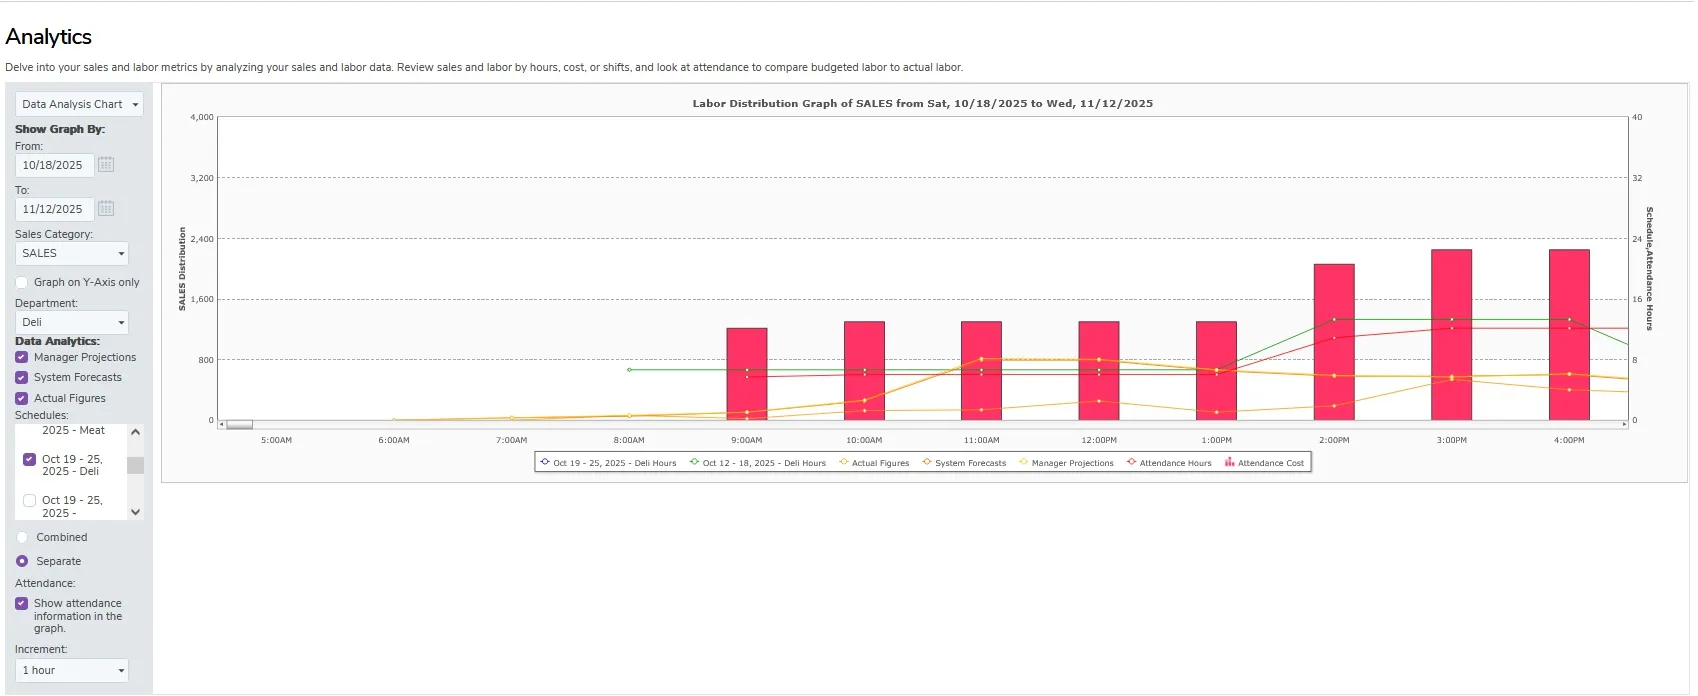
Analytics - allows users to view the various Analytics TimeForge provides regarding Sales Categories. Managers and Supervisors with access to View can view the Analytics page in TimeForge.
Sales Options - allows users to view and alter Sales Options, including settings for sales and labor comparison. Managers and Supervisors with Add/Edit access can adjust Sales Options. Managers and Supervisors with access to Add/Edit or View can view existing Sales Options.
Sales Reports - allows users to view the Sales Reports page, which includes reports that compare sales and labor. Managers and Supervisors with access to View Sales Reports can access the Sales Reports page.
Dashboard - allows users to view the Dashboard page in the Sales tab. The Dashboard details a variety of information related to actual, projected, and forecasted sales. Managers and Supervisors with access to View the Dashboard can view the data on the Dashboard page.
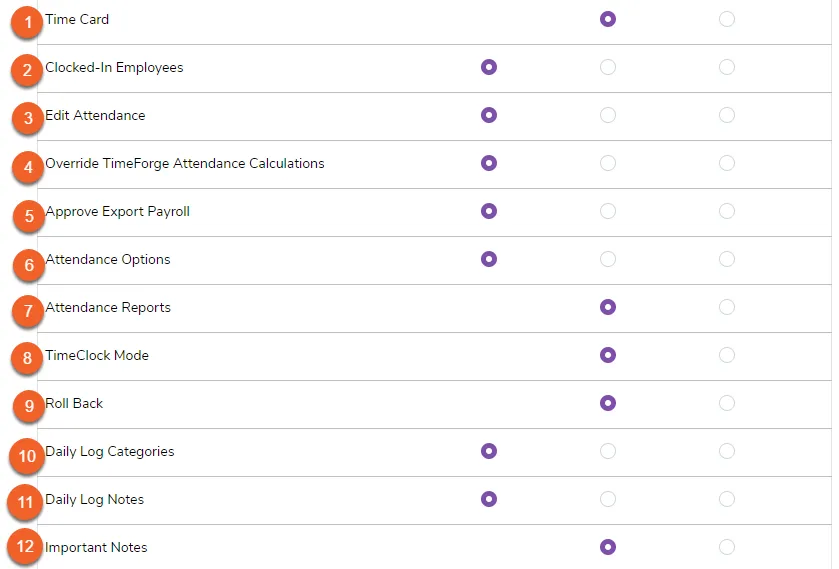
Time Card - allows users to view their own Time Card. Managers and Supervisors with access to View their own Time Cards can view attendance information on the Time Card page.
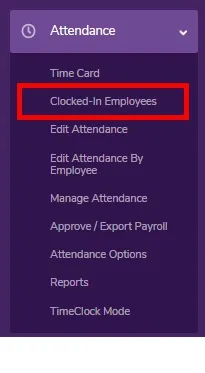
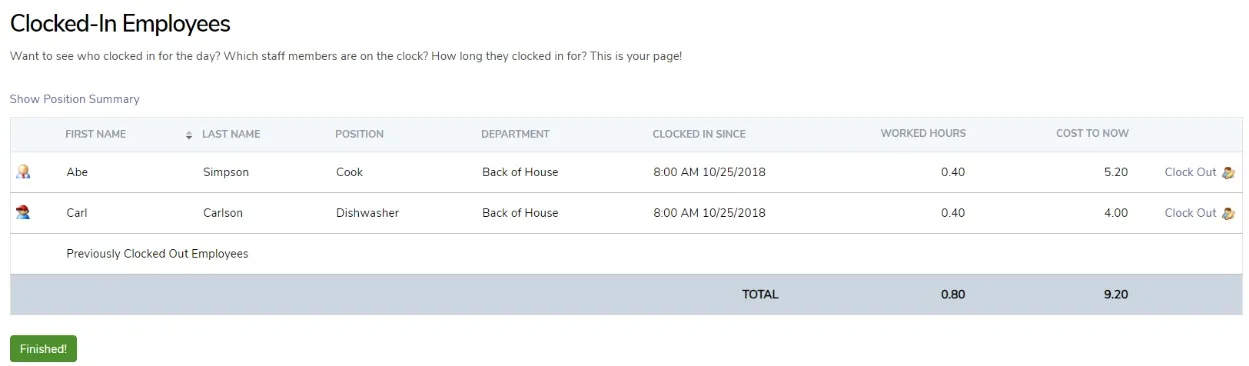
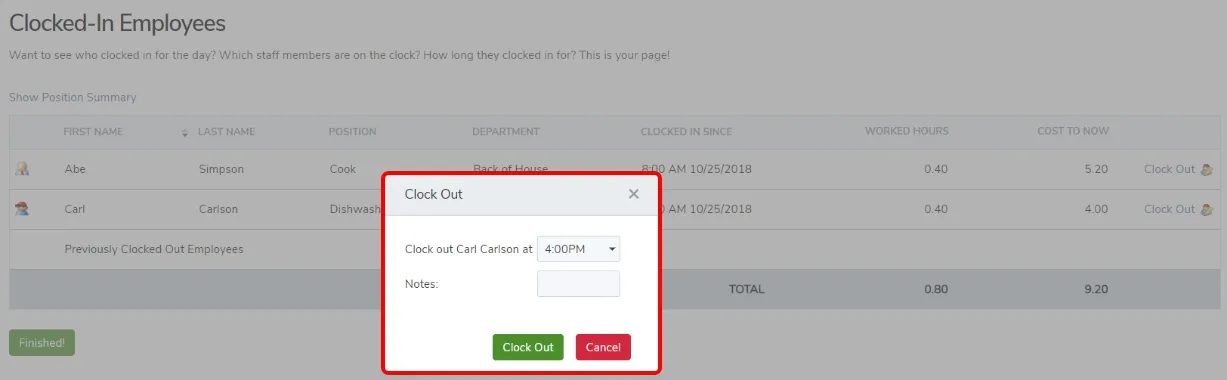
Clocked-In Employees - allows users to view and update the Clocked-in Employees page, which displays all employees who are currently clocked in. Managers and Supervisors with access to Add/Edit can view clocked-in employees and clock employees out from the “Clocked-In Employees” page (provided that employees clocked in with the TimeForge.com website and not with integrated hardware). Managers and Supervisors with access to View the “Clocked-In Employees” page can view employees who are currently clocked in.
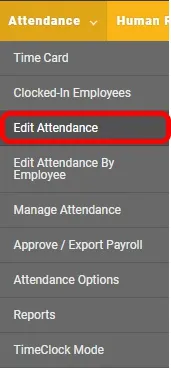
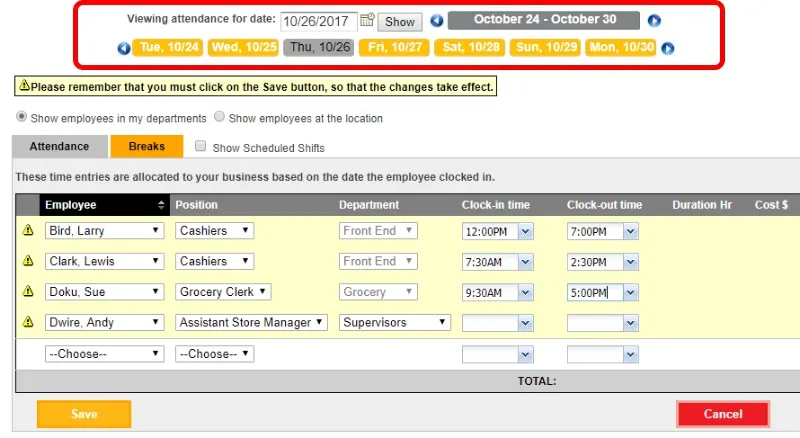
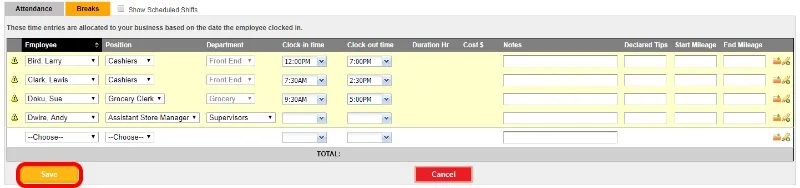
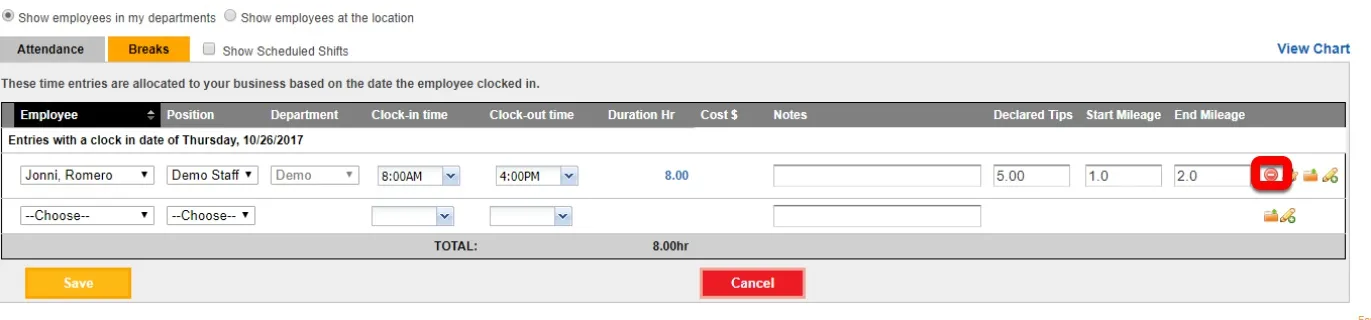
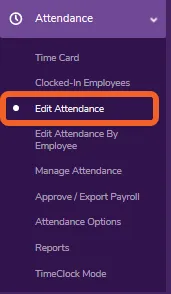
Edit Attendance - allows users to view and make changes on the Edit Attendance page, including adjustments made to punches and breaks. Managers and Supervisors with access to Add/Edit can view and edit attendance entries. Managers and Supervisors with access to View the “Edit Attendance” page can to view attendance entries.
Override TimeForge Attendance Calculations - allows users to view and edit the time duration of attendance entries, without editing the clock in and out times for punches. Managers and Supervisors with access to Add/Edit TimeForge Attendance Calculations can view and adjust punch durations without adjusting clock in and out times. Managers and Supervisors with access to View overridden TimeForge attendance calculation can view adjustments to punch duration.
Approve Export Payroll - allows users to access the Approve/Export Payroll page, which includes the option to apply PTO and export to a select payroll provider. Managers and Supervisors with access to Add/Edit this page can edit, approve, and export payroll. Managers and Supervisors with access to View this page can view payroll information.
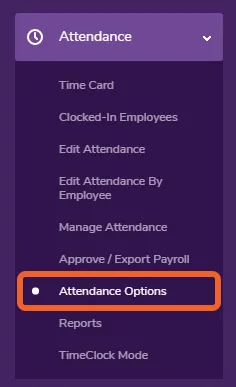
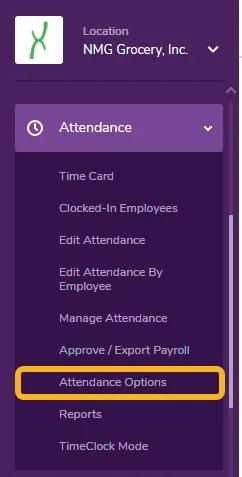
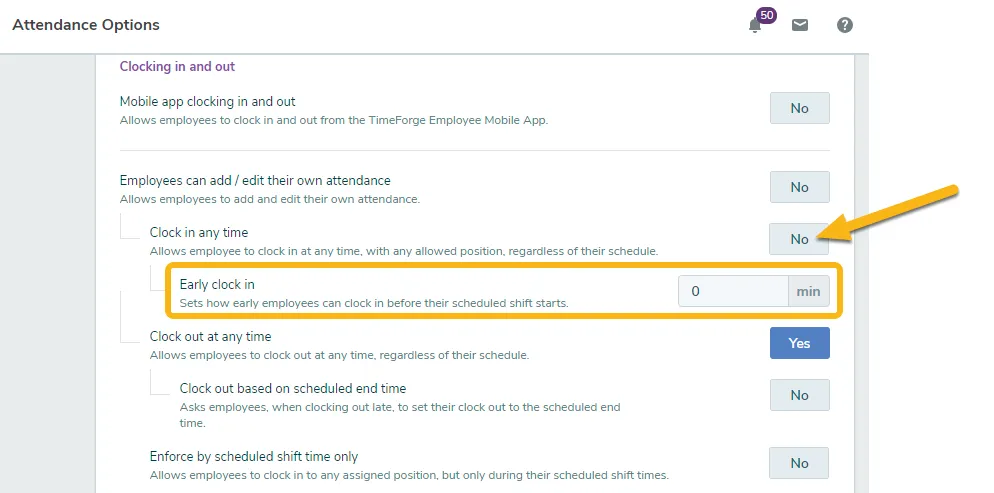
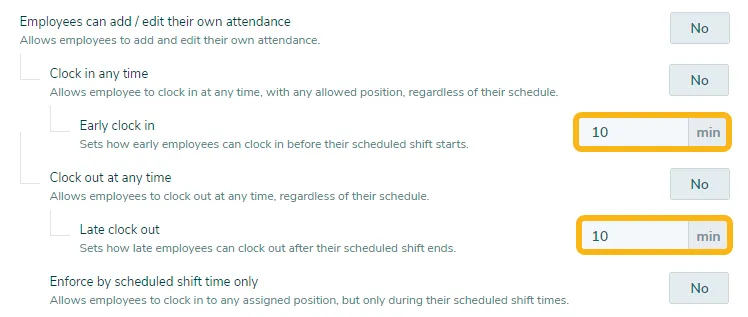
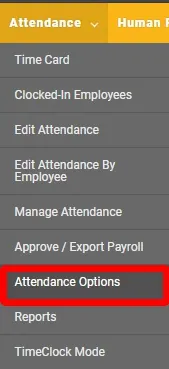
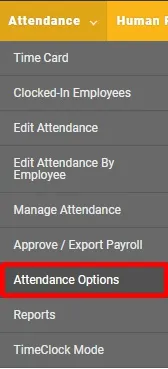
Attendance Options - allows users to view and edit the “Attendance Options” page. Managers and Supervisors with access to Add/Edit this page can view and change settings in “Attendance Options”. Managers and Supervisors with access to View this page can view existing “Attendance Options”, but cannot “Save” changes.
Attendance Reports - allows users to run and view Attendance Reports, including employee time sheets and payroll reports. Managers and Supervisors with access to View Attendance Reports may run and view reports.
TimeClock Mode - allows users to access TimeClock Mode, which allows a computer to operate solely as a time clock. Managers and Supervisors with access to View TimeClock Mode can enable and disable TimeClock Mode.
Roll Back - allows users to roll back pay periods for adjustments. This setting only controls roll backs – actual approval of pay periods is controlled by the Approve Export Payroll setting (#5 above).
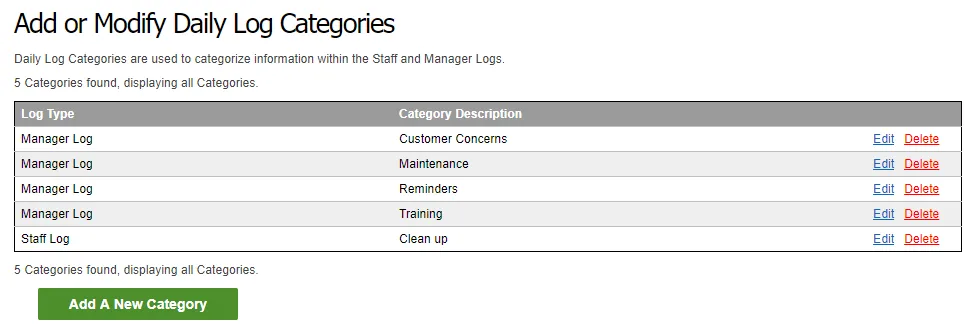
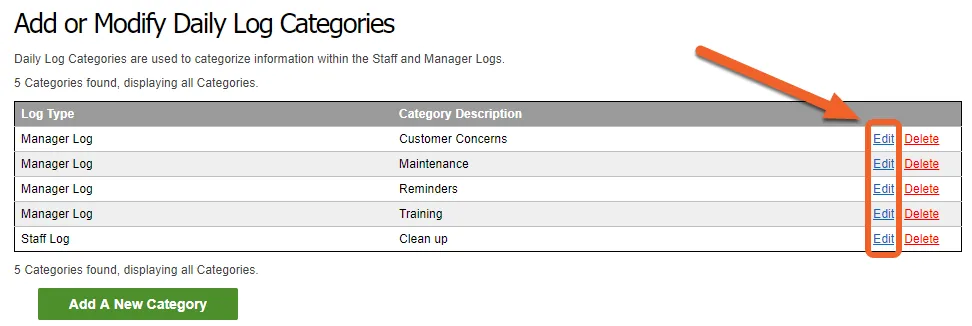
Daily Log Categories - allows users to view and edit Daily Log Categories, which may used to filter notations in the Daily log. Managers and Supervisors with access to Add/Edit Daily Log Categories can view, create, and edit Daily Log Categories. Managers and Supervisors with access to View Daily Log Categories can view existing Daily Log Categories, but cannot “Save” new Daily Log Categories..
Daily Log Notes - allows user to view and edit the Daily Log, which may be used to record important events and notes about the day. Managers and Supervisors with access to Add/Edit Daily Log Notes can view and add notations to the Daily Log. Managers and Supervisors with access to View Daily Log Notes can view notations made to the Daily Log, but cannot add new notations.
Important Notes - allows users to view Important Notes from the Daily Log. Important Notes are marked with a star on the Daily Log. Managers and Supervisors with access to View Important Notes will be able to view Important Notes when in the Daily Log.
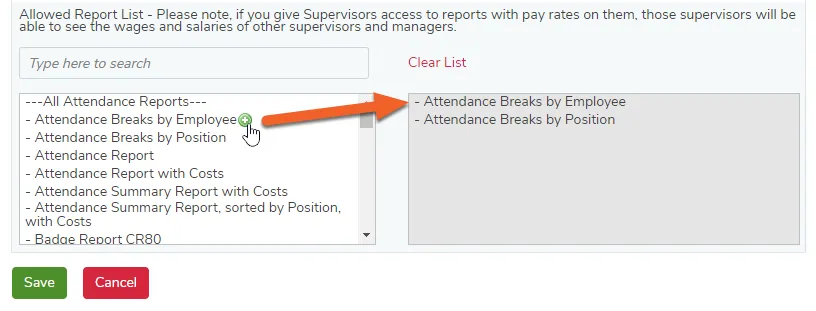
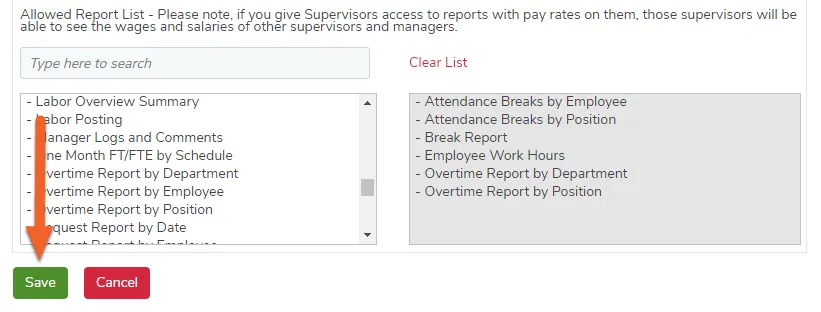
After selecting your settings for the security template, it’s time to select the reports you would like users to have access to. This list includes all Schedule, Attendance, and Sales reports available in TimeForge. Selecting reports from the left column adds them to the Allowed Reports List in the right column.
To add reports to the list:
Hover over the name of the report you wish add to the list
Click the green plus sign icon
The report will be moved into the right side box, and the users with the security template will have access.
Don’t forget to click Save at the bottom of the screen once you’re finished!
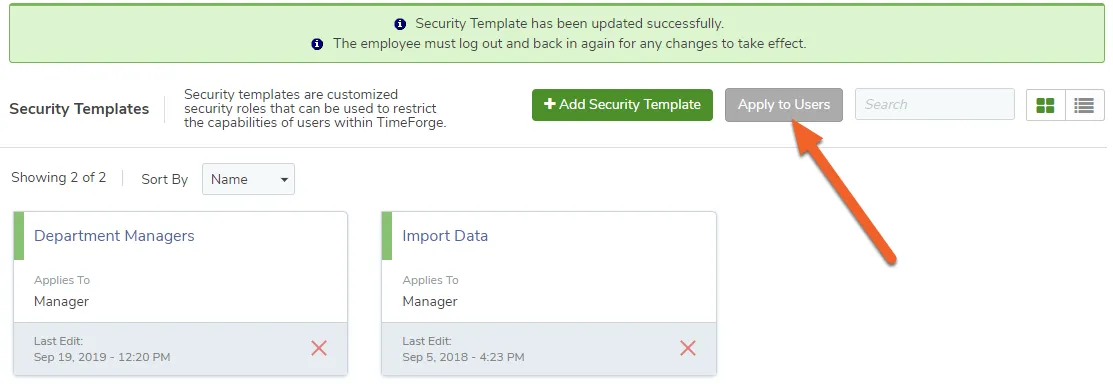
Your new security template will now appear in your list, and you’ll be able to apply it to users. One quick way to do this is from the Security Templates page, by clicking the button Apply to Users. This method is useful if you want to add the template to multiple users at once. If you only want to add a template to a single user, you can apply it directly through their profile as well.
Apply a permission group to a specific user
To provide you with the ability to restrict who has access to some information, TimeForge allows you to create and assign permission groups. These security features can help you define who has access to make changes such as break rules, company settings, and employee positions. You can also define who can view personal information like pay rates and social security numbers.
These permission groups can be assigned to both managers and supervisors independently. In other words, you can create a unique permission group so that your managers have more access than your supervisors.
Assigning a permission group only takes a few clicks!
Locate the manager or supervisor you wish to apply a permission group to from your employee list. If you’re using grid view, you can click anywhere on the card to edit. If you’re using list view, click the Edit link.
Look for the section titled Permission Group. Choose the group you would like to apply from the drop down menu.
Don’t forget to click Save to save your changes!
Create Leave Policies, such as "Sick Leave" and "Vacation"
This guide teaches Managers how to create and use Leave Policies, such as “Vacation” or “Sick Leave.” Leave policies in TimeForge can be Location-based, Corporation-wide, or applied only to specific individuals.
Location-based leave could be useful if your corporate office gets PTO but your call center doesn’t, for example. Location-based leave could also be useful if your business has locations spread across multiple states and those states have different PTO rules.
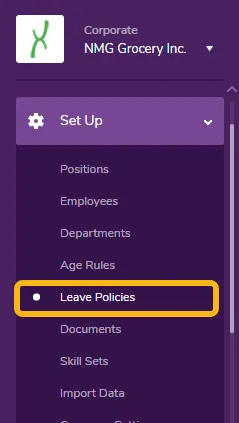
Go to the Leave Policies (formerly Leave Types) page under the Corporate Set Up Tab
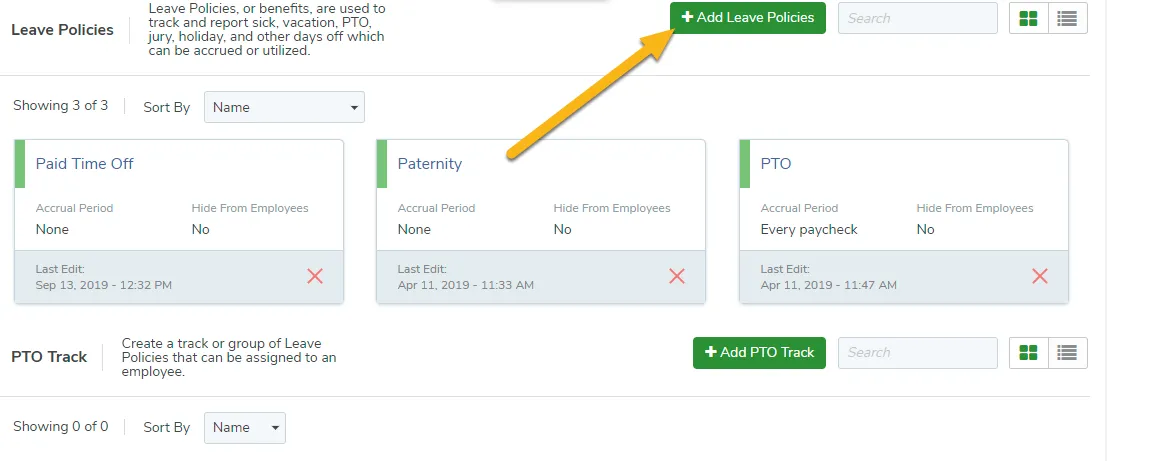
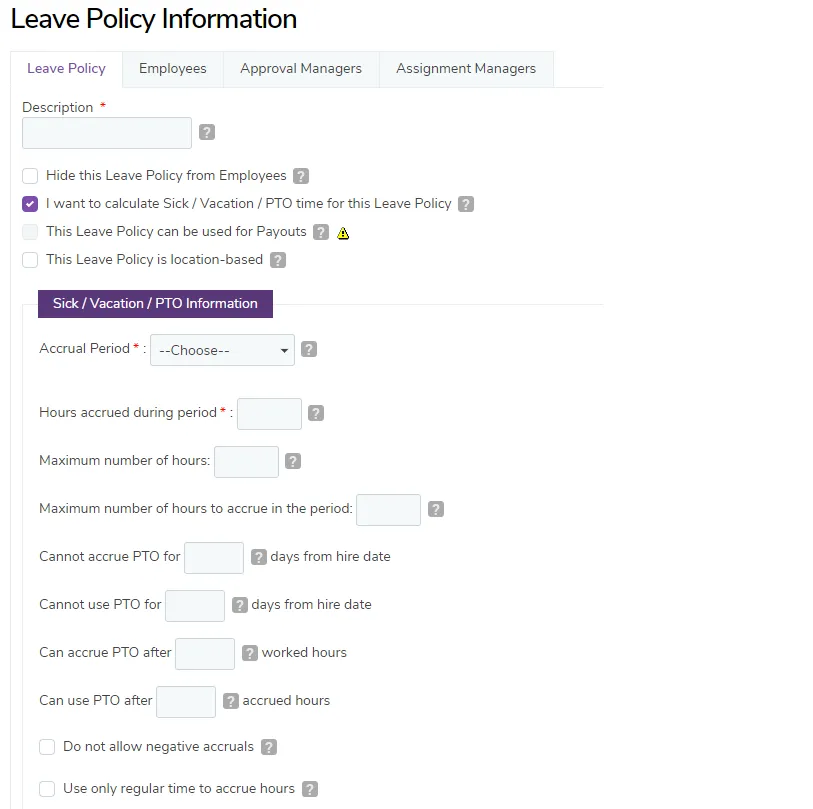
Click the + Add Leave Policies button in the upper right to create a new type of leave. If you have any Leave Policies in the system already, they will be listed on this page. You can also edit an existing policy from here.
Leave Policies are very configurable and can be adjusted to suit your business needs. You can set whether and how often this leave is accrued, the maximum balance, how long after initially being hired employees have to work before starting to accrue it, and more.
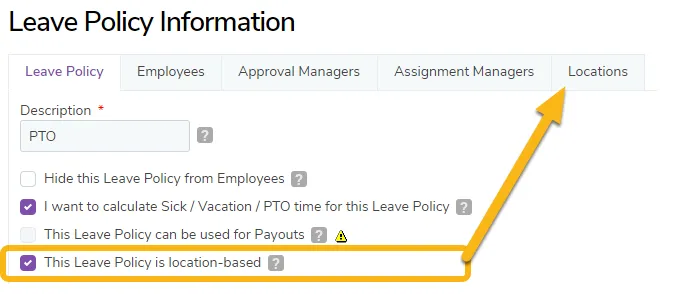
Do you want this Leave Policy to be Location-based?
If you are interested in this Leave Policy applying to only specific locations, check the box indicated below. When you check this box, an additional tab will appear, also pictured below:
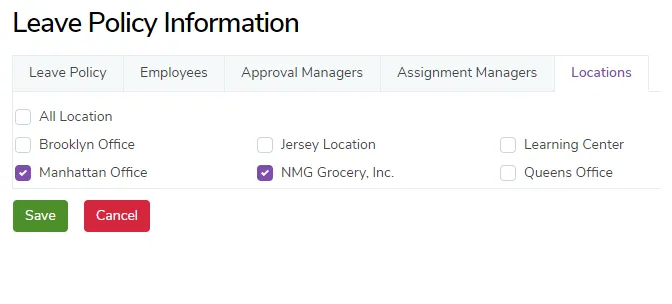
Location-based only: select the location(s) you want this Leave Policy to apply to
If you selected the option to make this Leave Policy location-based, you should now click the Locations tab and select which locations it should apply to.
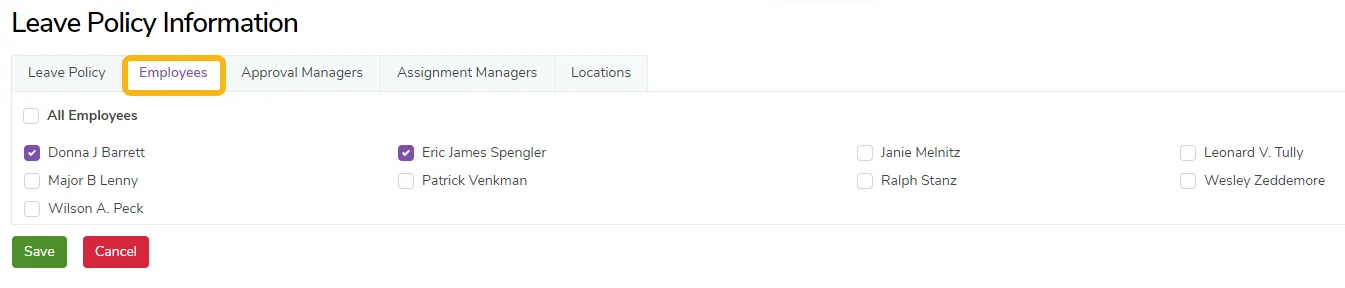
Select the employees for whom this Leave Policy should apply
If you would like this Leave Policy to apply to all employees, simply use the All Employees checkbox. Otherwise, select individual employees from the list.
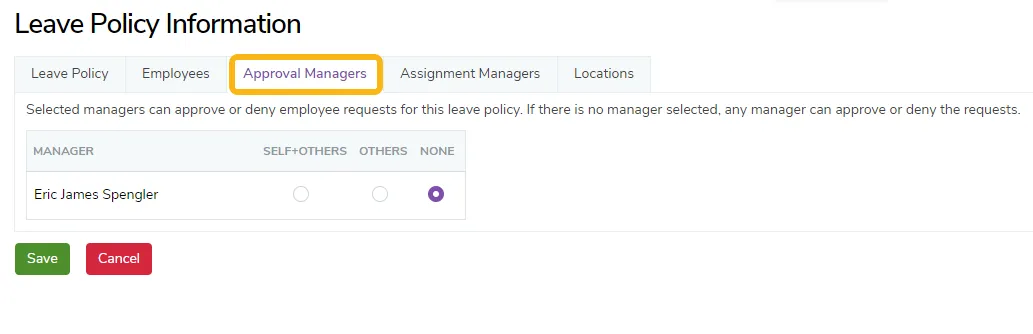
Click the Approval Managers tab and set your approval managers for this leave policy and their permissions. Approval managers can approve or deny employee requests for leave.
Approval Managers with Self+Others access can edit this Leave Policy and approve its use for anyone, including themselves, with available hours for that Leave Policy.
Approval Managers with Others access can approve this Leave Policy on anyone, except themselves, with available hours for that Leave Policy.
Approval Managers with None selected have no access to editing or approving this Leave Policy for anyone.
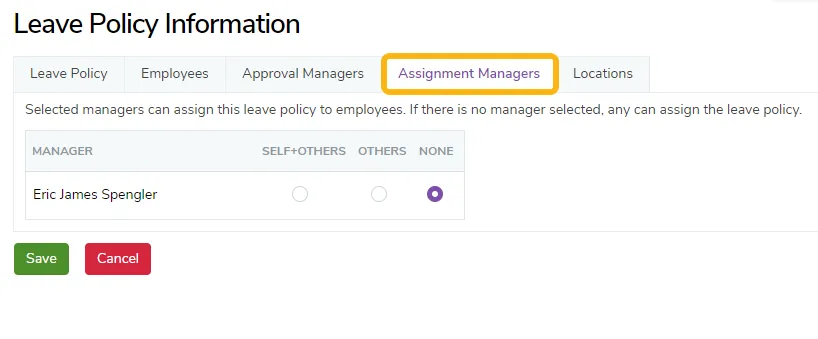
Click the Assignment Managers tab and set your assignment managers for this leave type and their permissions. Assignment managers can assign this leave type to employees.
This works the same way as it does with Approval Managers.
The option to create Assignment Managers allows you to create users who can assign leave policies for other employees without necessarily having approval access.
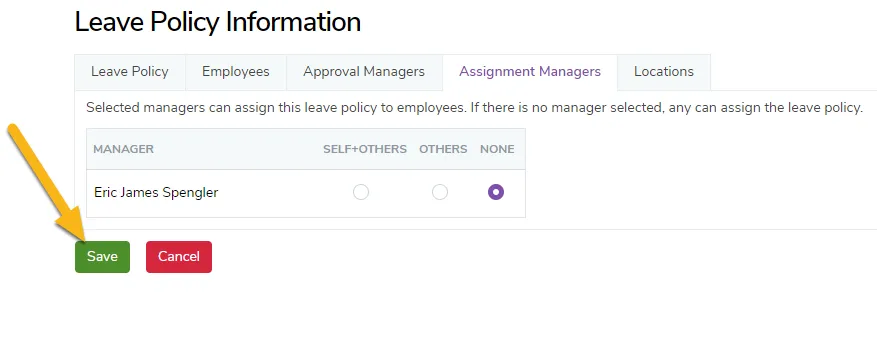
Once you’re finished setting all your options for this Leave Policy, be sure to click the Save button.
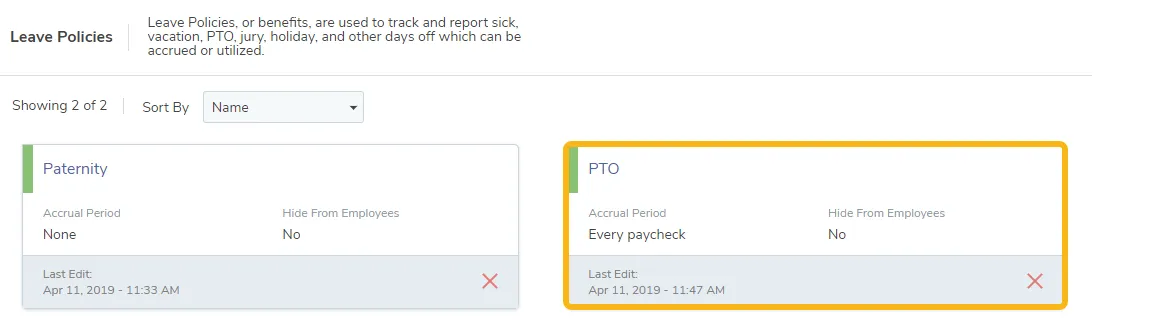
You will be returned to your Leave Policies page, and your new leave policy will now be shown in the grid/list.
Create Custom Fields
TimeForge already has built-in fields for collecting important employee information, such as phone numbers and birthday. But did you know that you can also create custom fields?
Custom fields allow you to collect and store other kinds of information relevant to your business. These form fields appear under your employee profile pages and may be set as required or even provided with a default value. Information can be collected using text, number, date, and text area fields.
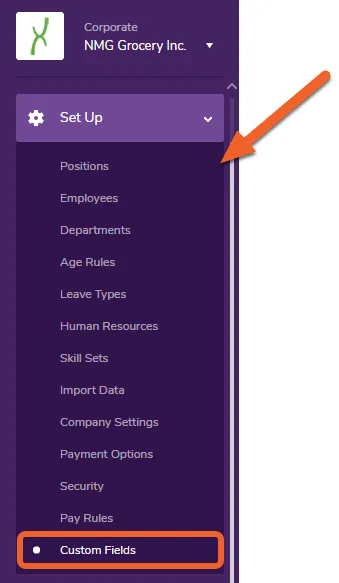
Navigate to the Custom Fields page under the Set Up tab
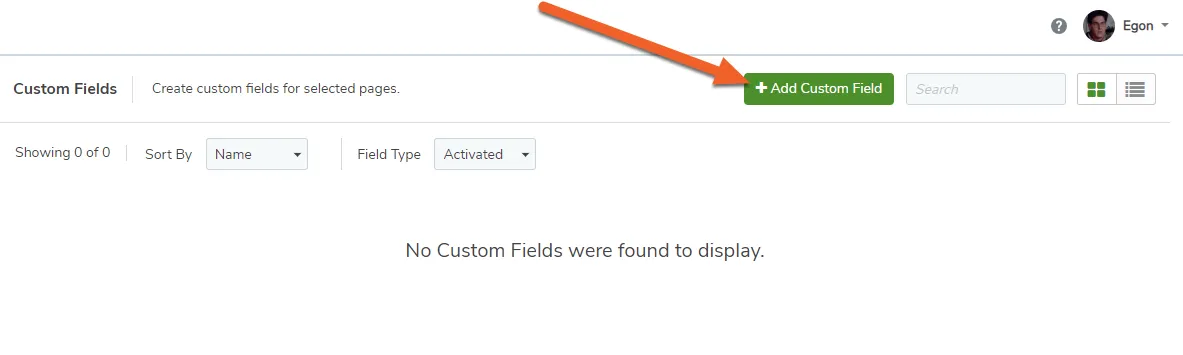
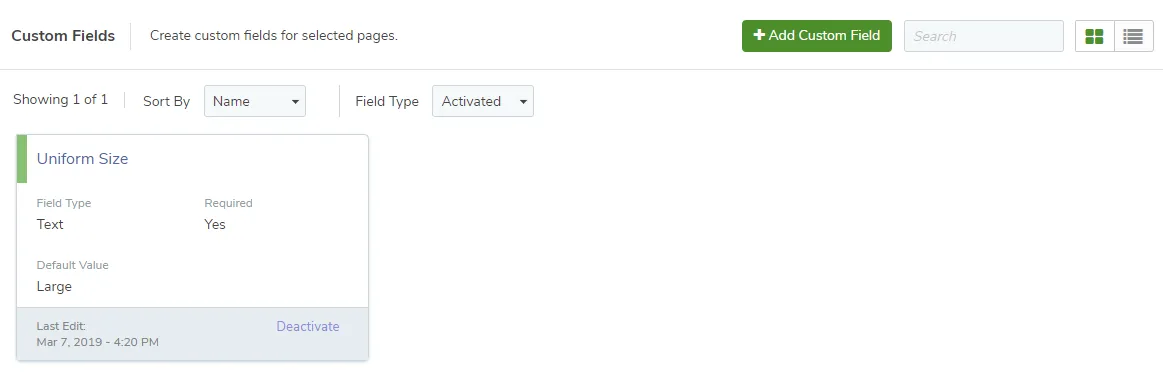
At minimum, enter a Name for the custom field and select the most appropriate Field Type.
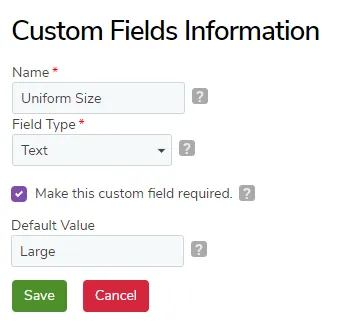
For example, if you expect employees to provide one or two words, you would set Text as the field type, as in the example below.
Text Area will allow multiple lines of text in a text box. Number will require a number to be entered, and Date will allow the employee to select a date.
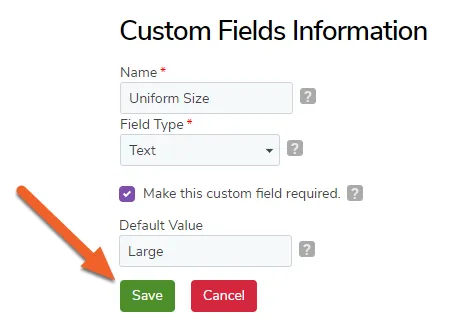
Checking the box will make the custom field required, and employees will have to enter a value. You can also supply a default value, as well.
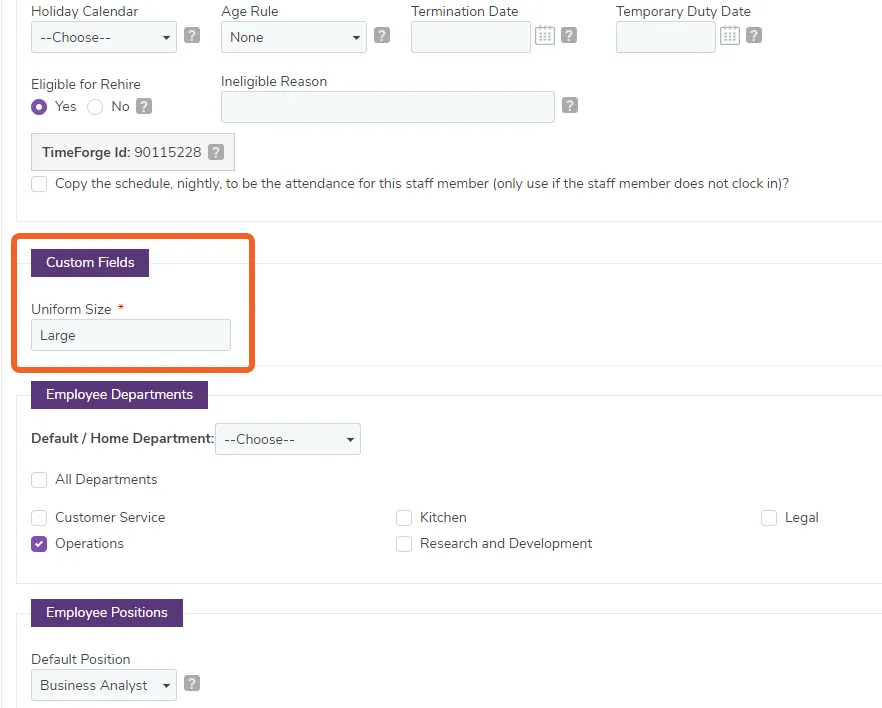
To see your new custom field, navigate to your employee list, select an employee, and check the area after Basic Employee Information. You’ll see a new section on the page titled Custom Fields.
In this case, since we provided a default value and checked the box in our example, Uniform Size is already prefilled with the default value “Large” and is marked with a red asterisk (*) to show that it is required.
That’s all there is to it!
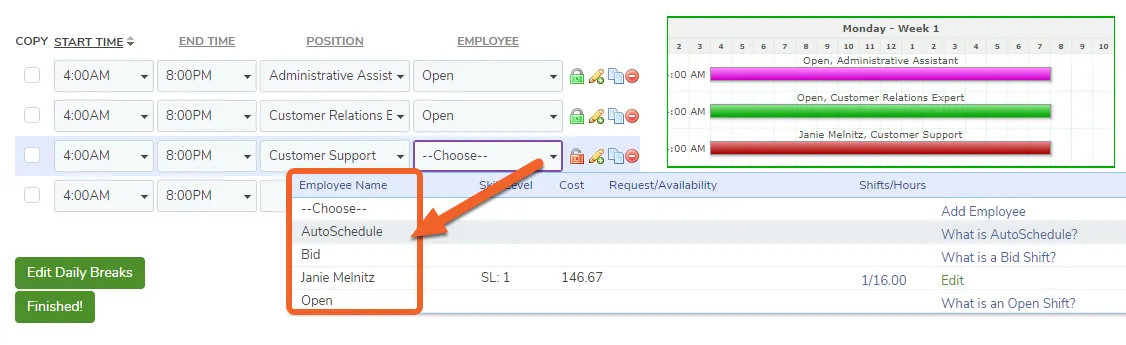
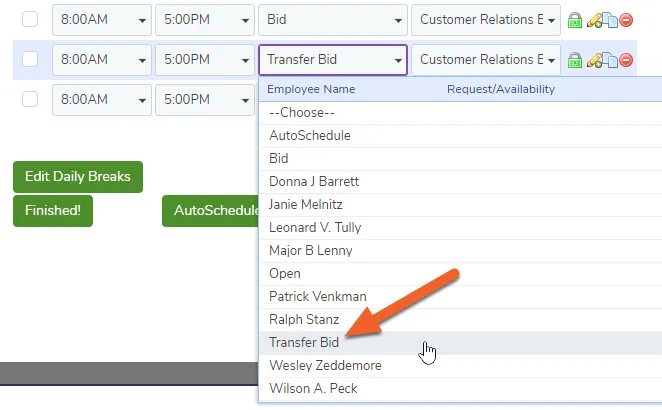
Enable Transfer Bid Shifts (bid shifts that can be shared across locations)
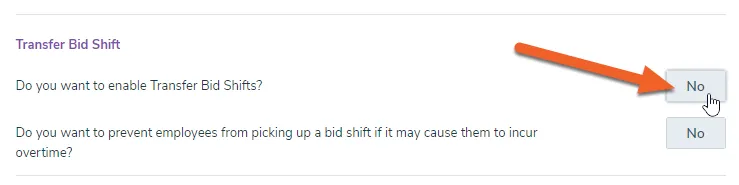
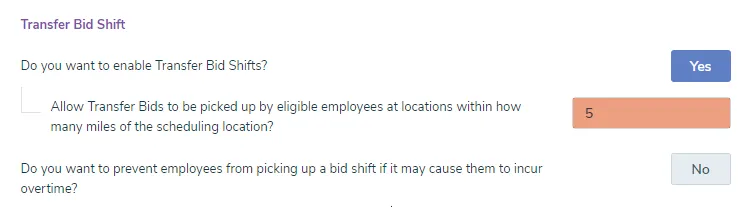
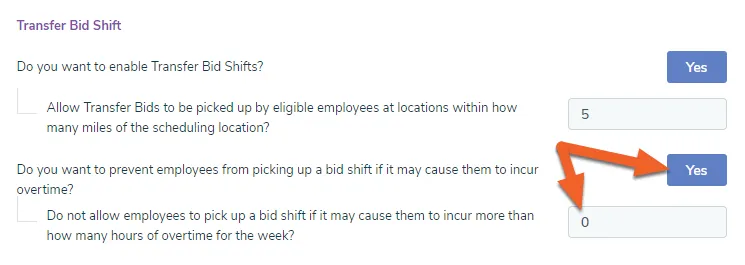
The Transfer Bid Shifts feature adds new functionality that allows managers to open up bid shifts to employees from other locations, as well as restrict employees from being able to bid on shifts that exceed a configurable limit of overtime.
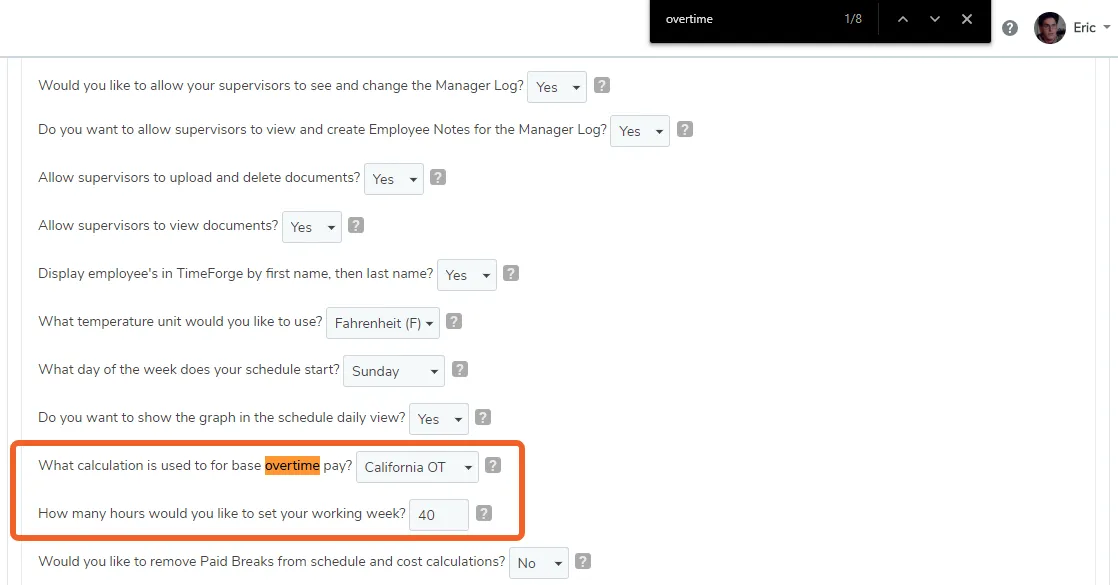
If desired, enable the prevention of picking up overtime shifts and set the overtime threshold:
Add, edit, or delete locations
TimeForge offers the ability to add, edit, or delete locations as needed. Locations are subsets of corporations; they are branches or specific destinations (such as buildings or addresses) where employees work. TimeForge accounts can have many different locations, and staff members can work at any number of them. TimeForge automatically handles collisions/conflicts between various locations so that staff members are not scheduled to work in multiple locations at once. Information for all locations can be handled by managers at the Corporate level, or for one location at a time at the Location level.
The ability to have and manage multiple locations from one account allows managers to streamline their scheduling, attendance, and sales by connecting the information for each location and allowing comparisons to be made.
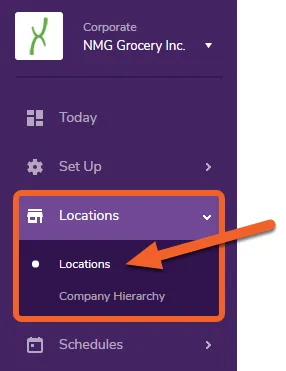
Navigate to the Locations page under the Locations tab
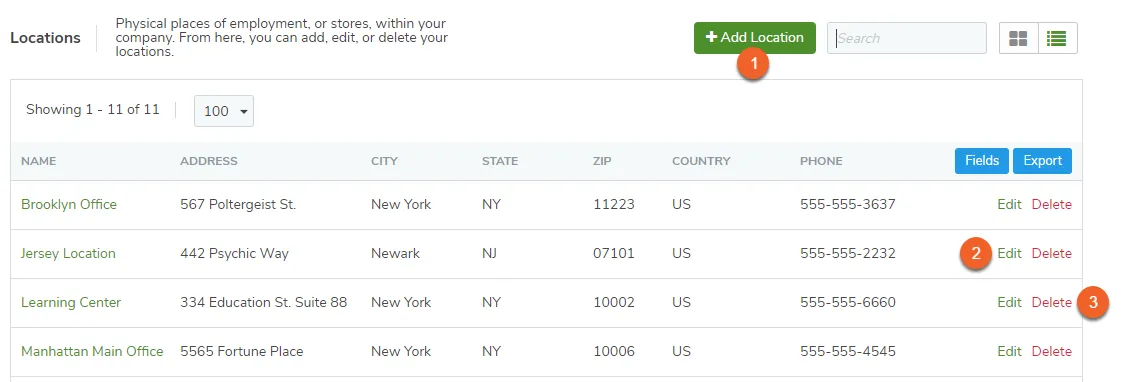
From the Locations page, it’s easy to add, edit, or delete locations.
Click the Add Location button to add a new location to your business inside TimeForge.
To edit an existing location, locate the appropriate location and click anywhere on the card (if using grid view) or otherwise on the Edit link (if using tabular/list view).
To delete a location, locate the appropriate location and click the red X or Delete link.
What information can be established for each location?
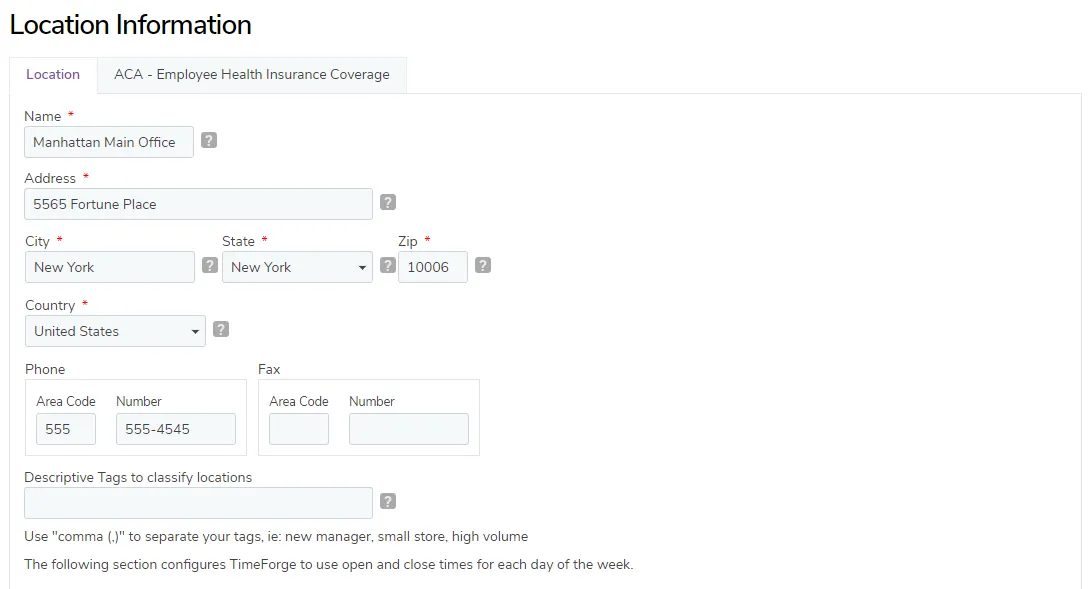
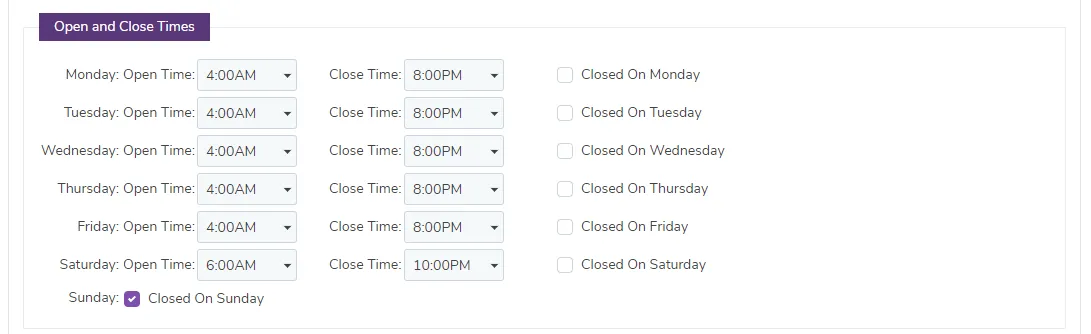
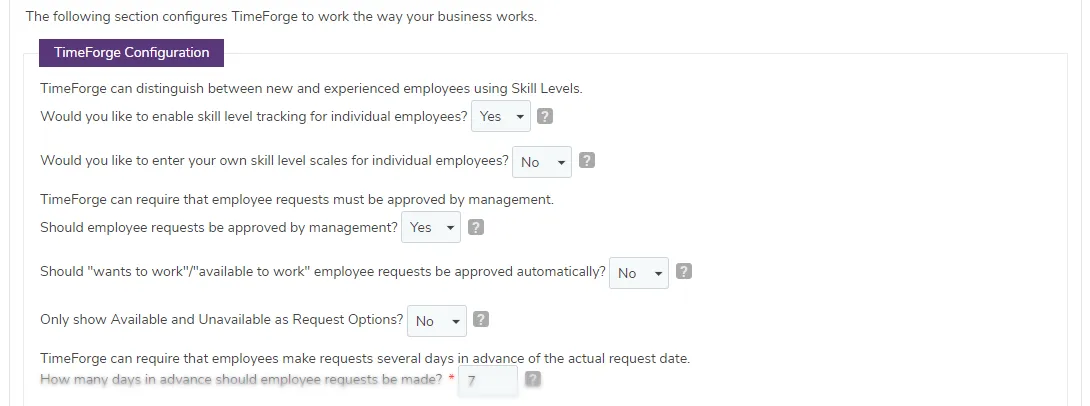
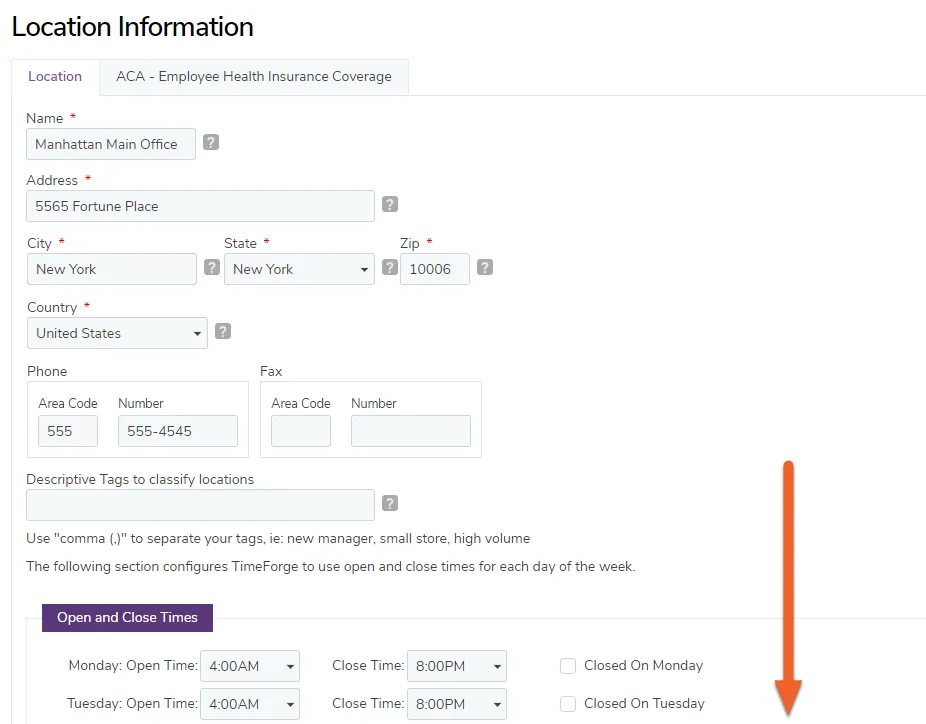
After either adding a new location or editing an existing location (see previous step), you will be presented with many options for location information, including:
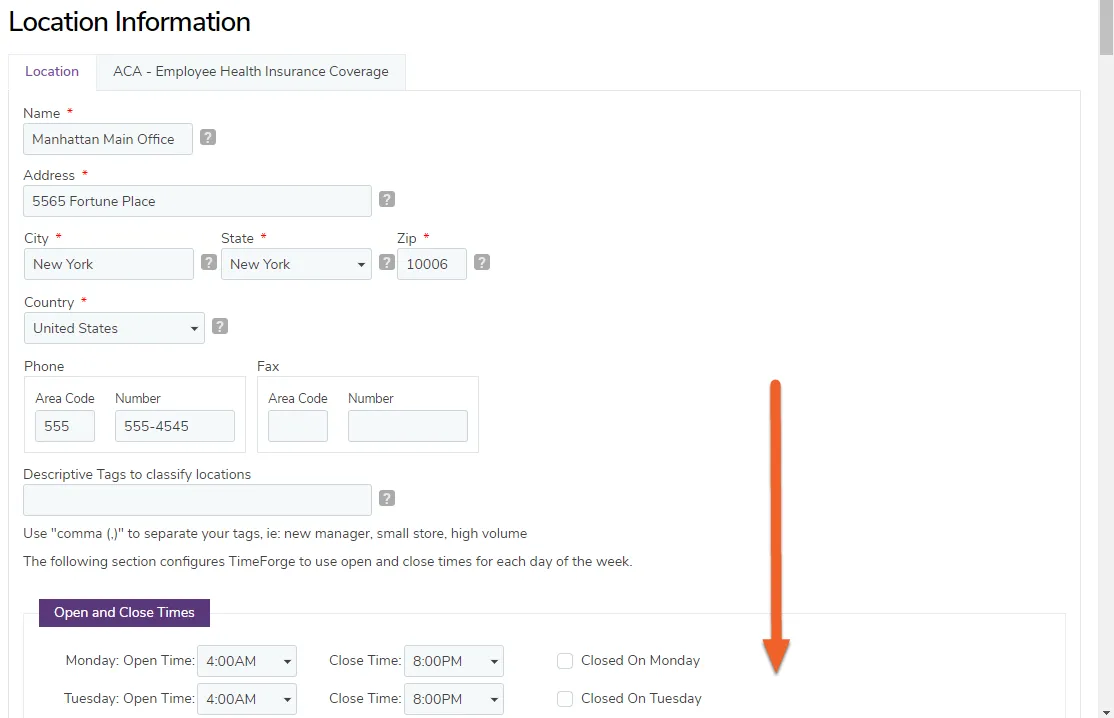
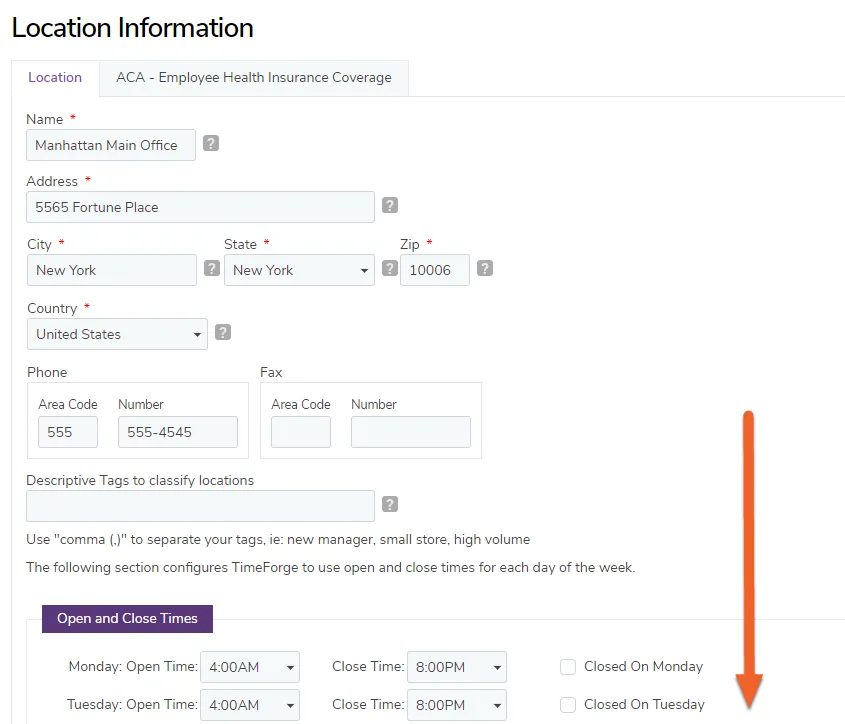
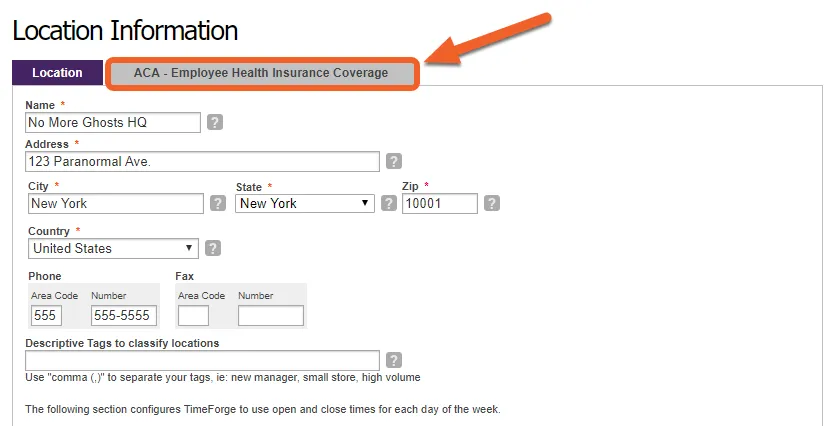
At the top of the page, you can enter general location information. Names and addresses are required for each location. Phone and fax numbers and descriptive tags may be added, as well, to help keep your locations organized.
TimeForge offers many, many customizable options for each location. In this section, you can change the default settings to make TimeForge work the way your business does.
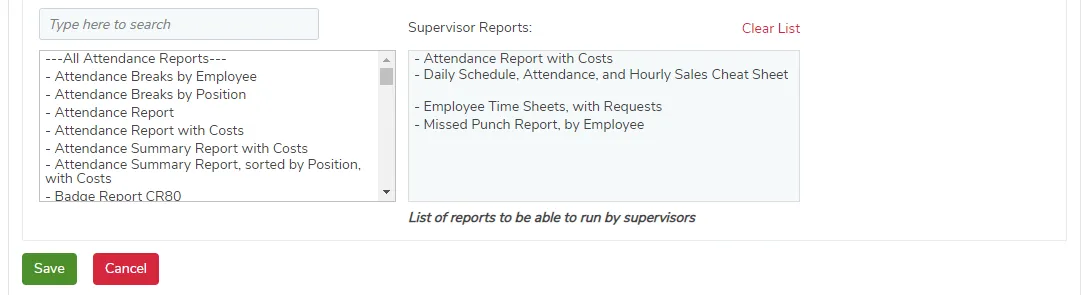
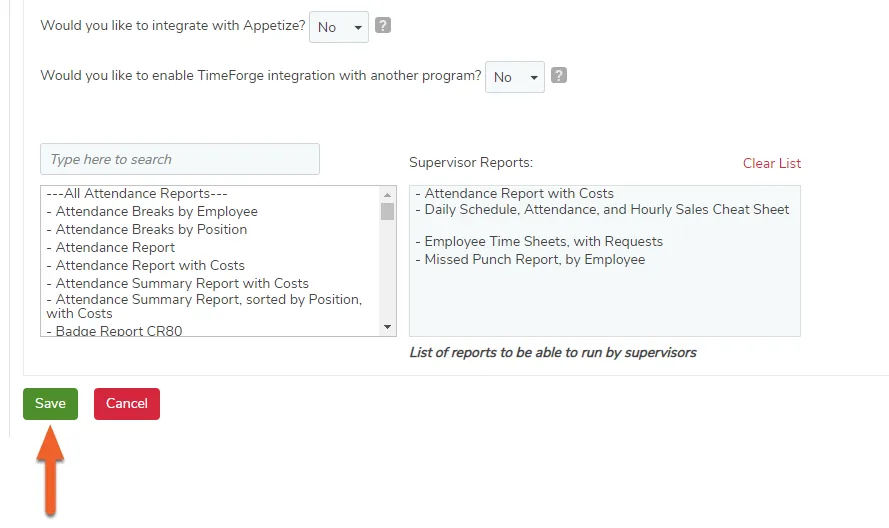
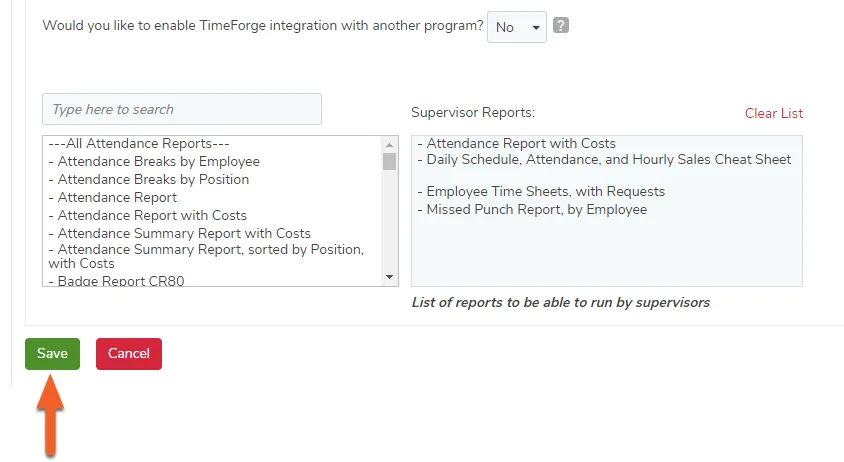
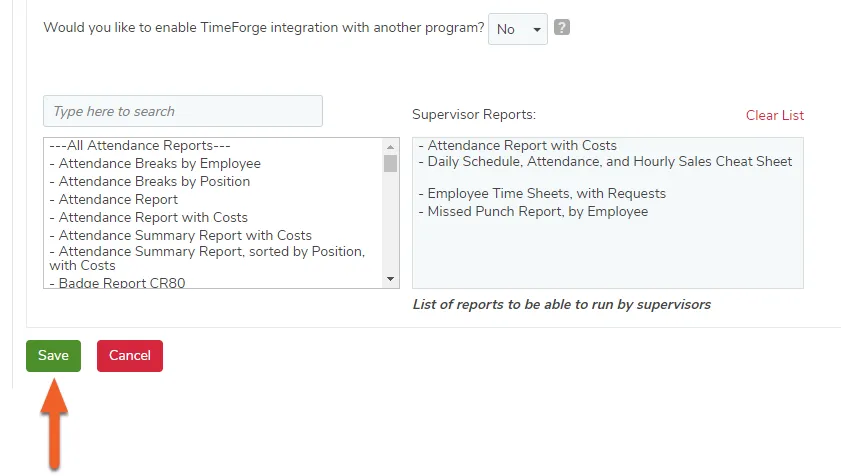
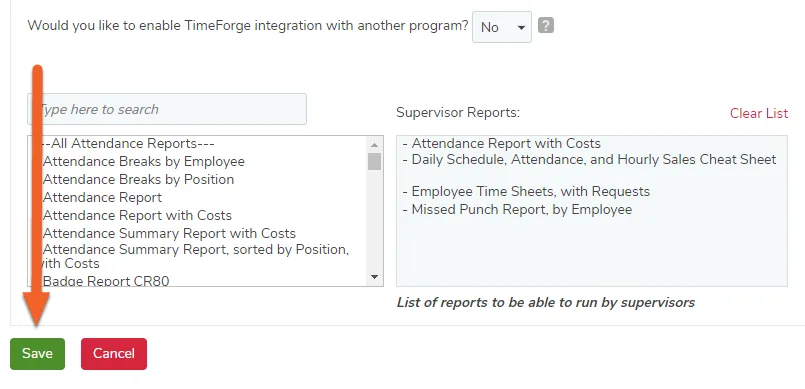
Near the bottom of the page, you can select which reports you’d like your supervisors to have access to.
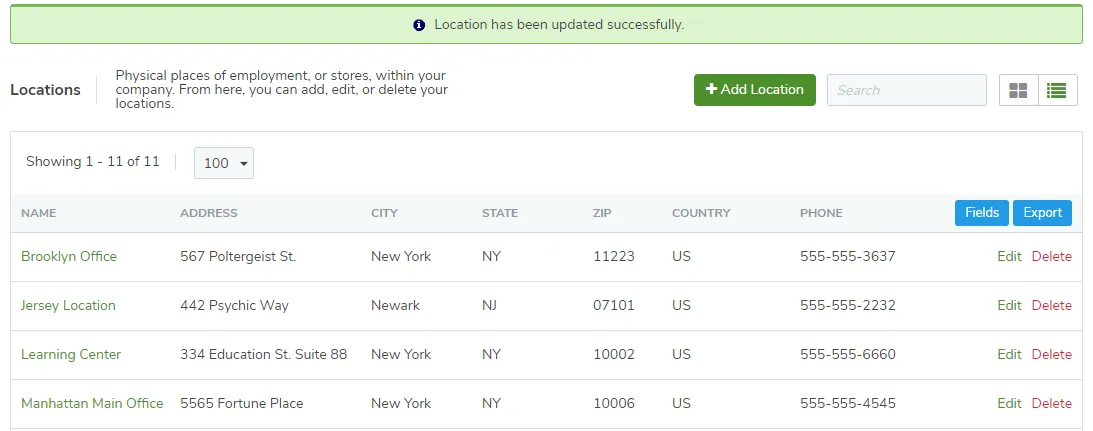
If you make any changes to the settings on this page, don’t forget to click the Save button to save your changes! You will then be returned to the Locations page with a notification confirming that your location has been saved/updated.
Manager Guides › Location Settings
Automatically approve Bid Shifts
Bid Shifts are a way to allow employees to build their own schedules in TimeForge, saving you the hassle of needing to assign staff members to every shift. You can simply set a bid shift for a specific time and date and let your employees build part of their own schedule.
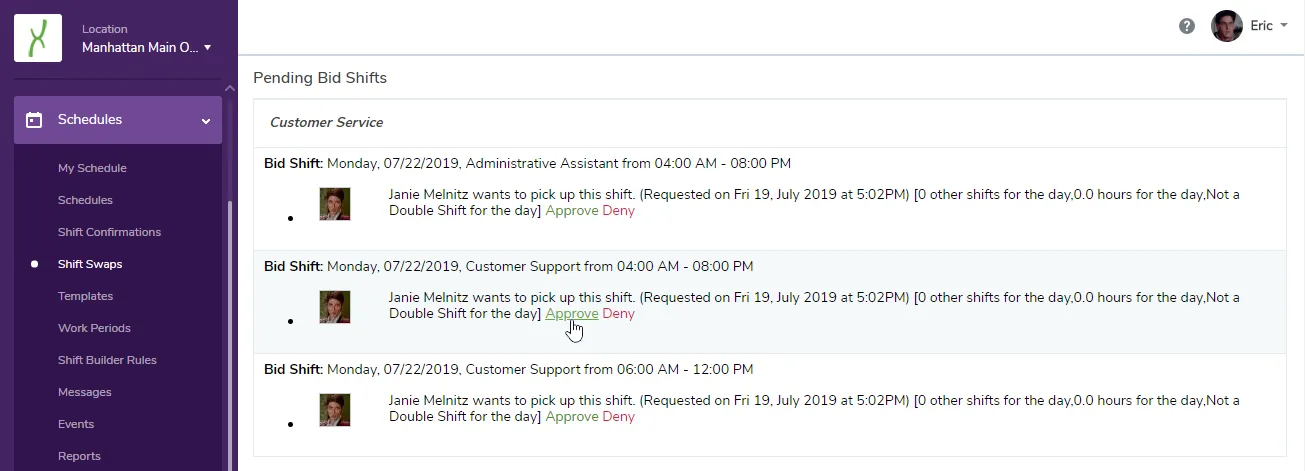
For example, a bid shift can be picked up by several qualified employees – providing management with a choice of multiple employees who want to work that shift. Bid shifts are then approved by management, and employees can choose to be notified, or not, about the approval (or denial) of the shift.
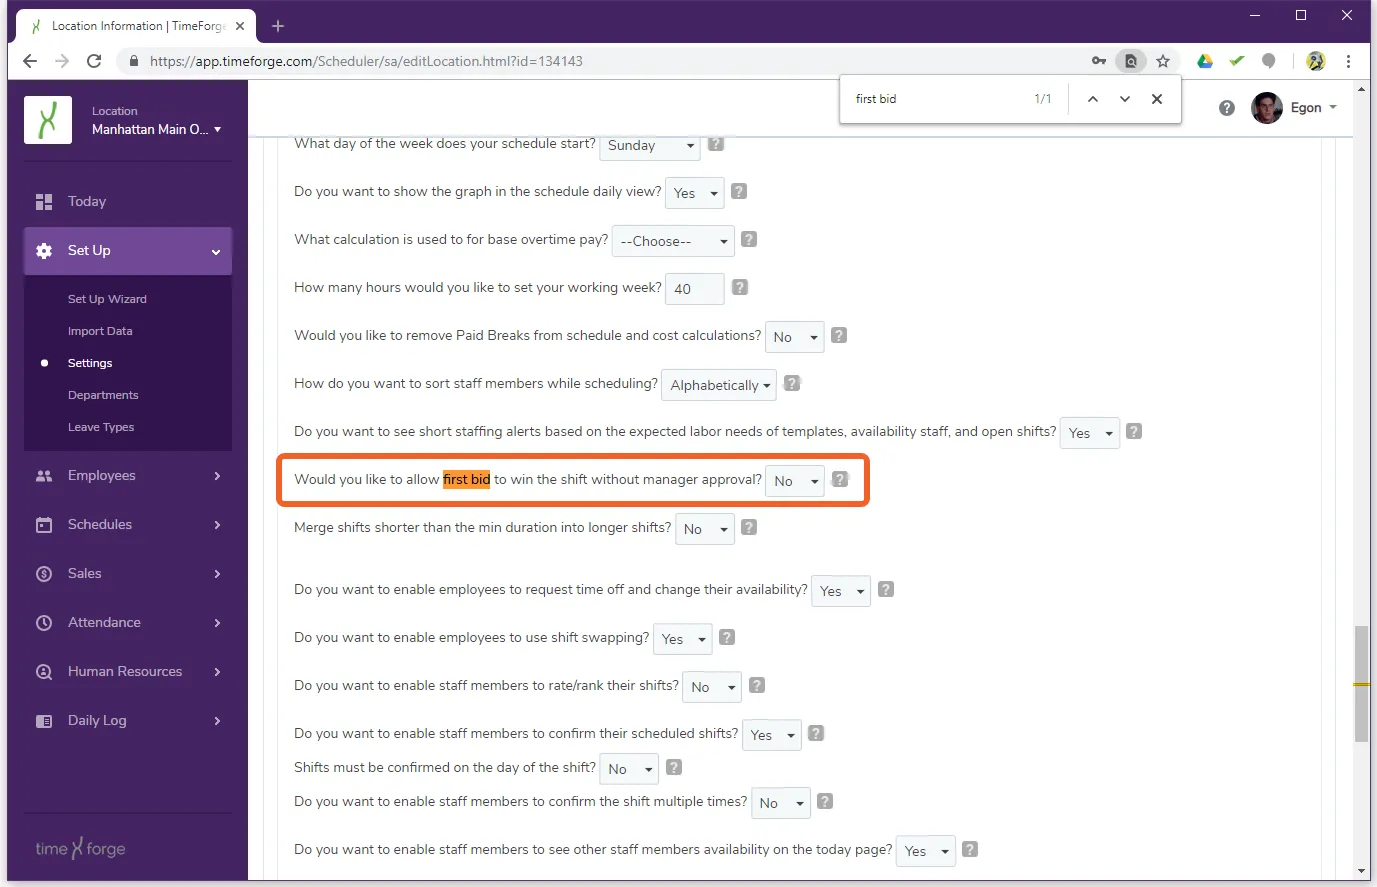
Alternatively, bid shifts can be set up be approved automatically. This is a great feature if you don’t need to be directly involved with the decision of who wins a bid. With automatic approval, the first person to make a bid is always the winner.
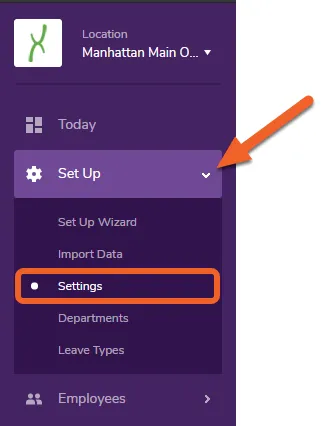
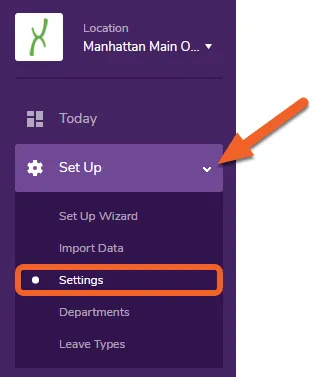
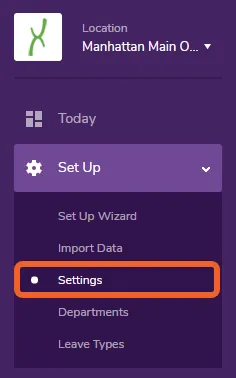
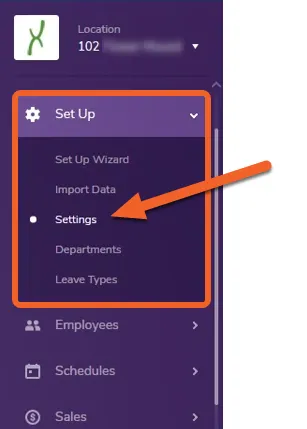
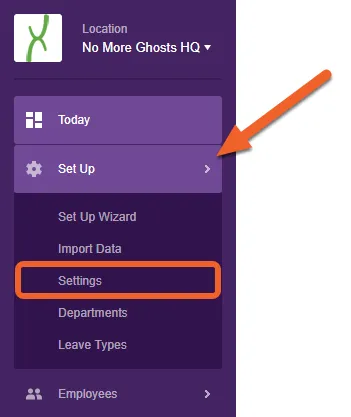
Navigate to the Settings page under the Set Up tab
Don’t forget to scroll down and click the Save button to save your changes!
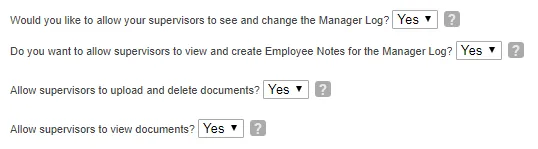
Restrict supervisors' access to personal information
TimeForge gives you the ability restrict access to personal information. With different security levels between managers, supervisors, and employees, TimeForge already has some built-in security that helps prevent unwanted access to confidential information. For instance, an employee is not able to see pay rates, make schedules, or edit attendance entries unless you specify otherwise.
Similarly, a Supervisor has access to schedules and attendance and most everything a Manager has access to (by default but this can be changed), but is unable to see confidential information like the pay rates of other Supervisors/Managers unless you specify differently.
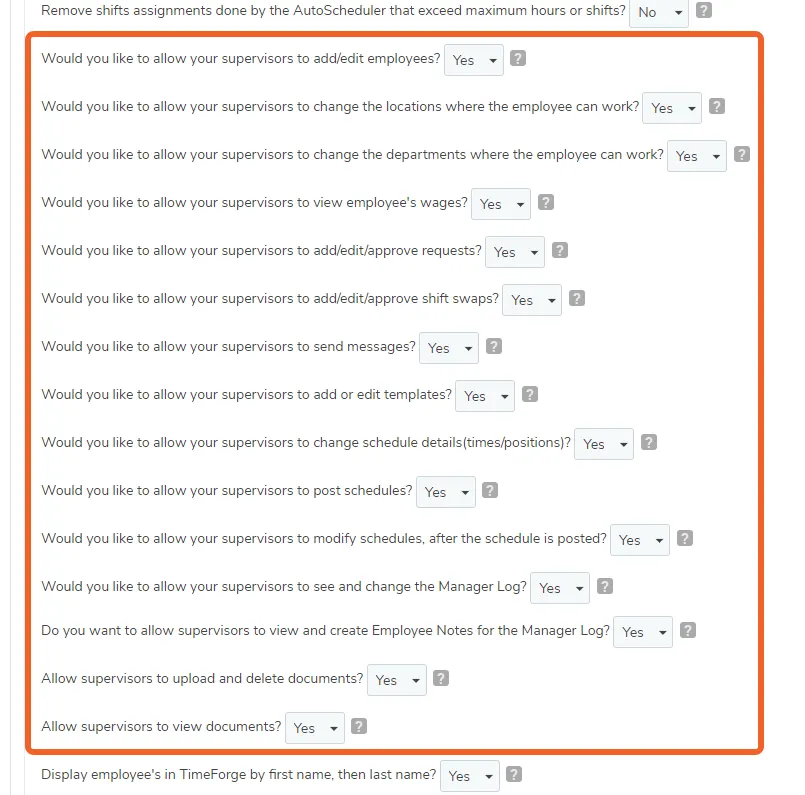
There are many options that can be customized for supervisors. Some of these options can be customized with security templates. Other options are listed below, and can be found on the “Settings” page.
Navigate to the Settings page under the Set Up tab
These options are located half-way down the page. If you don’t want your supervisors to have special access, you can designate which information is restricted here.
Click the Save button at the bottom of the page when done
Don’t forget to click the Save button at the bottom of the page when you’re done. This will save your changes.
Turn off shift confirmations
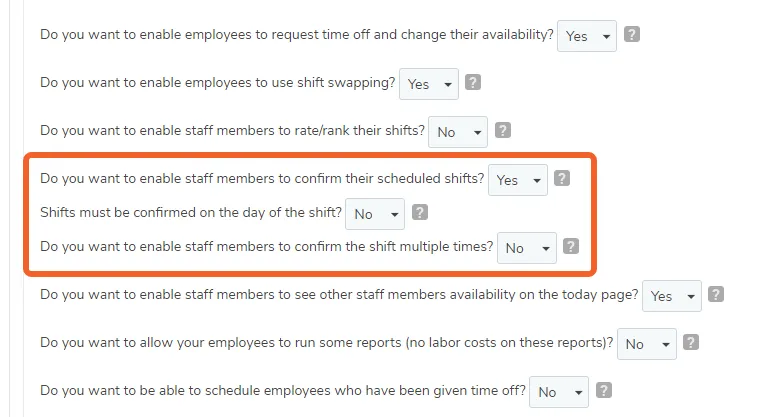
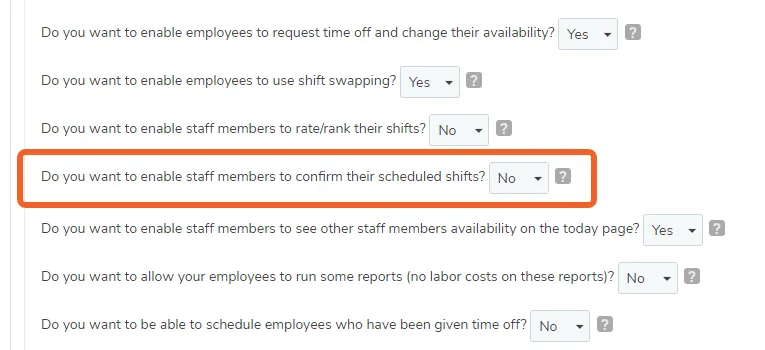
In TimeForge, shift confirmations allow employees to confirm that they will work a shift for which they are scheduled, notifying management that they “got the memo.” You may want to turn off shift confirmations if your business does not need employees to confirm their scheduled shifts. By turning off shift confirmations, employees will no longer have the option of confirming their scheduled shifts.
Here’s how you can easily disable confirmations.
Navigate to the Settings page under the Set Up tab
To save your changes, scroll down and click the Save button at the bottom of the page. You’re all set!
Create and modify Age Rules
TimeForge Age Rules enable your business to adhere to company, state, or federal mandates regarding minors and seniors in the workforce. For example, if employees under age 16 are restricted from working more than 20 hours per week, TimeForge can help you set up and enforce this restriction on the Age Rules page.
Here’s how you can set up age rules for your employees.
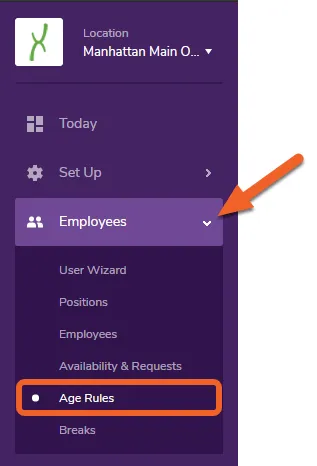
Navigate to the Age Rules page under the Employees tab
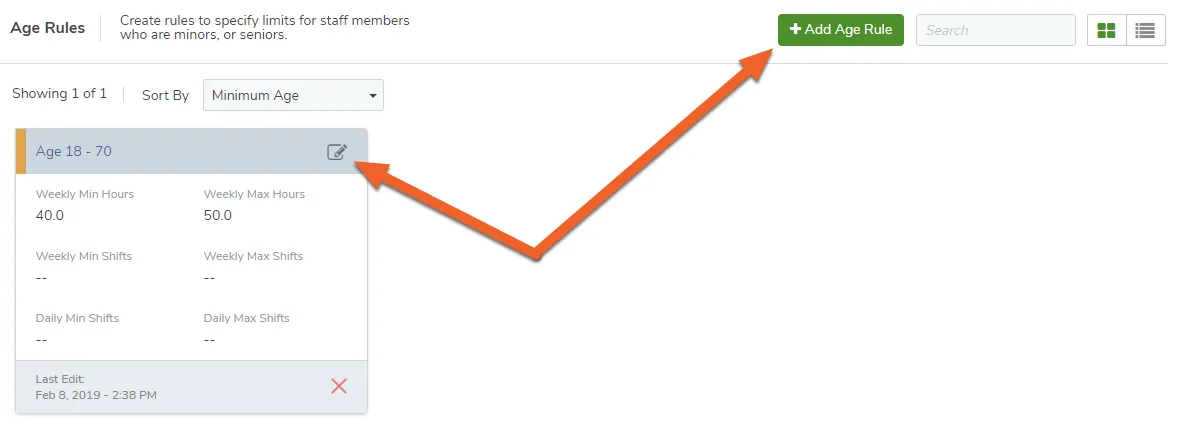
Age range-based rules are located at the top of the page. Click the + Add Age Rule button to create a new rule or click on a card to edit an existing rule. (If you’re in list view, you’ll see an Edit link instead.)
In the example below, we’ve set an age range of 18-70 years and have specified minimum and maximum hours that may be worked by employees that fit this rule. We’ve also set the maximum number of shifts that may be worked in a week.
Don’t forget to hit the Save button to save your changes!
Age Rules that can be applied on a case-by-case to individual employees
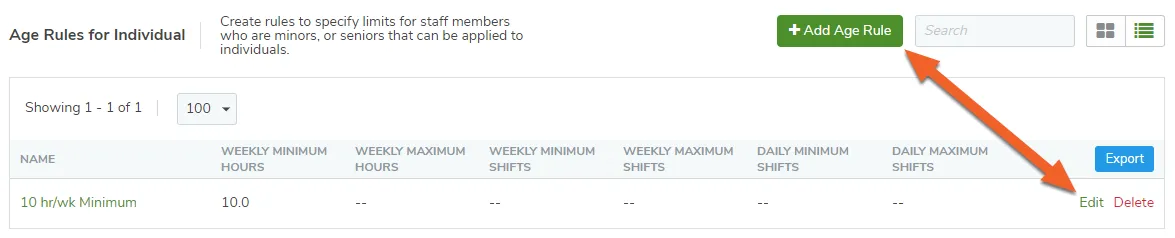
Age Rules that you will apply to individual employees are under the Age Rules for Individual section.
Click the + Add Age Rule button to create a new rule or click on the Edit link to edit an existing rule. (If you’re in grid view, you can just click on the card, as in the example above.)
Below is an example of a custom Age Rule that can be applied to one or more individual staff members. Notice that the Name field is the name of the rule, not the name of a staff member. This is because a single age rule like this one can be applied to as many or as few employees as needed!
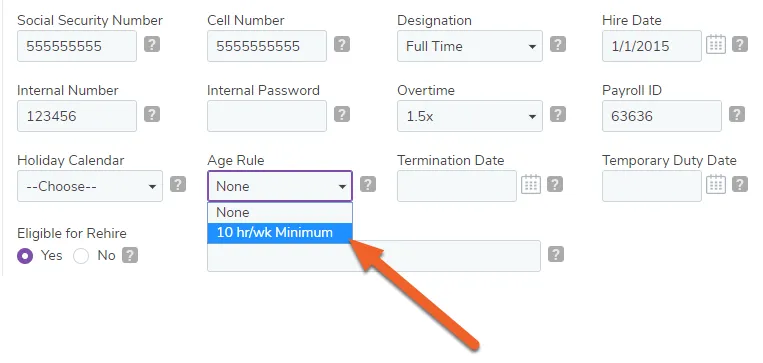
To apply an age rule to an employee, open up their profile and select an Age Rule from the dropdown menu:
Don’t forget to save your changes at each step of the way!
Manager Guides › Employees
The Employee Profile
Every staff member in TimeForge, whether they are an employee, supervisor, or manager, has a unique employee profile. The employee profile is essentially a portal where you can create, edit, and store information about your employees. This includes personal information (such as name, cell phone number, and email address), as well as attendance, schedule, and availability information – all in one convenient location inside TimeForge.
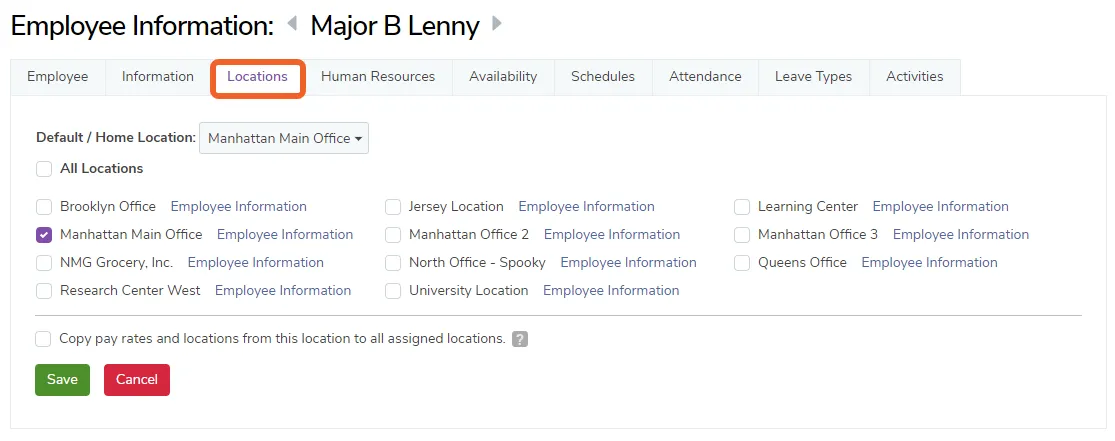
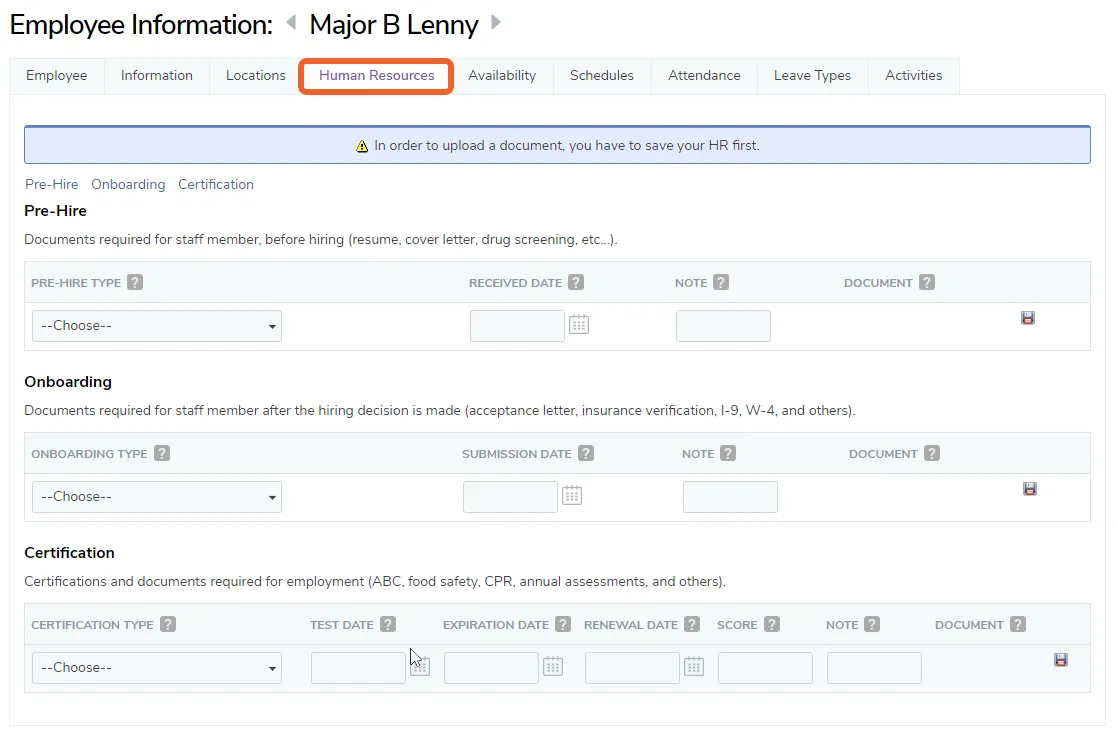
Here we provide an overview of each section (tab) in the employee profile.
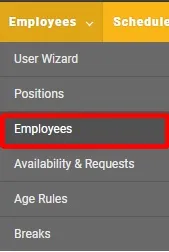
Open the Employees tab and select Employees from the dropdown menu
This will take you to the Employees page in TimeForge, where you can view your list of employees, edit their information, and add new staff members to the roster.
Select an employee to view or click the +Add Employee button to add a new staff member
The first tab in the employee profile holds basic information about their employment. Here, you can assign minimum and maximum hours so that TimeForge can alert you when those parameters aren’t met. This is also the area where you can terminate an employee, give them an internal number and password for clocking in and out, and assign their payroll ID.
Employee Departments, Positions, Type, and Login Information
If you scroll further down the page, you will find a few more options, explained below:
This is where you assign the employee to one or more Departments (if the business has Departments enabled in TimeForge), including a Default/Home Department.
This is the area that allows you to designate an employee’s Position(s). You can also include custom pay rates for an employee and designate skill levels.
Here is where you can specify how an employee can log in to TimeForge. You can either assign a username and password, or select email. If you choose email, an employee will use that address to log in, and they will receive an email informing them how to create a password.
This is where you tell TimeForge what type of staff member this is, whether an employee, a supervisor or a manager.
The next tab is the Information tab. This is where you can insert information that was traditionally kept in filing cabinets, saving you time and trouble from having to organize and keep track of a bunch of papers. You can even upload a picture of your employee to make everything more personable.
The page can also include information on historical pay rate and PTO changes, for reference.
On the Human Resources tab, you can assign onboarding documents and certifications to employees. TimeForge can also store digital copies of those certifications and onboarding documents to help get rid of office clutter and keep everything in one safe, convenient platform.
Similar to the schedule tab, you can select a date range, and TimeForge will display every attendance entry for that employee during that range. You can also click “Edit” next to a certain entry to edit the attendance.
The Activities tab will show you any HR Activities assigned to the employee and their progress/status.
View an employee's information
The Employees area of TimeForge houses important information about your employees, including basic info (name, address, date of birth, etc.), what departments they’re in, their job positions, login information, and security level. Additional tabs allow access to historical pay rate/wage changes, PTO changes, notes, what locations they work at, human resources documents, their availability, schedules, attendance, and more.
Employee profiles can be viewed at both the Corporate and Location levels, but the availability of certain information may differ between these levels or may be limited by security settings.
The steps below will show you how to view an employee’s details using either method.
Scroll down the page to view additional details, such as departments and positions. Switch tabs to view other areas of the employee’s account, such as HR documents attached to their record, their schedule information, and attendance.
You can also make changes to the employee from some of these screens; just remember to scroll down and hit the Save button to save your changes!
Add, edit, or remove an employee
Adding, editing, and removing employees from within TimeForge is very easy to do. Employee accounts need to be created for any staff member who will be scheduling employees or who will be placed on the schedule themselves. Additionally, any staff member who will be running reports, clocking in, or receiving messages needs to have an employee account.
Employees are automatically synchronized from some Point of Sale systems that are set up to integrate with TimeForge.
Navigate to the Employees page under the Employees tab
To add a new Employee, click the Add Employee button near the top of the page. You’ll also notice links to Edit or Terminate individual employees already in the system.
When you create a new employee, you will immediately be able to begin entering their information, also known as their “Employee profile.”
Each employee has a number of settings that can be configured or changed by managers and supervisors inside of TimeForge. These settings control the hours and shifts that an employee can work, the staff member’s availability, and what positions the employee can perform.
To return to this form at any time, simply edit the employee from the employee list.
Other employee settings include pay rates (which are not required), skill levels (for ranking how talented a staff member may be), and employee login information, including the employee’s email address.
If you need to remove an employee from the system, click their Terminate link in the employee list. You’ll receive a pop-up asking you whether the employee is eligible for rehire and, if not, why. Make your selections, then select Continue to complete the termination process.
Once complete, you’ll be returned to the Employee List and the following confirmation message will be printed across the window:
“Employee has been terminated, and will no longer appear on your list of employees beginning tomorrow.”
Terminate an employee
In addition to the simple ways you can do things like create an employee profile and track attendance, TimeForge makes common HR tasks, such as hiring and terminating staff, a simple one-click process. The process involved to terminate an employee is very easy, and it is similar to how you would edit an employee’s schedule. There are two ways to terminate an employee. By clicking the “Terminate” link or through the “Edit” link on the “Employees” page. The “Terminate” link will immediately terminate the employee. The “Edit” link provides you the option of setting a terminate date.
Here is how you can easily terminate staff as necessary at your business.
Open the Employees tab and select Employees from the dropdown menu
To terminate an employee, locate their profile in the Employees page and click the Terminate button next their profile. The screenshots below slows where the Terminate button appears when using the grid or tabular view of the Employees page.
After you select to terminate the employee, TimeForge requires you to review the fields shown below before finalizing the termination.
If the employee has any upcoming shifts, TimeForge displays a warning notifying you the system will delete or update upcoming shifts to either open, bid or autoschedule shifts *
If the staff member is eligible for rehire.
TimeForge does not require input in the “Ineligible Reason” field, but leaving a note can help you better document an employee’s termination.
You can set the termination date in the past or future depending on when the employee’s last day worked occurs.
Once you’ve reviewed all of the termination fields, click the Continue button to finalize terminating the employee. Note, the Employees page displays a terminated employee in the active list until their termination date is set in the past. If you assign the current date as the employee’s termination date, the employee’s name will appear in the active list until the next day.
You can also terminate an employee from their profile. To access their profile, click the Edit link on the row (if in List view) or simply click the employee’s card (if in Grid view, shown here).
Look for the field titled Termination Date. Enter the date on which you wish the staff member’s employment to end.
Don’t forget to click Save at the bottom of their profile when you’re finished!
From the Corporate level, you can assign a termination date at multiple locations to an employee profile. This saves you time as you don’t have to switch into each location you want to assign a termination date. To do this, navigate to the Setup tab and select Employees.
After you click on the profile you want to update, click the Locations button. If you want to terminate the employee across all locations, you can click on the Terminate All option. Clicking the Terminate option next a location’s name terminates the employee from that specific location.
The prompt below appears when you select Terminate All or Terminate. You must complete the prompt to finalize your changes.
To rehire an employee, all you have to do is remove the termination date.
If you have multiple locations, you can navigate to the corporate level and click the Rehire option next to the locations where you want to remove the termination date.
Set a user as an Administrative User
In TimeForge, Admin users are those users who aren’t scheduled and don’t clock in our out. Typically, business owners, HR staff, and accountants fall into this category. The key thing to remember about Admin users is that they don’t appear on the employee list at the location level. You must go to the corporate level to view admin users. Here’s how to assign someone the “Admin User” role.
From the Corporate level, navigate to the Employees page
You’ll want to open up the employee’s profile in order to assign them the Admin User role. To do that, click on their card (shown), or click the Edit button the row with their name.
At the bottom of the Basic Employee Information section, there is a check box that reads “The user is an Administrative User (cannot be scheduled or track time)?”. If this box is checked, the user will be considered an Admin user.
If you make any changes to the employee’s information, including checking or unchecking the Admin User box, you’ll want to make sure you scroll down to the bottom of the page and hit the Save button to save your changes.
Approve or deny employee availability requests
TimeForge managers and supervisors can easily approve or deny availability requests in bulk. All TimeForge users have the ability to request time off, or change their availability. These types of requests (which can affect the hours worked, PTO, or the schedule) must first be approved or denied, by a manager or supervisor at your location.
This guide will show you how to view the presence of pending requests on the TimeForge “Today” page, and then how to approve or deny those requests.
On the TimeForge Today page, managers can view their labor dashboard widgets - a screen that details the upcoming week and many key items to track. This includes shift swaps, open shifts, staff requests for time off, and messages, as well as scheduled labor, and employees that are currently on the clock.
After an employee submits a request, you an entry for their request populates in the Pending Requests widget.
Clicking on the “View all requests” link or clicking on one of the pending requests listed.
After clicking the appropriate link to view pending requests, you will be taken to a “Process Requests” page where you will see color-coded requests. Here, you can approve or deny each request.
You can view the type of request and any notes about it. If other employees have had time off for the same time period approved previously, TimeForge will show these staff members and their requests. Choose “Approve” or “Deny” as you see fit.
Additionally, you will find that TimeForge has predicted your necessary staffing levels, and will let you know if you are facing a staffing shortage before you approve the time off requests.
What happens if the employee requesting time off is already scheduled to work during that time?
If employees request time off after they have already been scheduled, TimeForge will provide you with several options:
You can Deny the request, which will notify the staff member that they cannot have the time off.
You can find a replacement, which will approve the request, and take you to the schedule to find a new employee for the shift.
You can operate short staffed, which will remove the shift from the schedule.
You can turn the shift into a bid shift, allowing staff members to bid to work the shift.
You can mark the shift as an open shift, leaving it open to be staffed by management at a later date.
Enter a comment (optional), then click Continue to finalize your decision to approve or deny the request.
Once you click the continue button, TimeForge will automatically send a message to the staff member, letting them know of your decision.
Apply overtime to an employee
No matter how carefully you create an employee schedule and watch your labor costs, often times something comes up and your employees will accrue overtime (OT) hours. You can set the rate at which employees accrue overtime (like 1.5x, 2.0x the normal rate etc.) as well as when the overtime hours begin to accrue. There are two ways to change these settings:
Universal OT settings, which affect every employee and every position,
Or from the information page for each employee, which can override the universal settings (this is useful if you pay a few employees different overtime hours than others).
Here are the easy steps involved with both methods of applying overtime hours, beginning with the universal setting.
Scroll down and find the overtime options, which are near the end of the page. Alternatively, you can click CTRL-F and do a quick-find for the word “overtime”.
Choose the calculation type you want to use as a base for overtime pay. You can choose from none (default), 1.5x or 2.0x the employee’s normal rate, or state OT rules depending on the needs of your business.
Choose how many hours the employee needs to work before they can begin accruing overtime.
Locate the employee to whom you would like to apply overtime. Either click the card to edit (if in Grid view, shown) or select the Edit button on their row (if in List view).
Click the +Add Employee button to add a new salaried employee (shown below), or click a card (Grid view) or Edit link (List view) to edit an existing employee.
Select the appropriate position(s) for the salaried employee. If your business uses Departments in TimeForge, you may first need to select an applicable Department before you can choose a Position.
If your TimeForge configuration supports it, you may also select an established account type if you wish to group the cost of the position’s attendance. You may also need to select the established pay rules you would like to apply to the employee’s position.
Check the Recalculate Cost box if you would like the employee’s calculated hourly rate to be recalculated according to their weekly rate, regardless of the number of hours worked.
Decide whether you would like to export this employee’s salary information or not
Check the Don’t Export box if you do not want this employee’s salaried position information to be exported with the rest of payroll. Or, input a fixed pay rate or fixed number of hours to be exported for this employee’s position each pay period.
At the bottom of the Basic Employee Information sections (a little further up the page), is an option to copy the employee’s schedule directly into the attendance. This option is useful for employees that do not clock in. You can schedule them for a reasonable number of hours and have that schedule automatically copied into their attendance, which can be adjusted as needed.
Scroll down and click Add This Employee if you are adding a new employee, or Save if you are editing an existing employee.
View your sent messages and see which employees have read them
TimeForge offers a built-in messaging service to provide a quick and convenient way for employees and managers to communicate. Additionally, TimeForge Messaging offers a written record of any correspondence. To see if your message has been read, and by whom, follow the steps below.
An information box will appear with the names of the employees who have read the message as well as a date and time for when it was viewed.
Assign an Internal Number and Internal Password to an employee
Internal Numbers and Internal Passwords can be used in a few different areas of TimeForge to allow users to clock in and out of the system. This can be useful in situations where an employee has difficulty clocking in on a Biometric TimeClock due to callused fingertips, for example.
Assigning an internal number and internal password for employees is simple and only takes a couple of clicks. This can be done from the employee’s profile.
Toward the bottom of the Basic Employee Information section, locate the “Internal Number” and “Internal Password” boxes. Enter a number (at least 4 digits) that is easy for your employee to remember.
You can use the same combination for both the number and the password, but for better security, we typically advise use two different combinations.
Click Save at the bottom of the page once you’ve finished.
Rank employees and restrict shifts by skill level
Skill levels in TimeForge allow managers and supervisors to rank employees based on their experience at each position. The higher the skill level, the more experienced the staff member. You can even use the skill level to help create an employee schedule.
Employees who work more than one position or job can have multiple skill levels. For example, an employee may be an excellent cashier (with a skill level of 5), but may be a manager in training (with a skill level of 2).
Employees can be ranked by skill levels for each position
Each shift may require employees of different skill levels, which can be set at the template or schedule level.
To designate a skill level requirement for a shift, click the pencil icon next to the shift you are creating.
A pop-up will appear, allowing you to edit some information associated with the shift, including required Skill Level.
Set blackout dates to prevent employee time-off requests for those days
Blackout dates can be useful if you have days that you don’t want to allow employees to request time off, like holidays or high-volume business days. You can also use blackout dates to allow a limited number of requests. Here is how to set up blackout dates with TimeForge.
Open the Employees tab and select Availability & Requests
This is the Availability and Requests page. From here, you’ll be able to black out certain time frames or dates so that employees are not allowed to request time off during those dates.
To black out an entire day, click the gray “Do Not Allow Requests” link for that day.
Another box will pop up, asking whether you want to allow any requests at all or if you’d only like to allow a limited number of requests for that day. If you choose No Requests, then your employees will not be able to submit a request at all.
If you choose the second option, only the number of requests you enter in the box will be allowed for that day.
When you’re finished, click Continue to finalize the black out date setup.
The date will be grayed out in the calendar in a darker shade of gray, indicating that it is a blackout date. Additionally, the link will read “Allow Requests” instead of “Do Not Allow Requests”:
Add an employee to multiple locations
In TimeForge, any employee can work at as many locations as you need them to. This gives you the power and flexibility of having the same employee able to clock in at any of your multiple locations, which is useful when you need to be able to divide your labor (and labor costs) across locations. It is also useful when you have employees that are frequently interchanged between different locations in a store.
Navigate to the Employees page under the Employees tab
To clock into a specific location, the employee should first use the Location selector in the upper left of the navigation menu:
Then, with the appropriate location selected, they should use the Clock - In box on their Today page:
Manager Guides › Schedules
Add a new schedule
TimeForge is a complete labor management tool, and one of the most useful features of TimeForge is the ability to quickly and easily create employee schedules. Once your employees and positions are configured in the software, creating an employee schedule is easy!
In just a few clicks, a complete employee work schedule can be assembled and posted for all staff members to view.
TimeForge allows you to build a labor schedule in different ways - depending on your exact scheduling needs. You could even choose to use the AutoScheduler and have accurate employee schedules created automatically for you. TimeForge includes a Daily View, which includes a bar/gantt chart to easily determine staffing levels, as well as a Weekly View, which resembles Microsoft Excel and allows you to work on an entire week at a time.
Then you’ll be able to see how the schedule looks if one already exists. If not, click the “+” icon in the Position tab to create a new one.
In the Edit Shift window:
Select the start and end time for the shift under Create a shift from – to.
Choose the Position (for example, Cashier).
Select the Employee assigned to the shift.
If applicable, choose an Event from the dropdown.
Add any relevant Notes (optional).
Set whether the shift is extra or on-call by selecting Yes or No.
Choose if the shift should be Available for AutoSchedule.
(Optional) If you want to duplicate this shift on other days, use the Copy this shift to multiple days option.
Click Save to confirm or Cancel to discard.
After saving, the new shift will appear in the Daily View under the assigned position. Verify the time and employee details are correct before publishing the schedule.
In the Classic View, TimeForge allows you to build employee schedules in different ways depending on your needs. TimeForge also allows you to switch between the Daily View, which shows a bar chart to visualize staffing levels, and the Weekly View, which looks like Microsoft Excel and lets you manage an entire week at once. The example below displays the Daily View within the Classic View, where you can create and edit schedules directly.
Some of the powerful features and benefits of the Daily View include:
Make a schedule template from the shifts you have created, or use a previously created schedule template to make a schedule fast!
If you have at least one schedule template, you can choose to use the TimeForge ShiftBuilder to help automatically build a schedule for you.
Choose Daily Labor Costs to review a graph of labor costs by position.
The work schedule can be built by employee (Schedule By Employee), or by position (Schedule By Position). Switch back and forth with a single click.
Adding a shift is easy - just pick the start and end times, then choose the employee or position from the drop-down. That’s it!
A graphical chart is shown next to each shift to allow you to easily staff your business.
If you have breaks enabled and break rules created, you can choose to edit the daily breaks that are created from your employee break rules.
Use the Daily View to Add Shifts to a date
To add shifts while using the Daily View:
Pick the appropriate Start Time (when the employee should arrive) and End Time (when the employee will likely leave) for the shift. Instead of choosing from the drop-down box, you are free to enter your own start and end times (such as 2:12pm)
Choose the job code for this shift from the Position drop-down box.
Use the Daily view to create employee schedules
After choosing the start and end times on the Daily View, and a position for the shift, click on the Employee drop-down. TimeForge will display a listing of all possible employees that are available to fill this shift.
Information about each employee will be shown, including their name, skill level for this position, an approximate cost to have the employee work this shift, and any notes about employee availability or requests.
Additionally – the “AutoSchedule” option is available. When you choose the “AutoSchedule” option, TimeForge will automatically look for the employee that is a “best fit” for the schedule, based on available hours, employee constraints (such as their availability), cost of labor, and a number of scheduling best practices.
Create employee schedules with different views - Weekly View
Pictured above is the Schedule Weekly View. Some of the powerful features and benefits of the Weekly View include:
The schedule can be built by employee (Schedule By Employee), or by position (Schedule By Position) or by Time.Switch back and forth with a single click. Group summaries (such as the total hours, number of shifts, and labor costs) can be switched on and off by clicking on Group Summaries. Click on Times, Hours, or Costs to quickly display each shift’s start and end times, hours of duration, or the cost of the shift. No more sorting through Excel for this data!
Important messages about the schedule, including broken scheduling rules and best practices are displayed at the top of the Weekly View.
Click on the date header (such as Sat 08/08 or Sun 08/09) to view a pop-up window of additional actions, such as switching to the “Daily View,” creating a template, copying shifts from one day to another day, and much more!
Click “Add Shift” or the start and end time of the shift to add or edit a new shift for the employee.
Create your employee schedule with the "Add/Edit Shift" pop-up in the Weekly View
In the Weekly View, clicking Add Shift will show the window below.
This window allows you to quickly add a shift to an employee / position combination, shows any other shifts that the employee is already scheduled for, and displays any requested time off. Shifts can also be copied to other days of the schedule with a single click!
Click Save when you are finished.
Drag and drop shifts to quickly copy schedules
In the Weekly View, you select an employee (or position) and drag it to another employee (or position). Release your mouse button when you see a green “check” icon. You will be shown the following:
You can choose to copy (duplicate) or move the shifts from one employee to another. Copy the shifts to copy any upcoming shifts, leaving the original shifts intact. Move the shifts to transfer shifts from one staff member to another.
Post the employee schedule to be viewable by employees
When the schedule is complete, it should be Posted. Posted schedules can be seen by all staff members that have access to TimeForge. Schedules that are not yet posted cannot be viewed by employees.
To post, simply click the Publish button found at the trop right-hand corner of the screen. Your schedule will now be viewable by your employees that log in to TimeForge.
Create and use daily or weekly schedule templates
In TimeForge, work schedule templates are 24-hour periods of time that reflect a single day of a schedule. In some industries, these are called “Master Schedules,” or “Master Work Schedules.” You can use a work schedule template to organize your labor requirements in advance of the actual schedule, allowing you to easily anticipate upcoming staffing needs. This is also helpful if you use TimeForge Sales to project your weekly sales because it can further help you control your labor costs. In other words, creating an employee schedule template will allow you to rapidly create a work schedule, as long as you spend a little time in advance thinking about your labor needs***.***
Templates can be created for any number of scenarios, and there are no limits on the number of templates that you can create in your account. For example, you might create a schedule template for staff members needed Monday through Thursday, and then separate templates for Friday and Saturday since they require more labor. Or, you might create schedule templates for each day of the week, with templates for Monday night football, holidays, or other special occasions.
Here is how you can easily build employee schedule templates for multiple staff members, and then use those templates to build a schedule.
Editing a schedule template for employees is similar to working with a staff schedule in the TimeForge Daily View.
In the classic mode, select the start time, end time, and position for each shift, and then choose the employee you would like to have work the shift. Just like the schedule Daily View, templates can be built by position or by employee, based on your business’s needs.
You can also build Templates using Work Periods (commonly called Day Parts), if you would like, by clicking on the Work Period icon, which is directly next to the start time.
Shifts on a template can be assigned to an employee, to the TimeForge AutoScheduler, or as a Open or Bid Shift.
AutoSchedule shifts allow the TimeForge AutoScheduler to choose the best fitting staff member, and will replace the AutoSchedule employee with the best fitting staff member when building the schedule.
Bid shifts can be requested by multiple employees, and the manager can choose the best staff member for the job.
Any qualifying employees will also be listed and can be chosen under the Employee column.
Open shifts will allow a manager to specify the assigned employee when building the schedule.
There are several options that can be chosen for each shift by selecting the shift properties icon, the small pencil, next to the shift.
Options include whether the staff member is an Extra or is On Call, the Skill level necessary to work the shift, and if the shift requires more than one employee to come in, then you can change how many staff members are needed to work.
Click the Finished! button when done.
Once you’ve created your schedule templates, it’s time to use them to build a schedule!
Navigate to the Schedules page under the Schedules tab
Choose the date range for the Schedule, and then name the schedule to continue. TimeForge will automatically assign a name, but you can change it to whatever makes sense for you.
When building your schedule, you can choose a weekly template, which will prefill all the days for you, or you can select schedule templates for each day individually.
When you are ready to have TimeForge build the schedule for you, simply click Assign Employees. TimeForge will then copy the shifts inside of your templates to the schedule and will assign staff members to work if necessary.
Click Finished! to see your schedule breakdown.
Remember, you’ll need to post your schedule to put it into effect!
Return to the Schedules page to post your new schedule and make it available to employees.
Save or restore a schedule using snapshots
TimeForge schedules are saved automatically when any field is modified, but sometimes it is useful to save the current schedule before making any modifications so that you may come back to the previous employee schedule if necessary.
Schedule Snapshots allow you to archive / save the current version of the schedule, along with some quick stats about the number of shifts, and the cost of the schedule. At any point in time, you can easily restore a previously saved schedule snapshot. Simply choose which snapshot you’d like to restore, and your employee work schedule will immediately roll back to the previously saved schedule snapshot.
Employee schedule snapshots are available on the weekly schedule of the schedule, and are very useful for:
Integrating newly hired staff members (identifying which shifts can be moved around to accommodate the new employees).
Rolling back to a previous version of the current work schedule.
Identifying shifts that can be removed or modified to reduce labor costs.
Viewing the effects of a drastic schedule change or shift swaps prior to actually “doing it”.
And other “What If?” scenarios with the employee work schedule and staff members.
To view Schedule Snapshots, or create a new one, click on the name of the schedule for which you would like to see or create a schedule snapshot. This button is located at the top of the weekly view of the schedule.
TimeForge will show a brief explanation of Schedule Snapshots. If you have already taken some snapshots, this is also where they would appear, but since this is our first time creating one, we don’t see any yet.
You can view previous Schedule Snapshots by bringing following the steps above to open up the Actions pop-up and View / Take Snapshots.
Listed with each snapshot is the date and time the snapshot was created, the number of shifts in the schedule, the total number of labor hours scheduled, and the estimated labor cost (schedule cost).
To restore a schedule snapshot, simply click on the button next to the desired snapshot, and then click on “Restore a Snapshot.” After a few seconds, your schedule will be restored to the selected snapshot.
To create a new snapshot of the schedule you are working on, click Create a Snapshot. You can create as many schedule snapshots as you need.
Create a sales-driven schedule
TimeForge gives you the flexibility to create an employee schedule several different ways. Part of this flexibility is the ability to create a schedule while using sales forecasts and projections. Depending on the specific needs of your business, you can compare your schedule to any key performance indicator (KPI) that you have set up.
After Manager Projections have been input into the TimeForge “Sales Module,” the Manager Projections can be displayed on the labor schedules, providing instant feedback on how each day of the schedule will compare to the manager projections. System Generated Forecasts can also be displayed on the employee schedule.
Creating a schedule and comparing it to projected sales is easy. This overview explains how to use the daily and weekly views in TimeForge to stay within your thresholds.
As the schedule is changed, the Manager Projections in the “Daily View” are updated automatically, displaying the ratio between the schedule and the Sales Category (e.g. SALES, Gross Sales, Net Sales) chosen for this schedule.
Here’s an example for a Vitamins department, in which the schedule has already passed (otherwise we would not see Actuals):
The Weekly View of the labor schedule will display critical statistics about the schedule, including the Variable Hours (hours scheduled for regular employees), Non-Variable Hours (hours scheduled for managers or supervisors), paid and unpaid breaks, as well as Manager Projections.
If the ratio is shown in green, then the ratio is beneath the desired ratio.
If the ratio is shown in red, then the ratio is too high.
Here we can see that the Manager Projections, System Forecasts, and Actuals were all within limits:
Define your ShiftBuilder Rules
In TimeForge, the shiftbuilder can automatically generate coverage and build shifts for you based on sales rules and comparisons. For example, one rule could be set up in a way that for every $1,000 in sales, you need 2 staff members in the store. Rules can be based on sales, based on minimum and maximum staffing levels, and more. Setting up ShiftBuilder Rules is one of the first steps to configuring your account to be able to generate schedules based on your sales projections/forecasts.
You’ll also need to configure your sales categories so that you can start viewing things like Net/Gross sales and labor percentages.
Here is how to configure ShiftBuilder Rules. However, don’t hesitate to contact us if you would like some extra help!
Select the Type of ShiftBuilder Rule you want to use. You’ll need to mix and match to determine which rules work for each position in your business.
Sales Rule: You’ll select the amount of sales (in dollars), and the amount of employees needed for that amount of sales. For instance, “For every $200 in sales, I need 1 Server on the schedule.” So, if you have $612 in sales that hours, the ShiftBuilder will generate coverage of 3 servers that hour.
Min/Max Rule: This is fundamentally how many employees you need for a given shift. For example, “No matter what my sales are, I always need at least 1 Server, and I never need more than 7 Servers.”
Shift Duration Rule: This lets you set up the minimum and maximum length for a shift. For example, “My Servers shouldn’t be scheduled for less than 4 hours or more than 8 hours.”
Rounding Rule is used for rounding in conjunction with Sales Rules. For example, “If I’m within fifty percent (0.5) of the next Server being called in, according to my existing Sales Rule, I want the ShiftBuilder to go ahead and pull in the next Server.”
Sales Range Rule Lets you build shifts based on a range of sales data. For example, “If my sales are between $0 and $150, I need 1 Server.” If you use a Sales Range Rule, you’ll need to either (1) add several Sales Range Rules to cover any realistic amount in sales you might expect, to make sure you have the proper coverage, or (2) also use a Sales Rule. (See example in next step.)
Click “Save ShiftBuilder Rules” once you’ve finished
Add as many ShiftBuilder rules as you need. Once you’re finished, click Save ShiftBuilder Rules at the bottom of the page.
Create and assign shifts using the ShiftBuilder
There are many ways that you can build an employee schedule in TimeForge. Whether you want to build shifts yourself, use templates to expedite the scheduling process, have the AutoSchdeduler automatically assign shifts for you, or have the ShiftBuilder automatically create employee shifts, TimeForge will save you time and headaches when creating a work schedule.
One unique feature to the already powerful ShiftBuilder is the ability to generate shifts based on manager projections. Doing this is easy and will better control your labor costs by essentially putting your work schedule on a budget.
The first thing you’ll need to do is set up some Manager Projections. Then, follow these steps to use the ShiftBuilder to generate shifts based on those projections.
You can now assign an employee to each shift or let the AutoScheduler find the best fit.
Add a break to a schedule, such as a lunch or meal break
In TimeForge, the employee breaks module is a powerful and flexible part of scheduling and attendance tracking in regards to scheduling employee breaks and meal periods. TimeForge breaks are controlled using Break Rules, and after you create an employee schedule, these Break Rules become scheduled employee breaks that can be controlled and monitored using TimeForge Attendance, or with a worksheet and signatures by staff members.
If you are using TimeForge Scheduling, you can add new schedules and breaks for staff members. Setting up employee breaks on your schedule is easy, and here’s how it’s done.
At the top of the add-edit shift screen, there is a Shift tab and a Breaks tab. Choose the Breaks tab to display scheduled breaks, or schedule new breaks.
Configure the time, the duration, and the type of break that you want for this shift. When you are finished adding breaks for this shift, click the Save button.
TimeForge can save you time scheduling breaks while you’re creating employee schedules. You can set up break rules so that breaks will automatically be created when you’re building a schedule. Sometimes you may need to add a break rule, or make changes to a break rule, even after you’ve already created a schedule. TimeForge allows you to easily update the schedule to reflect your new rules without having to start a new schedule.
Go to the Weekly View and click the title of the schedule.
Then click the Recreate Breaks option.
Click OK when prompted.
Recreating your breaks will undo any manual breaks you added. Only
Track or enforce employee breaks
In TimeForge, the employee breaks module is a powerful and flexible part of the scheduling and attendance tracking in regards to scheduling employee breaks and meal periods. TimeForge breaks are controlled using the “Break Rules,” and after you create an employee schedule, these “Break Rules” become scheduled employee breaks that can be controlled and monitored using TimeForge Attendance, or with a worksheet and signatures by staff members.
TimeForge “Break Rules” are designed to allow management to specify the language and requirements of paid, unpaid, optional, and required breaks, similar to how they might be specified by federal, state, or local authorities. For example, in some states, it may be required to provide a 15-minute optional and unpaid break to staff members who work at least 6 hours.
Setting up the “Break Rules” is easy, and here are the steps you need to take in order to schedule breaks for staff members.
To add an employee break rule, click on the Add A New Break Rule button. Here is an explanation of the information on this screen:
Employee breaks that apply to any position are listed under the Any Position section. Breaks for specific positions are listed under their respective position names. This flexibility allows management, like FOH and BOH, to have different staff member break setups.
Select the number of breaks, and the duration of the break(s). For example, here we are setting a rule for “2 breaks,” and each break lasts “5 minutes.”
Choose the duration that employee breaks repeat. For example, in the picture, we are describing breaks that occur once every 6 hours. If the breaks should be awarded every 2 hours, but the shift is 4 hours long, the staff member may be awarded 2 sets of breaks.
Decide whether the employee breaks are paid, unpaid, required, or optional, and add a description of the break (optional). For example, here we have a required but unpaid break with no description.
Decide if the break applies to all positions, or only one type of position, and also decide which specific shifts will receive the break. For example, here we are awarding breaks to staff members who work Cashier shifts that are at least 6 hours long, but no longer than 8 hours.
Not overlapping simply means that the breaks will be given so that they do not conflict with each other.
TimeForge will tie all of the Break Rules together, and then apply/award the breaks to staff members working any shift that applies. Based on the picture for this step, TimeForge will provide (2) 5-minute breaks to cashiers who work at least 6 hours, but less than 8 hours. Both of these breaks are required, but are unpaid.
When you’re done working with the employee breaks, make sure to click on the Save Break Rules button to save your changes.
After you create rules for employee breaks, you have the ability to test them to ensure that the break rules are configured exactly the way your business needs them.
To test the break rules, choose an applicable position, then choose a logical work shift, and finally click on Test Break Rules.
Open the Attendance tab and select Attendance Options.
The employee break options are at the bottom of this page.
This option must be set to “Yes” in order to display the rest of these options. Setting it to the default of “No” will essentially turn off any enforcement of the break rules you’ve set up.
This option will enforce the break time on your employee schedule. If this is set to “Yes,” employees are able to clock out anytime to take a break. If it is set to “No,” many more of these options will appear (everything listed as part of #4 below) so that you can specify how TimeForge will enforce the break rules.
With this option set to “Yes,” you can have TimeForge automatically distribute the breaks based on the schedule. If set to “No,” you’ll receive another option and can set what order breaks are taken. You can choose from “Employee Choice, Paid/Unpaid and Required/Optional, or Unpaid/Paid and Optional/Required.
With these options, you can have TimeForge automatically take out breaks depending on what works best for your business.
This option automatically turns a break into “Unpaid” after a set amount of time. That way, you can prevent employees from getting paid for taking breaks longer than what is allowed on the schedule.
Don’t forget to click Save Company Settings when you’re finished!
Schedule an event
TimeForge Scheduling can do so much more than just quickly create an employee schedule. One awesome feature of Scheduling is the ability to schedule an event, which can be utilized in a variety of manners. For example, events may be scheduled if a large party orders catering services form a restaurant. Perhaps, there is a company social that you would like to put on the schedule. In some cases, companies that go to their customers instead of having their customers come to them may use the Events feature to track where their employees are going. Events work much like regular schedules and shifts, and a comprehensive list of scheduled events can easily be viewed.
The process to schedule an event is painless, so let’s get started.
A list of certifications that have been set up in your account will appear on the Event Information page. Check the boxes next to the certifications required for any positions that might work at the event.
You can only set sales by clicking Edit after creating your event.
If you’re using TimeForge Sales and you already have your sales categories set, you can add them to your event and track how you’re doing. This feature will help you make sure your labor cost for each event is at a minimum.
Click Save when you’re finished adding event sales.
After you’ve created events, a new column called Event will appear while you’re building a schedule. To let your employees know which event they’re working, choose the name of the event from the dropdown list that now appears for the shift.
Filter shifts by position or department
With TimeForge, creating and editing an employee schedule is made simple! We also know that sometimes while creating a schedule, you may find it helpful to filter shifts so that you can ensure coverage for specific positions during the day. For example, a catering company may want to only view the waiters and bartenders for a particular day.
You can filter shifts in TimeForge with just a few clicks.
Navigate to the Schedules page under the Schedules tab
You are now viewing the schedule with only the selected positions.
Print a monthly work schedule
With TimeForge, you have access to the most flexible and powerful labor management system available. TimeForge gives you the ability to quickly and easily create, view, and print work schedules for staff members.
There are many different options for you to print the work schedule for your staff, as well as several types of schedule reports that can be printed.
Printing the monthly layout of your employee schedule is easy, and here is how it’s done.
Navigate to the Schedules page under the Schedules tab
You can also print a schedule from the Actions pop-up while editing/viewing the schedule. This allows you to see a visual representation in calendar view before you print.
Once you click Print (using either of the above methods), your schedule will appear as a printable PDF on screen, broken up into condensed 7-day segments. If your schedule spans a full month, for example, the PDF will include a condensed 7-day schedule for each week in the month.
Use your browser’s normal download and print methods to save and/or print a copy of the report.
Ways to view a schedule (Daily, Weekly, or Monthly)
With the TimeForge scheduling software, you have the power to create low cost employee schedules that are also effective. Additionally, TimeForge makes it easy to quickly view or print your monthly schedule. You can also quickly switch between weekly and daily views to help you create the perfect employee schedule.
Click on the link/card of the schedule you’d like to work on. Alternatively, you can create a new schedule using the + Add Schedule button at the top of the page.
The Weekly View will show you your scheduled positions and employees across the week. By clicking Group Summaries, you can also see the labor hours and costs associated with each position.
When this view is highlighted, you will see schedule information for the selected day, much like you did when you created the schedule.
Create a schedule in under 20 minutes with the AutoScheduler
The AutoScheduler is an industry leading tool that TimeForge offers to its users at no additional cost. AutoScheduler lets you input the basic outline of a schedule, then you click AutoSchedule, and presto! The perfect schedule is born. An AutoScheduled schedule is optimized to make both employees and managers happy by considering employee requests, skill levels, busy times, costs of different employees, and other criteria. The AutoScheduler creates the most profit-friendly and most employee friendly schedule possible.
Here’s how you can use the AutoScheduler to build your schedule.
Under the “Employee” column, select AutoSchedule. If there are any shifts you don’t want the AutoScheduler to adjust, click the lock icon on that row so that it is green and locked.
When you’re finished, click “AutoSchedule” at the bottom of the page.
Using the AutoScheduler on the entire week at once
This page will continue to load as long as the Autoscheduler is working. However, you don’t have to stay on this page – the AutoScheduler will continue to work in the background as long as you remain logged-in to your account. Feel free to work on your attendance, sales, or grab a coffee. Whichever is most urgent.
The amount of time it takes for the AutoScheduler to be finished depends on the size of the schedule, but it will never be longer than 20 minutes (it’s written in the algorithm to find the best fitting schedule in under 20 minutes). Once it’s done, all that’s left to do is review the schedule and post it.
Schedule an employee with multiple pay rates
With TimeForge, you have access to the most powerful labor management tool around. One of the most helpful tools in TimeForge is the capability to efficiently and effectively create an employee schedule. Since employees often work different positions, and those positions sometimes have different pay rates, TimeForge gives you the ability to schedule an employee with multiple pay rates.
Multiple pay rates are approached just like a regular work schedule. The only difference is an extra step during set up. The employee will need to already have multiple positions and pay rates set up. Then, it is just a matter of scheduling that employee to work multiple shifts with different jobs.
Here’s an easy approach to setting up and creating a schedule for employees with multiple pay rates.
In the example below, the employee is working from 8AM-12PM as an Cashier, which is at a rate of $12 an hour. Then, from 1:00-5:00PM as a Grocery Manager at a rate of $15 an hour.
TimeForge Attendance is a powerful system designed to help manage staff clocking in and out. One setting under the Attendance Options controls whether employees should automatically be swapped into different positions based on how they’re scheduled.
To view and change this setting, open the Attendance tab and select Attendance Options.
If set to Yes, the option below allows you to automatically swap employees’ positions based on the schedule without requiring them to clock out and back in again.
If you make any changes to these settings, don’t forget to click Save at the bottom of the page when you’re finished.
Move all shifts from one employee to another
You will want to move shifts from one employee to another if someone is unable to work scheduled shifts, if you prefer a different staff member to work a scheduled shift, if an employee is terminated, or for any other reason that you want to transfer shifts from one employee to another. TimeForge makes this process easy, simply follow the directions below.
Click on the check boxes next to the shifts you want to remove from this employee. Then, click on the think that says Bulk Assign These Shifts to Another Staff Member. (This link will only appear once you have selected one or more shifts.)
Click on the drop-down menu and select the employee to whom you want to assign these shifts.
Once you’re finished, click the Save button. The selected shifts will be reassigned to the employee you chose.
Approve or deny an employee Shift Swap
With the appropriate settings enabled, TimeForge allows your employees to swap or trade shifts.
Shift swaps are simple: If Joe Smith doesn’t want to work the shift that he is currently scheduled for, he can “give up” his shift, and another employee can “pick up” that shift. Then, a manager can approve or deny the swap. Of course, Joe is notified that he is still responsible for the shift until the swap has been approved by a manager.
You can view pending shift swaps either through the Schedules tab or through your Today page. After viewing shift swaps, you can accept or deny them, and you can also leave a message for the employee regarding the approval or denial of the swap. TimeForge also has alerts which will email managers (or staff members) when shift swaps are available or need to be reviewed.
On the Today page, you can view the number of pending and open Shift Swaps. Pending swaps are those that have been picked up but are awaiting manager approval. Given up shifts are those that have been “given up” but not yet “picked up” by another staff member. Shifts listed under the Bids category are bid shifts management created and are awaiting employees to pick up. You can find unassigned shifts under the Open category. Management creates opens shifts to mark a time slot they need cover, but have not decided on which employee to assign to the shift. Finally, Transfer Bids displays bid shifts created by management employees assigned to multiple locations can pick.
When you click one of the categories in the Pending Shifts widget, you’ll see a detailed view of each shift available for pick up or awaiting a manager’s decision.
Another way to view pending Shift Swaps (as well as those you have approved or denied) is to open the Schedules tab and click Shift Swaps:
Managers can determine potential cost difference in approving the swap, as well as whether the swap will violate the number of maximum hours assigned to the employee who is picking up the shift.
Click Approve to approve the shift swap or Deny to deny it.
The final step in approving a shift swap is confirming that you wish to approve the swap. When the final approval window pops up, you can even enter a message explaining why you approved or denied the shift swap. Click Continue to finalize the swap.
The approved swaps should then show up under Approved Shift Swaps. Denied swaps will show up under Denied Shift Swaps:
What does an employee see when they attempt to give up a shift?
They are informed that while they may give up the shift, they are responsible for it until someone picks up the shift and their manager approves the swap.
What does an employee see when they attempt to pick up a shift?
They are informed that while they may pick up the shift, they are NOT responsible for it until their manager approves the swap.
Divide the workday into Work Periods
TimeForge gives you total control over every aspect of the employee scheduling process. Work Periods allow you to split the day into different sections of time, such as Morning, Afternoon, and Evening, or Open, Mid, and Close. This is especially useful when you know your times of peak business. For instance, a restaurant may set up “Lunch” and “Dinner” work periosd so that they can make sure those hours are always fully covered.
Here are instructions for adding any work periods that might be relevant to your business operations.
Go to the Work Periods page under the Schedules tab
This page will allow you to split the day into different Work Periods. TimeForge will use the work periods to allow easy visualization of the schedule and availability.
Edit the work period information, then click Save at the bottom of the screen when you’re done.
Now when you create a schedule for this department, you’ll see the work periods you defined:
And when you visit your Availability and Requests page, you’ll see the workday divided into the periods you defined:
View your daily labor cost
Analyzing your daily labor costs, or how much employee wages cost each day, is important for understanding your business operations, noticing any room for improvement, and preventing over- or under-staffing in the future.
In TimeForge, there are two easy ways to view the daily labor cost, and both involve the Schedules page. Here are instructions for both methods of accessing your daily labor costs.
Under the schedule information, you should see a link to Today’s Labor Cost. In this example, we can see that we have 54 hours scheduled and a cost of $465.
To view a breakdown of cost by position, click the link.
A pie graph will appear, showing daily labor cost by position.
You’ll notice two things when you select Cost. First, the shift times/hours will be replaced with employee cost:
Second, at the bottom of the page, you will see the total costs per day of all shifts, including a Weekly Total at the end of the row:
Configure weekly iterative forecasting and notifications
Weekly Iterative Forecasting allows managers to schedule 2 weeks in advance (or more), but be notified of the impact that more recent forecasting could have on the schedule, and empower the store managers to make adjustments if they choose to. This option allows managers to have information about forecast sales so that their schedules can be more in line with the most recent forecast, or they can choose to leave their schedule as-is, without adjusting.
It’s already enabled! On the schedule pages, a new row should now be visible for Schedule/Forecast Target at Posted. TimeForge essentially takes a snapshot of the schedule when it’s published and preserves that data on that row in the schedule.
There are only two options to consider when using weekly iterative forecasting, and both are very easy to set:
The “off by percentage for forecasts” option needs to be configured for each location. This setting tells TimeForge when to notify managers that the forecast has changed the recommended schedule.
Managers need to opt into the notification about schedule forecast changes.
To do this, open up your profile and select the Alerts tab. The option you want to enable is at the bottom of the list:
Don’t forget to save your settings!
Create short term labor goals
TimeForge allows managers to configure their sales per labor hour (SPLH), costs per labor hour (CPLH) calculations, and labor targets in order to meet their store’s labor goals while remaining within their labor budget.
This guide will show you how to set up your location correctly so that you can make use of this feature and will then walk you through creating a schedule that meets your labor goals and budget.
The first thing you’ll want to do is make sure your location is configured with the CPLH calculations and labor target percentages that will be used to calculate labor target hours.
Go to the location Settings page under the Set Up tab
On the Settings page, find the setting that reads, “Do you want to calculate Labor Budgets for this location?”
Select “Yes” for this setting to enable it (if it is not already enabled). This will cause two related settings to appear underneath:
Labor Budget calculations should be based on the Manager Projection, and TimeForge should look back 4 weeks when calculating average labor costs.
(If your location does not have sales data from the past four weeks that can be used to make accurate calculations, you can set this number higher to look back even further in time.)
You should be comparing your sales values to Labor Costs, and when comparing sales metrics, you should be looking at Shift by Sales %. Your desired labor target should be set to whatever your goal is for that location. In the example below, it is set to 10.2.
If you don’t have recent attendance, you can use the back button or the date selector to locate your most recent attendance data.
In this example, we don’t have any attendance in the past few weeks, so we need to go back and update our location settings for labor to look further back than four weeks. You can set TimeForge to look back as many as 13 weeks (shown below).
(In most cases, for active stores, there should be recent attendance data, and this step should not be necessary.)
Next, we need to make sure we have sales data.
Go to the System Forecasts page under the Sales tab
With the Sales tab still open, select Manager Projections from the left side menu.
Again, as with the forecasts, we want to make sure we have Manager Projections through this week and next, in order to accurately create our next schedule to meet our labor and budget targets.
We can also use the Calculate Weekly button to add projections for additional weeks.
Click the + Add Schedule button in the top right corner of the page, then fill out the form as usual.
After handling any employee requests for time off, select your weekly template and then hit the Assign Employees button at the bottom of the page.
TimeForge will proceed to autoschedule your employees using your chosen template. Selecting the name of the schedule will show you a pop-up list of additional actions.
Choosing ShiftBuilder will allow you to generate the schedule based on your shift rules.
So for example, if the Sales Forecast for the schedule is 337214.9 (as shown above), TimeForge will allocate 444 total labor hours based on the SPLH. It then distributes those hours across positions based on how attendance is typically allocated.
If a value is in red, it means the allocated hours don’t meet the minimum required for that position, as defined by the shift builder rules. Thus, in the example above, if we schedule the 98 hours, we can expect to be short staffed in courtesy clerks.
The values in these boxes can be adjusted, but for this example, we’re going to go ahead and scroll down and Distribute by Forecasts.
TimeForge will generate labor coverage among staff members based on the forecasted hours. Let’s scroll down to the bottom to view the summary.
Here we can see some interesting information about our labor allocation. Let’s look at the first column, which is for Monday 07/22 (the last column in the grid represents the entire week):
Next to SPLH Hours, the top number is what’s on the schedule based on what the shift builder just generated. The bottom number is the number of hours that TimeForge thinks we need based on SPLH and the distribution of sales.
Next to Target % Hours, based on our labor target for this store (we used 10.2%), our SPLH is estimating that we should be using 96.44 hours this day. The difference between that number, and what we have scheduled, is shown below it in red (29.44 in this example). This means we have 29.44 hours we could allocate before we exceed our labor budget for that day.
View schedules and timecards using RSS
TimeForge will allow you to view schedules, messages, time cards, and more using any phone capable of reading an RSS feed. Of course, you can always use a web browser, such as Mobile Safari or Opera Mini, to view the TimeForge website at https://app.timeforge.com.
However, TimeForge schedules, messages, shift swaps, and much, much more can be viewed directly on your cell phone, iPhone, Blackberry, or other non-web browser reader by using RSS feeds.
TimeForge uses RSS feeds to deliver the information directly to your cell phone and requires that your phone be able to read both encrypted RSS feeds (over an SSL connection), as well as secured RSS feeds (which require a username and password).
Each RSS program is slightly different in how it requires that you add a feed. In this example, we are using Sage, a popular RSS feed reader for the Firefox web browser.
Click on the Find icon. Other RSS readers may require that you enter the URL of the RSS feed. If that is the case, enter the RSS RSS URL directly into the software. This URL is most commonly:
Some RSS readers (such as Viigo for the Blackberry) do support encryption, but do not support username and passwords. In some cases, these RSS readers can be coerced to support username and passwords by using a URL with the format of:
Sage, like many mobile web browsers (such as Safari and Opera) will automatically find any relevant TimeForge RSS feeds. Select the feed (“Timeforge’s Information”), and then click Add Feed.
These feeds have a lot of information in them, and contain details such as:
Using the TimeForge RSS feed, you can easily view and send TimeForge messages.
Maximize scheduling efficiency using Bid Shifts
In an organization with variable labor needs, defining fixed employee schedules can be operationally inefficient. Not only do employee availabilities often change, but schedules in which employee preferences are not considered can have a damaging impact on employee morale and turnover. Many organizations resolve this by utilizing tools likeTimeForge’s AutoScheduler to automatically and fairly distribute shifts to employees. However, it’s important to note that TimeForge offers a powerful alternative to AutoScheduled shifts: bid shifts.
Bid shifts allow employees to pick up their own shifts. While this may initially bring to mind images of mass chaos, our customers find that allowing bid shifts within the structure provided by TimeForge often contributes to a positive culture of accountability and payoff while reducing managerial time spent scheduling. Employees love the control and flexibility that Bid Shift scheduling affords them, and managers appreciate spending less time guessing when people do or don’t care to work.
TimeForge’s Bid Shift feature was designed to complement your other scheduling strategies and works seamlessly with your other settings. Details on how it works are below, but the basics are simple: when a schedule is posted, employees select the shifts they want to work.
Instead of assigning a shift as “AutoSchedule” or assigning it to a specific employee, the shift instead is assigned as “Bid”. This can be done automatically by the ShiftBuilder during schedule creation, or the scheduling manager can choose to mix some Bid Shifts with AutoSchedule shifts and employee-assigned shifts.
When the manager posts the schedule, a notification is sent to eligible employees (according to their notification preferences) letting them know that a shift is available for Bid. In order to be eligible to pick up a particular Bid Shift, an employee must meet the following requirements:
Eligible to work the position and department associated with the bid shift
Not scheduled during that time
Not Unavailable during that time
Optionally, you can choose to use Skill Level Enforcement to ensure that difficult or fast-paced shifts are only available to high-skill employees. Read more about skill level enforcement here.
The employee can bid on the shift from their mobile app or any device with internet access, simply by tapping Pick Up under Schedules > Available Shifts.
In most organizations, a manager review step is required. With TimeForge, this manager review step can be configured to be skipped if your organization desires. However, we strongly recommend a manager review step to ensure compliance and avoid unnecessary overtime.
If the manager review step is enabled (as it is by default under Location Settings), then the manager will be notified when a shift is bid on (according to their notification preferences). TimeForge will show the manager the “what if” scenario of approving a particular bid on a shift, including approximate cost, overtime status, etc. If multiple employees have bid on the same shift, the manager can use this information to select the winning employee.
When a manager selects the shift winner, that employee is assigned the shift, notified (according to their notification preferences), and the other bidders are also notified that they did not win the shift (according to their notification preferences).
Additionally, it’s important that managers fill any shifts that were not bid on to ensure adequate coverage. TimeForge offers notifications and reports to help the manager quickly identify any shifts that have gone unfilled, and the manager can then fill the shift or AutoSchedule it.
Further fencing of bid shifting is available, to ensure a frictionless and satisfying bidding experience for both managers and employees without negatively impacting operations. For example, TimeForge can ensure that all bids are input several days before the shift. Many organizations set this parameter at 3 days, to ensure the scheduling manager has time to review the bids, but some organizations set this parameter at 7 or 14 days to assist with advanced scheduling regulations in their areas of operation.
If you choose to enable bid shifts, it’s important that you discuss with your operators the HR repercussions and warnings that TimeForge will display.
For example, some risks of allowing Bid Shifts and TimeForge’s solutions to those risks are listed below.
Risk
Solution
Employees don’t get selected for their chosen shifts.
Ensure managers are well coached on how to avoid favoritism and ensure transparency in their employee bid selection. Alternatively, you can allow first bid to win without manager review.
Employees don’t bid on a shift and it remains open, leaving the store short-staffed.
Ensure managers are paying attention to open shift notifications and reports. Additionally, managers might need to allow fewer bid shifts and utilize more AutoScheduled shifts and employee-assigned shifts.
Managers don’t select bid winners in a timely fashion, leaving shifts open and the store short-staffed.
Ensure managers are paying attention to open shift notifications and reports. Additionally, requiring bids a certain number of days in advance of the shift will reduce the strain on managers to provide quick turnaround on bid approvals. Alternatively, you can allow first bid to win without manager review.
Schedule and approve transfer bid shifts
Transfer Bid Shifts allow managers to open up bid shifts to employees from other locations, as well as prevent employees from being able to bid on shifts that exceed a configurable limit of overtime. The idea is that if two stores are nearby to one another, employees should be able to pick up shifts from either location without necessarily being assigned to that location. TimeForge makes this easy.
Once Transfer Bid Shifts have been enabled, managers will notice “Transfer Bid Shift” as a shift assignment option (in addition to “Open,” “AutoSchedule,” “Bid,” and selecting a specific employee name). Managers will also notice “Transfer Bid” as a new section in the “Pending Shift Swaps” area.
If you’re using the Pending Shifts widget, you can view and approve pending bids, including Transfer bids, from the Location dashboard.
To approve and assign a shift, click the shift, select the employee you’d like to work the shift, and then hit the Assign button.
Set up Transfers and temporary store assignments
TimeForge helps you dynamically meet your staffing needs by allowing you to temporarily transfer employees and shifts to different departments or locations. The day after the transferred shift ends, the employee assigned to the shift will automatically be removed from the temporary store assignment.
This guide will show you how to properly set up your TimeForge account to allow transfers.
Before you can use Transfers, you’ll need to make sure your settings are configured correctly. The settings that enable and control Transfers are found at the Location level under Set Up > Settings.
At minimum, the option to Allow transfers must be set to Yes.
Additionally, to view outbound transfers, at least one of the following must also be set to Yes at the Corporate level under Set Up > Company Settings:
Show attendance for locations outside Home Location
Show attendance departments outside Home Department
After you configure your TimeForge account to enable Transfers, you’ll need to make sure the employees you want to transfer are set up with the correct Home Locations and Home Departments. This will allow you to see transferred employees and where they came from when you’re looking at a schedule.
To do this, edit the employee to bring up their information:
When you’re creating an employee schedule, you can now create shifts and then choose to transfer those shifts to schedules in different departments or locations, allowing you to temporarily reallocate labor as needed. The employee assigned to the shift will be transferred to the chosen department and location for the duration of the shift.
The day after the transferred shift ends, the employee will be automatically removed from the temporary store assignment – no further action is required on your part.
How to transfer an employee shift:
In your schedule, make sure you’re under the Weekly View.
Click Add Shift for the employee you want to transfer on the date you want the transfer to occur.
Fill out the transfer information, including the location and schedule to transfer the shift to (required).
When you’re finished, don’t forget to save!
Transfers show blue arrows next to them, and hovering over the text will show you information about the transferred shift:
When an employee is transferred to another location’s schedule, their profile information will show a Temporary Duty Date. This date can be found in the first tab, under Basic Employee Information.
Once the temporary store assignment ends, the employee will effectively be “terminated” from that store, resulting in a Termination Date. This simply removes them from the store they were temporarily assigned to.
These values (Temporary Duty Date and Termination Date) are updated each time an employee is temporarily reassigned – and each time the temporary assignment ends, respectively.
Create schedules using graphs
Managers now have two methods for creating and assigning shifts in a schedule’s Daily View. The first option (Classic) allows users to create shifts using drop down menus to select the shift’s start time, end time, employee, and position. The Daily View of a schedule uses this method by default.
The second option (Graph) allows users to create schedules using drag-and-drop graphs. To use this method, you must first click on the Graph button in the schedule’s Daily View.
This guide will show you how to use the Graph feature, as well as how to change between the two different methods.
Once you select the Graph option, you can then decide on arranging the shifts on the graph by employee or position. You can toggle between either arrangement by clicking on the arrow at the top left corner of the graph (highlighted below).
Drag and drop a shift and select an employee or position to assign the shift on your schedule. You can even leave a note or mark a shift as an extra just like the Classic option before saving your changes.
If you need to edit the start and end time of a shift, drag and drop the shift to the appropriate place on the graph. You can also use change the start or end time of a shift by hovering your cursor over the left or right ends of a shift. When you hover over a shift, a double arrow appears. The double arrow allows you to move the start or end time to a later or earlier time on the graph.
You can return to the more familiar drop-down method at any time! Just click on the Classic button in the upper left.
Enable Close/Open Exceptions and Penalties
States like California, Oregon and Washington require employers to give employees a break between shifts. If your state follows “right to rest” laws, also known as clopening laws, TimeForge has settings in place to help you stay compliant. This guide explains how you can enable close/open exceptions and penalties in your attendance options, as well as how to view attendance entries with close/open exceptions.
Navigate to your Attendance Options under the Attendance tab
Toggle the Close/Open flag, so that the button reads Yes. This will enable TimeForge to track open/close exceptions.
Set the threshold for how many hours must pass between the end of an employee’s shift and the start of a new shift. Typically, this number is defined by the laws for your city or state. Anything less than this number will be flagged as an exception by the system.
If your city or state requires you to pay employees for any time worked within the open/close hours threshold, set the Close/Open Penalty flag to Yes. This will enable TimeForge to apply compensation toward employee timecards.
Enter in a cost multiplier for any time worked within the close/open threshold.
Save your settings.
View attendance entries with close/open exceptions
You can view attendance entries with close/open exceptions from your Manage Attendance page.
Once you navigate to the Manage Attendance page, you can filter out your attendance entries by clicking on drop down menu located on the top right corner of the screen. Finally, you can select the Close/Open Exception option to pull up any attendance entries which began within the close/open hours threshold.
You can also find attendance entries with close/open exceptions from a specific time range by running the Attendance Exceptions CSV report.
To run this report, you’ll need to click on Reports under the Reporting tab and search for “Attendance Exceptions” in the page’s search bar.
Get pre-built schedules based on your scheduling history (RoboSchedule)
TimeForge is proud to introduce our latest feature, RoboSchedule. Yet another quick intuitive tool to help create employee schedules. Each RoboSchedule contains the shifts you’ve already been manually creating each week and eliminates the hassle.
Many managers rely on the TimeForge AutoScheduler and schedule forecasts, or if they’ve got a small crew, they might build schedules manually, one shift at a time. RoboSchedule cuts out the weekly clicks by monitoring your scheduling habits and auto-populating schedules based on your previous scheduling history. This functionality even includes auto-generating on the same day you normally build you schedules.
RoboSchedule Main Features:
Studies your weekly schedule uploads for optimization
Automatically imports previous schedule history
Will copy any previous consecutive manual edits
Use a template? It will automatically apply it to your schedule
In order to start using RoboSchedule you must first enable it. To do this you’ll need to individually edit each department at the location level.
If you only want to use RoboSchedule for a specific department you do not need to configure any of your other departments as the feature is automatically toggled off.
Enabling RoboSchedule Under Department Configuration Settings
RoboSchedule gives you the option the View the schedule prior to posting. If needed, you can also delete the schedule that was generated and schedule using any other preferred method.
The block feature enables you to toggle RoboSchedule off if you no longer want that particular department’s schedules to be auto-generated.
When clicking on View to the far right of the auto-generated schedule you will be prompted with a quick labor summary of that particular schedule. Click Edit if you would like to make any changes to the schedule prior to posting.
Be sure to click the No button if you do not want to edit the schedule.
Once you have reviewed the shifts the Roboschedule has created, you can proceed to the weekly view and click Publish on the schedule and your employees and management team will be alerted to the schedule.
Posting a RoboSchedule functions the exact same as your normal weekly schedule but with fewer clicks. Also, the more you use the RoboSchedule feature, the better it will get.
Be sure to click the OK button when you’re prompted about posting the schedule.
Manager Guides › Reports
Schedule and receive a report by email
TimeForge gives you the power to set up and receive email reports whenever you need them. Reports can be viewed for anything from employee schedules to net gross sales. Having the feature to send the reports is useful if you need a report regularly at the same time each week or day. Depending on how you set up the report, TimeForge can automatically send your reports to anybody, anytime, so that you never have to worry about it.
This article will teach you how to schedule email reports, as well as how to edit and remove them from your profile.
Reports will be listed in grid/card format with a title and description for each. Click a card to configure and schedule a report. For this example, we’ll select “7-Day Schedule Break Down.”
You’ll see a list of all your scheduled reports here. Simply click the Edit or Delete link on the row to edit or delete the scheduled report. This will not delete the report itself – it’ll simply remove it from your list of emailed reports.
Don’t forget to save your changes! If you need to reschedule a report, you can do so anytime by repeating the instructions at the top of this article.
Set reports to use 24 hour time
With TimeForge, you can easily set the default times on your reports to use 24 hour time format instead of AM/PM. Although you can set your default option, you can also switch back and forth between 24 hour and AM/PM for each report. Setting these option only takes a few clicks! Here’s how.
Beneath the schedules list, you’ll see some options for formatting the report. The one we’re looking for is the Hour Format. Setting this to 6.5 will force the report to use 24-hour format. Selecting 6:30 will cause the report to use 12-hour AM/PM format.
To run the configured report using the selected Hour Format, click the Run Report button.
Add a report to your favorites list
TimeForge offers a variety of reports in each of the scheduling, attendance, and sales modules. No matter what you’re looking for, TimeForge has a report that will tell you the information you need to know.
In addition to choosing a favorite report, you can also set up reports to be automatically emailed to any address at a specific time and frequency.
If you already have favorite reports, they’ll appear in the dropdown menu next to Favorite Reports. To add a new one, click on any card to open up that particular report.
For this example, we’ll add ‘Attendance Breaks by Employee’ as a favorite.
Near the top of the page, above the report options, you’ll see a link to Add as a Favorite Report. Simply click this link to add this report to your list of favorites.
Now return to the main menu and click Today. In the Favorite Reports section, you will see the report you just added.
Create a minimum wage report
In TimeForge, a minimum wage report is based on tips, and it shows how much more an employee should be paid per hour to meet minimum wage requirements.
Choose which locations you would like to appear on the report.
Select a date range or period (e.g. yesterday, last week, last month, etc.). Selecting a period may present department options if you have departments enabled.
Choose whether to view the report as a PDF or Excel spreadsheet.
Once you’re done configuring the report, select the Run Report button to generate the report.
If you choose to run the report as a PDF, it will load on your screen. If you run it as an Excel file, it will save to your computer and you will have to open it in Excel or a similar software.
The report will include columns for Employee Name, Pay Rates, Cost, Hours, Tips, Sub Total, Minimum Wage, and Difference.
Create an employee schedule report
TimeForge is the most flexible and powerful labor management system available. With it, you have the ability to quickly and easily create, view, and print employee schedules.
In addition to the various reports that can be printed, you can also quickly view and print your weekly schedule with one click on the “Schedules” page.
Printing reports of your employee schedule is easy, and here is how it’s done.
1. Select the schedule(s) you would like to run as a report
2. Choose to view the report as either a PDF file or Excel document. (Note: If you choose Excel, Timeforge will export the report to an Excel file, and you can print it from Excel.)
3. Determine how the cell data will be displayed. Choose either the number of shifts, duration of shift, cost of shift, or the actual time of shift.
4. Determine what will be displayed in the “total” cell of your report. Choose either number of shifts, duration of shift, or cost of shift.
After you run the report, your schedule will appear as an image. The options highlighted in red will appear when you mouse over the report.
To print, click the furthest icon on the right.
Create an employee attendance report
TimeForge is an extensive and powerful employee scheduling and attendance tracking management package, and you can begin to see some of the power by clicking on the Attendance tab. Many, but not all, of the attendance and time card capabilities occur within the Attendance tab.
Additionally, TimeForge has many labor management reports that can display things like sales, approved payroll, time card punches, and many other labor metrics that are important for successfully managing a work force.
Keep reading to learn how to quickly and easily create an employee attendance report.
TimeForge contains dozens of time card and staff member attendance reports, including PTO, sick, and vacation reports, reports detailing employee time sheets, payroll summary reports, and actual vs. scheduled time reports. Many TimeForge users like the “Attendance Summary Report, sorted by Position, with Costs” report because it offers a lot of valuable information all in one report.
Reports are ordered alphabetically, but you can narrow down the list by entering keywords in the search box at the top of the page.
For this example, we’ll run the Attendance Summary Report, sorted by Position, with Costs.
You can run staff member attendance reports either by choosing your specific date range or, choose from a drop down box containing various predefined date ranges. Once you select a date range or period, departments may become available for selection.
Next, check the departments you wish to run the report for. You can run a report for multiple departments.
Choose how you would like to view the report, whether as a PDF or Excel spreadsheet.
Choose whether the report needs to include attendance for all staff members. If you only want to run the report for one or just a few employees, uncheck the “All Staff Members” box and select the appropriate employees to include in the report
Configure any other settings as best suits your needs.
When you’re satisfied with the configuration, click the Run Report button at the bottom of the screen. What happens next will depend on your browser configurations.
If you selected to view as a PDF, the report will likely display on screen, and you can use your browser’s built-in options to download and/or print.
If you selected to view as an Excel spreadsheet, the file will either automatically download, or you will be presented with options to open/save (shown below). Selecting Save File will ensure you save a copy to your computer.
This particular report will generate columns for Employee Name (grouped by Position), Total Hours, and Cost, with totals for each position. For example:
Create a sales report
TimeForge sales is the most powerful way to keep track of your sales information and keep your labor costs at a minimum. Printing your sales report is easy in TimeForge. Here’s how it’s done.
If you chose to view/print as PDF, you’ll be able to print or save the file from your browser. If you chose to view as an Excel file, the spreadsheet will be downloaded, and you’ll be able to open it up and print from there.
Export an attendance (or other) report to PDF or Excel
In some cases, it may be important to export and save information from TimeForge into an Excel spreadsheet or PDF format for backup – say, for example, if you sell your business or need to further crunch the data.
This article will show you how to export an Attendance report as a PDF document or Excel spreadsheet and save it for future use, but these steps can actually be applied to any report in TimeForge.
Go to a Reports page, such as your Attendance Reports
When you’re satisfied with the configuration, click the Run Report button at the bottom of the screen. What happens next will depend on your browser configurations.
If you selected to view as a PDF, the report will likely display on screen, and you can use your browser’s built-in options to download and/or print.
If you selected to view as an Excel spreadsheet, the file will either automatically download, or you will be presented with options to open/save (shown below). Selecting Save File will ensure you save a copy to your computer.
Export a schedule report to PDF or Excel
This article will show you how to export and save a Schedule report as either a PDF or Excel file.
When you’re satisfied with the configuration, click the Run Report button at the bottom of the screen. What happens next will depend on your browser configurations.
If you selected to view as a PDF, the report will likely display on screen, and you can use your browser’s built-in options to download and/or print.
If you selected to view as an Excel spreadsheet, the file will either automatically download, or you will be presented with options to open/save (shown below). Selecting Save File will ensure you save a copy to your computer.
View changes to employee pay rates
In TimeForge, you can always view a list of employees with their historical pay rates for a given date range using the Employee Historical Pay Rates report. This article will show you how to run the report.
Configure the report options so that it will run the way you want.
For example, if you only want to run the report for one or just a few employees, uncheck the “All Staff Members” box and select the appropriate employees to include in the report (shown in example below).
When you’re satisfied with the configuration, click the Run Report button at the bottom of the screen. What happens next will depend on your browser configurations.
If you selected to view as a PDF, the report will likely display on screen, and you can use your browser’s built-in options to download and/or print.
If you selected to view as an Excel spreadsheet, the file will either automatically download, or you will be presented with options to open/save (shown below). Selecting Save File will ensure you save a copy to your computer.
This particular report will generate columns for Employee Name, Position Name, Old Pay Rate, New Pay Rate, and the date and time the pay rate was modified.
View employee clock-in and clock-out times
TimeForge Attendance was created to save management the time and hassle of keeping up with employee schedules. You can even enforce your employee schedule so that your employees only clock in and out at the times designated by their schedules.
In TimeForge, there are many ways to keep track of your employees’ time punches. For example, you can view currently clocked-in employees, quickly view who’s clocking in too early or out too late, and even create and enforce break rules.
Here’s how you can quickly run a report to view employee clock-in and clock-out times.
This report will display employee clock-in/clock-out times for the selected department(s). Department selection becomes available when you choose a Period for the report.
You can add this report to your favorites, which will make it available in a drop-down menu on your reports page. This is for quick access to frequently used reports.
You can Schedule this Report if you would like it to be emailed directly to one or more addresses at a specified date/time. Learn more about how to schedule reports.
You can choose a date range or a period (today, yesterday, next week, last week, etc.).
Choose whether to view the report as a PDF file or as a Microsoft Excel file.
Once you’re done customizing the report, click the Run Report button.
Your report will load as a PDF or will save as an Excel file, depending on what you selected in the previous step. From here, you can view all staff members’ clock-in and clock-out times as well as print or save the report.
Ad-hoc reports, including hourly sales reports
Under the new Reporting tab, managers now have access to ad-hoc reporting: a simple yet powerful tool that allows you to build and run your own reports in just a few easy steps!
One of the biggest benefits to ad-hoc reporting is that you can now run hourly sales reports. TimeForge will show you the entire week’s sales, with the option to view manager projections, actual figures, or system forecasts.
Click the Export button to export your report as an Excel file, CSV, or PDF:
Manager Guides › Sales
Configure your sales categories
Sales categories are key performance indicators (KPIs), or ways to evaluate the success of your company. Sales categories can be used for things like making an employee schedule, monitoring the labor costs of salaried employees, and even projecting your gross sales. TimeForge offers a very customizable “Sales” feature that helps you stay on top of your business’s metrics. If you’re integrated with a POS system, we’ll likely pull these sales categories from that system. However, if you need any assistance setting up sales categories, please don’t hesitate to contact us.
After configuring your “Sales Categories,” you’ll likely want to consider setting up ShiftBuilder rules so that you can start generating schedules with the ShiftBuilder based on your Sales Projections.
Go to the Sales Categories page under the Sales tab
Description: The Sales Category Description is simply the name of the Sales Category. This was determined when the Sales Category was created.
Type: The Type was also configured when the Category was added. Currency is the most usual choice, which is for numeric values such as Gross Sales, Net Sales, or Tips. However, “Inventory” should be used if you’re tracking items sold. If you’re tracking Customer Count, use “Other.”
Category as a budget: How do you want Sales to be Compared to Labor? If this should be based on a target threshold (like 13%), do not check this box. If sales should be directly compared to labor, do check this box.
Compare To: Most customers want to compare their sales to their labor costs (a dollar-to-dollar comparison). However, we also support comparing sales to labor hours (Sales Per Man-Hour), or comparing sales to scheduled shifts.
Calculation Type: Most customers want to calculate by “Numbers”, but we enable calculation by “Hours” if you need it. You should calculate by “Numbers” if you want your Desired Threshold to be the “magic number” that your schedules need to meet. That is, if your scheduled cost (or hours, or shifts, depending on item 4) need to be under 13%, then “Numbers” is for you. However, you should calculate by “Hours” if you want to enter a productivity budget that is calculated by multiplying your sales with your Desired Threshold. In other words, if your schedules need to be under $300 (or under 300 hours, or under 300 shifts, depending on what you selected in item 4), then “Hours” is for you.
Desired Threshold: If you do not want a category as a budget (item 3), and you are not using department-level or position-level thresholds, enter a “Desired Threshold” like thirteen percent (type in 13) - or whatever is appropriate for your business based your KPIs.
Threshold Formula Type: Cost|Hours|Shift by Sales % is the default formula, and most restaurants will use this default formula. It’s for comparing whatever was selected in item 4 - the labor cost, labor hours, or number of shifts - to the sales, and displaying that as a percentage. Cost|Hours|Shift by Sales is for comparing whatever was selected in item 4 - the labor cost, labor hours, or number of shifts - to the sales, and displaying that as a decimal. Sales by Cost|Hours|Shift can be used for SPMH (Sales Per Man-Hour), and most retailers will use this formula. It is for comparing sales to whatever was selected in 4 - labor hours for SPMH - and displaying that as a decimal. Similarly, Sales by Cost|Hours|Shift % is for comparing sales to whatever was selected in 4 - labor hours for SPMH - and displaying that as a percentage.
Show Sales Value on Schedule: If you want to display the sales value (like $1,500) on your Schedule, select Yes. If you want to display the Sales-to-Labor % on your Schedule, select No.
Under the Forecasting Configuration section, you can choose a forecasting threshold and select which forecasting algorithms to use. The TimeForge Algorithms are the default and recommended.
TimeForge Algorithm: This determines whether you’d like to use the default TimeForge Algorithms that our Sales Forecaster runs. Because of their accuracy, the default TimeForge algorithms are used most often and usually recommended.
You can input your own information and and create a forecast based on weighted averages. Usually, you’ll have very specific numbers and be looking for a specific date/day of the week to forecast.
This option determines whether you are interested in calculated the date for this forecast as either a date (the 1st) or a day(Friday).
Choose how many days in the future that TimeForge should look at to make a forecast. This number can either be in days or weeks.
Choose how many days in the past that TimeForge should look at to make a forecast. This number can either be in days or weeks.
You can determine a set number of days or weeks in the past that TimeForge should look at to make a forecast.
These options determine how heavily each average is weighted. So, if you want “the previous foretasted days” to be weighted more than the others, simply type in a higher number in the corresponding box. These four numbers must equal 100%.
Sales category forecasting threshold (Weighted Average Variance)
Forecasting your sales using a Weighted Average Variance is similar to calculating with Weighted Averages, except this formula actually lets you eliminate random outliers from being included in the calculations.
The TimeForge Sales feature is a powerful and easy-to-use analytics tool that can help you keep track of manager projections, actual sales numbers, and forecast sales using system generated projections that are based on your sales history. Sales numbers can be referenced and viewed on employee schedules, and analyzed using the Sales Analytics tool - a simple solution to ensure that complex schedule forecasts are kept in check.
Go to the System Forecasts page under the Sales tab
TimeForge will forecast sales for you based on your previous business. You can see daily totals, daily totals broken down by hour or 15 minute increments, or a weekly forecast.
Project your sales for the week
Using the TimeForge Sales feature, employee schedules can be compared to Manager Projections, Actual Numbers, and System Generated Forecasts. After creating the necessary Sales Category, numeric values should be entered into the Manager Projections area. Once the week (or day) is over, Actual Values from the Point of Sale system, Cash Register, Property Management System, or other revenue control system can be entered into the “Actual Values” area of the software.
You can project sales quickly and easily, just follow these steps.
Go to the Manager Projections page under the Sales tab
Manager Projections can be used to forecast sales for the week (or day). Manager Projections are typically the “gut feeling,” or estimates that you or managers create to project certain Sales Categories. Projections can be entered by hour or quarter-hour, and daily and weekly summations are easily viewable.
You can also copy a previous weeks projections by using the copy previous date link on the top left, as indicated below. Note that our Sales Category for this example is Gross Sales.
In the image above, there are no sales fields for 12am, 1am, 2am, or 3am because the “open” hours for this particular location are set to 4am to 8pm. The hours shown will always be dependent on any open / close hours that are currently defined for your location.
Enter or update your projections by the hour or quarter-hour. To enter quarter-hour projections, simply click the + plus sign next to a particular hour to expand it.
Any changes you make will be immediately saved, and changes to individual values will immediately update the totals per column.
At the bottom of the page, you can see a graphical representation of your total weekly sales based on the Sales Category you chose.
If you are the owner of your business’ TimeForge account or have the correct permissions, a number of settings are available to you under Sales Options, including:
Allowing Supervisors to access the Sales module in TimeForge
Viewing Manager Projections and System Forecasts on the labor schedule
Enforcing the labor ratios, which will disable the posting of schedules unless they meet the necessary labor ratio percentages
To configure these settings, select the Sales Options page from the left side menu.
Make your selections based on how your business works and how you’d like TimeForge to work for you.
Don’t forget to click Save if you make any changes to your Sales Options.
Use Sales Analytics to analyze your labor costs
TimeForge Sales includes a powerful Sales Analytics tool, designed to easily visualize the differences in labor costs, a manager’s sales categories (such as gross labor, customer covers, customer counts, or inventory items), and other relevant numerical information. Watching for trends in the numbers will allow management to be proactive in creating business decisions.
There are two ways to access the Sales Analytics tool in TimeForge. Either through the employee schedule page, or through the “Sales Analytics” page.
Follow the instructions on the Sales Analytics page, choose the desired Sales Category, and any other applicable options from the left-hand column.
1. Choose which type of chart to display. You can select either Data Analysis, Staffing Sales, Staffing Cost, or Threshold.
2. Input the start and end time that the chart should display.
3. Select the sales category you want to appear on the chart.
4. Decide if you want manager projections on the chart.
5. Select which schedules need to be included on the chart.
6. Choose how the graph is broken down, either by day, or all the way down to 15 minute increments.
The software will build a visual chart, allowing you to graphically compare Manager Projections, System Generated Forecasts, and the Actual numbers against employee work schedules.
The above graph is a sample employee schedule from 10:00am - 5:00pm, and the Sales Analytics tool is displaying the cost of labor (in purple), as well as the Manager Projection (in blue) for the same time period. Employee schedules can be combined, or graphed separately, based on your requirements (1).
Note:The labor costs purple line stay flat, while the blue Sales Type line (Gross Sales in this case) goes up and down. This may indicate that some staff should be sent home when the blue line goes down sharply, and staff members should be brought in when the line goes up sharply.
The same graph as above is displayed, but this graph compares the Sales Type with the Scheduled Shifts during the time period, instead of Labor Costs.
Tip:Scheduled Shifts are indicative of the number of unique shifts scheduled during the time period. Just like the Labor Costs, sharply increasing or decreasing lines may indicate a need to change the schedule.
View sales percentages and values simultaneously
You can see see sales percentages and values side by side that display the raw projections, forecasts, or actual sales on the schedule.
When you see the schedule. This is what the Sales % and Values will look like side by side.
Enforce the Labor to Sales Ratio
The TimeForge sales module is a powerful management tool with the ability to enforce your labor to sales ratio when you create an employee schedule. You are able to choose any sales category that you’ve previously set up to be enforced on the schedule. Furthermore, you can create as many sales categories as your business needs, and use TimeForge to make accurate sales forecasts so that you always know how much labor you have to work with.
Your labor to sales ratio provides you with a benchmark for how much profit your business is making. TimeForge can track your labor to sales ratio for convenient analysis. According to your settings and preferences, TimeForge can also TimeForge can alert you when your schedule costs exceed your schedule threshold (when a schedule is costing you more than you predicted).
Here’s how you can enforce the labor to sales ratio on your employee schedule.
On the Sales Options page, look for the question that says “Do you want to enforce the Sales Category ratios on the schedule?”
Click on the drop down menu, and select either “Weekly” for the ratio to be based on your weekly sales, or “Daily” to use the daily percentages of your weekly sales*.*
To enforce the ratio, you’ll need a schedule. Create a new schedule by opening the Schedules tab, selecting Schedules, and clicking the + Add Schedule button in the upper right.
Create your schedule as you normally would, and choose an appropriate sales category to enforce on the schedule. You can choose up to 5 different sales categories.
Here’s an example with one Sales Category added already:
From here, you’ll continue making your schedule as you normally would. If your schedule exceeds your sales category ratio, you will receive a warning (shown below). Additionally, the AutoScheduler won’t be able to schedule a shift that would conflict with the sales category ratio.
If you attempt to make a schedule that would be understaffed, or overstaffed, based on your system forecasts, a warning similar to the one above will appear. Click “OK” to continue scheduling anyway, or click “Cancel” to try something else.
Enter your Sales Thresholds
You may want to enter sales thresholds so that you can better analyze the profitability of your business. Sales Categories offer the ability to monitor your business operations in a quantifiable way. By paying attention to the measurable aspects of your business, you can streamline your operations and prevent surprises to your budget from sneaking up on you, especially with labor costs and accurate scheduling practices. The way you decide to use Sales Categories is up to you, as there are many options to experiment with.
For example, Joe, a grocery store manager, might want to monitor the number of items processed per minute at his store’s registers. Like all managers, Joe does not want to have more employees on hand than are required for the amount of work to be done, so he wants to compare the number of items processed per minute to the number of cashiers working. Each cashier can process 100 items per minute. If the store is processing 1,000 items per minute, Joe needs 10 cashiers on hand to keep up with the amount of work to be done. But Joe only has 8 cashiers on hand! Should he call someone to come in to work? Well, if Joe has set his Sales Threshold appropriately to ten percent (1 employee is 10% of 10 items per minute), TimeForge will notify him that he is short-handed.
For example, by comparing Gross Sales to Labor Costs, you can have a benchmark to understand how well your business ran during a certain period of time. An optimal ratio of Gross Sales to Labor costs for your business might be 10, like Joe’s.
Here’s how to enter a desired threshold to a sales category.
Go to the Sales Categories page under the Sales tab
Select a Sales Category from those available. If you need to create a new category first, and you have more than one Location, you’ll need to go to the Corporate level to do so.
Enter your desired Sales Threshold in the appropriate field.
Enter your Actual Sales values
You may want to enter Actual Sales values to more accurately track sales figures for your business, which can help you predict future sales. Actual Sales figures can be analyzed and viewed in your TimeForge Reports. The ability to predict future sales enables you to build more profit-optimal schedules by estimating the amount of business you will encounter during a certain time period, reducing the likelihood of over staffing or under staffing.
To view the Actual Figures chart, select the sales type, the department, and the date. Actual Figures do not show weeks in the future, only the past and present weeks.
Insert the Actual Sales Values and remember to click the Finished button after completing work.
Forecast sales using weighted average variance
Forecasting your sales using a Weighted Average Variance is similar to calculating with Weighted Averages, except this formula actually lets you eliminate random outliers from being included in the calculations. TimeForge offers a very customizable Sales feature, and this lesson is designed to help you navigate through setting up a weighted average variance forecasting configuration painlessly. After configuring Sales Categories, you’ll likely want to consider setting up ShiftBuilder Rules so you can start generating schedules with the ShiftBuilder based on your Sales Projections.
Of course, if you need any further assistance, please don’t hesitate to contact us.
Forecasting your sales using a Weighted Average Variance can help to eliminate random outliers from being included in the calculations. It’s what happens when you’re calculating a grade for a class, but the teacher lets you drop your lowest grade, but only if it’s 30 points lower than the average of your other grades.
The following is an explanation of each setting under the “Weighted Average Variance” category.
1. Look at last year, month, or week? By day or by date?
Should the algorithm pay attention to a day from last week, from last month, or from last year? Select whichever option is the best indicator for sales.
Should the algorithm search by date or by day? For example, If it’s forecasting for June 2, 2013, should it look at June 2, 2012 (date) or the first Sunday in June in 2012 (day).
Enter into this field the number of days that the alogorithm should consider. Additionally, select whether the algorithm should look for these days by day or by week. In the example above, we’re considering 8 weeks in the future and 8 weeks prior to today to find the forecasted number. (It would be 8 days if “day” was selected)
3. Use forecasts if actuals aren’t available? Or skip?
This option indicates what TimeForge should do if there are no Actual Sales for the algorithm to calculate from. Choose to either use the forecasted sales for that date as the basis for the current forecast, or simply skip that day.
Since our forecasts are based on hourly sales, this option determines if we run the algorithm based on 1-hour intervals or based on 15 minute intervals (if unchecked, we use 15 minute intervals).
This option determines if we use median averages or raw data. If you check this box, the algorithm will use median averages with the percentage in step 6 to exclude any “random” sales data.
6. Enter the allowed range for the median average.
How far from the “middle” should we base the forecast on? In the example above, any data above or below 33.3% of the average will be excluded from the forecast calculations.
Import Sales from a CSV
Sometimes, typing sales information into each day or hour of your week can be a tedious process. TimeForge includes a CSV importer to make bulk data entry much easier. Follow these steps to import your sales with a CSV file:
If using Departments, specify which departments can have data imported.
Make sure your CSV file is formatted properly (see Notes).
Browse the documents on your computer and select the appropriate file.
Decide whether you want your sales numbers to be imported as Manager Projections or Actual Figures.
Click “Continue”.
Notes:You cannot currently import data on top of data that already exists.
Make sure that your number formatting for the Amount column doesn’t include commas (for example, “1234″ instead of “1,234″).
If you are importing data for the whole day, set the start and end times to be the open and close times.
If you are using departments, make sure the names in the CSV match names in TimeForge exactly.
Import Sales Thresholds from a CSV
TimeForge’s sales thresholds are a powerful tool to allow you to budget and monitor your labor costs. Using the sales thresholds, you can set up a target budget based on labor costs, labor hours, or labor shifts.
To easily import the sales threshold information, follow these steps:
Make sure your CSV file has the necessary information–such as the sales category, position or department, the start date and end date, the threshold, and minimums and maximums.
Note:Each threshold should be on its own line.
Click “Browse” to find and select the appropriate CSV file.
You can choose to import a number of fields related to Sales thresholds.
Check the box to ignore the first row when importing the data.
Click “Import Data”. TimeForge will load your data and show you any warnings or errors when it’s done.
Sales Type – Enter the sales category, such as Gross Sales.
Position Name – Enter the TimeForge Position Name. Note:You can use positions or departments, but not both.
Department Name – Enter the TimeForge Department Name. Note:You can use positions or departments, but not both.
Threshold Start Date – Enter the date the threshold begins.
Threshold End Date – Enter the date the threshold ends.
Threshold Min Value – Enter the minimum value for the threshold.
Threshold Max Value – Enter the maximum value for the threshold.
Distribute projections throughout the day based on Actual Sales figures
Your sales vary hour-by-hour throughout the day. For example, you may do 50% of your sales between 5 PM and 8 PM. In TimeForge, you can keep track of your actual figures even down to the 15 minute interval to see exactly how these sales vary. You can also copy this varied percentage of your total daily sales when you’re filling out manager projections.
Let’s say you’re projecting $20,000 of sales on Saturday. You can use your historical actual figures to determine the pattern of when you’ll be selling. For example, let’s say every Saturday you do 50% of your sales from 5 PM to 8 PM. After you tell the system to find this pattern, you can simply put your projected $20,000 in for the total sales on Saturday, and the system will distribute those sales based on the pattern. You would then see $10,000 distributed from 5PM to 8PM (or 50%) instead of evenly distributing the sales across all hours of the day.
Here are instructions on how to use this functionality.
Go to Backfill and select a period to set sales percent calculations for Manager Projections. This will tell the system which information to consider when it is finding a pattern of your daily sales. For example, if you chose “Last 4 weeks”, the system will average each individual day for the past 4 weeks to determine the percentage of daily total sales down to the 15 minute interval.
Note:Before selecting the Backfill period, make sure you have Actual Sales figures for those periods. The manager sales projections percentages are based on your actual sales.
After selecting a backfill period, a pop up should appear confirming your selection.
After you enter a value for your total weekly sales, click “Calculate Weekly”. Then, sales projection figures will automatically populate for each day of the week.
TimeForge is a complete labor management system, with both employee scheduling and attendance tracking capabilities.
Using TimeForge, staff members are able to clock in and out, record tips, take breaks, enter mileage, and do many other operations to streamline labor management. And although most employees are great at remembering to clock in and out, occasionally someone forgets, and you’ll need to modify a time card entry.
You can adjust the shift where necessary, including changing the employee, position, and clock in or out times. You can also add a note if you would like to.
TimeForge will automatically adjust the labor cost based on the time duration and any over time adjustments.
Note:If you have enabled departments, there may be shifts that you are unable to see (if they are in another department).
To delete a Timecard entry click the red button on the far right hand side of the attendance entry.
Edit an employee's attendance
TimeForge is a complete labor management system, with both attendance tracking and employee scheduling capabilities.
Using TimeForge, employees are able to clock in and out, record tips, take breaks, enter mileage, and do many other operations to streamline labor management. And although most employees are great at remembering to clock in and out, occasionally someone forgets, and you’ll need to modify or add to their time card.
Go to the Edit Attendance by Employee page under the Attendance tab
If an entire time punch is missing, you can quickly add one from the same page. All you need to do is:
Select the position the employee works.
Pick the date that you’d like to edit.
Input the correct time that the employee worked.
Once again, remember to click Save to save your changes!
View clocked-in employees
TimeForge is an extensive and powerful employee time card entry and attendance tracking management package, and you can begin to see some of TimeForge’s functionality by clicking on the Attendance tab. Many, but not all, of the employee attendance capabilities occur within the Attendance tab.
With TimeForge, you can add or edit employee attendance by date or employee, approve payroll for pay periods, export time punches to a third-party payroll company, and run numerous reports to review employee attendance. Additionally, TimeForge can monitor labor costs in real time.
TimeForge will display the clocked-in staff members.
For each employee, you can review their name, position, and when they clocked in. You can also see a computed cost for the staff member, if they were to be clocked out.
In many cases, you will also see a “Clock Out” link, which will allow you to clock out the staff member.
Note: If this link is not displayed, you are most likely running TimeForge integrated with another system, such as a Point of Sale system. Some systems do not support clocking users out from the TimeForge website.
After clicking on “Clock Out,” you can modify the clock out time.
TimeForge can display position summaries, including the number of staff members clocked in for each position.
To display this information, click on the Hide (or Show) Position Summary link.
Prevent employees from riding the clock
TimeForge is an extensive and powerful attendance tracking, employee scheduling, and labor management package, and you can begin to see some of TimeForge’s power by clicking on the Attendance tab. Many, but not all, of the time card punches and employee attendance capabilities occur within the Attendance tab.
With TimeForge, you can add or edit attendance by date or employee, approve payroll for pay periods, export time punches to a third-party payroll company, and run numerous reports to review employee attendance.
TimeForge has a number of additional time card capabilities, including the ability to enforce your schedule and stop employees from riding the clock.
Open the Attendance tab and select Attendance Options
TimeForge includes a number of settings on the Attendance Options page. These options include the ability to restrict how staff members clock-in and clock-out based on the schedule.
By default, staff members can clock in and out at any time. However, by toggling these options to No, you can make sure that employees clock in or clock out within a certain time limit (“grace period”). An attempt to clock in or out outside of the grace periods will require a manager override.
In the example below, we set a grace period of 10 minutes for both clock-ins and clock-outs to prevent employees from riding the clock.
If a staff member is scheduled to begin work at 10:00am, a 10 minute grace period will allow the employee to clock in at 9:50am but not at 9:45am. If a staff member is scheduled to end work at 3:00pm, a 10 minute grace period will allow the employee to clock out at 3:10pm but not at 3:15pm.
Don’t forget to save any changes you make to these settings!
Employee clock-ins and clock-outs are now enforced
With schedule enforcement enabled, and grace periods set up, employees who are too early to clock in, or too late to clock out, are presented with the manager override screen.
So that the staff member can’t ride the clock, a manager will need to enter their username and password, or use their fingerprint, if you are using the TimeForge Fingerprint scanner.
Record tips and mileage
TimeForge is a complete labor management package, and one powerful feature is the ability to track time and attendance for staff members. TimeForge can track hourly or salaried employees, and can also track information about each shift worked.
In many businesses, employees need to record tips and mileage on a per-shift basis. Tip tracking allows management to accurately report the income that individual staff members are earning, and mileage reporting allows staff members to receive mileage reimbursements for their vehicles.
The first option highlighted in orange controls whether or not employees are required to report tips. Set this to “Yes” to require tips to be reported.
The second option highlighted in orange option in TimeForge controls whether staff members are required to enter mileage. Set this to “Yes” to require staff members to record driving mileage.
After you change these options to “Yes,” the above positions checkbox will appear.
In most businesses, only a few staff members collect tips or need to record driving mileage for reimbursement. In hospitality-related businesses, these are commonly delivery drivers, caterers, or employees who are shopping for the business, in addition to the servers and bartenders who collect tips.
Choose which positions will be required to record mileage.
TimeForge will prompt employees when they clock out for their declared tips, start and ending mileage, and any necessary notes for the shift.
Approve your payroll
TimeForge is an extensive and powerful time and attendance management system. Many, but not all, of the time and attendance capabilities occur within the Attendance tab.
With TimeForge, you can add or edit attendance by date or employee, approve payroll for pay periods, export time punches to a third-party payroll company, and run numerous reports to review employee attendance.
There are several ways to manage payroll inside of TimeForge, and many users simply run one of the many payroll reports at the end of their pay period.
You can also manage the Approval process by approving time cards for a pay period, reviewing any sick, vacation, or PTO time, and then exporting payroll to one of our supported payroll providers. To use this feature, you must first have set up payroll periods for your location.
If you have not yet processed the selected pay period, TimeForge will display a list of time card entries for the pay period.
You can review staff member time cards by date, time, employee, position, or cost.
Additionally, TimeForge will display outliers, or “Most Different” time entries, so that you can quickly and easily identify time punches that may be erroneous or problematic.
Focusing on time entries labeled “Very Different” will allow you to find missed punches, late and early clock-ins, employees who forgot to clock out, and other strange data before you have approved the payroll. After the payroll is approved, you will not be able to edit the time punches inside of TimeForge. Instead, you’ll need to make the changes in your payroll program.
When you are ready to Approve payroll, click on the “Approve Attendance Export” at the bottom of the screen.
Export your payroll
TimeForge is an extensive and powerful employee schedule and attendance tracking management package, and you can begin to see some of TimeForge’s power by clicking on the Attendance tab. Many, but not all, of the time and attendance capabilities occur within the Attendance tab.
With TimeForge, you can add or edit attendance by date or employee, approve payroll for pay periods, export employee payroll to a third-party payroll company, and run numerous reports to review employee attendance.
There are several ways to manage employee payroll inside of TimeForge, and many users simply run one of the many payroll reports at the end of their pay period. This works well for many TimeForge customers.
You can also manage the approval process by approving time cards for a pay period, reviewing any sick, vacation, or PTO time, and then exporting payroll to one of our supported payroll providers. To use this feature, you must first have set up payroll periods for your location.
With TimeForge, you can export employee payroll to many payroll providers, including QuickBooks, ADP, Paychex, SurePayroll, Heartland Payment Systems, CompuPay, and others.
If you have not yet processed the selected pay period, TimeForge will display a list of time card punches for the pay period.
You can review staff member time cards by date, time, employee, position, or cost.
Additionally, TimeForge will display outliers, or “Most Different” time entries, so that you can quickly and easily identify time punches that may be erroneous or problematic.
Focusing on time entries labeled “Very Different” will allow you to find missed punches, late and early clock ins, employees who forgot to clock out, and other strange data before you have approved the payroll. After the payroll is approved, you will not be able to edit the time punches inside of TimeForge. Instead, you’ll need to make the changes in your payroll program.
Note:You will not be able to approve payroll if employees are currently clocked in for the time period.
When you are ready to Approve payroll, click on the Approve Attendance Export at the bottom of the screen.
Prior to clicking “Approve Attendance Export” you must click and select each day that you are exporting payroll for or you will be prompted with the above message. The main purpose of this prompt is to decrease the instance of error.
After approving attendance, you will have a chance to review, edit, and approve Leave Type requests.
First, you will see a summary of all Sick/Vacation/PTO and you will be able to adjust the hours as needed.
Next, you will see the Totals by Leave Type followed by the Totals by Employee.
If you are sure all of your Leave Type hours are correct, click the Approve Sick/Vacation/PTO button at the bottom of the page.
Note: This is the only time you will see this page. Rolling back the pay period will not roll back the Sick/Vacation/PTO Approval page. Do not click the Approve Sick/Vacation/PTO button unless you are positive the totals are correct.
TimeForge will process the time card punches for the payroll period you selected and return a payroll file to you, which will allow you to send the file to your payroll provider.
To ensure a successful import into your payroll provider, you will be prompted to correct any problems before an employee payroll period will be exported.
Set up pay periods
TimeForge will allow you to manage your labor, employee schedules, and time and attendance in the way that works best for your business. If you want to manage different departments differently, TimeForge will let you.
However, to ease the administration of staff schedules, payroll exports, and labor statistics, TimeForge supports the concept of pay periods. Each location, store, or unit can have a specific pay period. Payroll periods can be:
- Weekly, where staff are paid every week
- Bi-Weekly, where staff are paid every other week (common in many hospitality and restaurant businesses)
- Monthly, where staff are paid on a specific date (common in many professional and teaching businesses)
- On the 1st and 15th, where there are always two pay periods in a single month
After setting up pay periods, you will be able to quickly and easily export payroll, approve sick, vacation, and PTO time, and run reports that correspond to your pay periods.
Here are the simple steps to set up payroll periods in your account.
After choosing the correct settings for your Payroll Periods, make sure to save your settings.
Limit clock-ins and clock-outs to a specific IP address
TimeForge has the ability to limit clocking in and clocking out to a specific Internet Protocol (IP) address. One common concern with web based software and attendance tracking is ensuring that staff members are actually at work before they are allowed to clock in. TimeForge can require staff members to be physically be at the location that connects to a specific IP address before allowing staff members to clock in or out.
IP addresses are unique identifiers for computers on the internet and are normally provided by your Internet Service Provider (ISP). In some cases, your ISP will provide a dynamic IP address, which changes every few weeks. Most ISPs will allow you to get a static, or sticky-static IP address for a nominal monthly fee. In many cases, multiple computers in a single office will share a single IP address through the use of a router or firewall device (such as those provided by Cisco, Linksys, D-Link, or Netgear). Similar to a phone number, only one physical location at a time can have an IP address.
Note:TimeForge can require that employees must clock in and clock out using a fingerprint scanner, which will restrict clocking in and out to a single physical computer at your location, regardless of the IP address.
Employees that try to clock in to TimeForge from an IP address other than those you have allowed will receive a warning similar to the one pictured below.
These staff members will not be able to clock in or clock out.
Prevent clock-ins from home or with a cell phone
TimeForge Attendance is a powerful time tracking tool for retail, restaurant, and other service businesses. With this tool, you can view your clocked-in employees, view employee attendance reports, approve/export payroll, and much more!
By default, employees can clock-in from anywhere that has an Internet connection, and this includes work, home, or their mobile Internet on a cell phone. In some circumstances, this is the correct and desired set up. However, for many businesses in the retail and food service industries, it is not desirable to allow staff to clock-in anywhere.
To support these businesses, TimeForge includes the ability to restrict employee clock-in and clock-out functionality to specific IP addresses, or physical locations.
You can specify where staff clocks-in by adding one or more IP addresses that employees must be at to punch in for the day. To add an IP address for employees to clock in:
- You can type your IP address into the text box next to the “Add this computer to allowed IPs” button. If there is more than one allowed IP address, they should be separated by either a space, comma, or on separate lines.
- Instead of typing in the IP address, you can click on the Add this computer to allowed IPs button, and TimeForge will add your current IP address to the list of allowed IP addresses.
Note:Remember to click “Save Company Settings” at the bottom of the page when you’re finished.
Additional options for clocking in and out
TimeForge includes a powerful and flexible time and attendance management system, and is able to track (and round) clock in and clock out times on an accurate minute-by-minute clock, which is synchronized with the National Institute of Standards and Technology. TimeForge can use the clock in and clock out times to calculate the payroll for your pay period without any problems. Accurate time tracking is part of what TimeForge does!
Locate the option to round clock in and clock out times and choose the appropriate rounding rule from the drop down menu. However, TimeForge will not round any clock in or clock out times provided by your Point of Sales (PoS) system. If you want to round time and attendance in your Point of Sale system, please do so within the PoS software.
Note:TimeForge will not round clock in or clock out times for previous pay periods. Changing the rounding rules will only affect upcoming attendance entries.
When a staff member is too early to work, they will receive a pop-up window similar to the above image.
A manager can allow the staff member to clock in, or another employee can provide their own credentials (username and password, or fingerprint) to allow the employee to clock in.
Switch the option highlighted above to “Yes,” and your employees will automatically be clocked in.
Scroll down to the bottom of the page and click “Save Company Settings” when you’re finished.
Automatically switch the position for clocked-in employees with multiple jobs
TimeForge is a powerful and easy to use, labor management platform for service oriented industries (restaurants, retail, c-stores, grocers, hotels, etc.). Service-oriented businesses often have difficulties managing the complexities of their ever changing workforce.
TimeForge helps manage labor by making labor management simple. Employees are commonly scheduled to work doubles, or back-to-back shifts. In some cases, a staff member may transition from one job (or position) to another without ever leaving the business, and may forget to switch their position in the attendance system.
To help ease the administration of employees clocking in and out throughout the day, TimeForge can automatically switch staff to the correct position.
For example, a waiter or waitress (server) may work from 10:00am - 3:00pm as a waiter, and then transition to a bartender from 4:00pm - 8:00pm. Or, a lifeguard may work from 8:00am - 1:00pm, then as a swim coach from 1:00pm - 3:00pm.
Locate the option above that’s highlighted in red.
Switch this option to “Yes.”
TimeForge will now automatically switch jobs / positions for staff members who work back-to-back shifts.
Note:The staff member needs to clock in to the first scheduled shift to allow TimeForge to transition between positions.
Configure break options
The TimeForge Breaks module is a comprehensive feature inside of TimeForge Attendance that allows management to control employee breaks and meal periods. You can set the Break Options as needed for your business, which provides you significant flexibility in managing and monitoring staff member breaks and meal periods.
You will want to configure Break Options so that they conform to fit your business’ operations, and so TimeForge can provide the best possible and most convenient Attendance monitoring to your business. Some of the Break Options you’ll need to consider are whether employees are required to take breaks. For example, if your state labor laws require a 15 minute break every 4 hours, you’ll want to require breaks.
You also need to consider whether employees can take breaks without being scheduled for a break. For example, if John needs a bathroom break, but isn’t scheduled for a break for another two hours, do you want to provide him the option of taking an extra break? Additionally, you should decide whether you want employees to be automatically clocked in and out for breaks. For example, if Jane is scheduled for a ten minute break at noon, do you want TimeForge to clock her out for ten minutes automatically at noon?
If set to “No”, staff must take their breaks based on the scheduled break times and the posted schedule. So, if no breaks are scheduled, staff cannot take a break.
If set to “Yes”, staff are allowed to take a break at any time, regardless of the scheduled break times or types.
If set to “Yes”, staff must take their breaks based on the order of their scheduled breaks and the posted schedule. For example, if an unpaid/required break is scheduled first, and then a paid/optional break, employees must first take the unpaid/required break, and then they can take the paid/optional break.
If set to “No”, staff are allowed to take a break at any time, regardless of the scheduled break times or types. For example, if an unpaid/required break is scheduled first, and then a paid/optional break, employees may take either break, in any order.
If set to “No”, staff must take their breaks manually (by going to TimeForge and starting their break).
If set to “Yes”, TimeForge will automatically take scheduled breaks for any staff member who forgets to take their scheduled break. For example, if an unpaid/required break is scheduled at 10:00am, but the employee forgets to take the break, TimeForge will automatically take the break for them.
If set to “No”, employees must end their breaks manually (by going to TimeForge and ending their break).
If set to “Yes”, TimeForge will automatically end scheduled breaks for any staff member who forgets to end their scheduled break. For example, if an employee starts a 15 minute unpaid/required break at 10:00am, but forgets to end the break at 10:15am, TimeForge will automatically end the break for the staff member.
If set to “No”, employees are allowed to take their scheduled breaks at any time, regardless of the scheduled start times for the breaks. For example, if a break is scheduled at 11:15am, the employee can click on “Take a Break” at 11:00am, and will be allowed to start the break at 11:00am.
If set to “Yes”, employees must take their breaks no earlier than the scheduled start time of the break. For example, if a break is scheduled at 11:15am, the employee can not click on “Take a Break” until 11:15am.
If set to “No”, employees are allowed to take breaks that are of any duration, regardless of the scheduled break times. For example, if an employee ends a scheduled 30 minute break after 20 minutes, they will be allowed to do so.
If set to “Yes”, employees must take a break that is at least as long as the scheduled break time. For example, if an employee attempts to end a scheduled 20 minute break after 15 minutes, TimeForge will not allow them to do so. They must be on break at least 20 minutes, if this option is set.
If set to “No”, breaks that are unpaid will never convert to any other type of break. For example, if an employee ends a scheduled 15 minute unpaid break, it will continue to be an unpaid break.
If set to “Yes”, any break that is unpaid, but ends prior to the scheduled duration, will be converted from an unpaid break to a paid break. For example, if an employee ends an unpaid 30 minute lunch break after 28 minutes, then the 28 minute unpaid lunch break will convert to a 28 minute paid break.
Edit an employee's break
Managing staff member breaks, meal periods, and scheduled lunches can be a headache for even the most experienced management team. In addition to the ability to view your clocked-in employees, view attendance reports, and approve/export payroll. TimeForge Attendance makes quick work of taking and managing staff member breaks.
You will want to edit employee breaks by date if an employee forgot to clock out during a break, forgot to clock in after a break, or if there was some other attendance error that needs remedied.
Choose the date that you would like to edit by entering it into the date field in the format MM/DD/YYYY, or click on a date from the calendar that pops up when you select the calendar icon (located next to the “Show” button).
After choosing an employee, you can begin editing the attendance and breaks.
Don’t forget to click “Save” when you’re finished.
Set your location's open and close times
In TimeForge, “Open and Close Times” are an optional safety net for your daily labor costs and ultimately payroll. By entering an open or close time, you are telling TimeForge when your “day” actually starts and ends. For example, if you have an open time of 8:00 AM, and an employee clocks in at 5:00 AM, their attendance will be recorded on the previous day. This is because TimeForge believes the current day won’t begin until 8:00 AM. On the other hand, if your close time is set to be 10:00 PM, and an employee clocks out at midnight, their attendance will be recorded on the next day.
The “Open and Close Times” should not be the same times as your hours of operation if there is a chance your employees would work outside of those hours. In any case, it is good to allow for extra time in case your employees ever are outside of that range.
Here is how you can easily view and change your open and close times.
If you want to use Open and Close Times, Use the time you tell your employees to show up for their shift to the time everyone goes home. If for any reason your attendance appears on the wrong day but falls between your open and close times, call us, and we’ll get the issue resolved.
Note:If you make any changes to the Open or Close Times, be sure to scroll down to the bottom of the page and click “Save”.
Turn attendance tracking on or off for salaried employees
TimeForge gives you the ability to copy hours from the schedule in order to show attendance for salaried employees. While making an employee schedule, you may choose to schedule your managers and other salaried employees so that you can keep accurate record of hours worked. However, this may not be ideal for every business, and is an easy option to toggle on and off.
Highlighted in red above is the option that copies a salaried employee’s scheduled hours to attendance.
Scroll down and click “Save” if you make any changes to this page.
Configure and track meal penalties
With TimeForge, employers can easily track meal penalties and automatically apply compensation toward an employee’s regular hours. This is useful for those employers who do not care to differentiate regular hours and a lunch break.
Alternatively, you can track meal penalties separately from regular hours. Both options are easy to configure. Here’s how to set up meal penalties, then how to interpret your attendance report based on your chosen settings.
The report will add the number of hours you entered into the employees meal penalty to their regular hours.
For example, Craig Anderson worked an 8 hour shift, but we added 1 hour as compensation for a meal penalty. So, that extra hour gets added to his regular hours, which is why we see 9 hours worked on the report.
If TimeForge does NOT include meal penalties as regular hours…
The report will not add the number of hours you entered into the employees’ meal penalty to their regular hours.
For example, Craig Anderson worked an 8 hour shift, but we added 1 hour as compensation for a meal penalty. However, in this example, we didn’t want that meal to count towards his regular hours, so the meal penalty doesn’t get added, which is why we see 8 hours.
Apply a meal penalty to an employee
At TimeForge, we understand how important Federal and State Wage and Hour laws are to follow for companies that supply and use a contingent workforce. This affects every aspect of your labor management, from creating employee schedules to accurately tracking employee attendance. Not following or understanding these laws can lead to costly violations that can be easily avoided.
Here’s how you can create a meal penalty for an employee’s attendance.
Click on the pencil icon to the right of the appropriate employee attendance entry.
The above box will display. Enter the number of hours to count toward a meal penalty. Then click “Continue” to save the meal penalty.
Manage Attendance Overview
Manage Attendance is a new feature that allows you to handle all aspects of your employee’s attendance in one centralized location. In Manage Attendance, you can easily view your employees’ attendance, compare attendance with scheduled shifts, quickly add or edit shifts, and more.
Navigate to the Manage Attendance page under the Attendance tab
The Manage Attendance layout is designed to provide you with everything you need to know in one central place. We’ll walk you through it:
Sorting and “Show Shift Times”: Sort the list of employees by department, position, exceptions, and more. Click the button for “Show Shift Times” to add shift clock in and out times to the table.
Hide/Show Scheduled Hours: By clicking the “Hide Scheduled Hours” button located above the Week Date Bar, TimeForge will hide the scheduled hours from the table, leaving only the attendance hours. This can be reversed by clicking on “Show Scheduled Hours.”
Week Date Bar: View attendance for a whole week. Change weeks by selecting the arrows, or go directly to a specific week by selecting the Calender icon. Clicking on a specific day will take you to the “Day View,” where you can see information focused to a single day. You can use the arrows on the top right and left of the chart to move to next or the previous week.
Employee List: Employees are listed on the left side of the screen. Each row consists of that employee’s attendance information. Clicking on a specific employee will open up a more detailed view of their information.
Attendance Table: Each cell shows scheduled hours and actual hours for each employee and day. The smaller number in size on the left is the employee scheduled hours, and the larger sized number on the right is their attendance hours. Clicking on a specific cell opens a pop-up that allows you to edit and add attendance for that day for that employee.
Totals: On the right side of the table, the attendance entries for each employee is summarized. The number on the left is the total scheduled hours for the week and the number in the box represents the total attendance hours. When attendance hours are greater than scheduled hours, the box becomes red to highlight the fact.
After selecting an employee from the Manage Attendance main page, the employee detail view of shifts and summarized information pop-ups:
Date Range: When set to “Enter your own Dates,” then you can enter a custom date range by changing the dates for “From” and “To.” If set to “Use Predefined Dates,” then dates are preset by pay period.
Row Titles: The left column shows the titles of each row.
Shift Information: Each card of information includes clock in/out times, position, pay rules, modifications, and more. Clicking on a shift will allow you to edit the attendance information.
When viewing a particular employee in Manage Attendance, to delete a shift, simply click on the Delete button which can be found to the left of the date stamp. Note that you can only delete shifts worked. To remove a scheduled shift, you must edit their actual schedule.
First select the day you’d like to transfer from the Manage Attendance screen to bring up the display.
To move an employee’s punch to another day, click on the small calendar icon on the upper left of a shift that they worked.
Next, a calendar will appear to allow you to select the date you’d like to transfer to. Once you confirm the move, the employee’s punch will be moved to the selected date. Please note that this will not move an employee’s schedule, only their punches.
Editing an employee’s time is easy! All you need to do is click on a day that you would like to edit the time for, then select the time field you want to edit.
At the bottom of the screen you’ll notice the Modifications section of the table. This keeps track of all edits made to an employee’s time. If an employee clocks in or out via a time clock, you’ll notice that the Name field will say “Web Service.”
Don’t forget to click the Save button in the upper right to save your changes!
A message should appear at the top of your screen that says “Break Information was saved successfully.” It may also say “Attendance Information was saved successfully.” Once you’ve received confirmation, click Close.
To hide or show the shift times an employee was scheduled to work and actually worked, there is a button that appears on top of the chart in the center.
This button will say either:
Hide Scheduled hours: This will hide the amount of hours they were scheduled for and only show the hours the employee worked.
Show scheduled hours: This will show both the hours the employee was scheduled for as well as the hours they worked.
As always, if you need help or have any questions, please contact TimeForge Support. Our awesome support staff will be glad to answer any questions or help in anyway they can.
Use TimeClock Mode to allow employees to clock in or out on a shared computer
TimeForge Attendance provides two different and distinct methods for employees to clock in, based on manager preference.
One method, described below, is to use the TimeForge Time Clock Mode, which displays a list of employees (including your name), and you can clock in or out by simply clicking on your name, and entering your password.
This method of clocking in and out is designed for use on shared computer systems.
Before finalizing your Time Clock clock out, you may review your current time card. Specifically, TimeForge Attendance displays how long you have been clocked in during this shift, and what your total is for the week. You may also enter any declared tips, mileage calculations, or notes for management.
Choose Clock Out to complete the clock out process.
Require passwords in TimeClock Mode
Allow employees to view their timecards
First of all, Yes! Timeforge gives employees the ability to view their own timecards so that the can keep track of their hours each week. This can save the employees time and effort when keeping accurate records of their own hours worked. It can also save managers from having to keep track of attendance in the off-chance that employees think there’s a discrepancy on their check. No need to worry, only managers and some supervisors can make changes to attendance records.
Go to the “Attendance Options” page under the Attendance tab
Don’t forget to click the “Save Company Settings” button at the bottom of the page when you are finished.
Adjust holiday pay for an employee
This article will teach you how to manually adjust an employee’s pay through the Manage Attendance screen. This is especially useful, for example, if you need to adjust an employee’s pay rate based on their eligibility for holiday pay.
Click the Manual Override button in the Pay Rules row. This will allow you to manually adjust the duration and cost values for various types of pay, such as Regular, OT, and Holiday.
Once you’re finished making any adjustments, don’t forget to click the Save button in the upper right to save your changes.
Show temperature check during clock-ins
TimeForge allows managers to enable temperature checks at their location. With temperature screening enabled, when an employee attempts to clock in for their shift, they will be prompted to answer the question, “Is your body temperature over 100 F?”
If the employee answers No, they will be clocked in normally. If the employee answers Yes, they will be prevented from clocking in, and instructions will be shown on screen to wait for a manager. TimeForge will automatically send a message to the manager to let them know the employee is waiting.
This feature works on browser-based clock-ins and on our hardware time clocks. It also works alongside our COVID-19 Health Questionnaire, which prompts employees to answer a few quick questions recommended by the CDC.
Don’t forget to click the Save button to save your changes. If you have multiple departments, you may be prompted to choose whether to copy your settings to those departments as well.
After an employees selects to clock in, the TimeClock will prompt them to enter their temperature as shown below.
If their temperature falls above the threshold set in your attendance settings, the TimeClock will prevent them from completing their clock in.
Show COVID-19 questionnaire during clock-ins
To help prevent the spread of the COVID-19 virus, TimeForge can prompt a health questionnaire during clock-in. The questionnaire presents the employee with a few quick questions similar to those used in the CDC Facilities COVID-19 Screening.
If the employee answers No to all of the screening questions, they will be clocked in normally. If the employee answers Yes to any of the questions, they will be prevented from clocking in, and instructions will be shown on screen to wait until a manager arrives. TimeForge will automatically send a message to the manager to let them know that the employee is waiting.
This feature currently works on our browser based clock-ins at this time. It works alongside our temperature check feature, which can be enabled per location.
This feature is enabled at the corporate level. If you have an account with more than one location, you can find the Company Settings option at the Corporate level.
TimeForge sends out a message on TimeForge and an email to a manager if an employees answers Yes to any of the health screening questions.
On the Today page, the Messages widget found on the Personal section will display any recent messages you’ve received.
You can also pull up your recent messages by clicking on the envelope icon on the top right corner of the screen (see arrow in screenshot below).
Enable automatic clock outs
Attendance entries require both a clock in and out time. If an employee fails to clock out, you can manually clock them out from your timeclock or the web portal before fixing an attendance entry. There’s also another option: automatic clock out.
Automatic clock outs can help you keep track of entries where an employee forgot to punch out. Follow the instructions below to learn how you can setup automatic clock outs and how to find auto-clocked out entries.
You can automatically clock out employees at a specific time or a number of minutes after their shift’s scheduled end time. Each option has their own advantages.
Enable “Auto clock out employees” if your location actively uses TimeForge for scheduling. This feature also works if your employees have varying start times throughout the day. By enabling this feature, the system clocks out employees who do not record a punch out by waiting a specific number of minutes after the employee’s scheduled shift ends.
In the example below, the system would wait 180 minutes (3 hours) after an employee’s scheduled out time before automatically ending their shift:
If your location does not have overnight employees and closes its operations at a specific time, enable the “Clock out everyone at a certain time” setting. This setting clocks out an employee if they do not record a punch out by the time you enter.
4. Click the green “Save” button to finalize your changes
The “clock out by schedule” and “clock out by absolute time” filters in the Manage Attendance page allows you to quickly find entries where an employee did not punch out. You can find these filters by following the next three steps:
Navigate to the Attendance tab and select Manage Attendance
In the top right corner click on the filter drop down menu
Select either “clock out by schedule” and “clock out by absolute time” depending the clock out method your location uses
After you select the filter for the clock out method your location uses, entries which did not have clock out recorded by an employee will appear.
Manager Guides › Human Resources
Applicant Tracking and Onboarding Overview
TimeForge offers a suite of features to seamlessly track and review applicants, hire them, and then onboard them as new employees. This guide provides an overview of these features and how to get started.
TimeForge’s built-in Applicant Tracking and Onboarding System (ATOS) can easily accommodate and help streamline your business’s current processes for reviewing job applicants and onboarding new hires.
For example, you might have a hiring process that looks something like this:
Track
Each of these steps (reviewing the applicant’s resume, conducting the interview, sending an offer letter, etc.) can be customized and tracked in TimeForge. As the applicant progresses through the process, you can then mark each step as complete. One, two, three, done.
Hire
When it comes time to hire an applicant, you can do so easily from their application page in TimeForge. TimeForge will remove the new hire from the applicant list and set them up as an active employee in the system for you, using the information that was recorded in the application. No need to copy anything over into a separate profile!
Onboard
HR can then assign onboarding documents to the employee through TimeForge and track which forms have been completed and when. Onboarding documents can be anything from direct deposit authorizations to employee handbooks to online forms. You can even use this system to renew employee certifications and enforce annual employee training!
Ready to get started? To get the most out of TimeForge’s Applicant Tracking and Onboarding system, you’ll want to complete the following steps:
Create Applicant Tracking Steps for one or more positions in TimeForge (e.g. receive resume, interview applicant, send offer letter). It’s super simple.
Create some Human Resource Types for your business. These are types of documents that can be attached to an application or onboarding packet.
Create HR Activity Templates (optional, but recommended!). Templates allow you to send multiple documents at once to your entire company, an entire location, a group of employees at a location, or even a single employee. They can greatly streamline your onboarding process.
Create Job Postings for your positions to define the expectations of the job, when the job will become available, who is making the request, and more.
Once you have the above in place, you can advertise your job openings and start reviewing and tracking applicants. When you’re ready to hire, you can seamlessly convert applicants into employees in TimeForge and begin onboarding them immediately, using the activity templates you created.
Create a Document to store and assign HR forms
TimeForge is capable of keeping track of employee information, including HR documents, such as I-9s, W-4s, training manuals, insurance verification, certifications, and other forms that are applicable to the labor management needs of your business. By creating Documents, you can organize these forms for easy configuration and retrieval.
Documents are further filed under specific categories that are provided by TimeForge. For example, an acceptance letter, job application, and I-9 might be filed under Onboarding Document, while a handbook on customer service policies might be filed under Ongoing Training.
Navigate to the Documents page at the Corporate level
At the top of the page, you’ll notice a button to Add Document. Click this button to create your own document of a specific type. Any documents you’ve already created will be listed on this page, either in the grid view (as shown in this example) or list view.
Fill out the form to customize your new document. Documents can be of the following types: prehire, onboarding, certification, ongoing training, or offboarding.
Depending on the type you choose, a good Description might be Food Safety Certification, Direct Deposit Form, or Employee Handbook Acknowledgement.
What do the checkboxes mean?
Auto renew certification? (Certification only)
Check this box to automatically renew the certification.
Allow employees to view this Document Information?
Check this box to only allow employees to view the document.
Allow employees to upload documents for this Document Information?
Check this box to allow employees to upload documents (such as a signed form, resume, etc.).
Allow employees to change the documents for this Document Information?
Check this box to allow employees to change the document after they have already uploaded it. Otherwise, employees can only upload the document once (no do-overs).
This Document Information is a job application? (Prehire Documents only)
Check this box to indicate that this document is a job application.
This Document Information is a form?
Check this box to indicate that the HR Type is an Orbeon form. Orbeon forms are online forms that can be filled out, signed, and submitted from the employee’s browser.
When you click Save, you’ll notice a few changes immediately on screen: 1) a new Positions tab will appear at the top, between Human Resource Type and Alerted Managers, and 2) new alerts fields will appear at the bottom, just above the save button:
(Optional) Choose whether managers should receive alerts
If you want to notify one or more managers, select Yes from the dropdown menu, then hit Save.
(Optional) Choose which managers will receive alerts
If you choose to send alerts, you’ll also want to set which managers should receive them.
Switch over to the Alerted Managers tab to choose which managers should receive alerts about this document. When an employee makes a change to the document, e.g. uploads a signed form, TimeForge will notify the selected managers.
Now that you’ve created a new HR Type, you’ll want to put it into action! Click the Positions tab to begin assigning your new document to relevant positions in your company.
Select the positions that should use this document. You can set additional requirements by individual position or for all positions, including a renewal period, expiration period, and whether the document is required before an employee in that position can be scheduled or clock in.
If you need to provide employees with a document to review or a form to sign, you can upload it here. Each position can have a different version of the form, if desired.
Click Save to save your changes across all three tabs.
That’s it! The selected positions will now require this type of document. If it’s a prehire document, the document will be required as part of the employee’s application and can be tracked using Applicant Tracking Steps.
Create Applicant Tracking Steps (ATS)
TimeForge comes fully equipped with a customizable applicant tracking system, called Applicant Tracking Steps (ATS), that allows you to track your job applicants from resume to hire.
Applicant Tracking Steps are just that: steps, inside TimeForge, that enable you to easily track your job applicants throughout the entire review and hiring process. These steps can also be used to outline the process itself, ensuring that applicants applying for the same position all go through the same process and complete the same steps.
This guide will show you how to create your own applicant tracking steps in TimeForge.
Applicant Tracking Steps are tied to positions in TimeForge. Each position can have its own steps.
For example, you might want to request a writing sample from your Marketing Coordinator applicants or your Technical Writer applicants but not from your Field Technician applicants.
For this example, we’ll create steps at the Corporate level. Open the Set Up tab, then select Positions from the sub-menu.
And now, the fun part! Here, you define your applicant tracking steps, starting with Step 1. Typically, your first step might be something like Receive Resume, Acceptable Resume Received, or Resume Accepted.
With applicant tracking steps in place, you’re now ready to track your applicants in TimeForge.
Create a job posting
By creating your job postings inside TimeForge, you can greatly streamline the review and hiring process. The system will store information about your applicants for review, allowing you to archive those who don’t meet your criteria and to hire those that do. When you hire a job applicant, TimeForge uses their application to create their employee profile, saving you time and effort that would otherwise be spent on manual data entry.
TimeForge offers two great options for listing your job openings: 1) your company’s own website, using our custom job board system, or 2) integration with Indeed.com, a popular job board service. To take advantage of either of these options, please reach out to our amazing Customer Support team.
This is where you provide the description for your job posting. You can copy and paste from your favorite word processor (e.g. MS Word, Google Docs) or use the tools provided to create and design from scratch.
(Optional) Save your job description as a template
Saving a description as a template will allow you to reuse that description later. So save a description as a template, click the Save as Template link.
Provide a name for your new template, then click the save button.
And that’s all there is to it! The next time you need to create a job posting for this job (or a similar job), you can select the template from the dropdown menu to load the description.
TimeForge allows you to manage applications, job postings, and track potential new hires. What makes it even better is that when you’re ready to hire someone, all it takes is a single click to move their information from their job applicant record into an employee record in TimeForge.
This article will show you how to review and track job applicants.
Navigate to the Applicants page under Human Resources
Applicants can be reviewed at both the Corporate and Location levels, though in order to be visible at a location, the applicant must have applied to that location.
To begin reviewing applicants, open the Human Resources tab and select Applicants from the sub-menu.
On the Applicants page, you can view and edit current applicants, as well as manually add new ones. To review a specific applicant’s information, click the Edit link for the applicant you would like to review.
Here, you can view and edit the applicant’s basic information, track their progress, upload documents to their application, or add them directly to your employee list by hiring them. If you decide not to hire, you can Archive the applicant, which will save their application and information for later but remove them from the applicant list.
The sections below will walk you through each area of this page. Be sure to click the Save button to save any changes you make on this screen.
Basic Information
Basic information includes name, address, birth date, phone number, email, etc. Near the top right, you’ll also notice a handy ranking feature. Simply click on a star to rank the applicant from 1-5 (the applicant shown below was given a 5-star ranking).
Applicant Tracking
TimeForge’s Applicant Tracking system allows you to quickly and easily see the progress of an application. In the example below, the applicant has passed the first three steps (acceptable resume, phone screening, and manager interview) and is currently at Step 4 in the process. The steps shown depend on the position being applied for.
Documents
The last section on this page is the documents section. This is where you can upload and review documents pertinent to the application, such as a cover letter and resume.
Below the documents section, you have the option to Save any changes you’ve made and return to the applicant list, Cancel (return to the applicant list without saving), or Hire the applicant. There’s also an option at the top of the page to Archive the applicant.
Archiving an applicant will remove him from the applicants list. However, his information will still remain on file for later viewing, in case you change your mind or your preferred applicant doesn’t work out.
To archive an applicant, simply click the Archive link in the upper right corner. You will be asked to confirm your choice.
Where can I find the applicants who have been archived?
To review an archived applicant later, simply click the Show Archived Applicants button on the Applicants page.
You’ll now be able to view the archived applicant and even unarchive them, if you’d like.
If the applicant is a good fit, you can choose to hire them directly from this page. Simply scroll down to the bottom of their applicant information (past the Documents section), and click Hire!
Hiring the applicant will remove him from the applicants list and will make him an active employee inside TimeForge. You can choose to send an email invite at this time (this will allow the employee to set up their credentials in TimeForge) or do so later.
Track your job applicants throughout the review and hiring process
Using TimeForge’s Applicant Tracking system, you can easily track your job applicants during every step of the review process, from the moment you receive a resume to the moment you decide to hire. Before you can start tracking applicants, you first need to create your applicant tracking steps for the position(s) you want to hire. Once that’s done, use this article to get the most out of applicant tracking in TimeForge.
For this tutorial, we’ll use the Corporate level. However, if your business has more than one location, you can also follow these steps at the Location level.
Open the Human Resources tab, then select Applicants from the sub-menu.
Under the Applicant Steps section, you’ll see the position they’re applying for and the steps they’ve completed so far, if any.
In the example below, you can see that applicant tracking steps have been created for this position, but none of them have been completed by this applicant, yet. Let’s go ahead and start progressing the applicant through the steps!
Progress the applicant through the steps as they’re completed
Let’s say this particular applicant has already submitted an acceptable resume and has completed her over-the-phone screening interview.
For each line, we can add Notes about the step, such as how well she did, whether she arrived on time, or which manager implemented the step. There are also optional fields for Date Scheduled and Date Completed.
When you’re ready to mark a step as complete, simply check the box at the end of the row.
Your changes won’t be permanent until you save them. Scroll down past the Documents section and hit Save to finalize your work.
When the applicant completes the next step in their application, you simply return to this page to update their Applicant Steps.
Should the applicant not meet your criteria, or fail to complete a step, you can choose to Archive the applicant and remove them from the applicants list. Alternatively, if the applicant is a good fit, you can Hire her directly from this page.
Add an HR document directly to an employee's profile
TimeForge makes it easy to onboard your employees! From the employee profile, you can add forms and important documents for them to review, sign, and submit. When the employee logs in, they’ll be notified of the tasks they need to complete or forms they need to fill out as part of their onboarding process, such as reading the company handbook and signing an acknowledgment form.
Although this tutorial is focused on onboarding, the steps below can also be used to add prehire documents, ongoing training documents, offboarding forms, annual notices, and certifications to an individual employee’s profile.
To learn how to add multiple documents at once from a template, check out our tutorial on HR Activities!
In addition to onboarding documents, you can also add prehire documents, ongoing training documents, offboarding forms, and certifications directly to the employee’s profile.
For this tutorial, we’re interested in the Onboarding category.
The submission date can be one of two things: the date the employee submitted the form (if you are uploading a document already completed on paper, for example, and you want to add the record to their profile) or the date you provided the form to the employee (if you intend to use the system to provide the employee with a blank form to sign, for example).
(Optional) Enter a note about the form or document
Click the floppy disk icon at the end of the row to save your entry.
If the Document Type uses an Orbeon form, an Orbeon icon will appear on the line, allowing you to complete all or part of the form prior to sending it to the employee. Orbeon forms must be set up by Timeforge in advance. If interested, contact our Support team to learn more!
Otherwise, you can click the file attachment icon to upload a file, such as a PDF document.
The document will be immediately available to the employee.
How does the employee access and fill out the form?
We have a handy guide to help employees through this process, but here’s the essentials:
If the onboarding document is an Orbeon form, the employee can simply click the link in their profile and fill out the form online.
If it’s a PDF form, the employee will download the form from their profile, open it up, fill it out, and save. Then, they need to remove the original form from their profile and upload their completed version. Alternatively, you can instruct your employees to email you the completed documents, or to print them out and turn them in by hand. The choice is yours!
Create alerts for certifications that are about to expire
One of the benefits to using TimeForge to manage your HR documents is that you can set up alerts to notify personnel of changes. This allows managers to be notified when an employee uploads a signed and completed document, for example.
When you create an HR Type as a Certification, Ongoing Training, or Prehire document, you have the option to notify both the manager(s) and the employee that their certification is about to expire. This gives personnel the chance to renew the training or certification prior to the expiration date.
This article will teach you how to set up these handy alerts in TimeForge. To learn how to enforce certifications (prevent employees with expired certifications from being scheduled or clocking in), see our guide on HR Types.
Under Manager Alerts and Employee Alerts, you can choose when to notify selected managers and the employee, respectively. When you enter a number, an additional field will appear underneath, allowing you to set up multiple alerts.
In the example below, TimeForge will notify the selected managers at 1 week before expiration and the employee at 4 weeks and again at 1 week before expiration. This gives the employee time to renew their certification before the manager is involved.
Finally, don’t forget to click the Save button to save your changes under both tabs.
Create HR Activities to send onboarding, certification, or training documents to employees
You may already know that TimeForge’s Applicant Tracking and Onboarding system allows you to upload onboarding documents to an employee’s profile. But did you know there’s a way to assign HR documents to an entire company, location, or group of employees at the same time? Yup! By using HR Activities.
HR Activities can be applied to a variety of situations, based on the needs of your business. For example, you could use an HR Activity to collect benefits information for your entire company, to onboard a fresh group of new hires, or to assign training to a select group of employees (or all employees) at a specific location. With HR Templates, you can streamline the process even further.
Just click on a link below to get started!
Company-wide and location-specific HR Activities
From the Corporate level, navigate to the HR Activities page
Provide a Description, Start Date, and End/Due Date. You can also supply an optional email address (or multiple addresses) to notify HR or other personnel when the activities are completed.
Next, select the HR Documents you’d like to attach (these are defined under HR Types).
Once you’ve filled out the Activity form and chosen your documents, it’s time to assign the activity to one, multiple, or all locations in your company. Open up the Locations tab:
Then, select your desired locations. Keep in mind that all employees at these locations will receive the documents and will be required to complete the activity!
Provide a Description, Start Date, and End/Due Date. You can also supply an optional email address (or multiple addresses) to notify HR or other personnel when the activities are completed.
Next, select the HR Documents you’d like to attach (these are defined under HR Types).
Once you’ve filled out the Activity form and chosen your documents, it’s time to assign the activity to one, multiple, or all employees at the selected location. Open up the Employees tab:
Then, select the recipients from the list! Simply hover over a line item and click the green plus sign to move the selected employee(s) over to the recipients column.
You can select All Managers, All Supervisors, or All Employees at a time. Or, you can select all employees assigned to a specific Position or Department. Scroll all the way down to select individual employees by name, or (if you have a long list of employees) use the search filter at the top of the list.
For this example, let’s check the box to select All Staff Members at this location:
Your new activity will now appear in the HR Activities list! The activity will also appear on the employee-level Activities page for each employee you added.
Once you’ve added activities for your employees, follow these steps to track individual employees’ progress or to view their activities at the employee level.
Create an Activity Template to quickly load documents into an HR Activity
HR Templates can help you streamline your HR Activities by allowing you to re-use the same set of documents over and over again. For example, you could use a template to send your standard onboarding packet to a fresh group of hires each month, or to collect quarterly gym logs for your company’s physical fitness reimbursement program. Whatever your needs, TimeForge is designed to work for you!
There are two super easy ways to create an Activity Template: from the templates page or from an existing activity. This article will show you how to do both! Just click on a link below to get started.
From the templates page
Navigate to the HR Templates page under Human Resources
Your new template is now ready for use and can be found under the Activity Template page!
How do I use my new template?
Using your new Activity Template is simple! When creating a new HR Activity, simply select it from the list under Apply a Template, then click the Apply button.
The documents associated with that template will be added to your new activity!
As always, don’t forget to save your changes!
Add multiple HR documents to an employee's profile using HR Activities
Activity Templates are a huge time saver because they allow you to send multiple HR documents at once to your employees. You may already know how to create HR Activities for your entire company, location, or subset of employees, but this guide will show you how to use HR Activities at the employee level. This can be super helpful if you need to train or onboard a single employee here or there, as it allows you to send a standard onboarding or training packet without having to upload each individual document to the employee’s profile.
Navigate to the employee’s profile at the Location level
From here, you can create a new HR activity from a template and apply it directly to the selected employee, OR you can add this employee to an existing activity in the system:
When you hit Save, TimeForge will do two things. First, it will create a new HR Activity for this location, using the template you chose and the options you specified, and second, it will add the selected employee to to the new activity. You can then re-use the activity with additional employees, if desired.
TimeForge allows you to create customizable holiday calendars, which can be used to specify work holidays and set rules for compensating your staff on those dates.
Begin by giving your holiday calendar a name and a default pay multiplier. To add a holiday, enter a date into the Holiday Date column and then name the holiday. The settings along the rest of the row allow you to determine the holiday pay rate and how it is earned. Below are descriptions of the Holiday Pay Type,Previous Worked, and After Worked columns.
TimeForge also allows you to set cost multipliers, min/max hours, and whether employees who work scheduled shifts before or after the date should be eligible for holiday pay.
This field calculates the holiday pay premium that is added to the employee’s pay rate.
For example, if an employee gets paid $10 an hour normally and this field is set as 1.5, then the employee will be paid $15 an hour for every hour worked that is between the minimum and maximum hours awarded on the holiday. If the employee works less than the minimum hours, they will get their normal pay rate and not receive the holiday pay. If they work more than the maximum, they will receive the holiday pay amount until they hit the maximum, after which they will receive their normal pay rate for each additional hour that is worked. These fields are available for the Working holiday and Working/Non-Working holiday pay types.
2. Cost multiplier if holiday is NOT worked:
This works the same as as the first field for non-worked holidays. The difference is the number entered will be multiplied by the “Hours awarded if not worked” field.
For example, if an employee’s pay rate is $10 an hour and you set the cost multiplier as 1.5 and the hours awarded as 10, then each employee that has this holiday pay calendar will be awarded $15 for 10 hours for a total of $150. For Non-working holidays, the multiplier only applies if the employee did not clock in for the day. These fields are available for the Non-Working and Working/Non-Working holiday pay types.
For Hours Allocation, there are two options: 1) Holiday Hours, which use all of the rules mentioned above, and 2) Matching Hours.
Matching hours will match the hours the employee has worked for that day. For matched hours, if an employee works 5 regular hours on the holiday, then they will receive 5 hours of holiday pay. For holiday hours, they would receive 5 hours of holiday pay - no regular hours awarded.
As you add each holiday to your calendar, make sure to save it using the save button on each row. If a holiday entry and it’s rules are not saved this way it will not be applied to the holiday calendar.
When you are finished, click the Save button to publish the holiday calendar. This will apply the pay rule settings to the schedule builder. Remember that any unsaved holidays will be deleted, so be sure to save all entries individually first.
Create an Affordable Care Act (ACA) form for Employee Health Insurance Coverage
At TimeForge, we understand that the Affordable Care Act has serious implications for you and your business. In fact, we even wrote a book about it that explains just how serious those implications are and how you can stay on top of them.
This tutorial will show you how to create an ACA Employee Health Insurance Coverage form and how to send that form to your employees, all from inside TimeForge! It doesn’t get any simpler than this.
TimeForge will send an email and message to your employees, with the form attached.
You can choose to send it to all your employees or only those who have not yet received the form.
New Holiday Calendars
TimeForge allows you to create customizable holiday calendars, which can be used to specify work holidays and set rules for compensating your staff on those dates. This guide will teach you how to create and configure a new holiday calendar.
Begin by clicking Add Holiday Calendar. After this step you’ll then be able to enter in all the specifics for the holiday you’d like to create. This is a good time to make sure you know the date, necessary rates and frequency of the holiday you’d like to schedule.
Enter the name of your Holiday Calendar, this name can be whatever you choose. Later, you will name the actual holiday the calendar pertains to.
We recommend entering a descriptive name for example, “Hourly Staff” or “Part Time Workers”.
2. Default Multiplier:
The rate multiplier is specific to if the employee works the days listed on this calendar.
For example, if an employee’s pay rate is $10 an hour and you set the cost multiplier as 1.5, the employee will be awarded $15 for every hour that they work on the holiday.
3. Use default templates:
Select any default templates if applicable.
4. Default previous worked:
If this is checked, by default it is a requirement that an employee is eligible for non-working holiday pay if the employee worked their last scheduled shift before the holiday.
5. Default after worked:
If set to yes, it is a requirement that an employee is eligible for holiday pay if they work their first shift scheduled after the holiday.
6. Calculate by allocated date:
If set to yes, the entire shift will be eligible for holiday if the employee clocks in anytime during the holiday. If set to no, only the portion of the shift that falls on the holiday will be eligible for holiday pay.
This setting allows you to select which type of hours (e.g. holiday, regular or custom) will be allocated to this specific holiday.
2. Cost Multiplier if Holiday is Worked:
This cost multiplier is specific to the hours an employee works while assigned to this holiday date.
3. Eligible Matching Hours:
If set to “yes” the eligible matching hours will copy any worked hours to also be non-worked.
For example, if a holiday calendar has matching hours enabled, and the employee worked 8 hours of the applicable holiday would also get 8 hours of non-worked time allocated to them.
1. Hours allocation:
Holiday hours: employees who worked the holiday will receive their hours as holiday.
Regular: employees can also receive regular time when working a holiday. (The default multiplier won’t apply when hours are allocated as regular)
Custom: if your holiday hours are allocated differently you’ll see a drop down menu to enter in a specific pay code associated with that holiday.
2. Cost Multiplier if Holiday Worked:
Default: If default is selected, the default multiplier for the holiday calendar will be used.
No Multiplier: No multiplier will be used on the shift. (The shift will use a 1.0x multiplier)
Custom: Allows you to input a custom multiplier for the holiday.
3. Eligible Matching Hours:
If eligible matching hours is set to yes, TimeForge will automatically copy an employee’s worked hours as non-worked hours as well.
Select Yes if your employees are paid if they don’t work on the holiday. Otherwise, skip the following step.
1. Cost Multiplier if Holiday is not worked:
If an employee is paid to not work the holiday, you would enter the cost multiplier associated with the shift.
2. Hours Awarded Type if Not Worked:
Fixed Hours - can be designated as holiday or custom hours. Enter the static amount of hours you’d like to add to the employee’s time card.
Average Hours - TimeForge can take an average of the employee’s worked hours in order to award holiday pay.
Weekly by Day: This will only reference the same day of the week as the holiday when looking at historic attendance.
Weekly: This will look at all of the historic attendance data for the employee.
4. Lookback Period:
Designate a lookback period of the historic attendance history inside TimeForge to calculate average weekly hours work to pay holiday premiums.
5. Exclude Overtime Hours from Average:
To exclude any OT from being calculated in the above lookback period, make sure to select “yes”.
6. Must Work Previous Shift:
You can also designate that in order for an employee to be eligible for the Holiday that they must work their most recently scheduled shift prior to the holiday’s date.
7. Must Work Next Shift:
You can also designate that in order for an employee to be eligible for the Holiday that they must work their next scheduled shift after to the holiday’s date.
8. Next Shift Details:
If you selected ’yes” that an employee must work their next scheduled shift in order to be eligible for the holiday, you can then designate if the hours should be applied prior to their next scheduled shift, or you can select “Do not apply it” and it will wait until the shift has been completed.
You’ll need to add the holiday calendar to each employee who’s eligible at the location level.
Navigate to the Employees page and hit “Edit” to the right of the employee’s profile you’d like to apply the holiday calendar to.
Scroll down to the “Holiday Calendar” field and select the calendar you’d like to apply to the employee. You will need to do this for every employee that is eligible for the calendar.
You have now successfully created a holiday calendar and applied it to your employee!
For many businesses that aren’t using TimeForge and don’t have access to the Daily Log, keeping track of the daily notes, events, task lists, to-do items, and can be a cumbersome task. Add to that having to keep track of employee attendance and employee schedules, and it’s any wonder work actually gets done.
This article explains the disadvantages to using pen-and-paper log books and explains why the TimeForge Daily Log, an online digital log book, is superior in every way.
Some businesses tackle the tornado of paper and notes with supplies from the local office supply store, such as notepads, lab notebooks, 3-ring binders, and other similar products. While these products are inexpensive, the disadvantages are obvious:
Paper products will tear with even mild abuse.
Writing can be smudged or rendered unreadable with a single drink spill, or wet hands.
Staff using ink pens can scratch out each others notes, making notes indecipherable.
Handwriting from management and staff in a hurry can be unreadable weeks or months after the note is made.
Light weight notebooks can easily be lost in a back office.
Searching dozens of paper notebooks for historical notes is impossible.
Organizing paper books into categories on a day-by-day basis is cumbersome at best.
Multi-unit (multiple location) operators have no insight into the day-to-day operations of each location without faxing and scanning pages to each other.
In most cases, the paper log book is simply insufficient for modern businesses. Many niche businesses provide organized paper equivalents of the 3-ring binder or lab notebook, like RedBook Communications and CommLog. While these product are superior to paper notebooks from your local office supply store, almost all of the disadvantages of the paper process remain. In addition, these proprietary log books are organized in a format that might not work for your business.
Fortunately, the TimeForge Daily Log does not suffer from any of the disadvantages described above. The TimeForge Daily Log is a superior digital log book, designed to work the way that your business works. Some of the advantages of the TimeForge Daily Log include:
You always know where it is. Simply log in to your TimeForge account with a web browser or mobile phone. It’s always accessible and always on, which means it can never be misplaced.
Notes are never smudged, because they are entered into the computer. There’s no need to remember acronyms, abbreviations, or interpret sloppy handwriting.
Staff and Management notes cannot be erased. They can be removed from searching, but they are always available. You’ll never lose another note!
Every note is tagged with the staff member who entered it, as well as the date and time that the entry was made. No more finger pointing over late or misplaced notes.
You can organize the Daily Log to work the way your business works, with your own categories. Use your own organization system to track any note or reminder you need.
Built-in search capabilities allow you to quickly and easily search notes. You can search instantly for notes by staff member, date, category, or across multiple locations!
Keep notes organized across multiple stores, without the need to fax or scan pages from your notebook. You always have instant access to one or more locations!
Divide notes into what employees should see (the Staff Log) and what management needs to see (the Manager Log). Send broadcast notes to staff and ensure that manager notes are only viewed by managers.
The TimeForge Daily Log is a great tool for anyone in management. It helps keep track of things like daily notes, tasks, and to-do items, all in one easy-to-use place, and makes it easy to communicate those items with your fellow management and staff members. This means less time spent searching through paper notes and more time spent being productive and managing your employees.
Inside the Daily Log, there are three different styles of Logs that each have a unique purpose: the Manager Log, the Staff Log, and the Audit Log. Here is a quick overview of what you can do with each.
The primary purpose of the Manager Log is to make sure your management team is on the same page and ensure that your business runs smoothly. Within the Manager Log, you can add anything from a note about an employee calling in sick to a total of your scheduled vs. actual hours.
How do I change whether Supervisors can access the Manager Log?
By default (meaning, if you didn’t change these settings, or we didn’t change them for you at your request), Supervisors have access to the Manager Log, which means they can view and edit log entries, comments, and uploaded documents.
If you’d like to change your current settings, you can do so from the Settings page for your location. To get there, simply click the Set Up tab, then select Settings.
Scroll down until you see the following (or hit CTRL-F on your keyboard to do a quick find):
Select Yes or No according to your business needs, then scroll down to the bottom of the page and hit Save to save your changes.
The Staff Log is a great way for management to keep employees informed and to communicate important news in a way that’s transparent. When you make an entry in the Staff Log, it’s visible to all employees at that location (not just management), and employees can respond in the form of comments.
In addition, at the time of entering the note, you have the option to send a copy of that note to one or more staff members as a direct message, so you can be sure they don’t miss a thing.
What do employees see on their end?
Employees see the same interface, just with fewer options. They can search the entries, use the date picker, and make comments, but they can’t add new log entries or delete existing ones.
The Audit Log is an excellent resource for any business that has several individuals in charge of managing time and attendance. This log helps to ensure honesty and integrity among members of management because it automatically records user actions within TimeForge. The Audit Log allows you to clearly see who did what and when. Also, entries in the Audit Log cannot be deleted, and because the system can’t be manipulated, business owners can enjoy peace of mind.
The TimeForge Daily Log is a digital log book designed to work the way that your business works. You’ll soon find that keeping track of things like notes and reminders is much more efficient through a digital medium.
The Manager Log is a management log book that can only be viewed by managers. Log entries are written and viewed by members of management.
The Staff Log is a log book that is written by management but is viewable by staff members (employees).
The Audit Log is an internal log book that records important changes in TimeForge during the normal course of business, such as when new shifts are posted as part of a schedule.
Before you can add any entries to the Manager or Staff logs, you must first create categories. Your entries can only belong to a single category, but you can have as many entries or categories as you’d like.
This article will teach you how to create your first Daily Log category in TimeForge, as well as any additional categories after that.
This will open up a form to add a new category. Use the first drop-down to select which log you’d like to create the category for (Manager Log or Staff Log), then provide a name for your category, such as “Maintenance.”
Here are some additional ideas for category names.
Manager Logexamples
To-do List Item
Employee Actions
Customer Concerns
Equipment Maintenance
Bank Deposits
Staff Logexamples
Uniform Reminders
Meetings
Upcoming Events
HR Documents
Menu Updates
Click on “Add A New Category” to add a category, or choose edit next to the log you’d like to modify.
Adding additional categories is easy! Just return to the Categories page and click the Add A New Category button. You can add as many categories as you want.
By default, the Daily Log will open up the Manager Log. For this example, let’s select the Staff Log by clicking the link in the upper right of the page:
(Optional) Use the date picker to select a previous date
The date picker is useful if you’d like to add (or review) a log entry for a specific date in the past. The Manager and Staff logs always show entries for the previous two weeks from whatever date is selected. The default date when you visit the log is always the current date.
Write the body of your note/log entry, including any details you want staff members to see (remember, this is a Staff Log note, which means it’ll be visible to employees in TimeForge). To mark the note as important, check the box directly below this section.
Add any tags to help label the note and make it easier to find with searches.
Upload a file, such as a photo, image, or checklist form.
Indicate whether you’d like to send the note to employees as a message and, if so, to whom.
The entry forms for the Manager and Staff logs are very similar! They both include a category and note, and they both support tags, uploaded documents, and being marked as important.
However, Manager notes differ in that they can be written about a specific employee (see highlighted area in the image below). Also, because Manager notes are only visible to management, there’s no extra form fields to share the note with staff.
The TimeForge Daily Log is the perfect tool to help communicate information with employees and other managers. Viewing entries in the Daily Log is simple! Read on to learn how.
By default, the Daily Log will open up the Manager Log, which contains notes made by management, for management. To view the Staff Log (notes from management to employees) or the Audit Log (automatic notes about changes made in TimeForge), use the links in the upper right corner.
Viewing Manager and Staff Logs
Select the day for which you would like to view log entries
The Manager and Staff Logs always show the last two weeks’ worth of log entries by default, with the current date (and most recent notes) at the top of the page.
To view the logs for a different day, use the date picker at the top page (1), or use the search feature to search for logs between a range of dates (2).
If you used the date picker, you can simply view the selected date’s logs at the top, followed by the previous two weeks. You’ll see all comments, as well.
If you used the search feature, you’ll be shown relevant entries matching the criteria you entered. You can click on a date to be taken to that day as if you’d selected it in the date picker. This will allow you to see all comments associated with that entry, as well as additional information only visible on the main screen (e.g. Schedule, Attendance, Volume for that day, etc.).
Viewing Audit Log Entries
The Audit Log is a little different from the Manager and Staff Logs because all of the entries in the Audit Log are recorded automatically by TimeForge and include important information about schedules (who created the schedule, for what positions, and when) and employee changes (new hires or transfers, for example). Since there are typically a lot more notes, there are more options for browsing them, too!
Date picker.
Month selector.
Day-of-the-week selector, with the selected date highlighted.
Manager Guides › Task Management
Create a checklist to manage tasks
TimeForge’s task management solution allows managers to create to-do lists, checklists, and other kinds of task lists. These checklists can be used for anything you can imagine! Regular maintenance or cleaning, daily sanitation of workstations, inventory review - just about any kind of to-do item you might want to assign and track.
This guide will walk you through the process of setting up a new checklist.
When you create a new checklist, you will add to-do items or tasks, grouped in whatever way makes the most sense for your business.
Each task can be flagged with different options that control things like whether you should receive notifications or reminders about them, how often the tasks should be completed, etc.
These options are explained below.
Enter Description of your Checklist
Select Departments: Check the appropriate departments associated with this Checklist.
Add a Group by clicking on the “Add New Group” buttons: Groups allow you to arrange your Checklist into sections. For example: a Group called “Store Front” that holds all things regarding to the front of the store.
Configure Notifications/Reminders and Employee access: Configure Notifications allows you to pick which employees TimeForge informs of a new task waiting to be completed. Configure Reminders allows you to select who receives a notification when any item in this group becomes past due. Lastly, you can pick which employees see and interact with the Categories in the group when you select Configure Employee Access.
Add Categories to your Groups: Categories are the individual items or tasks in you checklist. For example: Checking lights or stocked items.
Set the options: Each task can be set up allow Follow-Ups, Comments, or Ratings. A Follow-Up allows you to set an employee to follow up with regarding that specific task. Comments are simple comments attached to a task. Ratings allows you to give a task a star rating.
Save: Click the “Save” button at the bottom of the page.
That’s all there is to it!
Complete the tasks on your checklist
Once your Checklist has been created, you can check off the items there, either from your browser or using a tablet or mobile device. This is sometimes referred to as “going on a store walk,” but TimeForge’s task management solution actually supports all kinds of to-do lists. Walking the store is just one of the many things you can do with our built-in checklists.
In this guide, you’ll learn how to complete the tasks on your checklist.
Tasks will be listed in a table that includes the checklist they belong to, which group, the task name, status, due date, score, notes, and finally any additional actions that may be taken. To select a task, simply click on a row:
Note the colored bar on the left side of each row.
When an item is Red, it is not started or is still incomplete.
When an item is Green, it is all complete.
When an item is Yellow-Orange, it is still waiting for Follow Up.
When you select a task, a pop-up will appear with various options. The options will depend on how the task was configured (for example, if it was set to allow ratings or follow-ups).
Near the bottom of the task, there’s an option to upload files, such as images, documents, etc. Under that is a checkbox to mark the task as complete, if it’s done.
When everything looks how you want it, don’t forget to save your changes!
Enable follow-ups for checklist items
TimeForge’s task management solution allows you to remind managers to follow up on tasks assigned to them or other employees at a location. Each time you assign a follow up to them, a manager/supervisor sees an updated To-Do list item in the “Store Walk” widget on the dashboard.
This guide walks you through how to configure tasks for follow-ups, assign them, respond, and close out items in your to-do list.
To view any tasks assigned to you personally to follow-up on at your location, navigate to the Today page and select the Personal dashboard. Look for the “Store Walk” widget.
All follow-up tasks have a “Do This” banner next to them:
To complete or update a task, click the Edit button next to your assigned task. A pop-up will appear.
Type in any notes or upload helpful files or images.
Update the Complete option to “Yes” if you finished the task assigned.
Click the Save button once you’ve finalized your changes.
Attach files and images to items on your checklists
TimeForge’s task management solution allows you to rank, comment on, and upload files to a task that has been created in the system. Our file upload feature helps managers as well as employees keep track of activities they complete or work on throughout the day. This can be especially useful for documenting things like liquid spills, broken equipment, or other hazards, especially if you operate in an industry or area that requires visual documentation of workplace hazards.
This guide outlines how you can use the file upload feature to share images and documents for any tasks.
Click Edit on an item that you would like to upload a document or image to. A pop-up will appear for that task.
At the bottom of the pop-up, you’ll see an area that says ‘Drag files here or Select Files.’ You can click ‘Select Files’ to choose one on your device.
Documents or images that are attached to an item will appear at the bottom of the item next. Simply clicking on the document or image’s name will open it for you to view.
Manager Guides › Mobile App
Log in and navigate the app
The TimeForge Manager mobile app allows managers to view schedules, bid shifts, pending requests, messages, attendance, daily logs, and even review their sales and labor metrics, all from the convenience of a mobile phone or tablet.
This guide will teach you how to use the app and its features, including how to turn a mobile device into a TimeClock that can be used to clock employees in and out.
Don't have the app yet? Here's how to get it.
Search the Apple Store or Google Play store for the mobile app
To log in to the TimeForge Manager app, you will use the same username and password that you use for your TimeForge account when you log in from a browser.
TimeClock: swap between “TimeClock mode” and “Normal mode” and edit related settings.
Sales: view your sales numbers versus projections and costs for each department individually or store wide.
Analysis: see various graphs breaking down your sales, projects, and costs. You can also see how departments match up based on these numbers.
The remainder of this guide is dedicated to showing you how to navigate these areas of the app to get the information you need.
Today Page Overview
The Today screen in the TimeForge Manager app presents many of the important pieces of information normally available through the browser, such as schedules, pending shift swaps, open shift swaps, bid shifts, pending requests, messages, attendance, and daily logs.
By default, the app will show the current date. To select a different day, tap on the date on the top right to bring up the slider.
Then, use the slider to select the desired date:
View, add, or edit employee shifts
The TimeForge Manager mobile app allows you to not only view shifts on your mobile device but also add new shifts, edit existing shifts, or remove them from the schedule entirely. Here’s how.
You will see a list of employees scheduled to work for the selected date. By default, the page will open to the current day, but you can tap the date in the upper right corner to select a new date.
Tap on a shift to bring up a list of options. You can:
Add a New Shift (will allow you to select an employee and other shift details)
Edit this Shift
Delete this Shift
Each of these options is described in more detail below:
Add a New Shift
When adding a new shift, the app will prompt you to select the department and schedule you wish to add the shift to. You’ll then be able to select the appropriate employee, position, and start and end times.
In this example, we’re adding a new shift to the Customer Service schedule for employee Zeddemore:
When you’re done selecting the details for the shift, tap the Add button to add the new shift to the schedule.
Edit this Shift
Edit allows you to select a new employee to work the shift or adjust the start or end times. For this example, we’re going to keep employee Zeddemore on the schedule, but we just need to adjust his start and end times.
First, we’ll select the new shift from the list:
Tap the Edit this Shift option, then select the appropriate details:
When done, simply tap the Edit button to commit your changes.
Delete this Shift
Delete will completely remove the shift from the schedule. When deleting a shift, you will be prompted to confirm this choice.
Let’s say we want to remove our new shift. First, we would select it from the list of scheduled shifts, then we would tap the Delete this Shift option.
Tap Delete to confirm your choice or Cancel to back out.
Review open and pending shift swaps
The TimeForge Manager mobile app can help you keep tabs on which shift swaps are still open and which ones are waiting on manager approval. All it takes is a few taps.
Shift Swaps are those that have been ‘given up’ and made available to be ‘picked up’ by other employees. When an employee picks up a shift swap, they are not responsible for that shift until the swap has been approved by management.
Shift swaps must be approved or denied on the TimeForge website, and employees can choose how to be notified about the approval of a swap.
When another employee picks up an open shift, you will see a notification next to Pending Shift Swaps:
Tapping Pending Shift Swaps will show you a list of those waiting on manager approval.
Tapping a shift will redirect you to the TimeForge website where you can approve, deny, or edit the shift swap.
Review pending bid shifts
The TimeForge Manager mobile app allows you to view pending bids on any shifts you designate as Bid Shifts in TimeForge.
Bid shifts are those that can be bid on by qualified employees, allowing them some control and flexibility over their schedules. With Transfer Bids enabled, employees can even bid on and pick up shifts at nearby locations.
Bid shifts must be approved or denied on the TimeForge website, and employees can choose to be notified about the approval or denial of the shift.
When employees bid on an available Bid Shift, you will see their bids in this list.
Tapping a shift will redirect you to the TimeForge website, where you can approve or deny a bid.
Review pending requests and availability
The TimeForge Manager mobile app allows managers to view employees’ pending availability and requests for time off.
At this time, requests must be approved or denied on the TimeForge website, but the ability to manage requests through the mobile app is a feature we hope to provide in the future.
Pending requests will be shown, including the name of the employee, what time of request (e.g. available to work, wants to work, does not want to work, unavailable to work), and the date and times the request applies to.
Read your messages
The TimeForge Manager mobile app allows you to read TimeForge messages through the app! Here’s how.
This will show you any messages you have for the selected date (by default, the current day, “today”). You can use the date selector in the upper right to choose a different date.
The message will be displayed on your mobile device. You can use the buttons to the left and right to view the Previous Message or Next Message in the list.
View employee attendance
The TimeForge Manager app allows you to view employee attendance (time punches) for a given date.
Tap the TODAY tile, then select Attendance Entries
You will be shown all attendance for the selected date. If you tap an entry, you will be taken to the TimeForge website, where you can adjust attendance.
Remember, you can tap the date in the upper right corner to bring up the date selector:
View Daily Log entries
The TimeForge Manager app allows you to view Daily Log entries, such as reminders, staff notes, to-do lists, notices, training announcements, and more. Accessible from anywhere, the TimeForge Daily Log is a powerful tool for keeping track of daily notes, events, and tasks without relying on a pen-and-paper notebook, which can be lost, damaged, or stolen.
You will be shown all logs for the selected date. If you tap an entry, you will be taken to the TimeForge website, where you can add or edit entries.
Remember, you can tap the date in the upper right corner to bring up the date selector:
View and edit employees
On the Employees screen, you can view who is clocked in or out. All it takes is a few taps. If the employee has an email address or phone number in TimeForge, you can also email or call/text them directly from your mobile device.
Tapping on an employee in the list will show you additional options, depending on whether the employee has an email or phone number associated with their TimeForge account:
If the employee has an email address associated with their account, you can email them using your mobile device’s preferred email application by tapping their email address.
If the employee has a phone number associated with their account, you can call or send them a text message by tapping their phone number.
Tapping the Edit button will take you to the TimeForge website, where you can view and edit the employee’s information on file.
Tap the email button to send an email using your preferred email app on your device
If you have more than one email app on your device, you may be prompted to select which one you would like to use.
Tap the phone number button to call or text (SMS) using your mobile device
Review your own schedule and attendance
On the My Labor screen, you can view your own schedules and attendance. You can even confirm or give up shifts.
Under Schedule, you will see your shifts for the selected location and date. Remember, you can tap the date (upper right) to bring up the date selector.
Tapping on a shift will present options to Confirm or Give Up.
Under Attendance, you will see your digital timecard.
Enable and exit TimeClock Mode
The Manager App can be used as a mobile TimeClock. This is a very handy feature if the manager wishes to use this instead of a biometric device.
The TIMECLOCK tile has 3 buttons. These are:
TimeClock Mode - Enables TimeClock Mode. In this mode, the manager can clock employees in or out at will from a list. Read below to learn how to enable and exit this mode on your mobile device.
Normal Mode - Enables Normal Mode. In this mode, employees must use their own credentials to clock in/out.
Settings - Provides a few configurable options, such as your default location and turning manager mode on or off.
Once TimeClock Mode is entered, you will see a list of employees for that particular location and any available actions you may take, such as clocking in, clocking out, starting a break, or ending a break.
To exit the page, simply tap the Back button in the upper left corner of the app.
You will be prompted for a manager’s Username and Password to proceed.
Clock in, out, and take breaks in TimeClock Mode
While in TimeClock Mode, the Manager App acts like a mobile timeclock, allowing you to clock employees in or out at will. This article will teach you how to locate an employee, clock them in, set them as on/off break, and clock them out.
For the selected location, locate an employee to clock in
First, make sure you have the right location selected. To select a different location, use the location selector in the upper right.
Once you have the correct location selected, you can either browse the list for an employee (if your list is short) or use the search bar (great for long lists).
Next to the employee’s name, tap the action bar where it says Clock In.
Select the department and position for this employee, then tap Clock In to complete the process.
Tap OK to acknowledge the successful clock-in. You will be returned to the employee list, which should now be updated according to the employee’s new status.
Clocking out is as easy as ending a break. Find the employee you’d like to clock out and tap the action bar (should say “Clock Out”) next to their name:
Then, type in any Shift Notes (optional), and tap the Clock Out button to complete the clock-out.
Enable and use Normal Mode
Normal Mode allows employees clock in/out individually using their own credentials. Therefore, in order to use this mode, Manager Mode must be disabled under Settings. This is because Manager Mode allows the ability to clock any employee in/out at will – which is not necessarily something most businesses want employees to be able to do. To recap:
Manager Mode - Allows a manager to log in using their own credentials and then clock employees in/out at will from a list of employees.
Normal Mode - Employees use their own credentials to clock in/out.
TimeClock Mode, Normal Mode, and TimeClock Settings are all accessible from the TIMECLOCK page in the app. From the home screen, tap TIMECLOCK.
Then, tap the Normal Mode button.
Because Normal Mode and Manager Mode are mutually exclusive settings, if you have manager functionality enabled, you will be informed that you can’t use Normal Mode:
Employees will be able to sign in/out using their own credentials. This allows the device to act as a portable timeclock that does not necessarily require manager supervision or require the manager to clock each employee in/out individually.
Adjust the TimeClock settings
The Settings page allows you to manage 3 basic options that control the TimeClock functionality on your device. These include: whether to authenticate users with a username/password or internal number/internal password, what the default location should be in TimeClock mode, and whether to enable or disable Manager Mode.
Default Location: Sets the default location in the app. The default location is selected when you log into the app.
Manager Mode: Enables or disables “Manager Mode”. With Manager Mode on, only the manager’s username and password are needed to perform various functions within the app.
With Manager Mode disabled, you can put the app in Normal Mode and hand your mobile device to your employees, thereby allowing them to individually clock themselves in and out with their own credentials. For this reason, you can’t use Normal Mode and Manager Mode at the same time – these modes are mutually exclusive.
View your Sales and Analytics
Using the TimeForge Manager Mobile app, retailers can view real-time Sales information from anywhere with just a few simple clicks. This guide provides an overview of the sales features and functionality available using the mobile app.
When you open the Sales page, the screen will display current sales totals by location by default. You can access additional screens by swiping left/right and by tapping a specific location to drill down into the details for that store.
Sales by Location
Also known as the Above-store Sales Dashboard, the sales by location screen provides information about multiple locations at once. This screen allows multi-unit operators to see information about all their stores at a glance.
Below is a breakdown of the information shown for each location (in this example, the location is called Location 10):
Daily Actual Sales and Projected Sales totals across all locations listed
Vertical red/green bar: green means actual sales are higher than same day last week, red indicates lower.
Daily SPLH and labor percentage. Up/down arrow indicates increase/decrease over same day last week.
Daily actual sales in red or green. Green means sales are higher than projected, red means lower. To the right, the projected sales are also listed.
Daily Attendance costs/hours and daily Scheduled costs/hours.
Weekly Actual and Projected totals, up to current day of the week. LW = Last Week; WTD = Week to Date.
For comparison purposes, when viewing data for the current day, all values are as of the current hour, including projections!
Sales by Department
When you drill down into a location, you can view additional screens with details specific to that location by swiping to the left. Sales by department is one of several ways you can view a breakdown of your sales.
While on the Sales by Department screen, you can easily switch between sorting by Department and by Amount using the buttons just below the date.
On the right side of each entry, you’ll see your total Attendance and actual labor costs. Under that will be your Scheduled labor and expected labor costs for comparison.
Finally, each entry has a red or green bar to the left of it, which indicates whether the figures are ahead or behind the previous week in terms of sales. In the example below, the green bar indicates that the CENTER STORE department is ahead of the previous week’s sales.
Select a different location or date (filter your results)
If you would like to view the sales data for a different location or different date, tap the More button in the upper right. You will be presented with a list of filters and information.
By default, drilling down to a location shows you your sales by department, but you can also see sales broken down by hour.
To view your sales by hour, simply swipe to the left on your screen.
The page will look almost identical, except entries will be by hour instead of department, and there will be an extra line above the list with the Total Amount of sales for the day.
When you tap the Analysis tile, you’ll be shown a graph of your Sales Data. By default, all departments will be shown, and data will be shown for the current week.
The blue bar shows forecasted sales, the yellow bar shows actual sales, and if you input any manager projections, there will be a red bar showing projected sales. A summary and key is available below the graph to make things easy.
The buttons at the bottom of the screen allow you swap between Graph and List view. List view simply shows the data in a list format similar to what we saw in the sections above.
You can view additional graphs, such as Labor Distribution, by swiping left.
The Labor Distribution graph will show you real time labor costs. Here we see actual sales (represented by a yellow line) compared to our actual (green line) and scheduled (red line) labor costs.
This graph is purely percentage based, and is comparing your schedule, attendance, and TF Labor Forecast (where applicable) to your sales trends. This is most useful when limited down to departments like Front End, where we should (usually) only have labor where our sales are.
All manager projections must be entered using the online version of TimeForge. To get to the appropriate screen, open the Sales tab and select Manager Projections.
This screen is where you enter your projected sales. There are several ways to do this:
The simplest way is to input projected sales for the entire week and select Calculate Weekly. TimeForge will distribute the total based on the previous week’s sales trends.
The second way is to enter a daily projected sales total into the TOTAL column for each day. TimeForge will distribute the amount by daily sales trends for that particular day.
You can also enter projections by hour or in even smaller (quarter-hour) increments!
Adjust the Manager app settings
There are currently two settings available that control overall functionality within the app (separate from TimeClock Settings):
Automatic refresh intervals (how long, in minutes, the app will wait before refreshing or updating data from TimeForge).
Default location used throughout the app.
From the home screen, tap the Settings icon at the bottom of the app
The Settings icon is also available in several other areas, but when starting the app, it’s easiest to find it right here on the home screen:
You’ll be shown the available settings, and the Settings icon will now be highlighted and the Home icon will be dimmed. To get back to the home screen, just tap Home!