
Set up Transfers and temporary store assignments
TimeForge helps you dynamically meet your staffing needs by allowing you to temporarily transfer employees and shifts to different departments or locations. The day after the transferred shift ends, the employee assigned to the shift will automatically be removed from the temporary store assignment.
This guide will show you how to properly set up your TimeForge account to allow transfers.
Configure your settings to enable Transfers
Section titled “Configure your settings to enable Transfers”Before you can use Transfers, you’ll need to make sure your settings are configured correctly. The settings that enable and control Transfers are found at the Location level under Set Up > Settings.
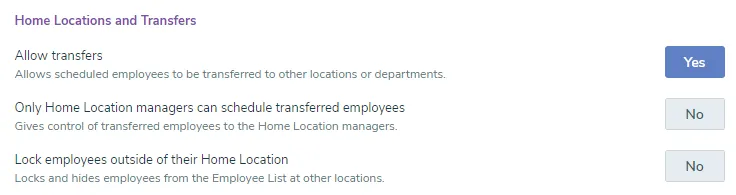
At minimum, the option to Allow transfers must be set to Yes.
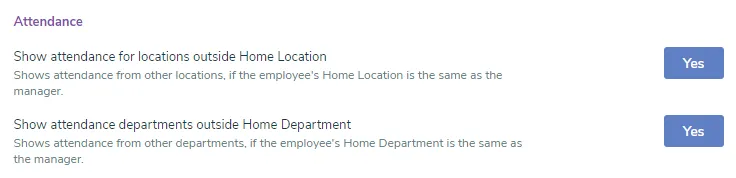
Additionally, to view outbound transfers, at least one of the following must also be set to Yes at the Corporate level under Set Up > Company Settings:
- Show attendance for locations outside Home Location
- Show attendance departments outside Home Department
Set home departments and locations on employees
Section titled “Set home departments and locations on employees”After you configure your TimeForge account to enable Transfers, you’ll need to make sure the employees you want to transfer are set up with the correct Home Locations and Home Departments. This will allow you to see transferred employees and where they came from when you’re looking at a schedule.
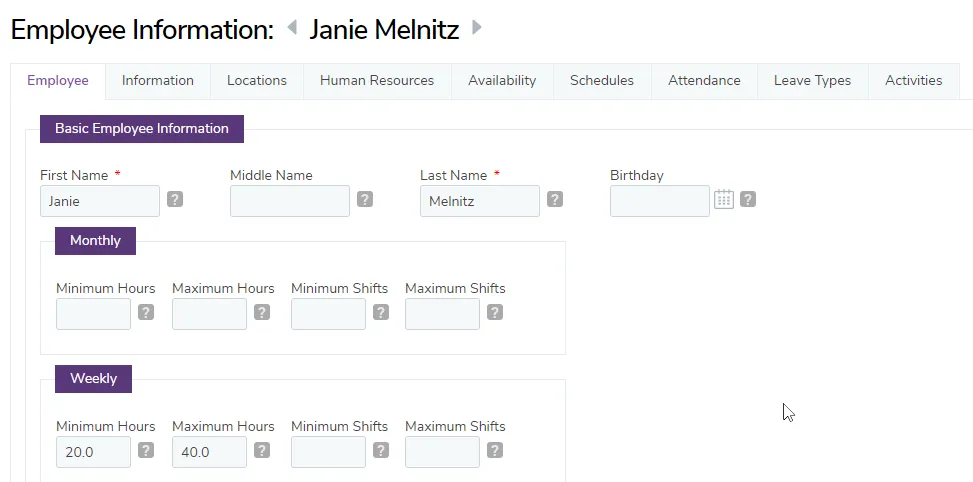
To do this, edit the employee to bring up their information:
Set the employee’s home department
Section titled “Set the employee’s home department”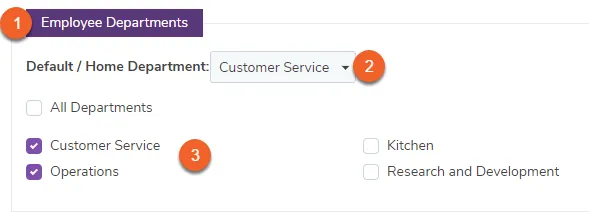
- Scroll down to the section titled Employee Departments
- Select the Home Department from the dropdown menu
- Check the departments the employee will transfer between
Set the employee’s home location
Section titled “Set the employee’s home location”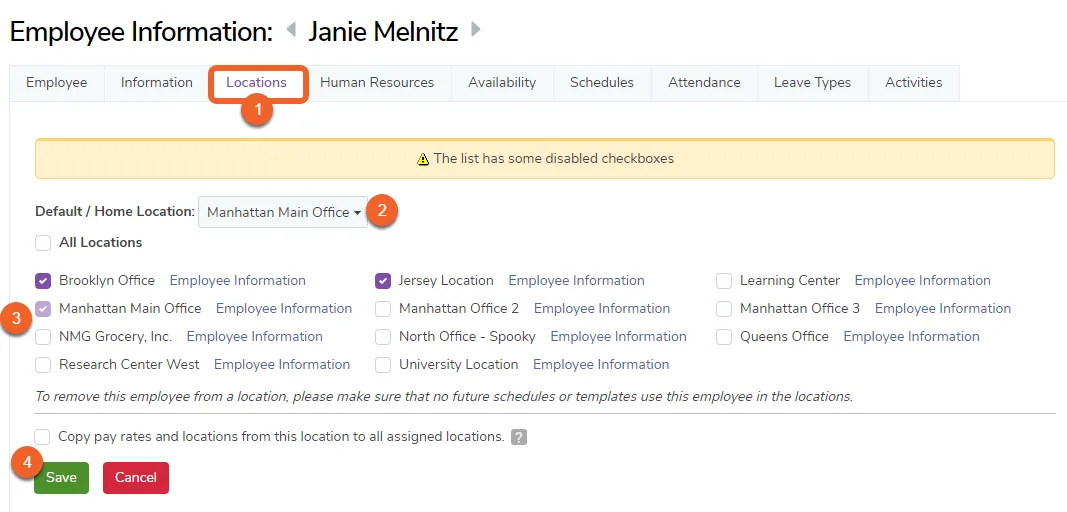
- Click the Locations tab
- Set the default or home location from the dropdown menu
- Check the locations the employee will transfer between
- Click the Save button at the bottom of the page when finished
Transfer an employee
Section titled “Transfer an employee”When you’re creating an employee schedule, you can now create shifts and then choose to transfer those shifts to schedules in different departments or locations, allowing you to temporarily reallocate labor as needed. The employee assigned to the shift will be transferred to the chosen department and location for the duration of the shift.
The day after the transferred shift ends, the employee will be automatically removed from the temporary store assignment – no further action is required on your part.
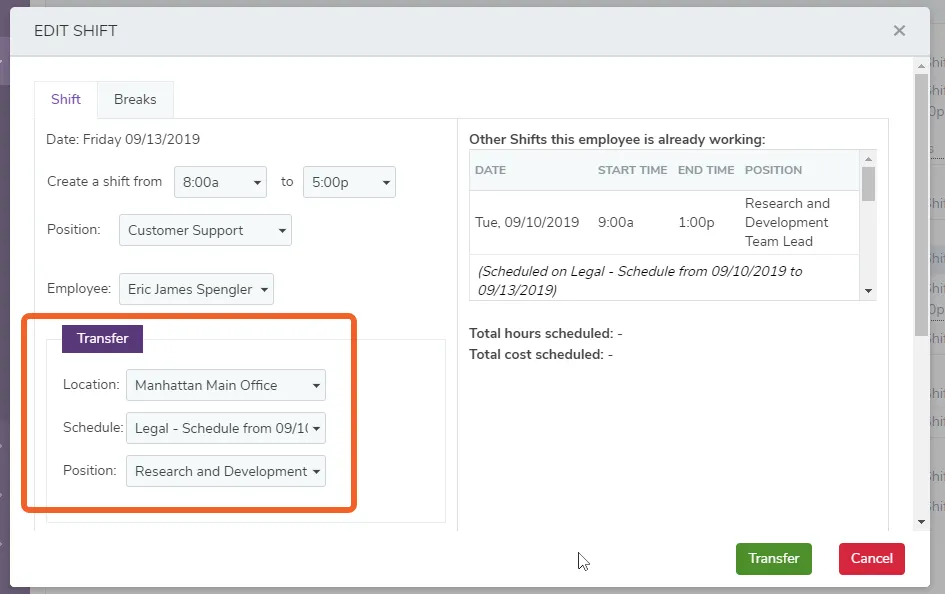
How to transfer an employee shift:
- In your schedule, make sure you’re under the Weekly View.
- Click Add Shift for the employee you want to transfer on the date you want the transfer to occur.
- Fill out the transfer information, including the location and schedule to transfer the shift to (required).
- When you’re finished, don’t forget to save!
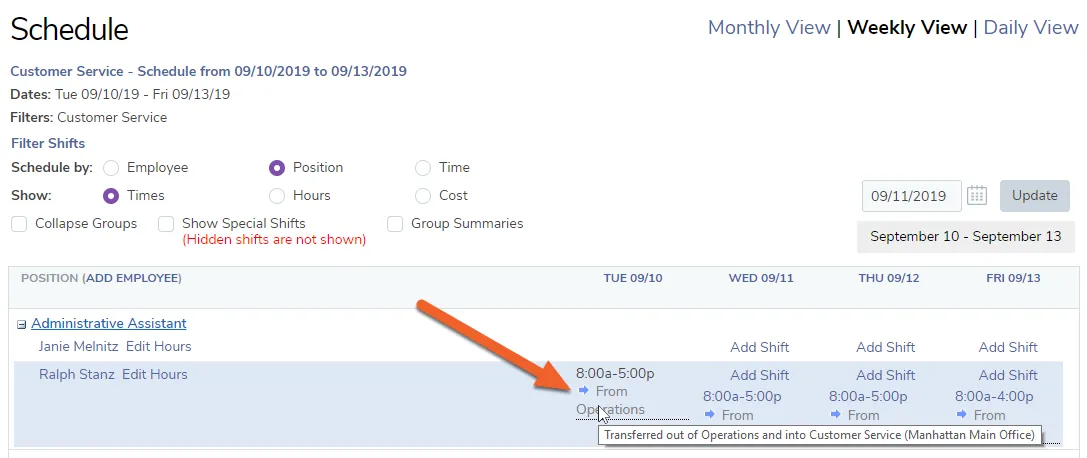
Transfers show blue arrows next to them, and hovering over the text will show you information about the transferred shift:
Changes to the employee’s profile
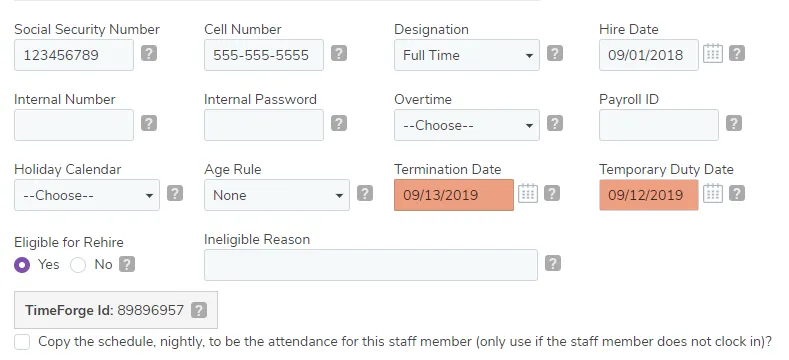
Section titled “Changes to the employee’s profile”When an employee is transferred to another location’s schedule, their profile information will show a Temporary Duty Date. This date can be found in the first tab, under Basic Employee Information.
Once the temporary store assignment ends, the employee will effectively be “terminated” from that store, resulting in a Termination Date. This simply removes them from the store they were temporarily assigned to.
These values (Temporary Duty Date and Termination Date) are updated each time an employee is temporarily reassigned – and each time the temporary assignment ends, respectively.