

Get pre-built schedules based on your scheduling history (RoboSchedule)
TimeForge is proud to introduce our latest feature, RoboSchedule. Yet another quick intuitive tool to help create employee schedules. Each RoboSchedule contains the shifts you’ve already been manually creating each week and eliminates the hassle.
Many managers rely on the TimeForge AutoScheduler and schedule forecasts, or if they’ve got a small crew, they might build schedules manually, one shift at a time. RoboSchedule cuts out the weekly clicks by monitoring your scheduling habits and auto-populating schedules based on your previous scheduling history. This functionality even includes auto-generating on the same day you normally build you schedules.
RoboSchedule Main Features:
- Studies your weekly schedule uploads for optimization
- Automatically imports previous schedule history
- Will copy any previous consecutive manual edits
- Use a template? It will automatically apply it to your schedule
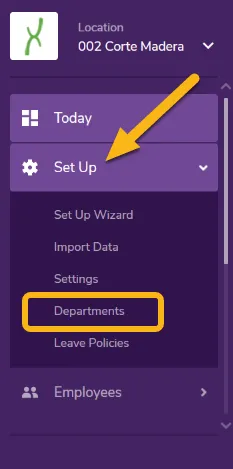
Navigate to the Set Up page
Section titled “Navigate to the Set Up page”From the Location level, open up the Set Up Tab and select Departments from the list.
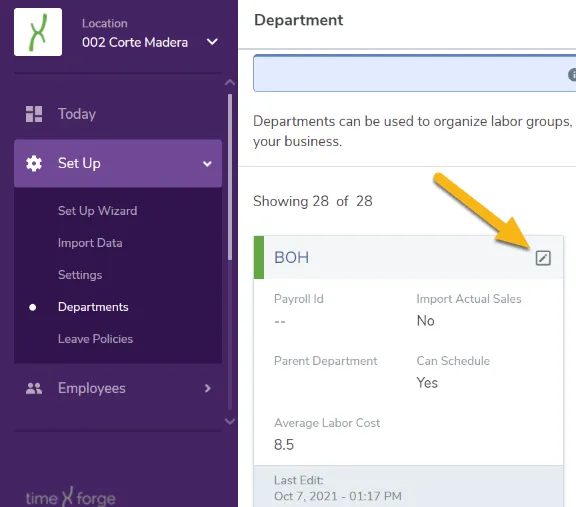
Click the Edit Department Button
Section titled “Click the Edit Department Button”In order to start using RoboSchedule you must first enable it. To do this you’ll need to individually edit each department at the location level.
If you only want to use RoboSchedule for a specific department you do not need to configure any of your other departments as the feature is automatically toggled off.
Enabling RoboSchedule Under Department Configuration Settings
Section titled “Enabling RoboSchedule Under Department Configuration Settings”-
Click Configuration tab listed on the top of the department settings
-
Toggle “Do you Want to enable Robo-Schedules?” to “Yes”
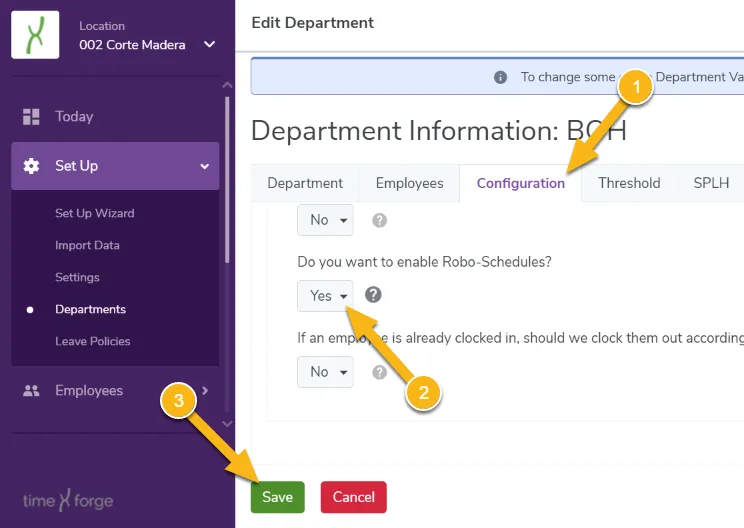
3 ) Be sure to click the Save button when you’re done.
View, Delete, and Block
Section titled “View, Delete, and Block”RoboSchedule gives you the option the View the schedule prior to posting. If needed, you can also delete the schedule that was generated and schedule using any other preferred method.
The block feature enables you to toggle RoboSchedule off if you no longer want that particular department’s schedules to be auto-generated.
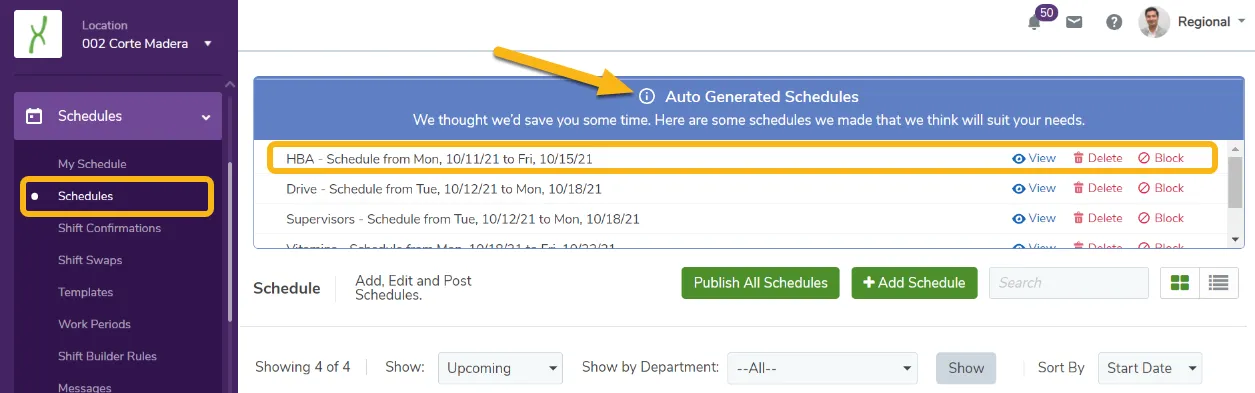
Viewing a RoboSchedule
Section titled “Viewing a RoboSchedule”When clicking on View to the far right of the auto-generated schedule you will be prompted with a quick labor summary of that particular schedule. Click Edit if you would like to make any changes to the schedule prior to posting.
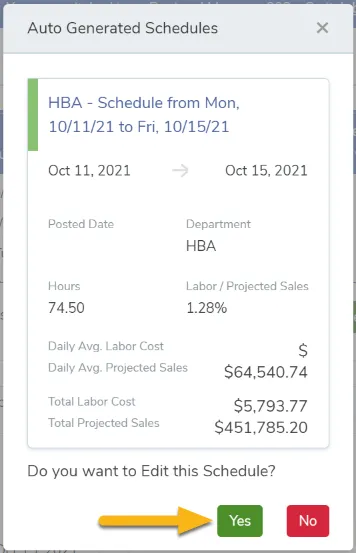
Be sure to click the No button if you do not want to edit the schedule.
Publishing a RoboSchedule
Section titled “Publishing a RoboSchedule”Once you have reviewed the shifts the Roboschedule has created, you can proceed to the weekly view and click Publish on the schedule and your employees and management team will be alerted to the schedule.
Posting a RoboSchedule functions the exact same as your normal weekly schedule but with fewer clicks. Also, the more you use the RoboSchedule feature, the better it will get.
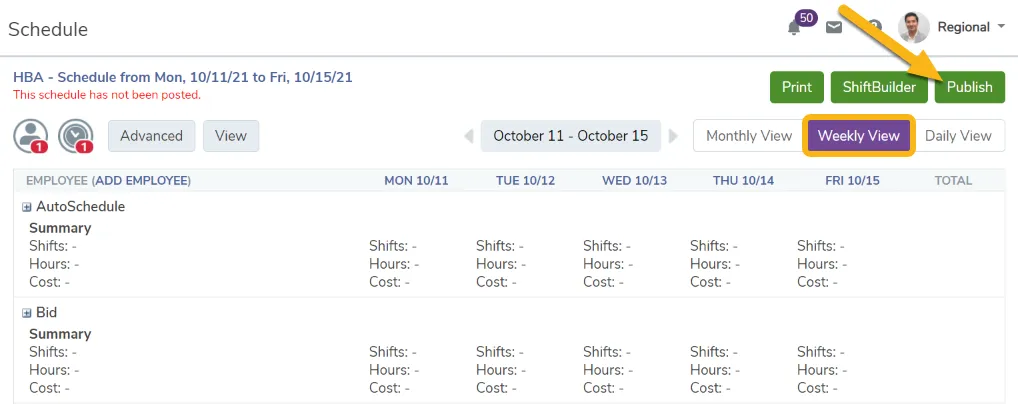
Be sure to click the OK button when you’re prompted about posting the schedule.