TimeForge offers a suite of features to seamlessly track and review applicants, hire them, and then onboard them as new employees. This guide provides an overview of these features and how to get started.
TimeForge’s built-in Applicant Tracking and Onboarding System (ATOS) can easily accommodate and help streamline your business’s current processes for reviewing job applicants and onboarding new hires.
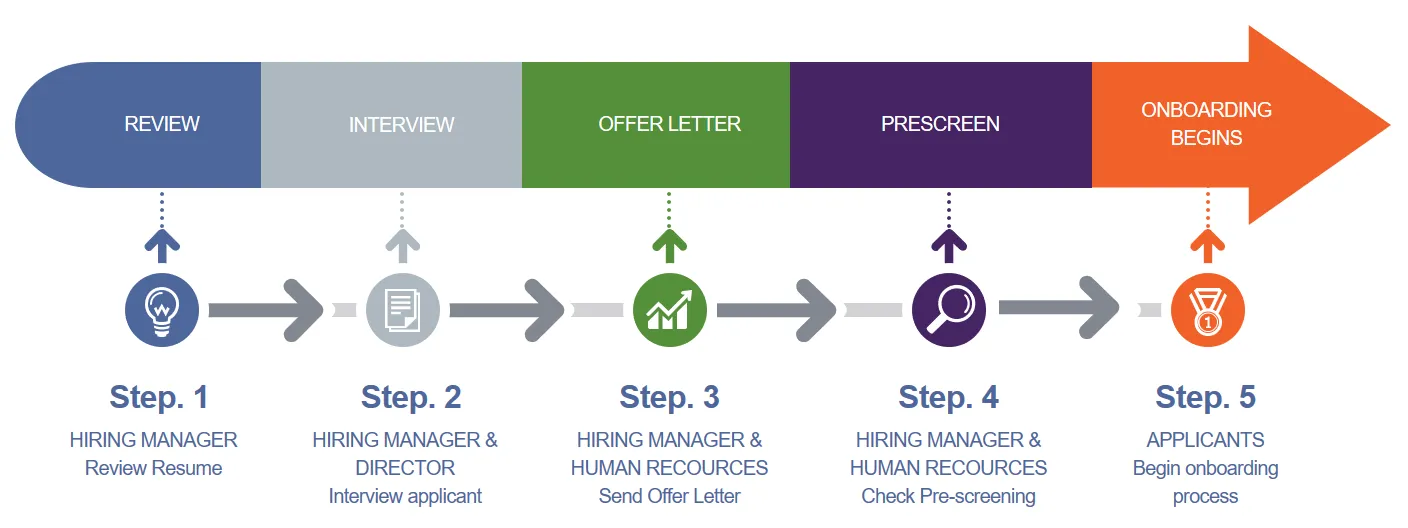
For example, you might have a hiring process that looks something like this:
Track
Each of these steps (reviewing the applicant’s resume, conducting the interview, sending an offer letter, etc.) can be customized and tracked in TimeForge. As the applicant progresses through the process, you can then mark each step as complete. One, two, three, done.
Hire
When it comes time to hire an applicant, you can do so easily from their application page in TimeForge. TimeForge will remove the new hire from the applicant list and set them up as an active employee in the system for you, using the information that was recorded in the application. No need to copy anything over into a separate profile!
Onboard
HR can then assign onboarding documents to the employee through TimeForge and track which forms have been completed and when. Onboarding documents can be anything from direct deposit authorizations to employee handbooks to online forms. You can even use this system to renew employee certifications and enforce annual employee training!
Ready to get started? To get the most out of TimeForge’s Applicant Tracking and Onboarding system, you’ll want to complete the following steps:
Create Applicant Tracking Steps for one or more positions in TimeForge (e.g. receive resume, interview applicant, send offer letter). It’s super simple.
Create some Human Resource Types for your business. These are types of documents that can be attached to an application or onboarding packet.
Create HR Activity Templates (optional, but recommended!). Templates allow you to send multiple documents at once to your entire company, an entire location, a group of employees at a location, or even a single employee. They can greatly streamline your onboarding process.
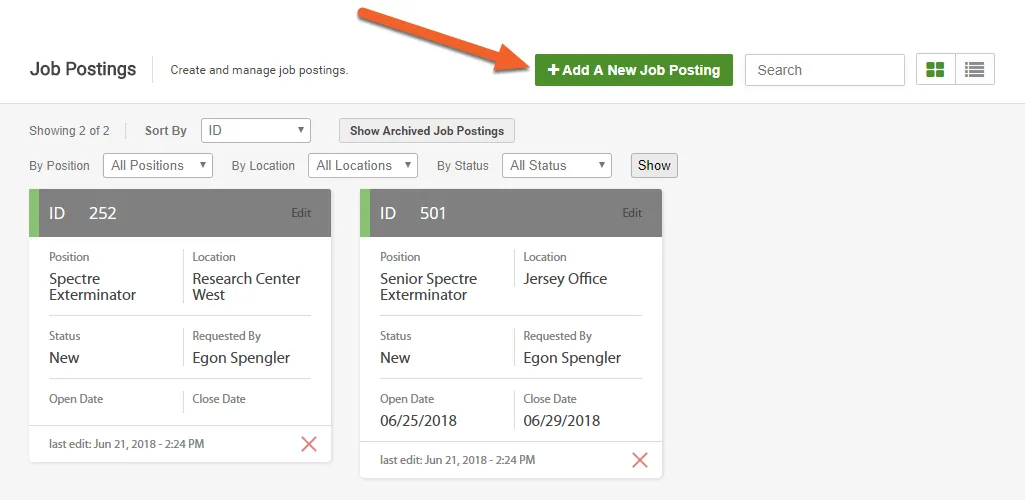
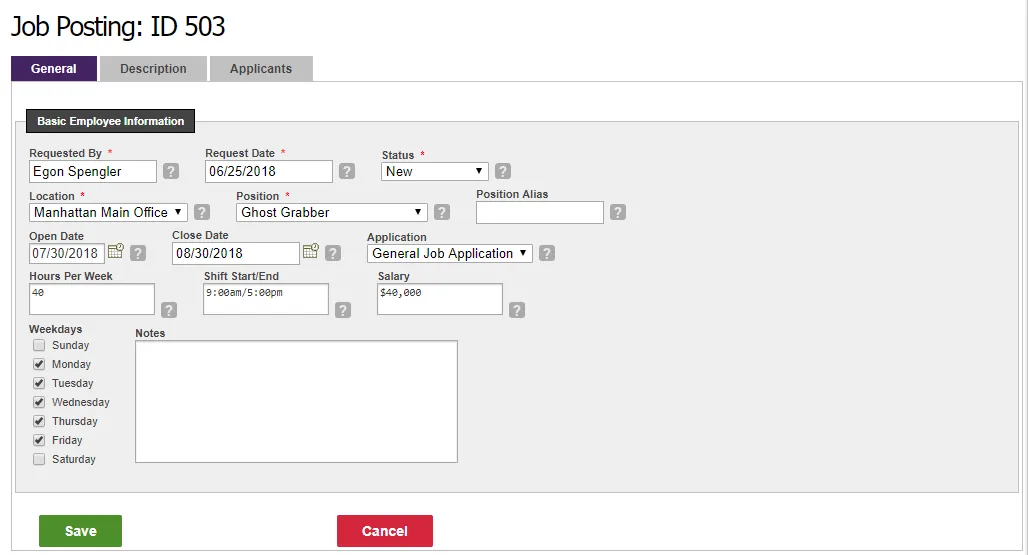
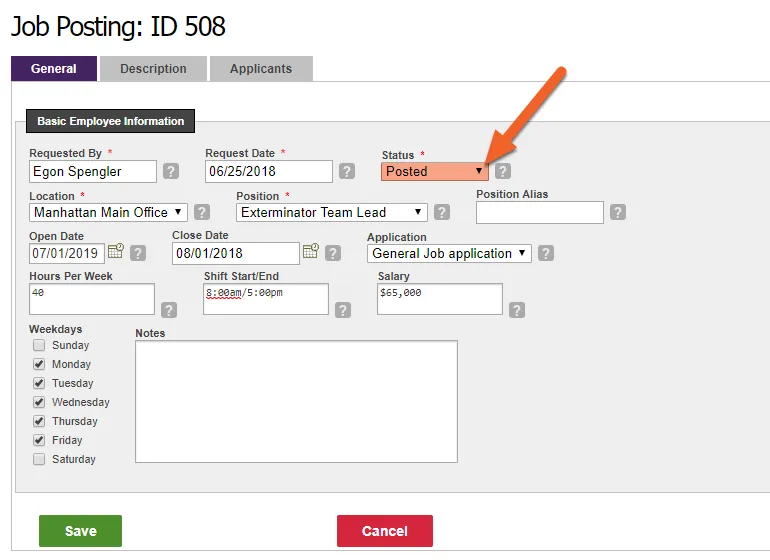
Create Job Postings for your positions to define the expectations of the job, when the job will become available, who is making the request, and more.
Once you have the above in place, you can advertise your job openings and start reviewing and tracking applicants. When you’re ready to hire, you can seamlessly convert applicants into employees in TimeForge and begin onboarding them immediately, using the activity templates you created.
Create a Document to store and assign HR forms
TimeForge is capable of keeping track of employee information, including HR documents, such as I-9s, W-4s, training manuals, insurance verification, certifications, and other forms that are applicable to the labor management needs of your business. By creating Documents, you can organize these forms for easy configuration and retrieval.
Documents are further filed under specific categories that are provided by TimeForge. For example, an acceptance letter, job application, and I-9 might be filed under Onboarding Document, while a handbook on customer service policies might be filed under Ongoing Training.
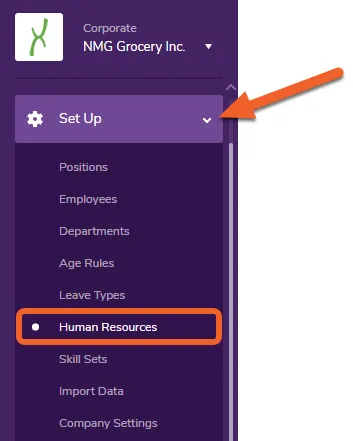
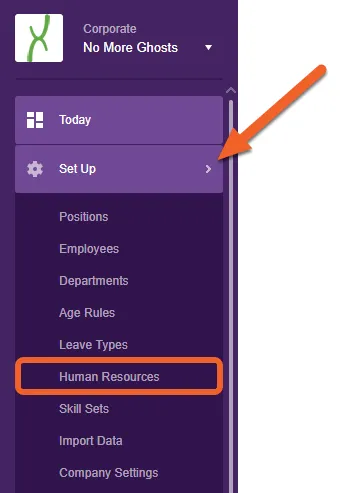
Navigate to the Documents page at the Corporate level
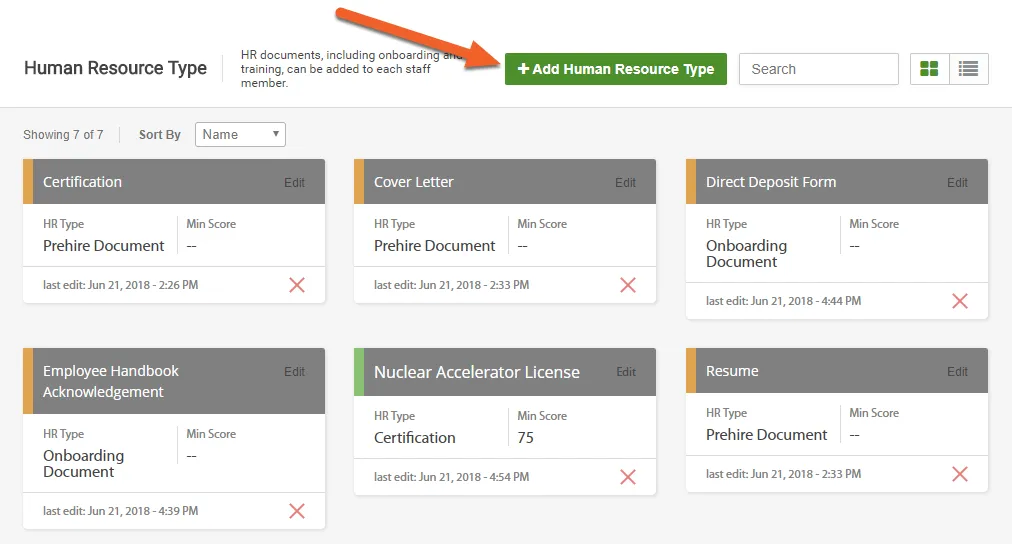
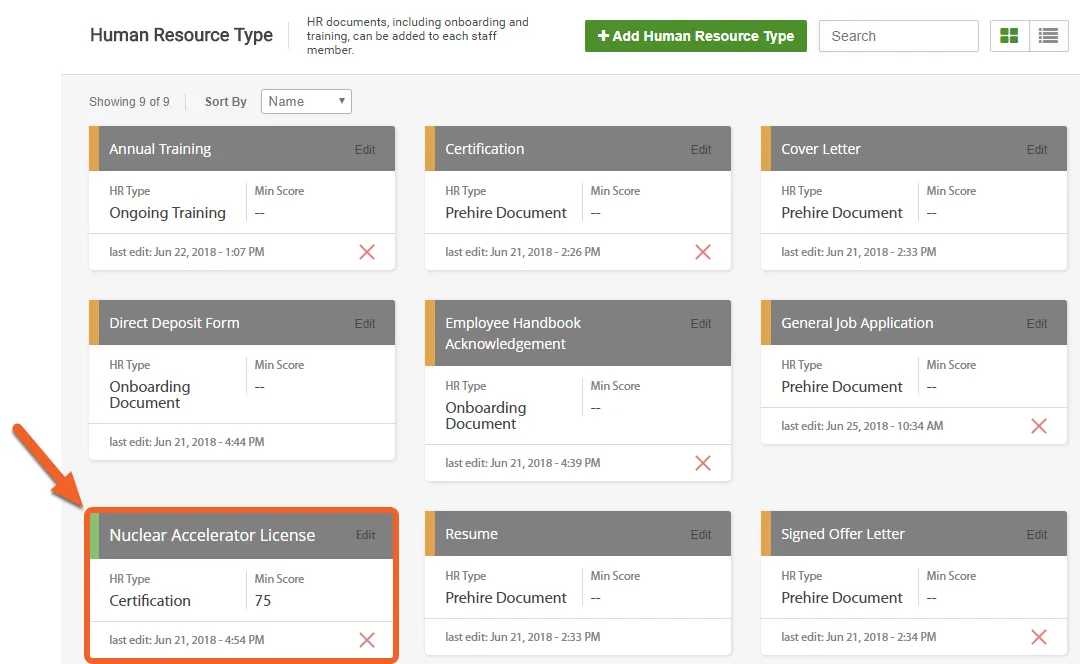
At the top of the page, you’ll notice a button to Add Document. Click this button to create your own document of a specific type. Any documents you’ve already created will be listed on this page, either in the grid view (as shown in this example) or list view.
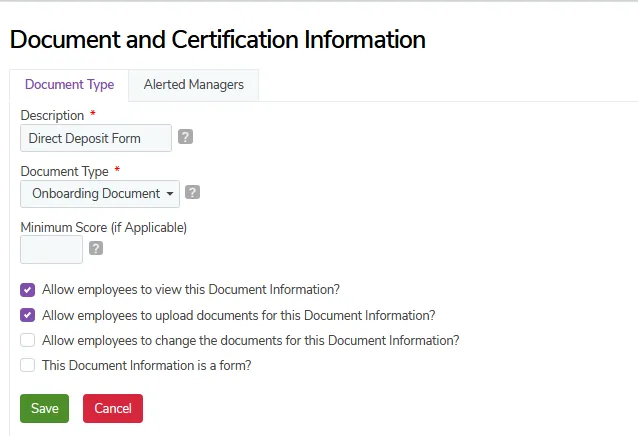
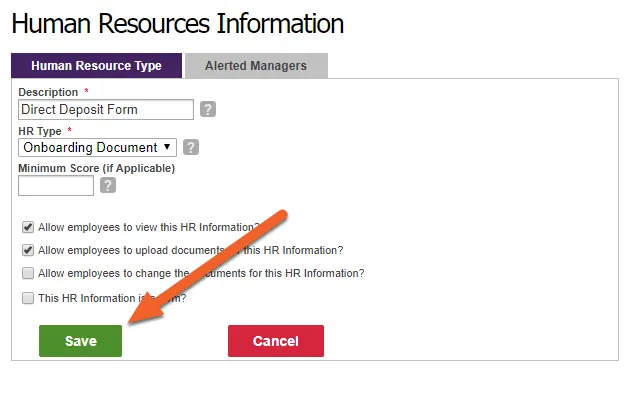
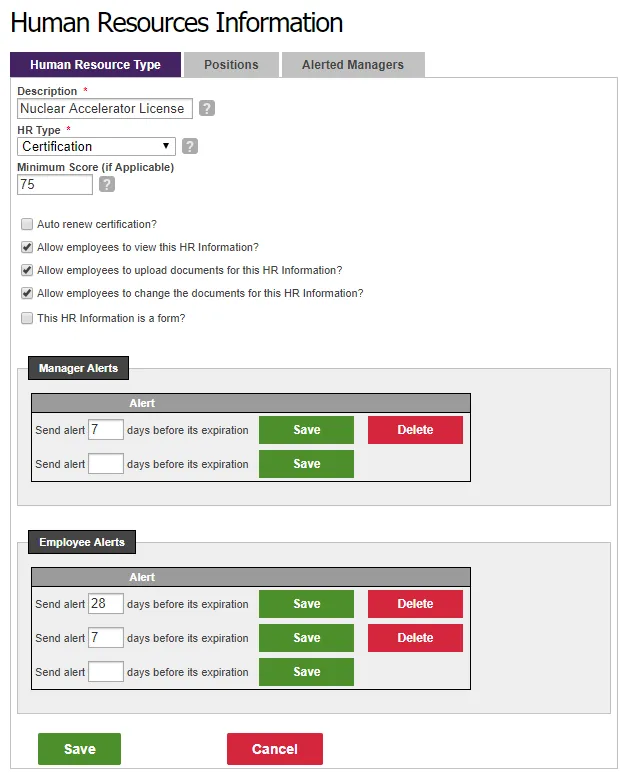
Fill out the form to customize your new document. Documents can be of the following types: prehire, onboarding, certification, ongoing training, or offboarding.
Depending on the type you choose, a good Description might be Food Safety Certification, Direct Deposit Form, or Employee Handbook Acknowledgement.
What do the checkboxes mean?
Auto renew certification? (Certification only)
Check this box to automatically renew the certification.
Allow employees to view this Document Information?
Check this box to only allow employees to view the document.
Allow employees to upload documents for this Document Information?
Check this box to allow employees to upload documents (such as a signed form, resume, etc.).
Allow employees to change the documents for this Document Information?
Check this box to allow employees to change the document after they have already uploaded it. Otherwise, employees can only upload the document once (no do-overs).
This Document Information is a job application? (Prehire Documents only)
Check this box to indicate that this document is a job application.
This Document Information is a form?
Check this box to indicate that the HR Type is an Orbeon form. Orbeon forms are online forms that can be filled out, signed, and submitted from the employee’s browser.
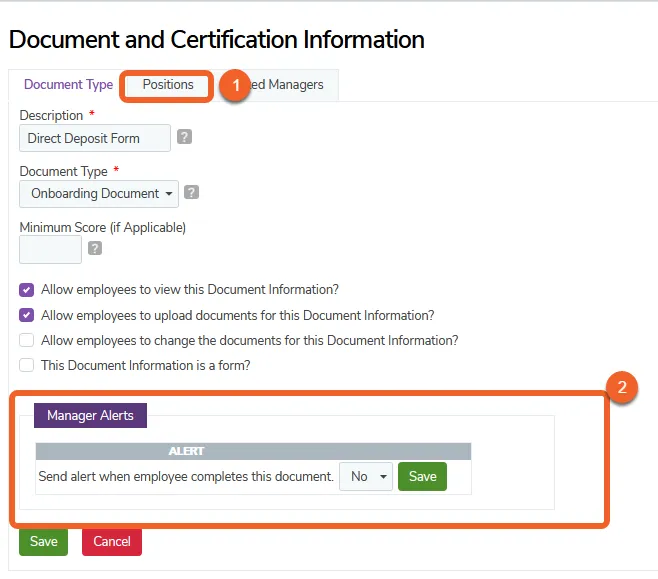
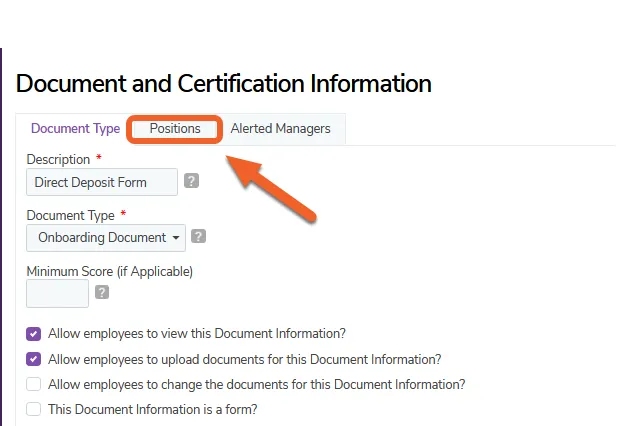
When you click Save, you’ll notice a few changes immediately on screen: 1) a new Positions tab will appear at the top, between Human Resource Type and Alerted Managers, and 2) new alerts fields will appear at the bottom, just above the save button:
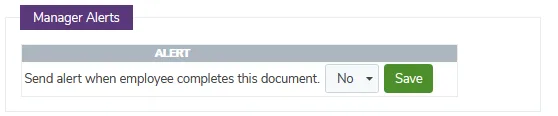
(Optional) Choose whether managers should receive alerts
If you want to notify one or more managers, select Yes from the dropdown menu, then hit Save.
(Optional) Choose which managers will receive alerts
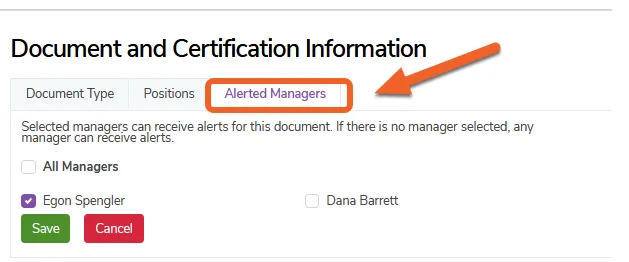
If you choose to send alerts, you’ll also want to set which managers should receive them.
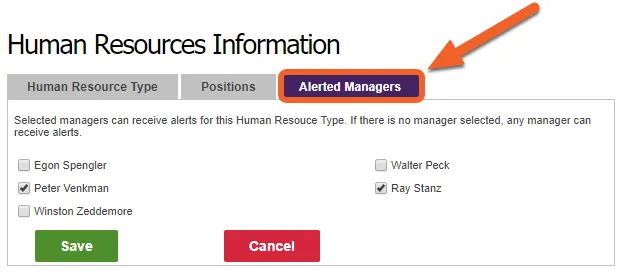
Switch over to the Alerted Managers tab to choose which managers should receive alerts about this document. When an employee makes a change to the document, e.g. uploads a signed form, TimeForge will notify the selected managers.
Now that you’ve created a new HR Type, you’ll want to put it into action! Click the Positions tab to begin assigning your new document to relevant positions in your company.
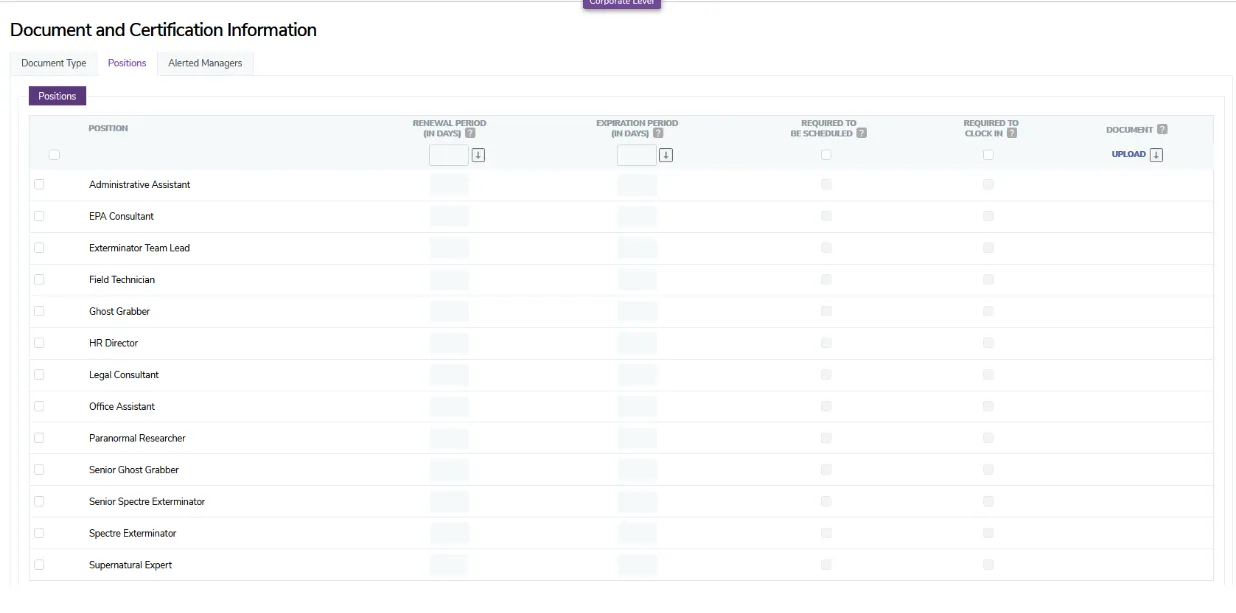
Select the positions that should use this document. You can set additional requirements by individual position or for all positions, including a renewal period, expiration period, and whether the document is required before an employee in that position can be scheduled or clock in.
If you need to provide employees with a document to review or a form to sign, you can upload it here. Each position can have a different version of the form, if desired.
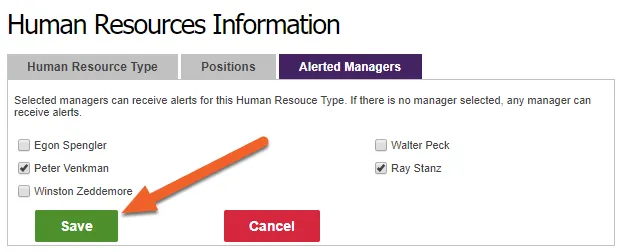
Click Save to save your changes across all three tabs.
That’s it! The selected positions will now require this type of document. If it’s a prehire document, the document will be required as part of the employee’s application and can be tracked using Applicant Tracking Steps.
Create Applicant Tracking Steps (ATS)
TimeForge comes fully equipped with a customizable applicant tracking system, called Applicant Tracking Steps (ATS), that allows you to track your job applicants from resume to hire.
Applicant Tracking Steps are just that: steps, inside TimeForge, that enable you to easily track your job applicants throughout the entire review and hiring process. These steps can also be used to outline the process itself, ensuring that applicants applying for the same position all go through the same process and complete the same steps.
This guide will show you how to create your own applicant tracking steps in TimeForge.
Applicant Tracking Steps are tied to positions in TimeForge. Each position can have its own steps.
For example, you might want to request a writing sample from your Marketing Coordinator applicants or your Technical Writer applicants but not from your Field Technician applicants.
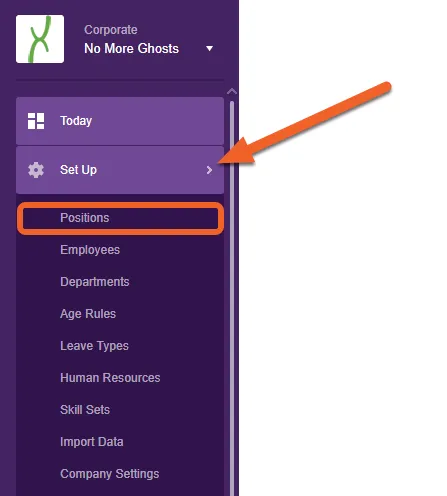
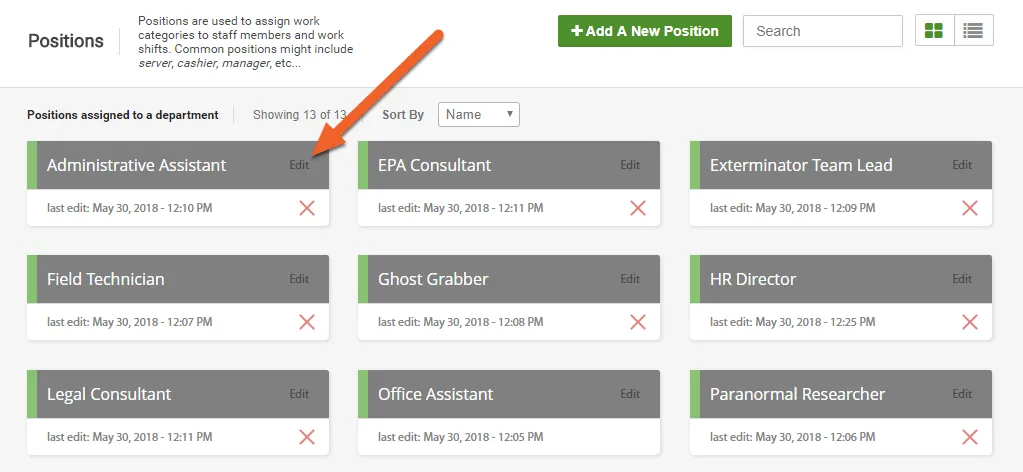
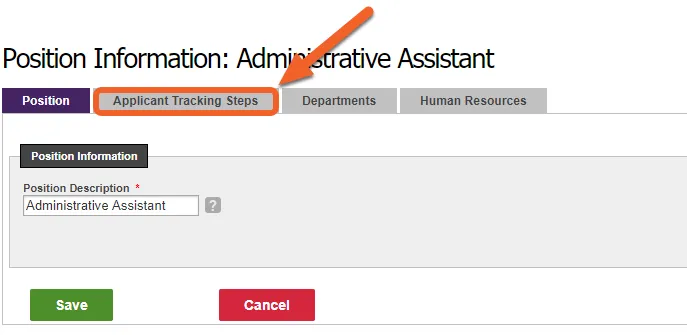
For this example, we’ll create steps at the Corporate level. Open the Set Up tab, then select Positions from the sub-menu.
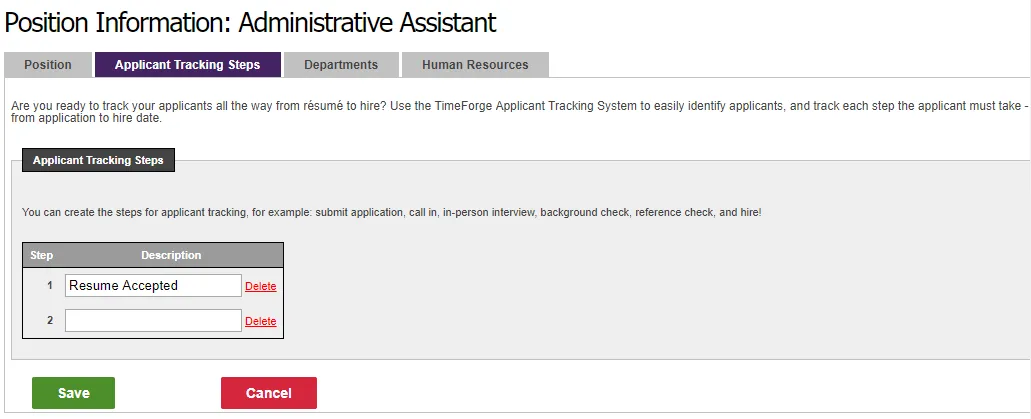
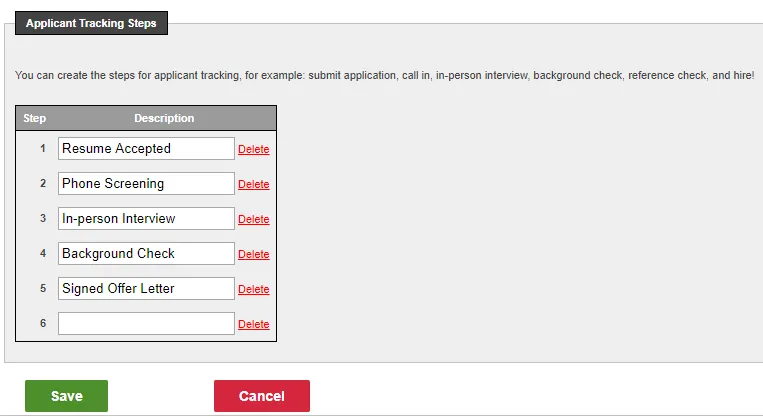
And now, the fun part! Here, you define your applicant tracking steps, starting with Step 1. Typically, your first step might be something like Receive Resume, Acceptable Resume Received, or Resume Accepted.
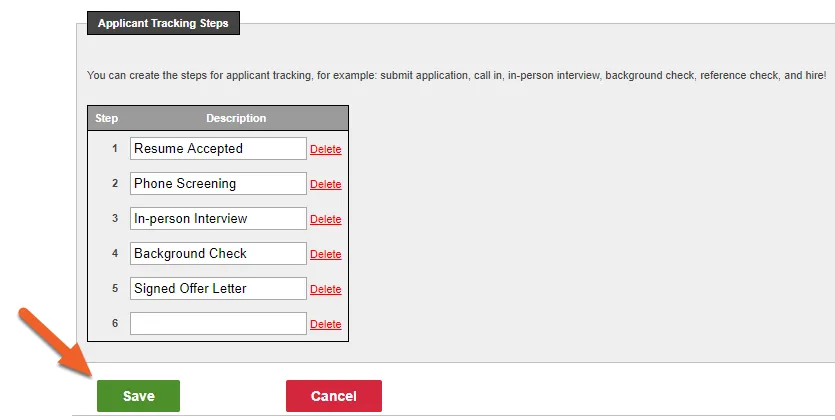
With applicant tracking steps in place, you’re now ready to track your applicants in TimeForge.
Create a job posting
By creating your job postings inside TimeForge, you can greatly streamline the review and hiring process. The system will store information about your applicants for review, allowing you to archive those who don’t meet your criteria and to hire those that do. When you hire a job applicant, TimeForge uses their application to create their employee profile, saving you time and effort that would otherwise be spent on manual data entry.
TimeForge offers two great options for listing your job openings: 1) your company’s own website, using our custom job board system, or 2) integration with Indeed.com, a popular job board service. To take advantage of either of these options, please reach out to our amazing Customer Support team.
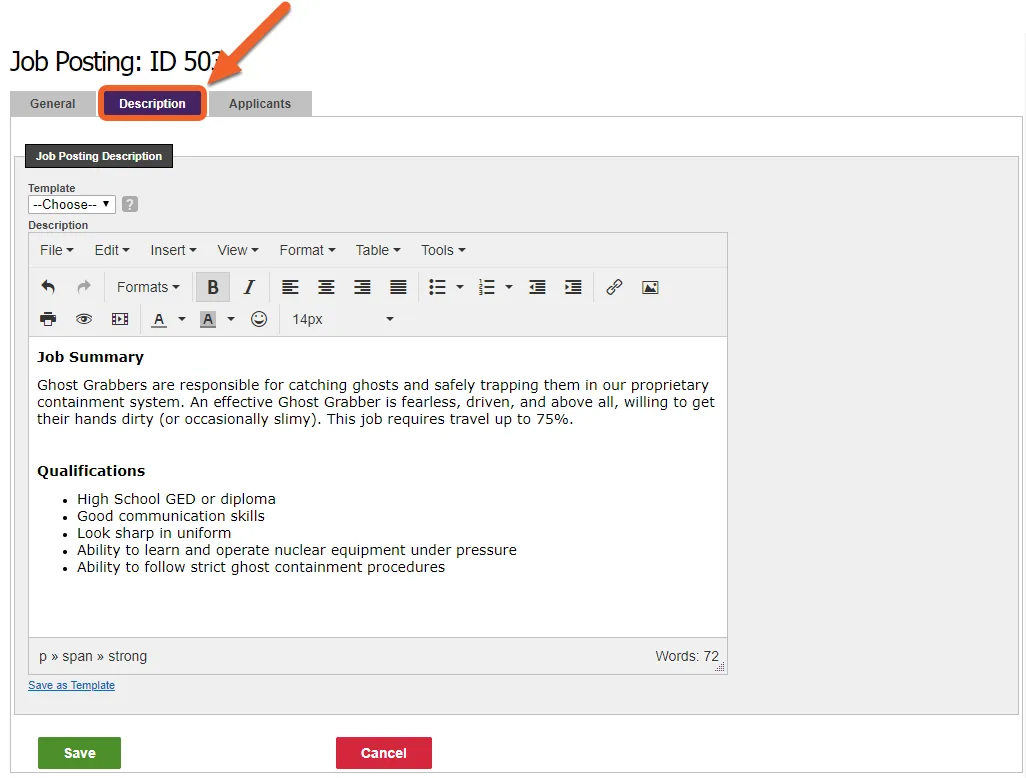
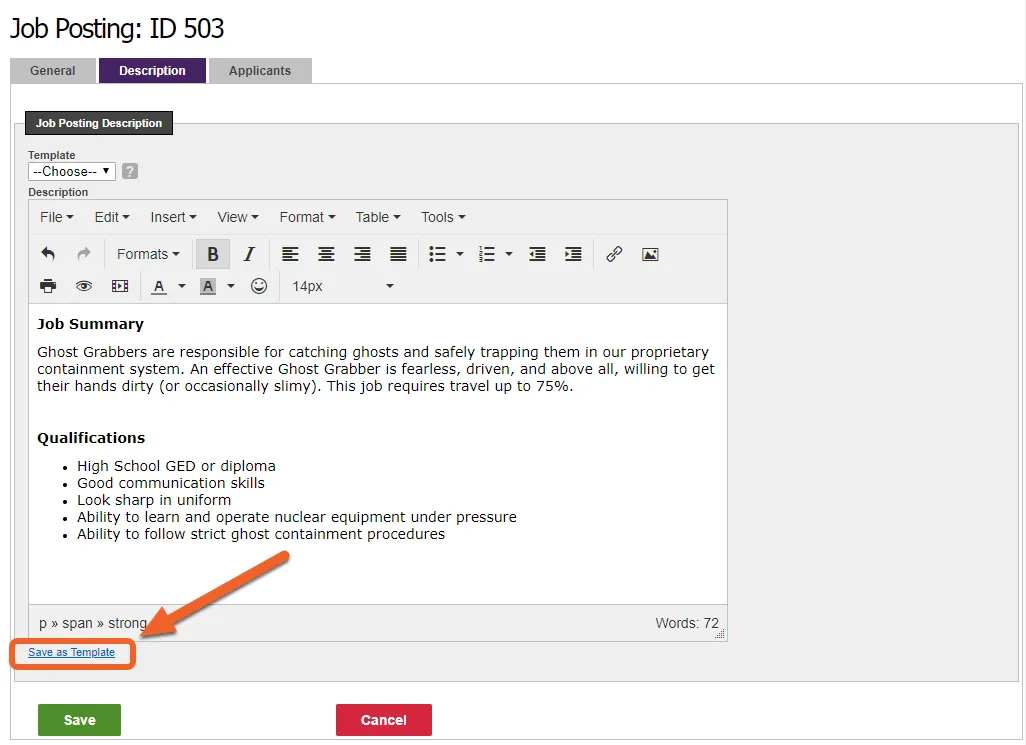
This is where you provide the description for your job posting. You can copy and paste from your favorite word processor (e.g. MS Word, Google Docs) or use the tools provided to create and design from scratch.
(Optional) Save your job description as a template
Saving a description as a template will allow you to reuse that description later. So save a description as a template, click the Save as Template link.
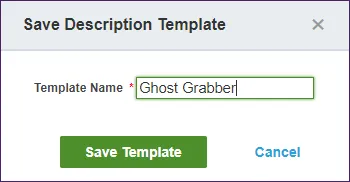
Provide a name for your new template, then click the save button.
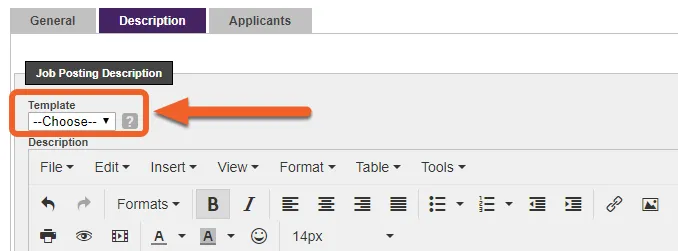
And that’s all there is to it! The next time you need to create a job posting for this job (or a similar job), you can select the template from the dropdown menu to load the description.
TimeForge allows you to manage applications, job postings, and track potential new hires. What makes it even better is that when you’re ready to hire someone, all it takes is a single click to move their information from their job applicant record into an employee record in TimeForge.
This article will show you how to review and track job applicants.
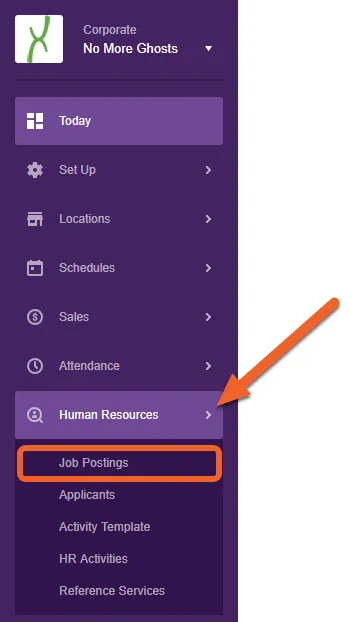
Navigate to the Applicants page under Human Resources
Applicants can be reviewed at both the Corporate and Location levels, though in order to be visible at a location, the applicant must have applied to that location.
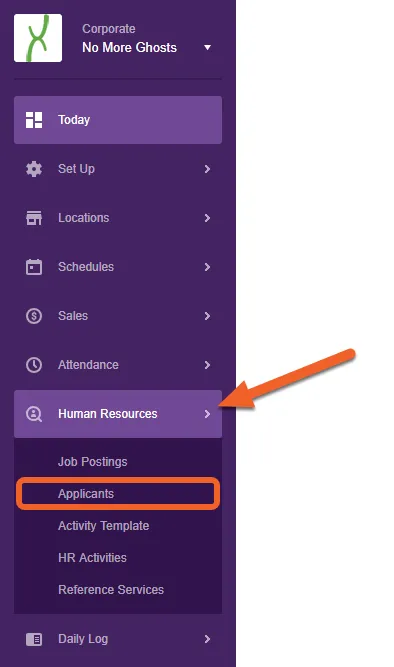
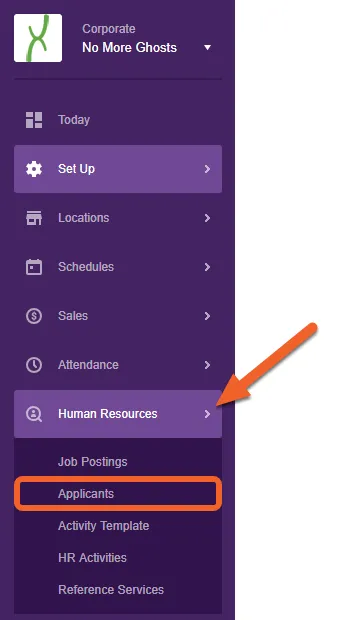
To begin reviewing applicants, open the Human Resources tab and select Applicants from the sub-menu.
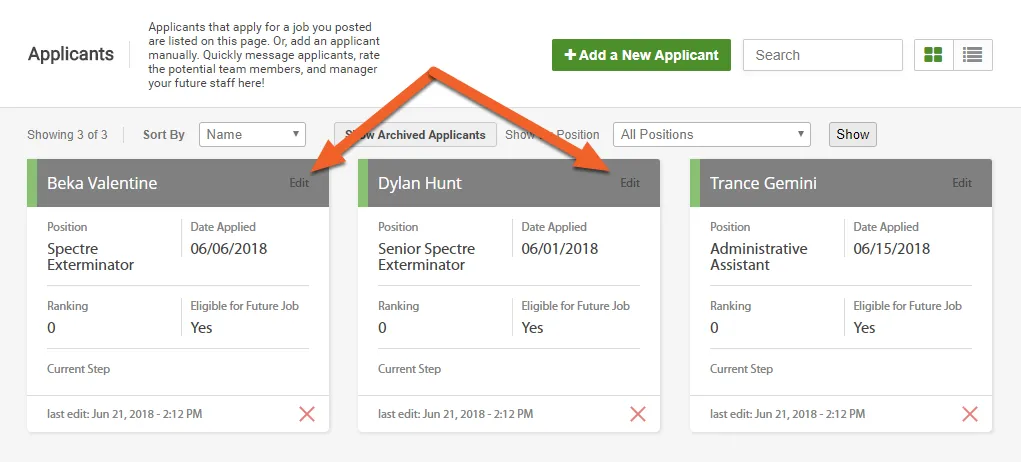
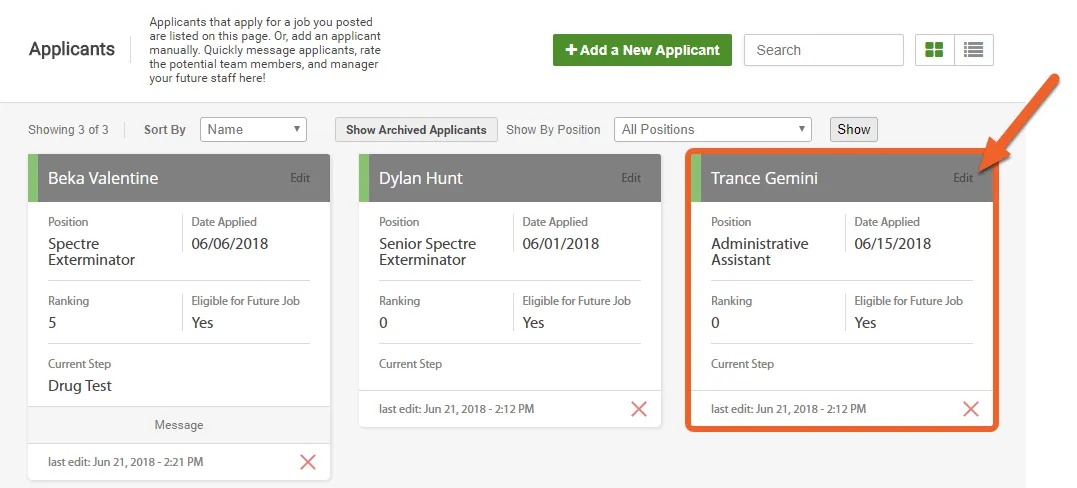
On the Applicants page, you can view and edit current applicants, as well as manually add new ones. To review a specific applicant’s information, click the Edit link for the applicant you would like to review.
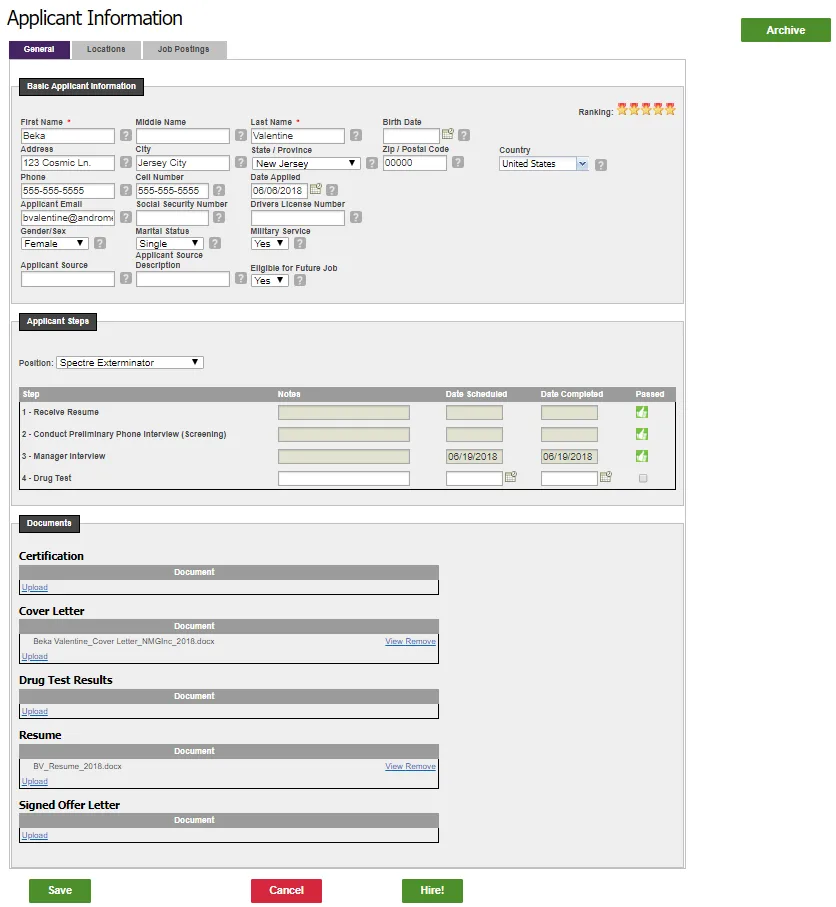
Here, you can view and edit the applicant’s basic information, track their progress, upload documents to their application, or add them directly to your employee list by hiring them. If you decide not to hire, you can Archive the applicant, which will save their application and information for later but remove them from the applicant list.
The sections below will walk you through each area of this page. Be sure to click the Save button to save any changes you make on this screen.
Basic Information
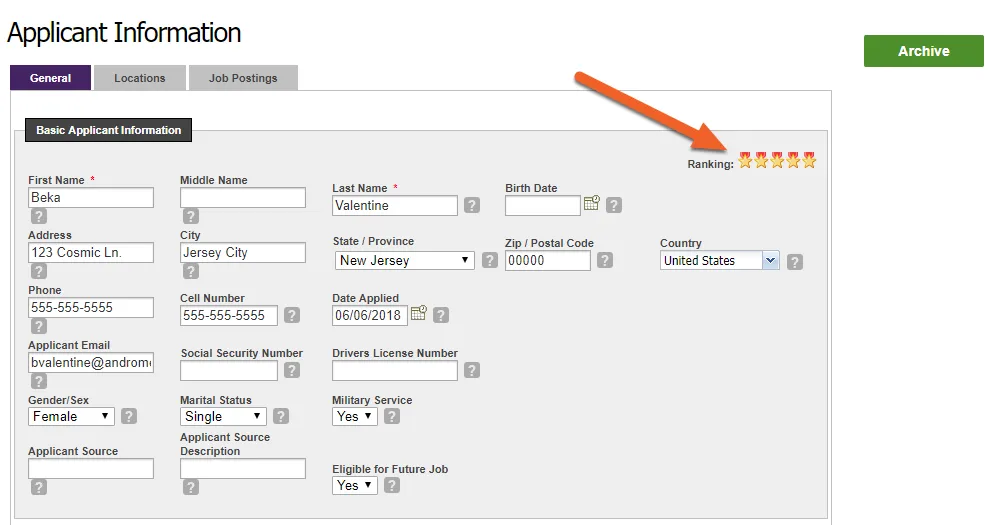
Basic information includes name, address, birth date, phone number, email, etc. Near the top right, you’ll also notice a handy ranking feature. Simply click on a star to rank the applicant from 1-5 (the applicant shown below was given a 5-star ranking).
Applicant Tracking
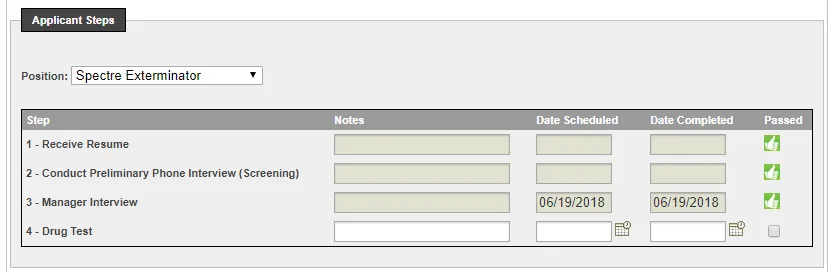
TimeForge’s Applicant Tracking system allows you to quickly and easily see the progress of an application. In the example below, the applicant has passed the first three steps (acceptable resume, phone screening, and manager interview) and is currently at Step 4 in the process. The steps shown depend on the position being applied for.
Documents
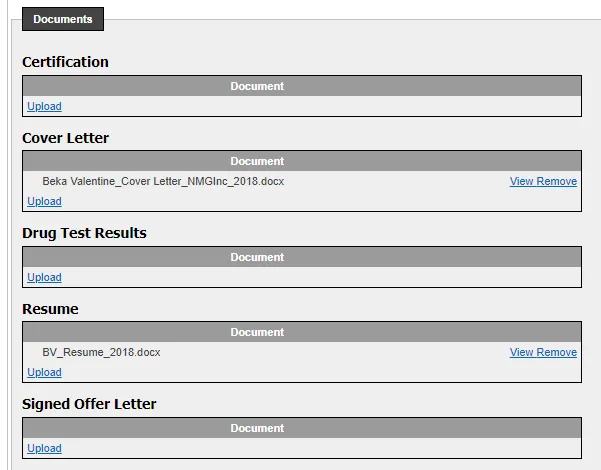
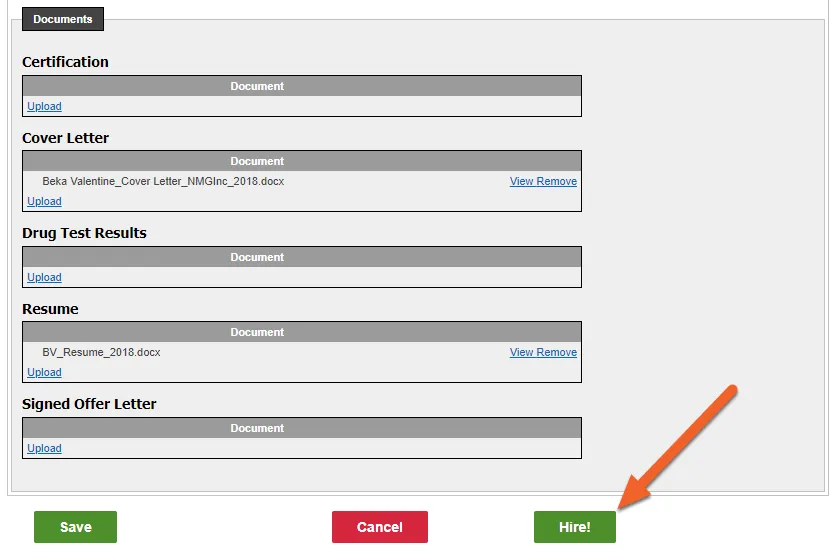
The last section on this page is the documents section. This is where you can upload and review documents pertinent to the application, such as a cover letter and resume.
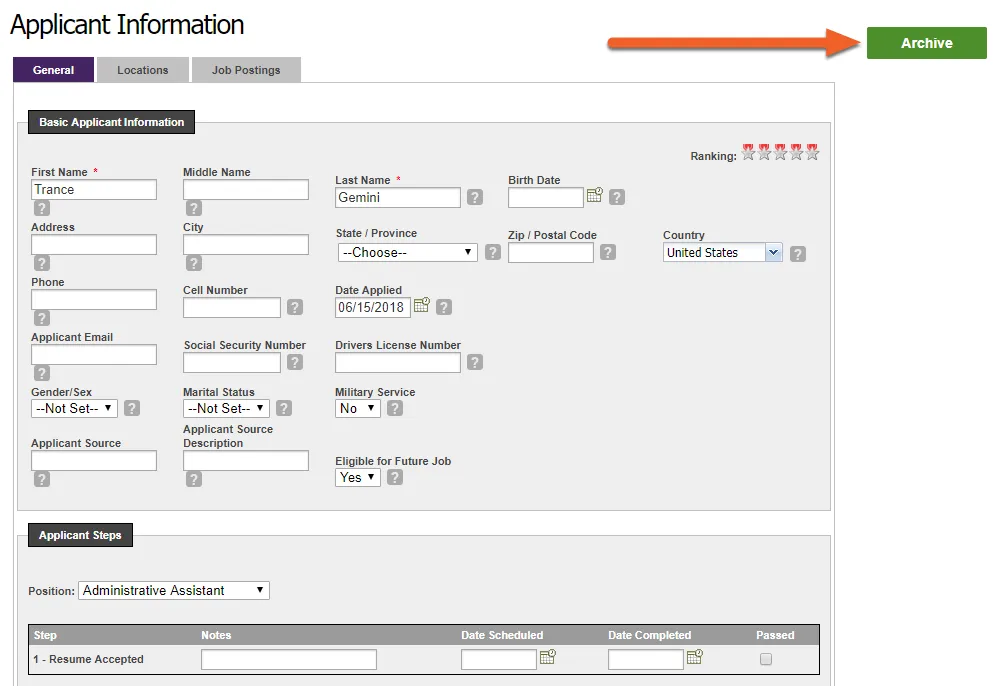
Below the documents section, you have the option to Save any changes you’ve made and return to the applicant list, Cancel (return to the applicant list without saving), or Hire the applicant. There’s also an option at the top of the page to Archive the applicant.
Archiving an applicant will remove him from the applicants list. However, his information will still remain on file for later viewing, in case you change your mind or your preferred applicant doesn’t work out.
To archive an applicant, simply click the Archive link in the upper right corner. You will be asked to confirm your choice.
Where can I find the applicants who have been archived?
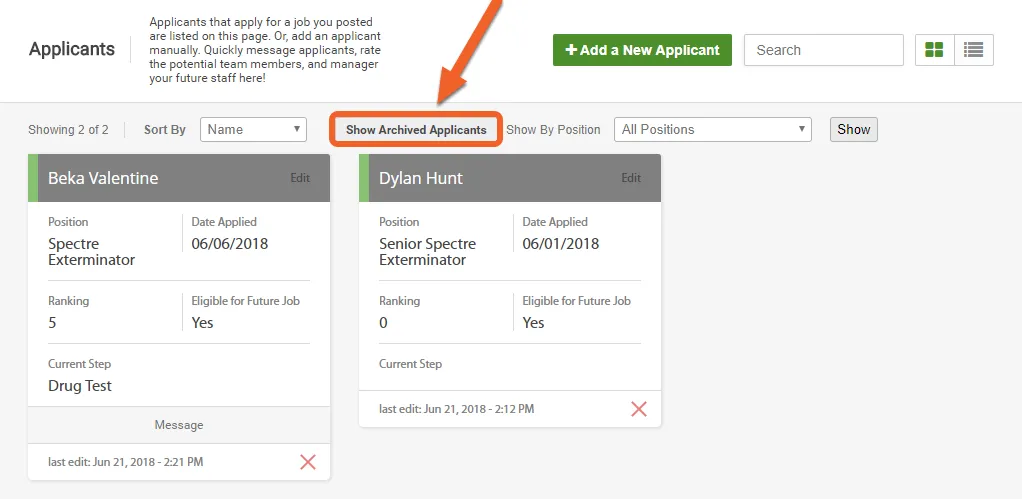
To review an archived applicant later, simply click the Show Archived Applicants button on the Applicants page.
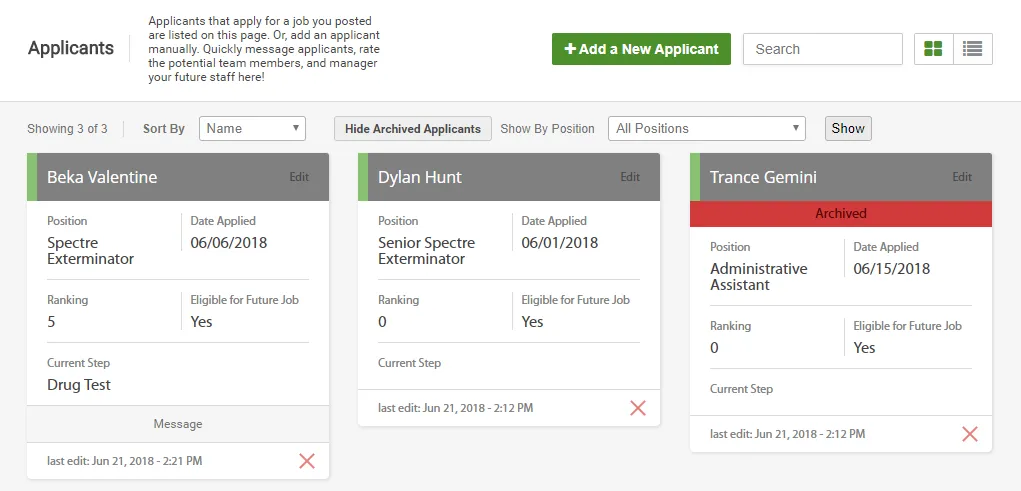
You’ll now be able to view the archived applicant and even unarchive them, if you’d like.
If the applicant is a good fit, you can choose to hire them directly from this page. Simply scroll down to the bottom of their applicant information (past the Documents section), and click Hire!
Hiring the applicant will remove him from the applicants list and will make him an active employee inside TimeForge. You can choose to send an email invite at this time (this will allow the employee to set up their credentials in TimeForge) or do so later.
Track your job applicants throughout the review and hiring process
Using TimeForge’s Applicant Tracking system, you can easily track your job applicants during every step of the review process, from the moment you receive a resume to the moment you decide to hire. Before you can start tracking applicants, you first need to create your applicant tracking steps for the position(s) you want to hire. Once that’s done, use this article to get the most out of applicant tracking in TimeForge.
For this tutorial, we’ll use the Corporate level. However, if your business has more than one location, you can also follow these steps at the Location level.
Open the Human Resources tab, then select Applicants from the sub-menu.
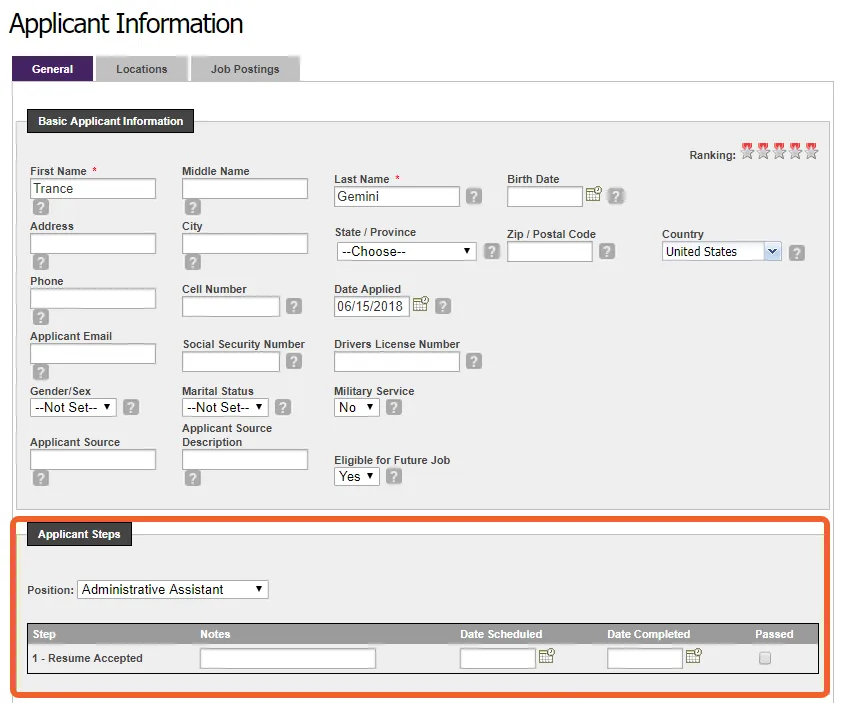
Under the Applicant Steps section, you’ll see the position they’re applying for and the steps they’ve completed so far, if any.
In the example below, you can see that applicant tracking steps have been created for this position, but none of them have been completed by this applicant, yet. Let’s go ahead and start progressing the applicant through the steps!
Progress the applicant through the steps as they’re completed
Let’s say this particular applicant has already submitted an acceptable resume and has completed her over-the-phone screening interview.
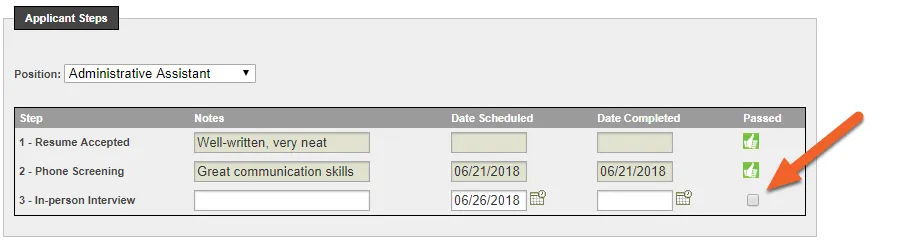
For each line, we can add Notes about the step, such as how well she did, whether she arrived on time, or which manager implemented the step. There are also optional fields for Date Scheduled and Date Completed.
When you’re ready to mark a step as complete, simply check the box at the end of the row.
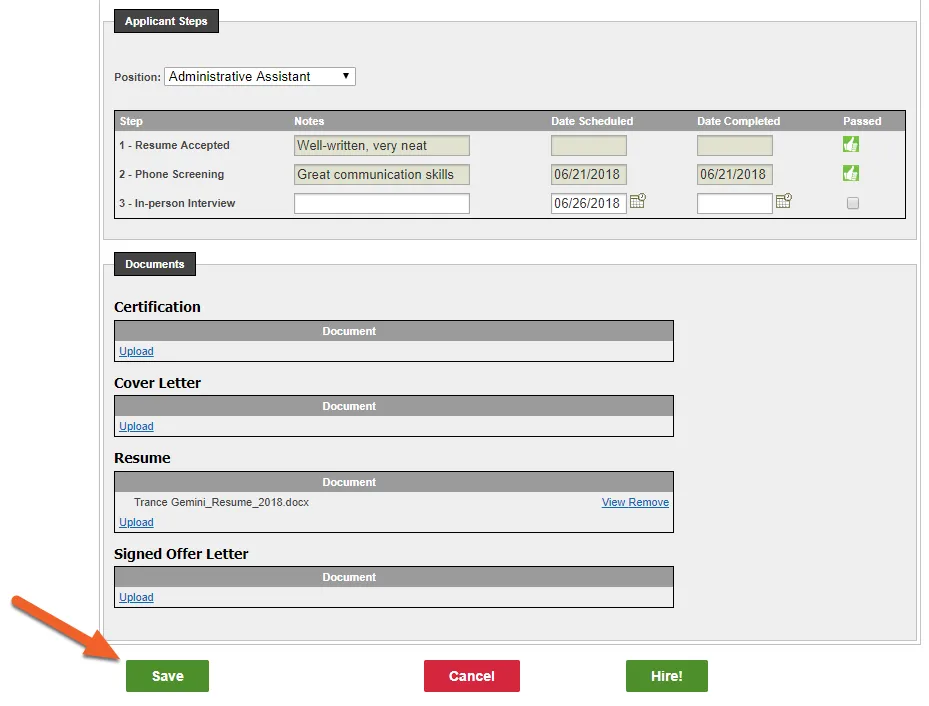
Your changes won’t be permanent until you save them. Scroll down past the Documents section and hit Save to finalize your work.
When the applicant completes the next step in their application, you simply return to this page to update their Applicant Steps.
Should the applicant not meet your criteria, or fail to complete a step, you can choose to Archive the applicant and remove them from the applicants list. Alternatively, if the applicant is a good fit, you can Hire her directly from this page.
Add an HR document directly to an employee's profile
TimeForge makes it easy to onboard your employees! From the employee profile, you can add forms and important documents for them to review, sign, and submit. When the employee logs in, they’ll be notified of the tasks they need to complete or forms they need to fill out as part of their onboarding process, such as reading the company handbook and signing an acknowledgment form.
Although this tutorial is focused on onboarding, the steps below can also be used to add prehire documents, ongoing training documents, offboarding forms, annual notices, and certifications to an individual employee’s profile.
To learn how to add multiple documents at once from a template, check out our tutorial on HR Activities!
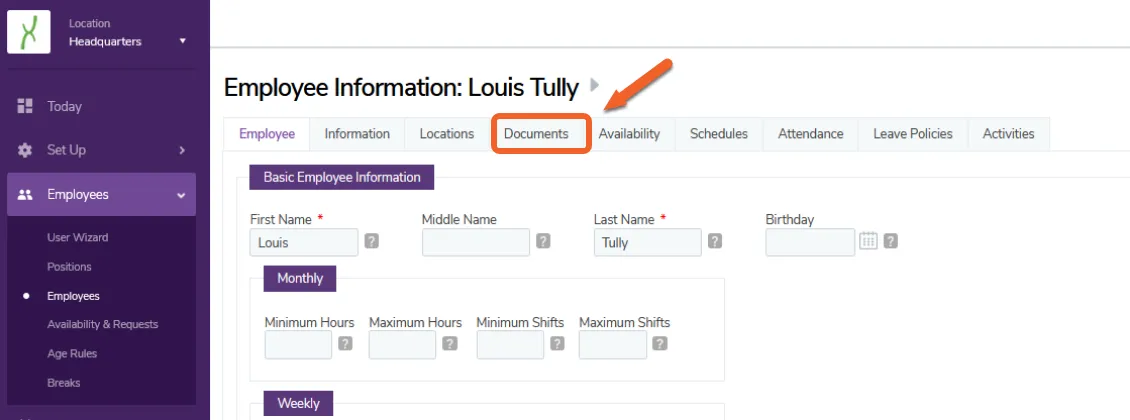
In addition to onboarding documents, you can also add prehire documents, ongoing training documents, offboarding forms, and certifications directly to the employee’s profile.
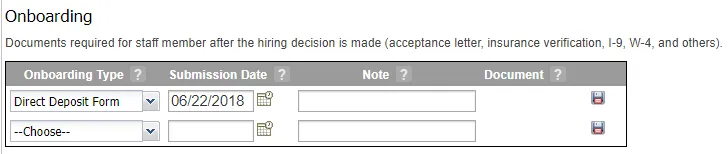
For this tutorial, we’re interested in the Onboarding category.
The submission date can be one of two things: the date the employee submitted the form (if you are uploading a document already completed on paper, for example, and you want to add the record to their profile) or the date you provided the form to the employee (if you intend to use the system to provide the employee with a blank form to sign, for example).
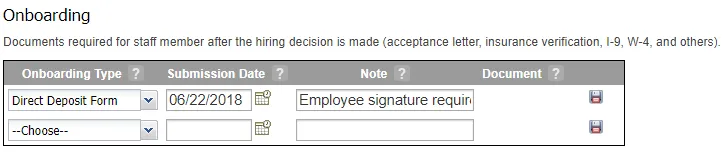
(Optional) Enter a note about the form or document
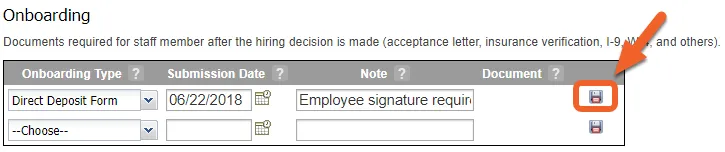
Click the floppy disk icon at the end of the row to save your entry.
If the Document Type uses an Orbeon form, an Orbeon icon will appear on the line, allowing you to complete all or part of the form prior to sending it to the employee. Orbeon forms must be set up by Timeforge in advance. If interested, contact our Support team to learn more!
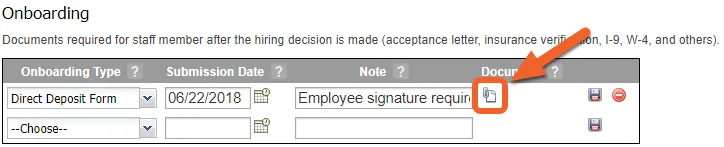
Otherwise, you can click the file attachment icon to upload a file, such as a PDF document.
The document will be immediately available to the employee.
How does the employee access and fill out the form?
We have a handy guide to help employees through this process, but here’s the essentials:
If the onboarding document is an Orbeon form, the employee can simply click the link in their profile and fill out the form online.
If it’s a PDF form, the employee will download the form from their profile, open it up, fill it out, and save. Then, they need to remove the original form from their profile and upload their completed version. Alternatively, you can instruct your employees to email you the completed documents, or to print them out and turn them in by hand. The choice is yours!
Create alerts for certifications that are about to expire
One of the benefits to using TimeForge to manage your HR documents is that you can set up alerts to notify personnel of changes. This allows managers to be notified when an employee uploads a signed and completed document, for example.
When you create an HR Type as a Certification, Ongoing Training, or Prehire document, you have the option to notify both the manager(s) and the employee that their certification is about to expire. This gives personnel the chance to renew the training or certification prior to the expiration date.
This article will teach you how to set up these handy alerts in TimeForge. To learn how to enforce certifications (prevent employees with expired certifications from being scheduled or clocking in), see our guide on HR Types.
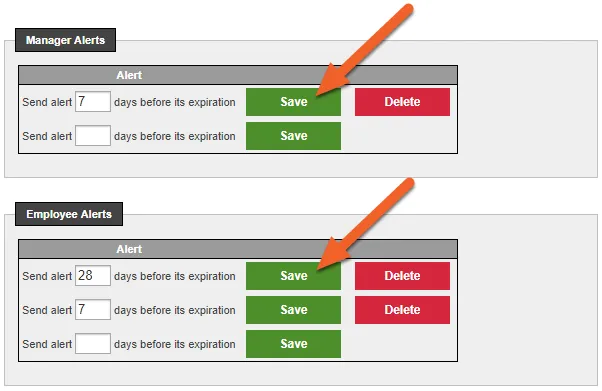
Under Manager Alerts and Employee Alerts, you can choose when to notify selected managers and the employee, respectively. When you enter a number, an additional field will appear underneath, allowing you to set up multiple alerts.
In the example below, TimeForge will notify the selected managers at 1 week before expiration and the employee at 4 weeks and again at 1 week before expiration. This gives the employee time to renew their certification before the manager is involved.
Finally, don’t forget to click the Save button to save your changes under both tabs.
Create HR Activities to send onboarding, certification, or training documents to employees
You may already know that TimeForge’s Applicant Tracking and Onboarding system allows you to upload onboarding documents to an employee’s profile. But did you know there’s a way to assign HR documents to an entire company, location, or group of employees at the same time? Yup! By using HR Activities.
HR Activities can be applied to a variety of situations, based on the needs of your business. For example, you could use an HR Activity to collect benefits information for your entire company, to onboard a fresh group of new hires, or to assign training to a select group of employees (or all employees) at a specific location. With HR Templates, you can streamline the process even further.
Just click on a link below to get started!
Company-wide and location-specific HR Activities
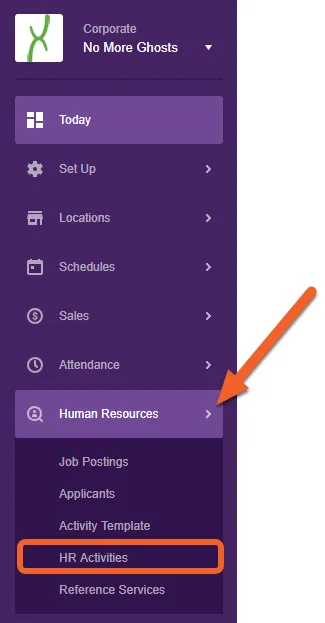
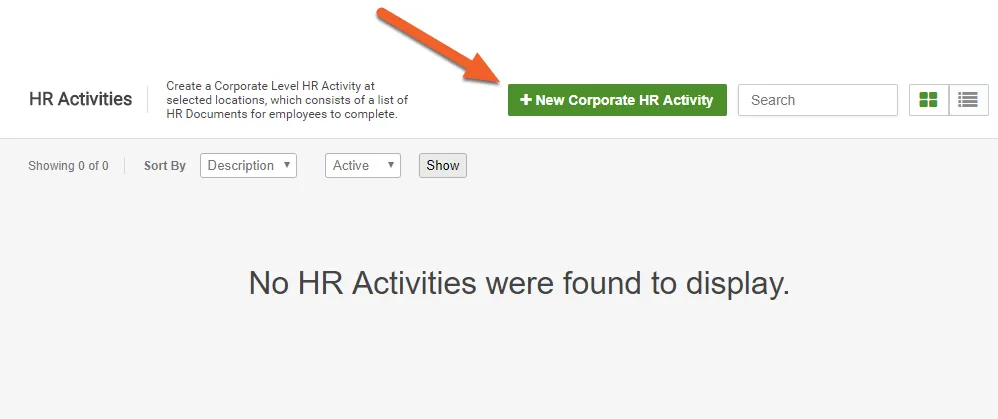
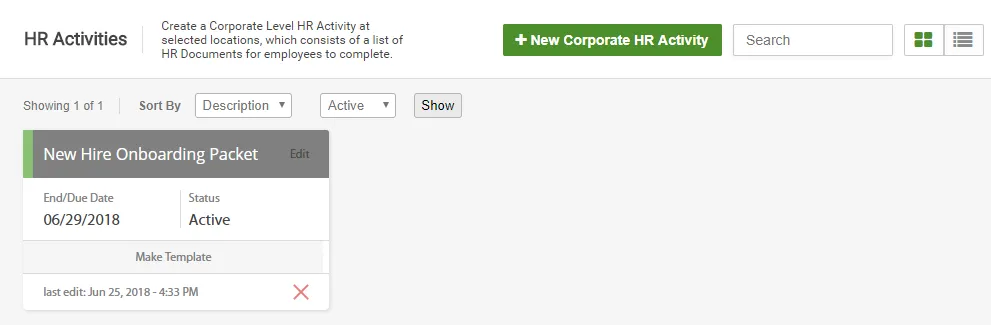
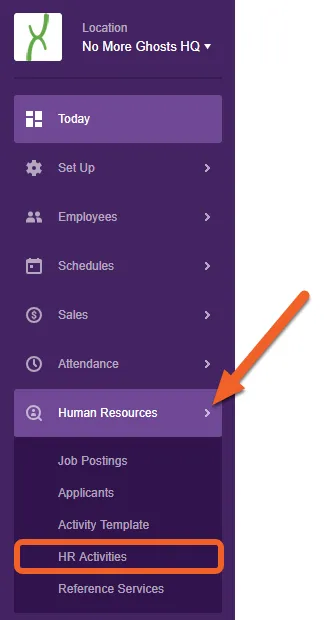
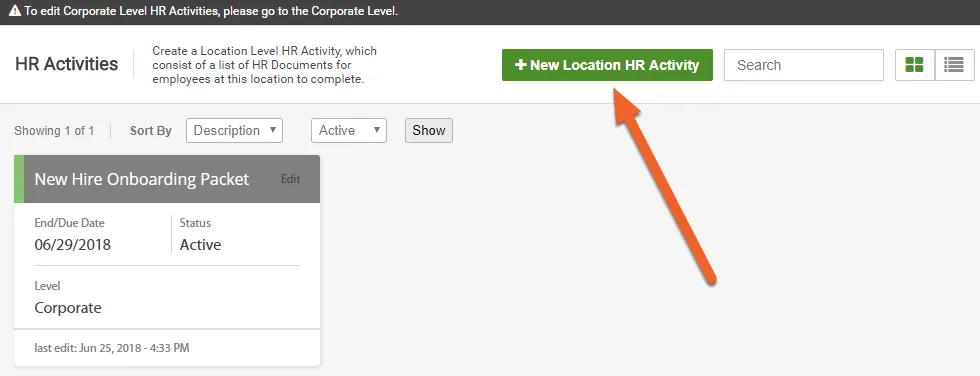
From the Corporate level, navigate to the HR Activities page
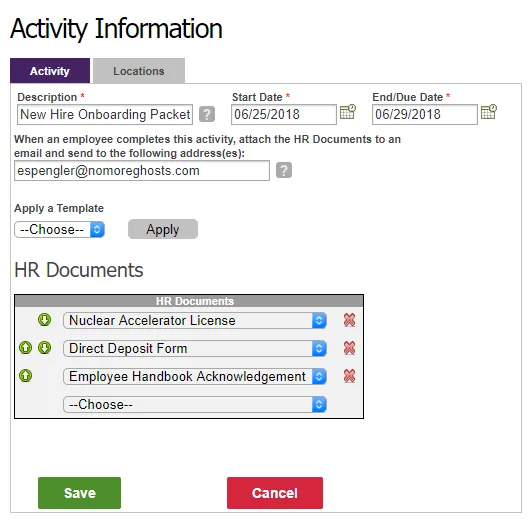
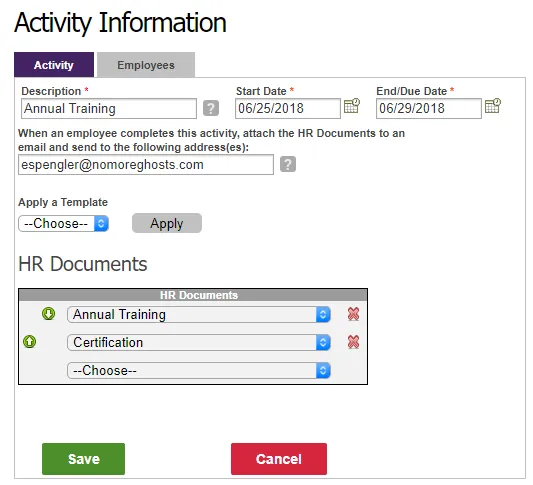
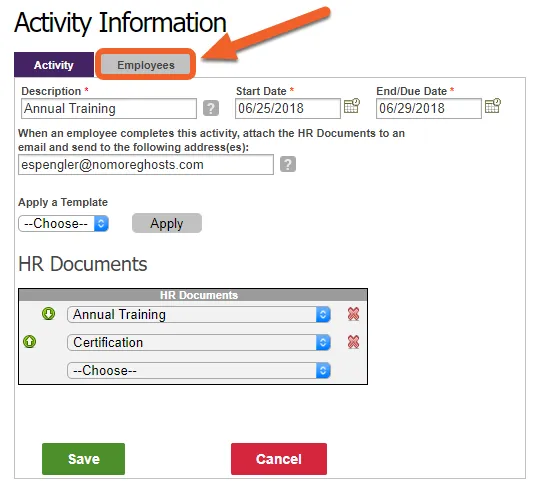
Provide a Description, Start Date, and End/Due Date. You can also supply an optional email address (or multiple addresses) to notify HR or other personnel when the activities are completed.
Next, select the HR Documents you’d like to attach (these are defined under HR Types).
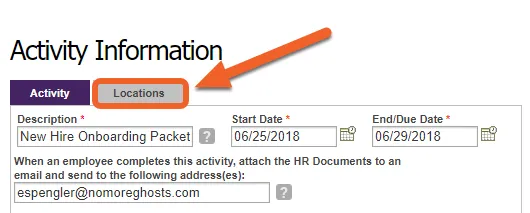
Once you’ve filled out the Activity form and chosen your documents, it’s time to assign the activity to one, multiple, or all locations in your company. Open up the Locations tab:
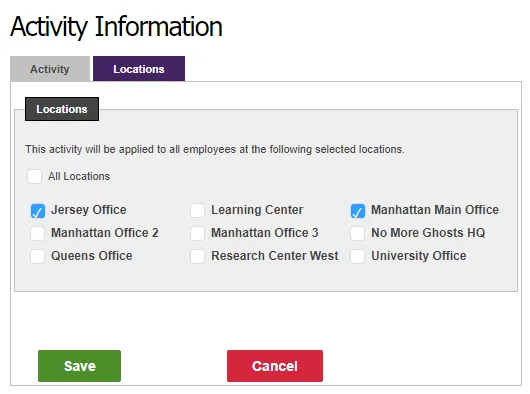
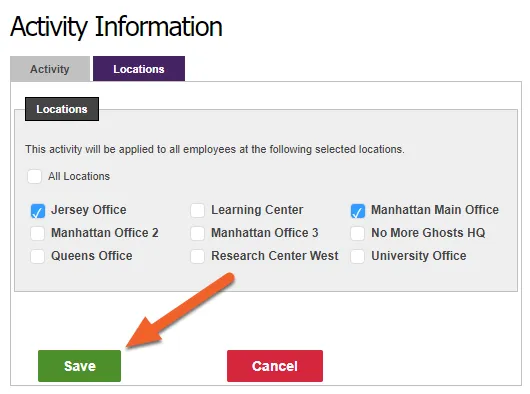
Then, select your desired locations. Keep in mind that all employees at these locations will receive the documents and will be required to complete the activity!
Provide a Description, Start Date, and End/Due Date. You can also supply an optional email address (or multiple addresses) to notify HR or other personnel when the activities are completed.
Next, select the HR Documents you’d like to attach (these are defined under HR Types).
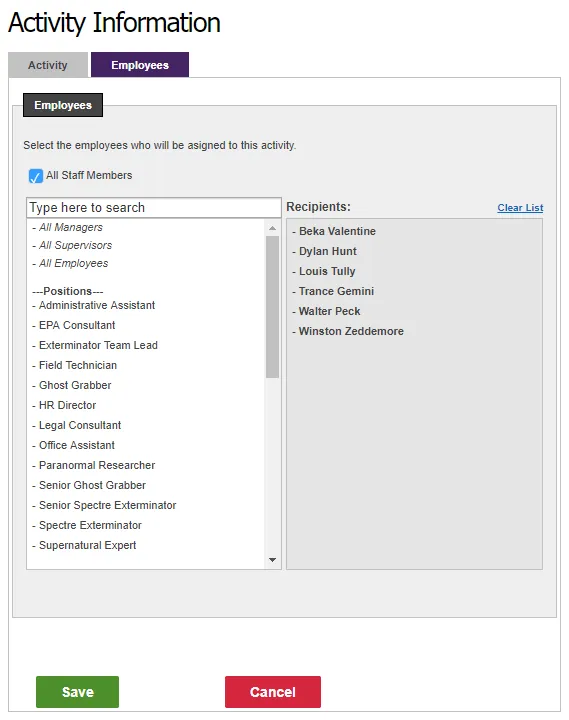
Once you’ve filled out the Activity form and chosen your documents, it’s time to assign the activity to one, multiple, or all employees at the selected location. Open up the Employees tab:
Then, select the recipients from the list! Simply hover over a line item and click the green plus sign to move the selected employee(s) over to the recipients column.
You can select All Managers, All Supervisors, or All Employees at a time. Or, you can select all employees assigned to a specific Position or Department. Scroll all the way down to select individual employees by name, or (if you have a long list of employees) use the search filter at the top of the list.
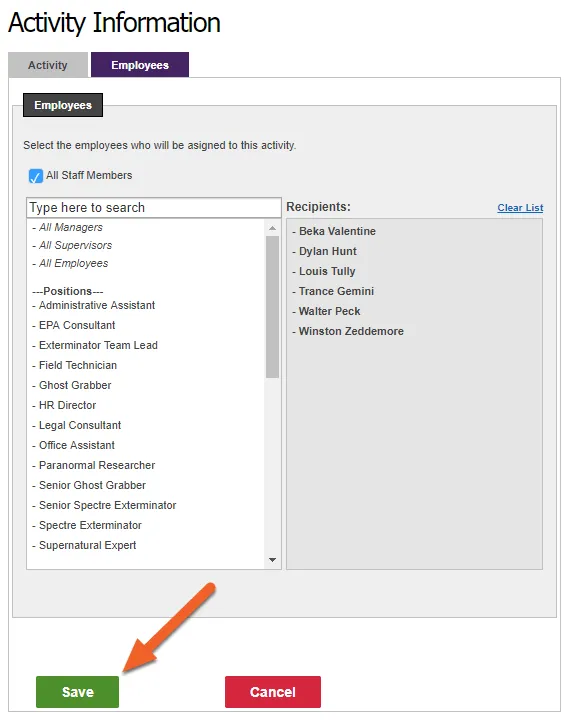
For this example, let’s check the box to select All Staff Members at this location:
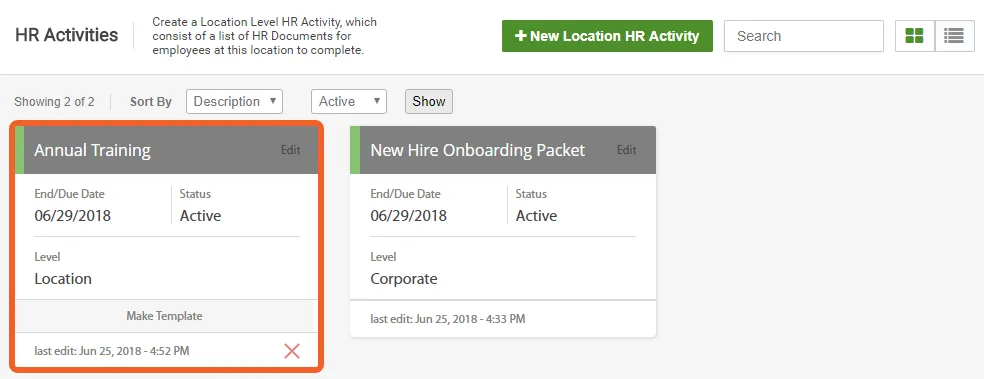
Your new activity will now appear in the HR Activities list! The activity will also appear on the employee-level Activities page for each employee you added.
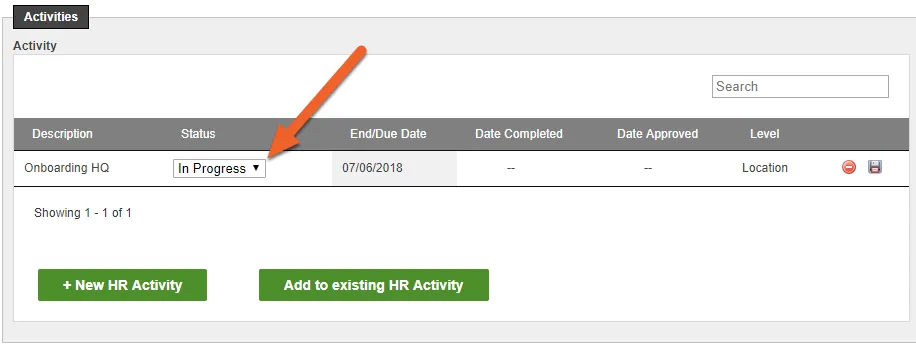
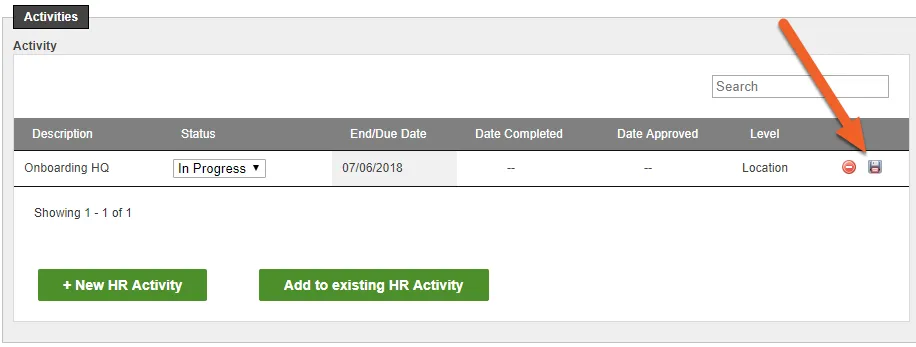
Once you’ve added activities for your employees, follow these steps to track individual employees’ progress or to view their activities at the employee level.
Create an Activity Template to quickly load documents into an HR Activity
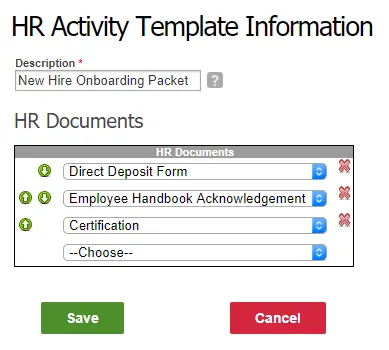
HR Templates can help you streamline your HR Activities by allowing you to re-use the same set of documents over and over again. For example, you could use a template to send your standard onboarding packet to a fresh group of hires each month, or to collect quarterly gym logs for your company’s physical fitness reimbursement program. Whatever your needs, TimeForge is designed to work for you!
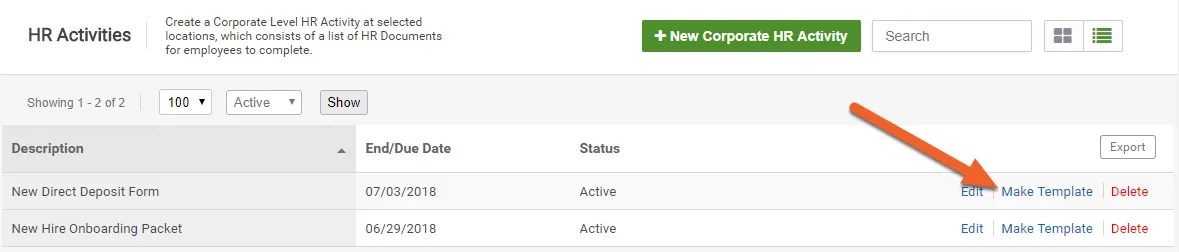
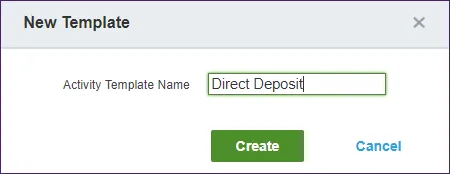
There are two super easy ways to create an Activity Template: from the templates page or from an existing activity. This article will show you how to do both! Just click on a link below to get started.
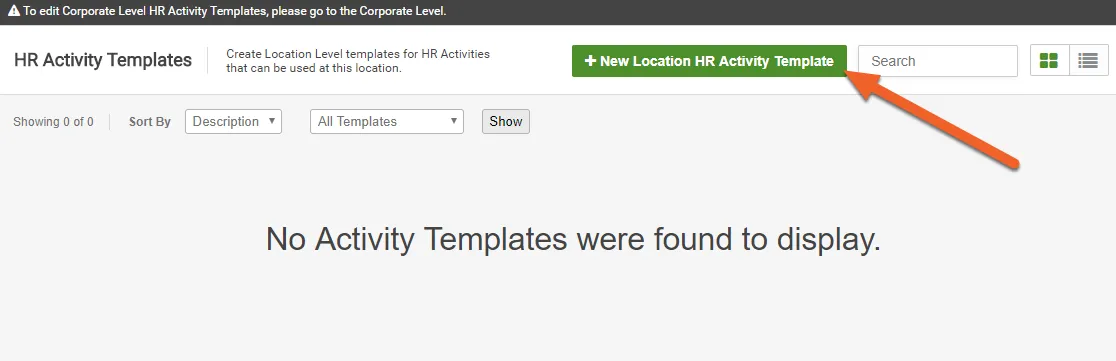
From the templates page
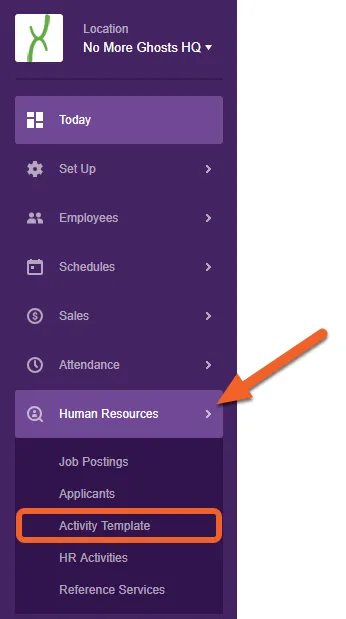
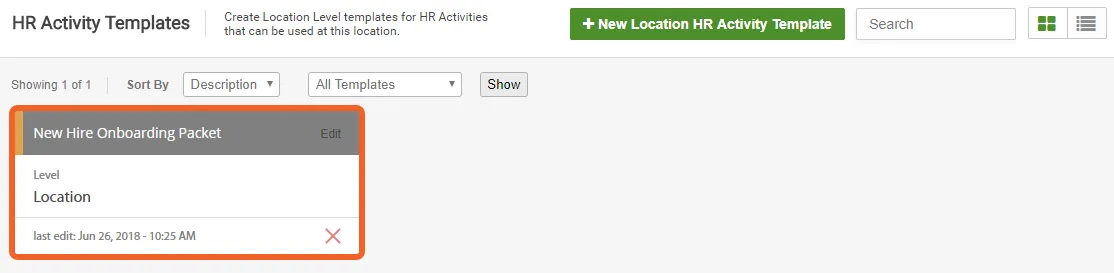
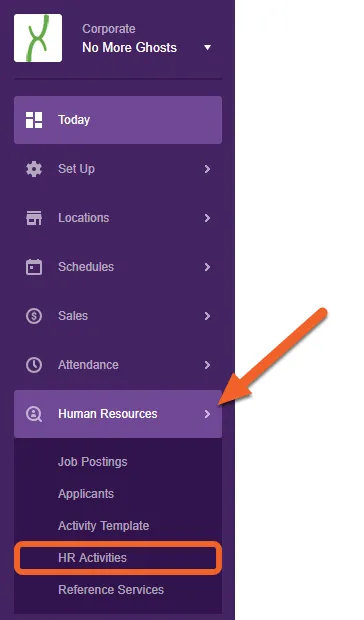
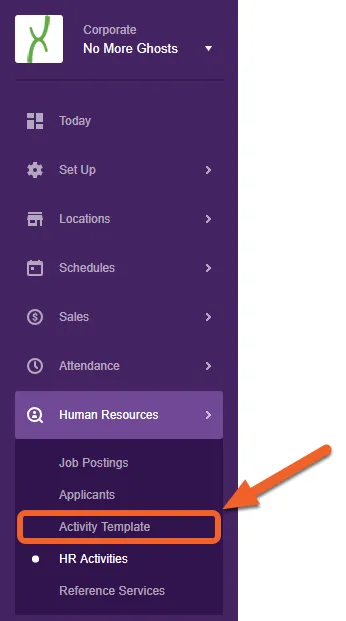
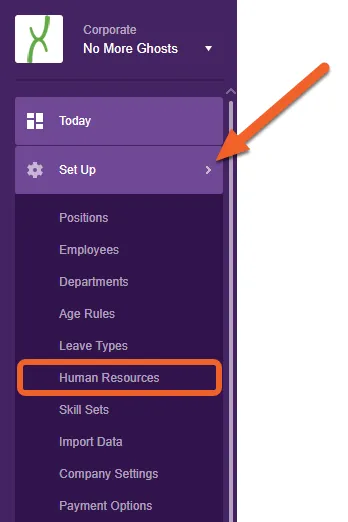
Navigate to the HR Templates page under Human Resources
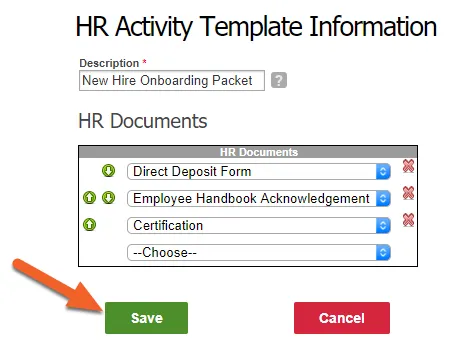
Your new template is now ready for use and can be found under the Activity Template page!
How do I use my new template?
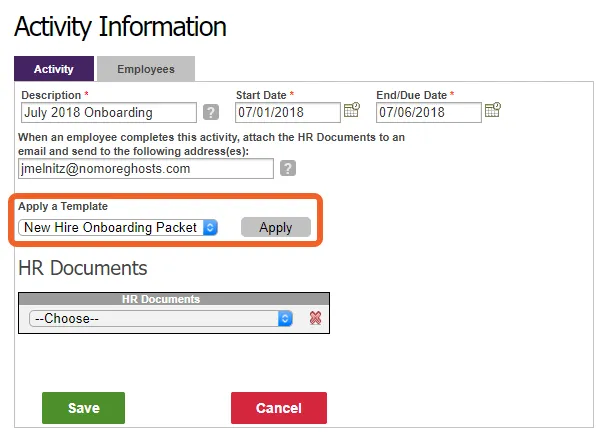
Using your new Activity Template is simple! When creating a new HR Activity, simply select it from the list under Apply a Template, then click the Apply button.
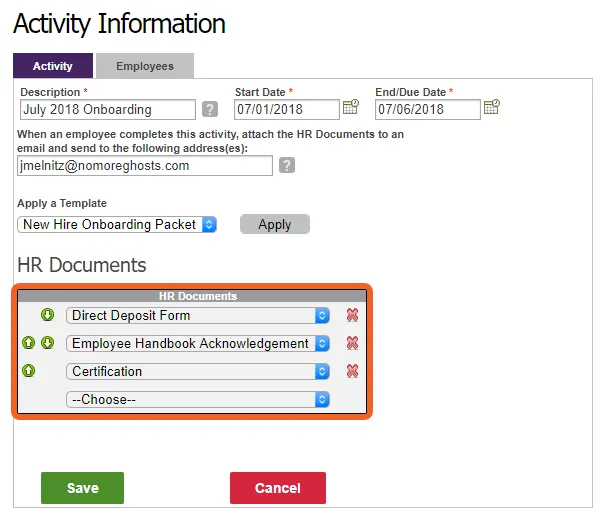
The documents associated with that template will be added to your new activity!
As always, don’t forget to save your changes!
Add multiple HR documents to an employee's profile using HR Activities
Activity Templates are a huge time saver because they allow you to send multiple HR documents at once to your employees. You may already know how to create HR Activities for your entire company, location, or subset of employees, but this guide will show you how to use HR Activities at the employee level. This can be super helpful if you need to train or onboard a single employee here or there, as it allows you to send a standard onboarding or training packet without having to upload each individual document to the employee’s profile.
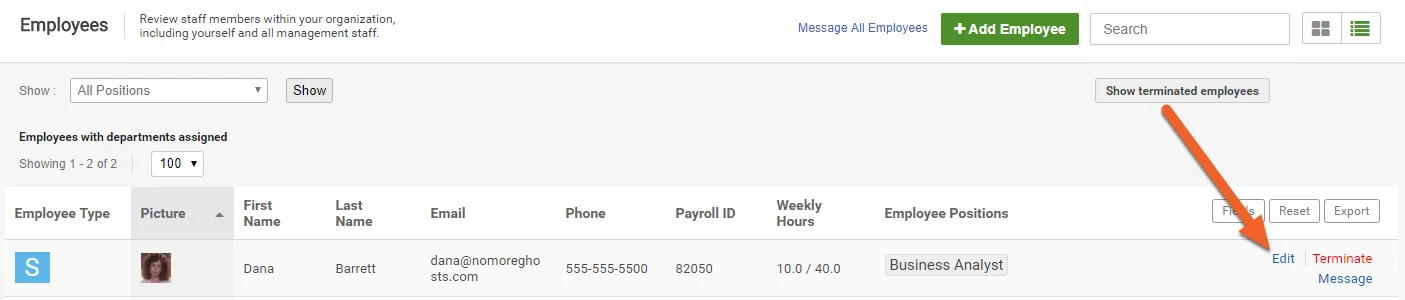
Navigate to the employee’s profile at the Location level
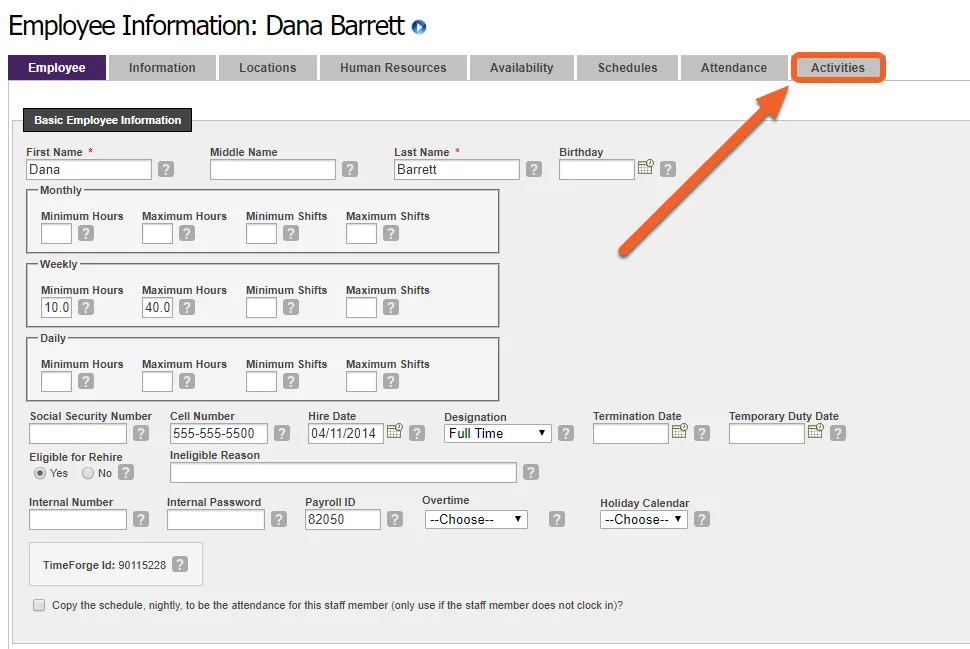
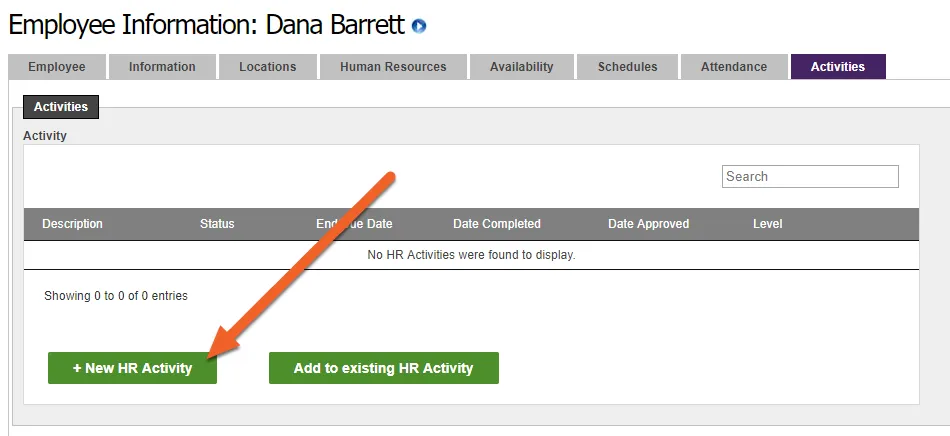
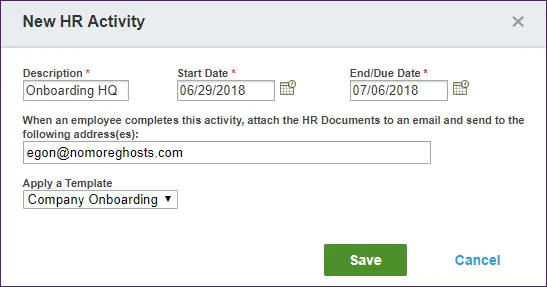
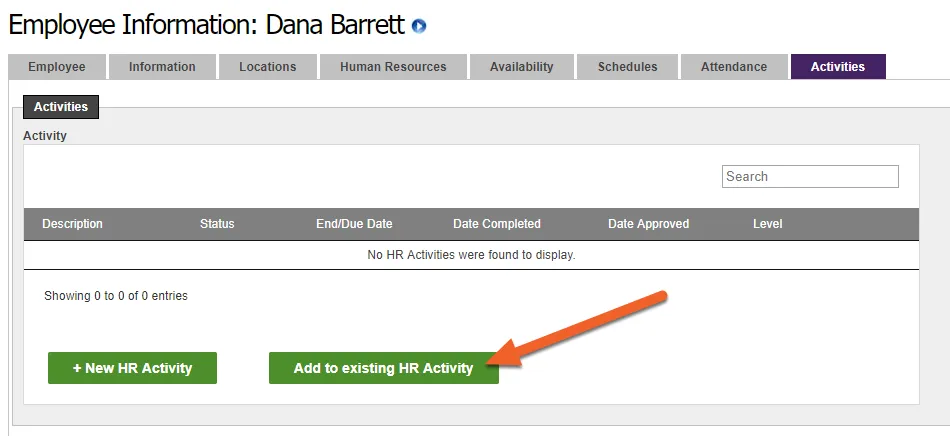
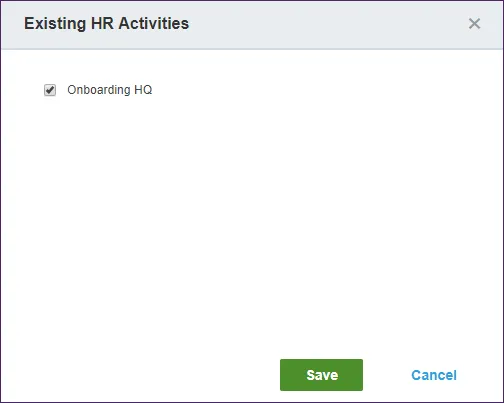
From here, you can create a new HR activity from a template and apply it directly to the selected employee, OR you can add this employee to an existing activity in the system:
When you hit Save, TimeForge will do two things. First, it will create a new HR Activity for this location, using the template you chose and the options you specified, and second, it will add the selected employee to to the new activity. You can then re-use the activity with additional employees, if desired.
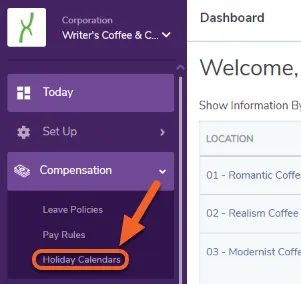
TimeForge allows you to create customizable holiday calendars, which can be used to specify work holidays and set rules for compensating your staff on those dates.
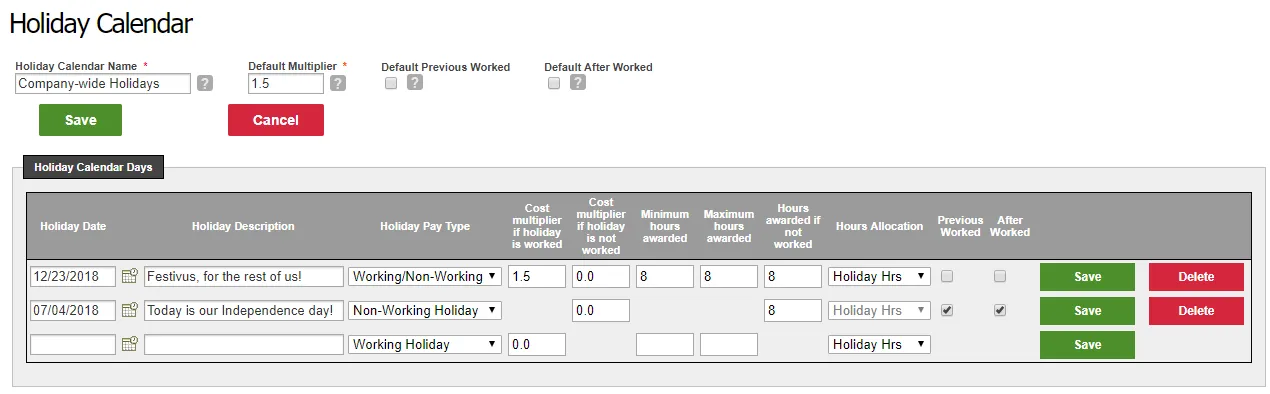
Begin by giving your holiday calendar a name and a default pay multiplier. To add a holiday, enter a date into the Holiday Date column and then name the holiday. The settings along the rest of the row allow you to determine the holiday pay rate and how it is earned. Below are descriptions of the Holiday Pay Type,Previous Worked, and After Worked columns.
TimeForge also allows you to set cost multipliers, min/max hours, and whether employees who work scheduled shifts before or after the date should be eligible for holiday pay.
This field calculates the holiday pay premium that is added to the employee’s pay rate.
For example, if an employee gets paid $10 an hour normally and this field is set as 1.5, then the employee will be paid $15 an hour for every hour worked that is between the minimum and maximum hours awarded on the holiday. If the employee works less than the minimum hours, they will get their normal pay rate and not receive the holiday pay. If they work more than the maximum, they will receive the holiday pay amount until they hit the maximum, after which they will receive their normal pay rate for each additional hour that is worked. These fields are available for the Working holiday and Working/Non-Working holiday pay types.
2. Cost multiplier if holiday is NOT worked:
This works the same as as the first field for non-worked holidays. The difference is the number entered will be multiplied by the “Hours awarded if not worked” field.
For example, if an employee’s pay rate is $10 an hour and you set the cost multiplier as 1.5 and the hours awarded as 10, then each employee that has this holiday pay calendar will be awarded $15 for 10 hours for a total of $150. For Non-working holidays, the multiplier only applies if the employee did not clock in for the day. These fields are available for the Non-Working and Working/Non-Working holiday pay types.
For Hours Allocation, there are two options: 1) Holiday Hours, which use all of the rules mentioned above, and 2) Matching Hours.
Matching hours will match the hours the employee has worked for that day. For matched hours, if an employee works 5 regular hours on the holiday, then they will receive 5 hours of holiday pay. For holiday hours, they would receive 5 hours of holiday pay - no regular hours awarded.
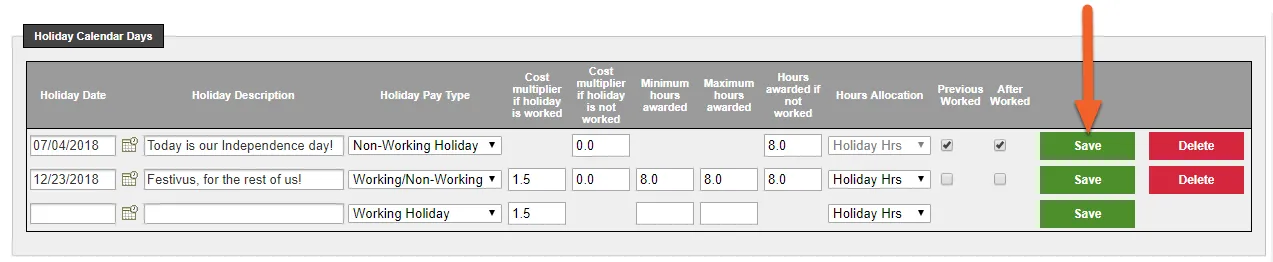
As you add each holiday to your calendar, make sure to save it using the save button on each row. If a holiday entry and it’s rules are not saved this way it will not be applied to the holiday calendar.
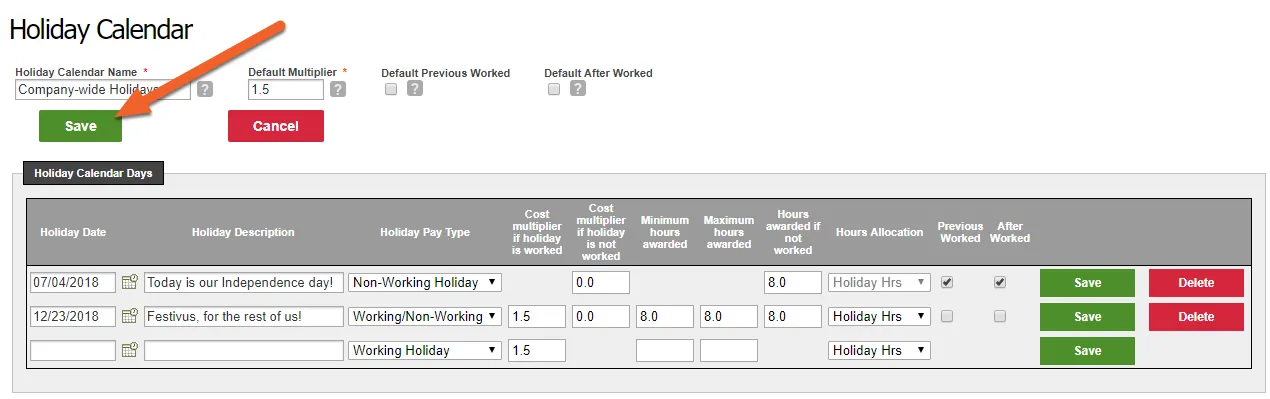
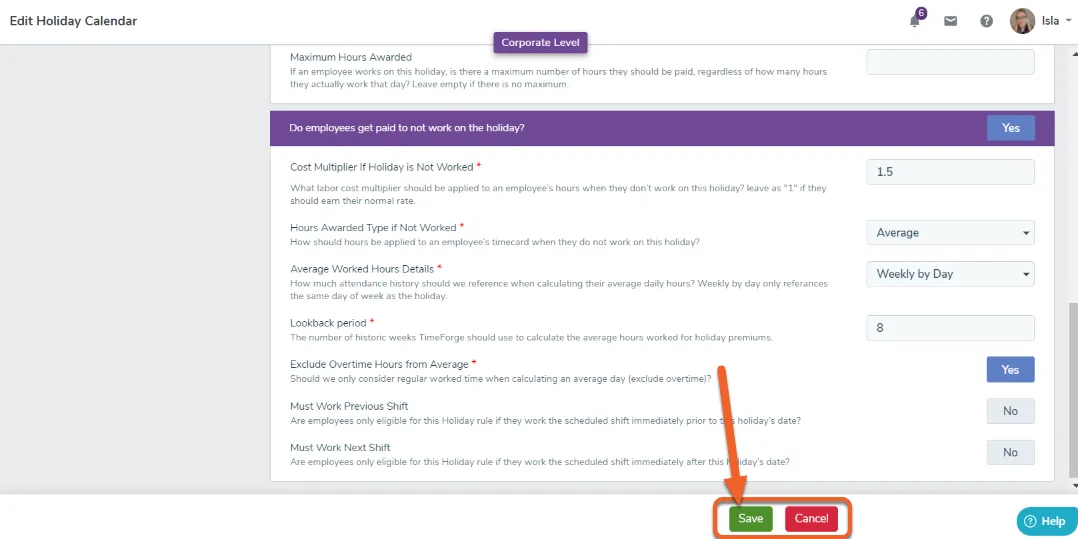
When you are finished, click the Save button to publish the holiday calendar. This will apply the pay rule settings to the schedule builder. Remember that any unsaved holidays will be deleted, so be sure to save all entries individually first.
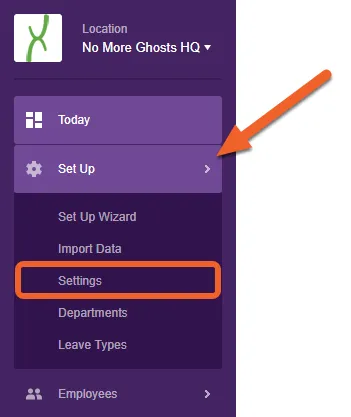
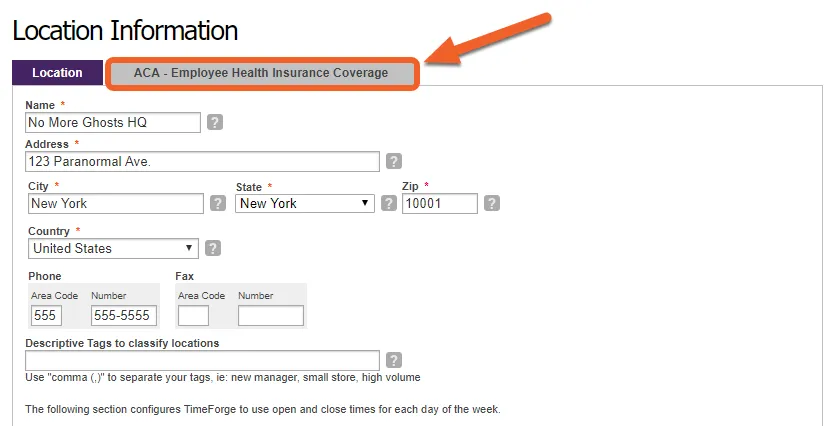
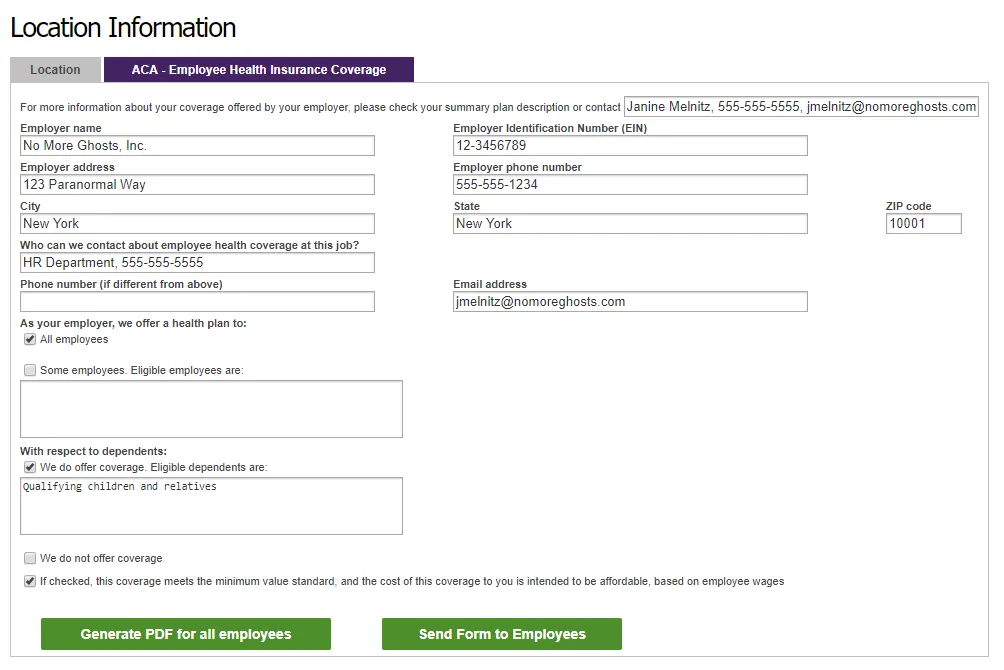
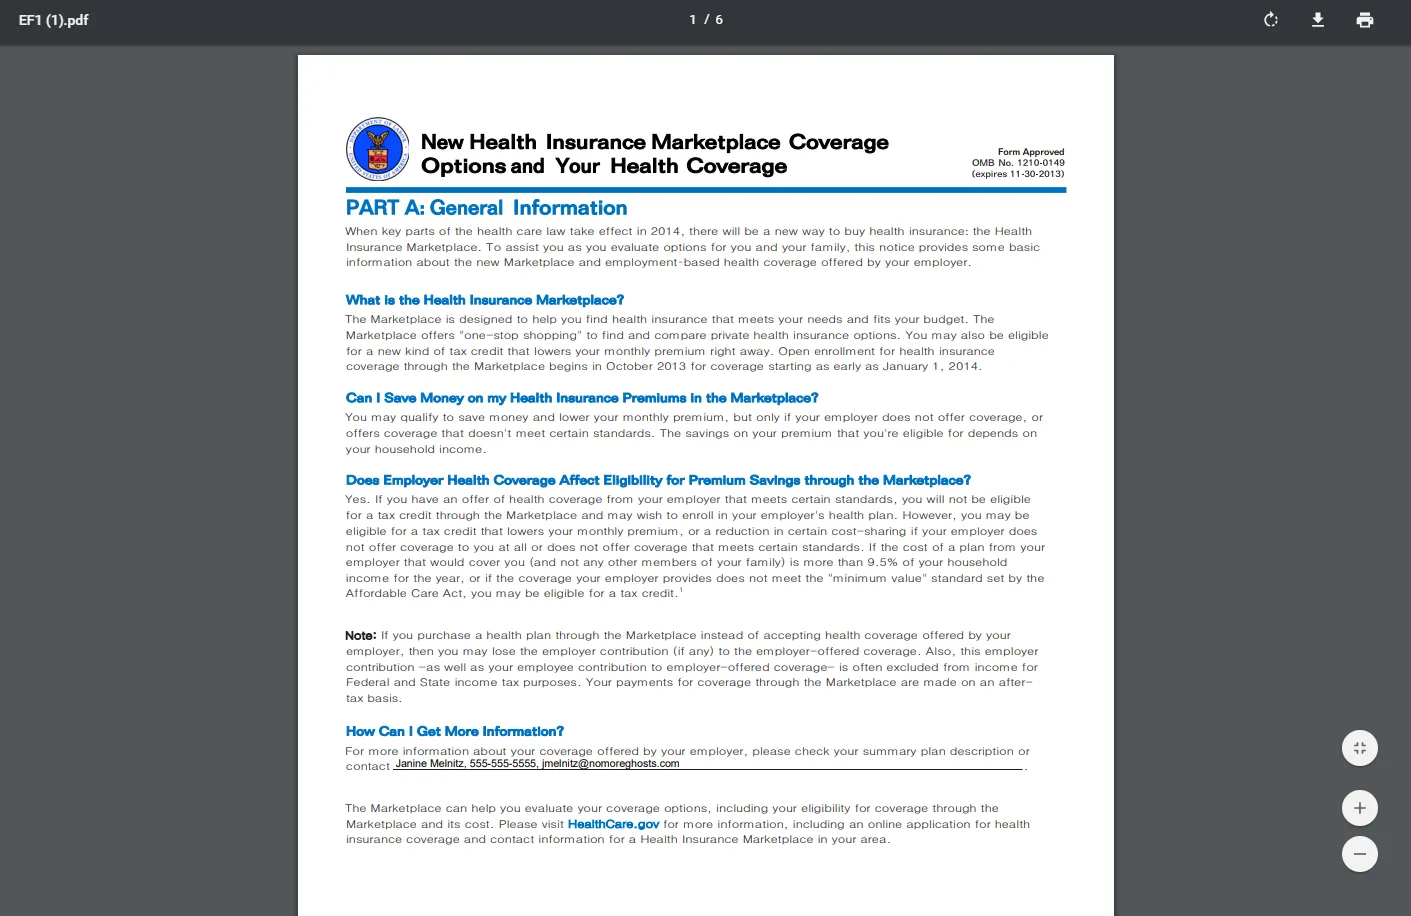
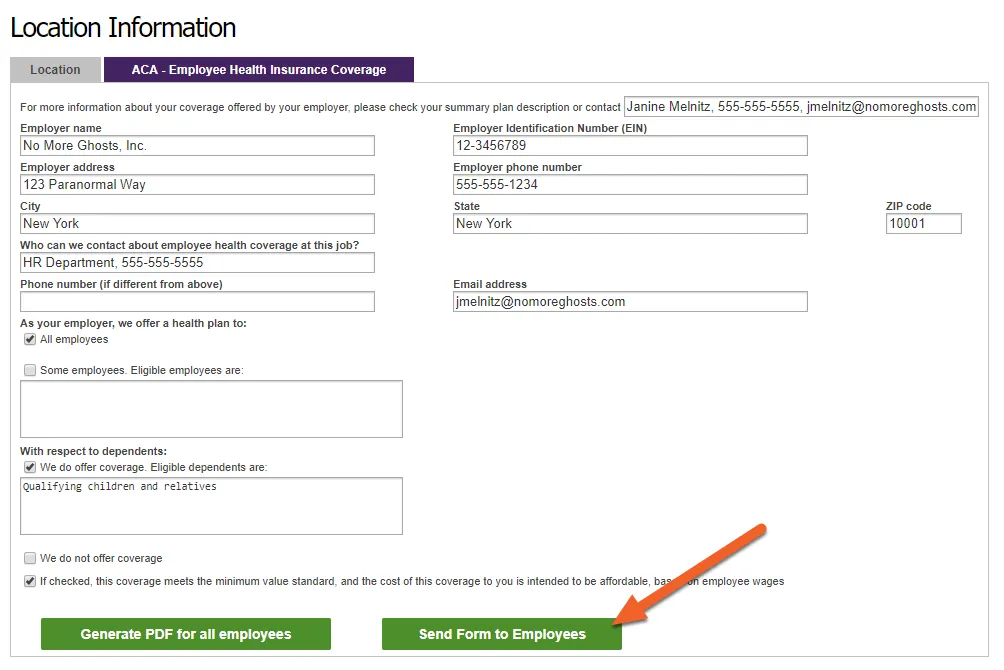
Create an Affordable Care Act (ACA) form for Employee Health Insurance Coverage
At TimeForge, we understand that the Affordable Care Act has serious implications for you and your business. In fact, we even wrote a book about it that explains just how serious those implications are and how you can stay on top of them.
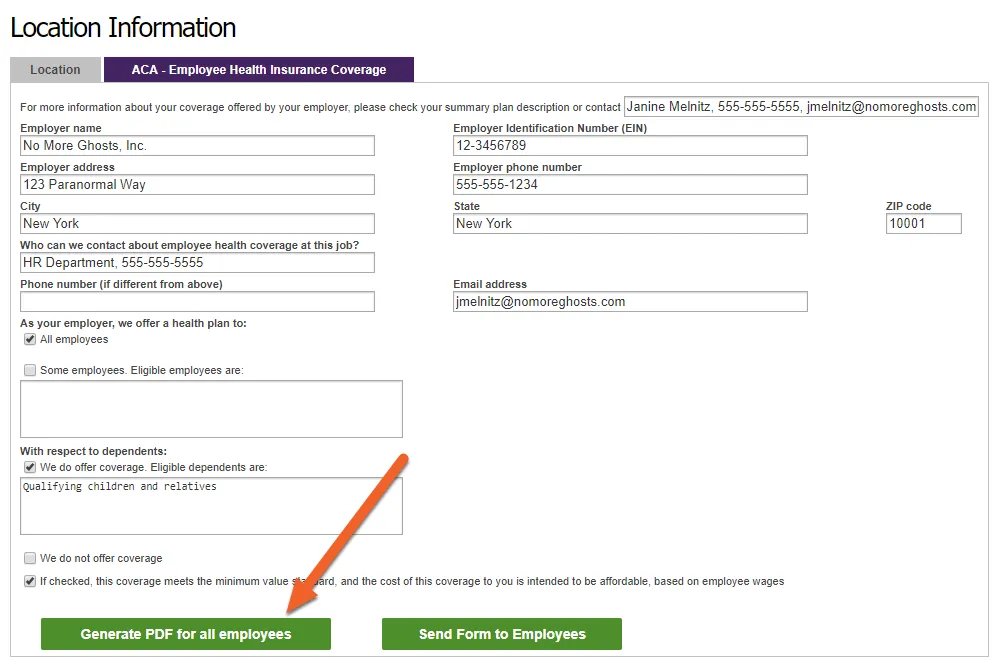
This tutorial will show you how to create an ACA Employee Health Insurance Coverage form and how to send that form to your employees, all from inside TimeForge! It doesn’t get any simpler than this.
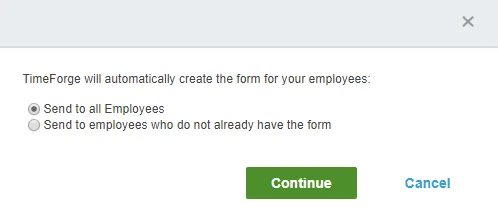
TimeForge will send an email and message to your employees, with the form attached.
You can choose to send it to all your employees or only those who have not yet received the form.
New Holiday Calendars
TimeForge allows you to create customizable holiday calendars, which can be used to specify work holidays and set rules for compensating your staff on those dates. This guide will teach you how to create and configure a new holiday calendar.
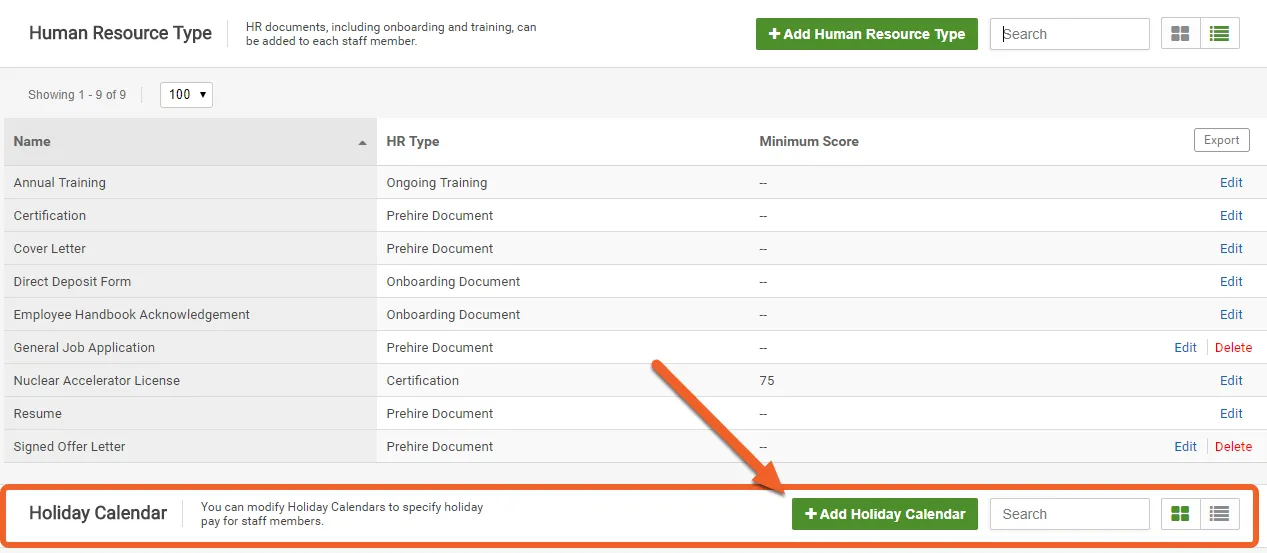
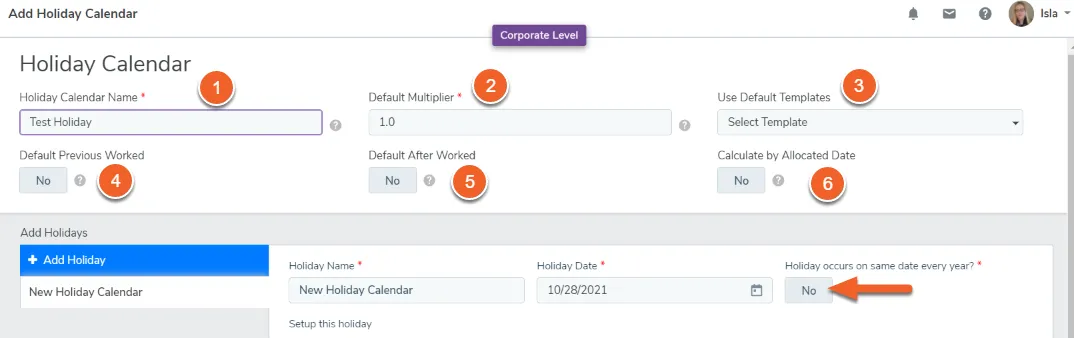
Begin by clicking Add Holiday Calendar. After this step you’ll then be able to enter in all the specifics for the holiday you’d like to create. This is a good time to make sure you know the date, necessary rates and frequency of the holiday you’d like to schedule.
Enter the name of your Holiday Calendar, this name can be whatever you choose. Later, you will name the actual holiday the calendar pertains to.
We recommend entering a descriptive name for example, “Hourly Staff” or “Part Time Workers”.
2. Default Multiplier:
The rate multiplier is specific to if the employee works the days listed on this calendar.
For example, if an employee’s pay rate is $10 an hour and you set the cost multiplier as 1.5, the employee will be awarded $15 for every hour that they work on the holiday.
3. Use default templates:
Select any default templates if applicable.
4. Default previous worked:
If this is checked, by default it is a requirement that an employee is eligible for non-working holiday pay if the employee worked their last scheduled shift before the holiday.
5. Default after worked:
If set to yes, it is a requirement that an employee is eligible for holiday pay if they work their first shift scheduled after the holiday.
6. Calculate by allocated date:
If set to yes, the entire shift will be eligible for holiday if the employee clocks in anytime during the holiday. If set to no, only the portion of the shift that falls on the holiday will be eligible for holiday pay.
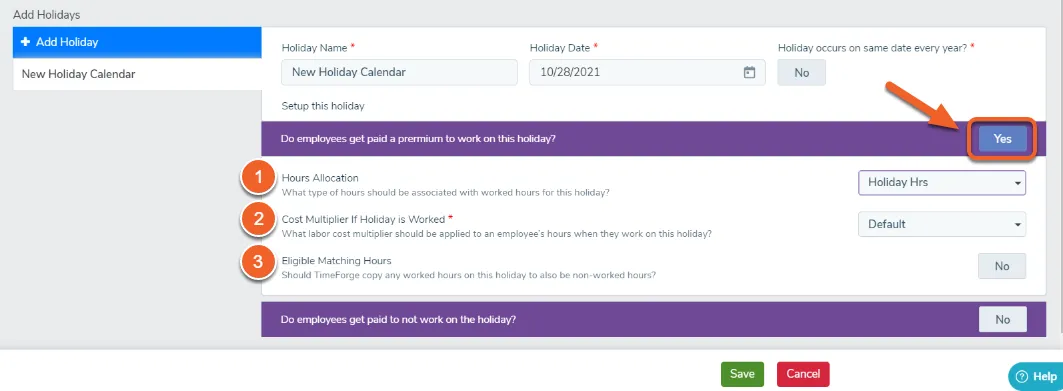
This setting allows you to select which type of hours (e.g. holiday, regular or custom) will be allocated to this specific holiday.
2. Cost Multiplier if Holiday is Worked:
This cost multiplier is specific to the hours an employee works while assigned to this holiday date.
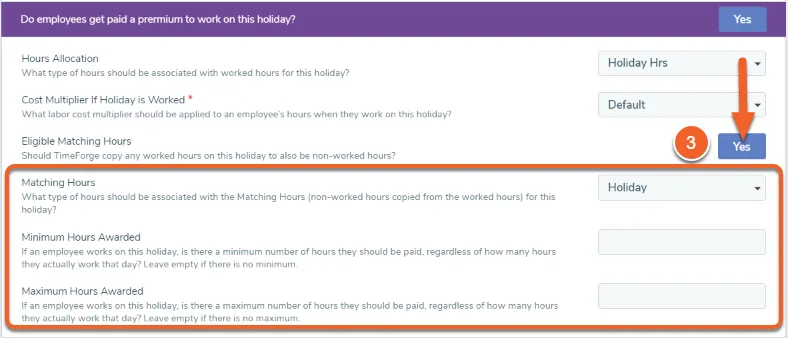
3. Eligible Matching Hours:
If set to “yes” the eligible matching hours will copy any worked hours to also be non-worked.
For example, if a holiday calendar has matching hours enabled, and the employee worked 8 hours of the applicable holiday would also get 8 hours of non-worked time allocated to them.
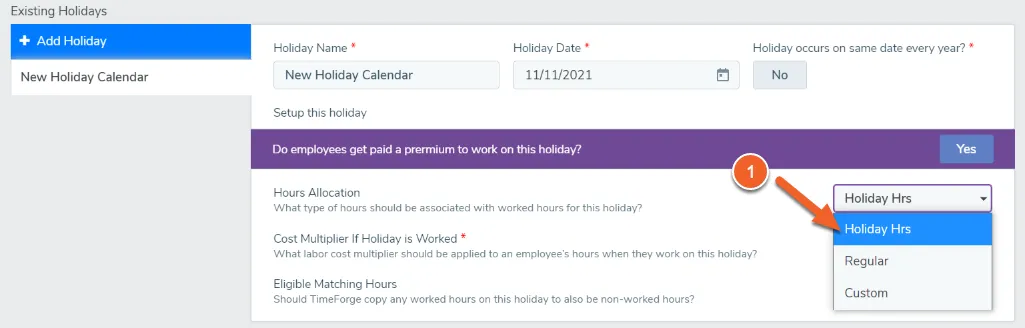
1. Hours allocation:
Holiday hours: employees who worked the holiday will receive their hours as holiday.
Regular: employees can also receive regular time when working a holiday. (The default multiplier won’t apply when hours are allocated as regular)
Custom: if your holiday hours are allocated differently you’ll see a drop down menu to enter in a specific pay code associated with that holiday.
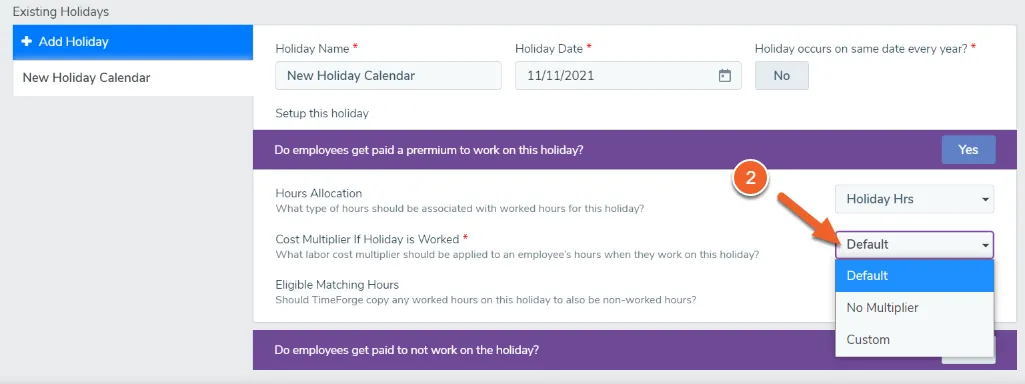
2. Cost Multiplier if Holiday Worked:
Default: If default is selected, the default multiplier for the holiday calendar will be used.
No Multiplier: No multiplier will be used on the shift. (The shift will use a 1.0x multiplier)
Custom: Allows you to input a custom multiplier for the holiday.
3. Eligible Matching Hours:
If eligible matching hours is set to yes, TimeForge will automatically copy an employee’s worked hours as non-worked hours as well.
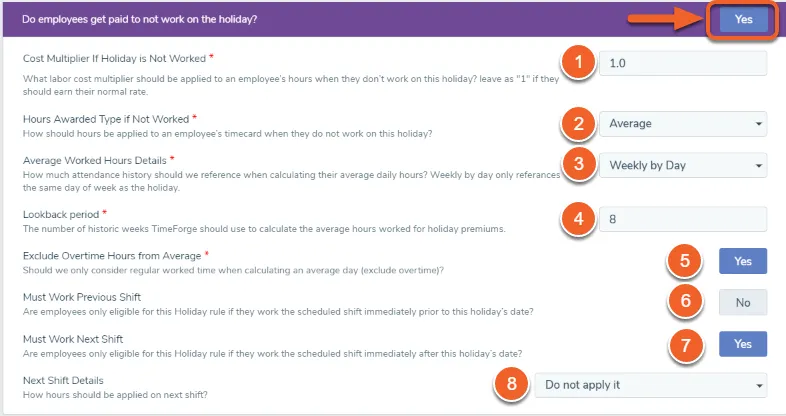
Select Yes if your employees are paid if they don’t work on the holiday. Otherwise, skip the following step.
1. Cost Multiplier if Holiday is not worked:
If an employee is paid to not work the holiday, you would enter the cost multiplier associated with the shift.
2. Hours Awarded Type if Not Worked:
Fixed Hours - can be designated as holiday or custom hours. Enter the static amount of hours you’d like to add to the employee’s time card.
Average Hours - TimeForge can take an average of the employee’s worked hours in order to award holiday pay.
Weekly by Day: This will only reference the same day of the week as the holiday when looking at historic attendance.
Weekly: This will look at all of the historic attendance data for the employee.
4. Lookback Period:
Designate a lookback period of the historic attendance history inside TimeForge to calculate average weekly hours work to pay holiday premiums.
5. Exclude Overtime Hours from Average:
To exclude any OT from being calculated in the above lookback period, make sure to select “yes”.
6. Must Work Previous Shift:
You can also designate that in order for an employee to be eligible for the Holiday that they must work their most recently scheduled shift prior to the holiday’s date.
7. Must Work Next Shift:
You can also designate that in order for an employee to be eligible for the Holiday that they must work their next scheduled shift after to the holiday’s date.
8. Next Shift Details:
If you selected ’yes” that an employee must work their next scheduled shift in order to be eligible for the holiday, you can then designate if the hours should be applied prior to their next scheduled shift, or you can select “Do not apply it” and it will wait until the shift has been completed.
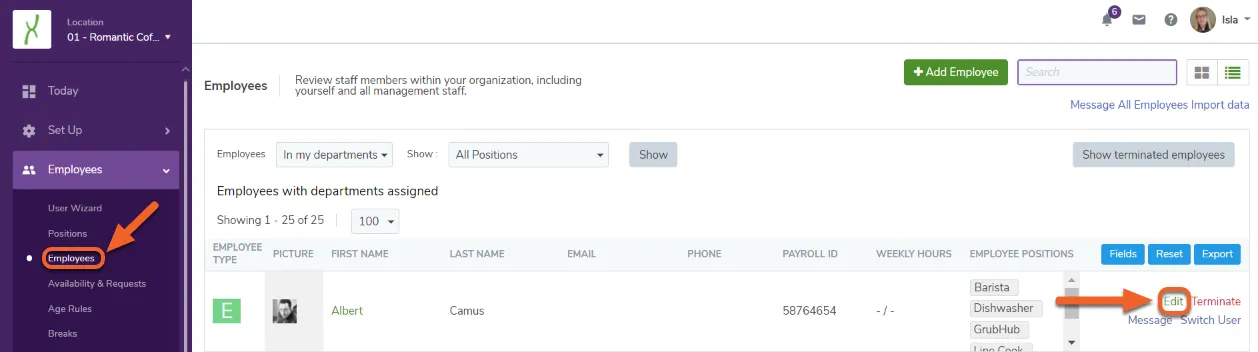
You’ll need to add the holiday calendar to each employee who’s eligible at the location level.
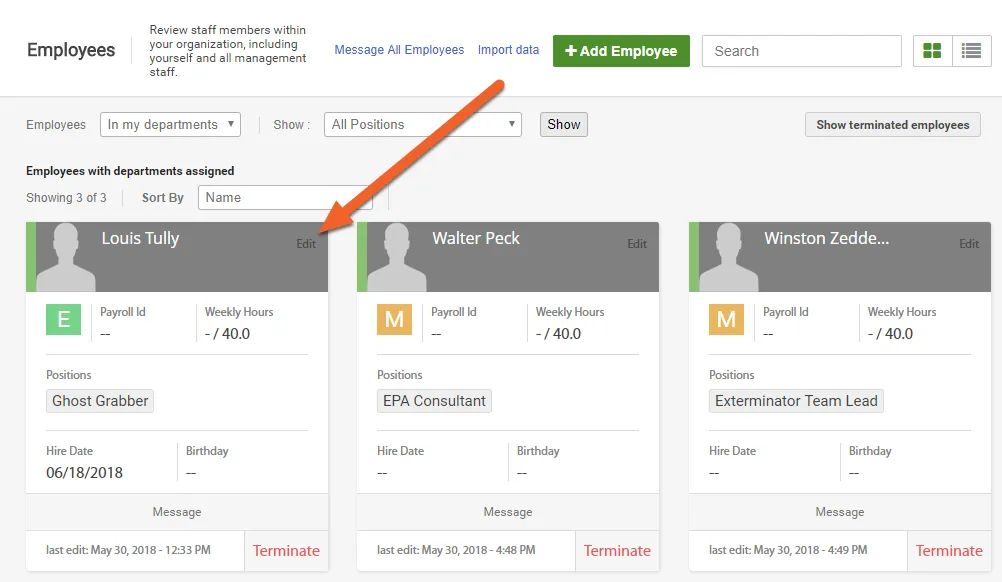
Navigate to the Employees page and hit “Edit” to the right of the employee’s profile you’d like to apply the holiday calendar to.
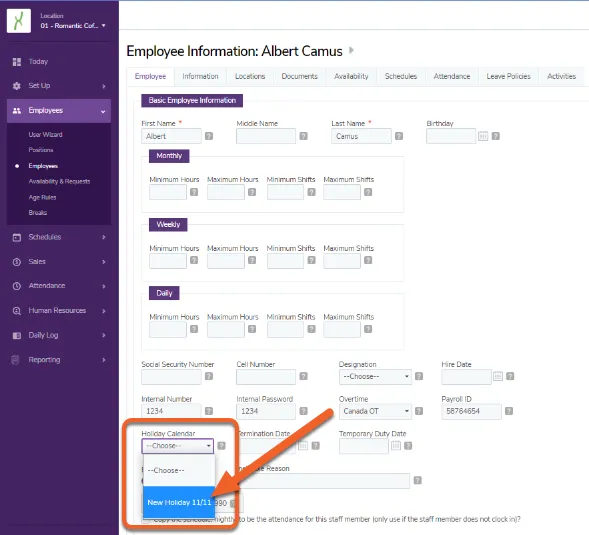
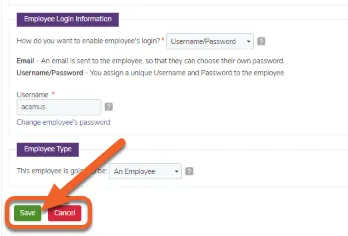
Scroll down to the “Holiday Calendar” field and select the calendar you’d like to apply to the employee. You will need to do this for every employee that is eligible for the calendar.
You have now successfully created a holiday calendar and applied it to your employee!