Create a checklist to manage tasks
TimeForge’s task management solution allows managers to create to-do lists, checklists, and other kinds of task lists. These checklists can be used for anything you can imagine! Regular maintenance or cleaning, daily sanitation of workstations, inventory review - just about any kind of to-do item you might want to assign and track.
This guide will walk you through the process of setting up a new checklist.
Once you’re logged in, open the Daily Log tab and select Checklist.
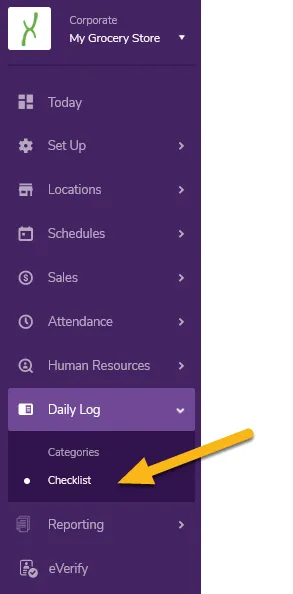
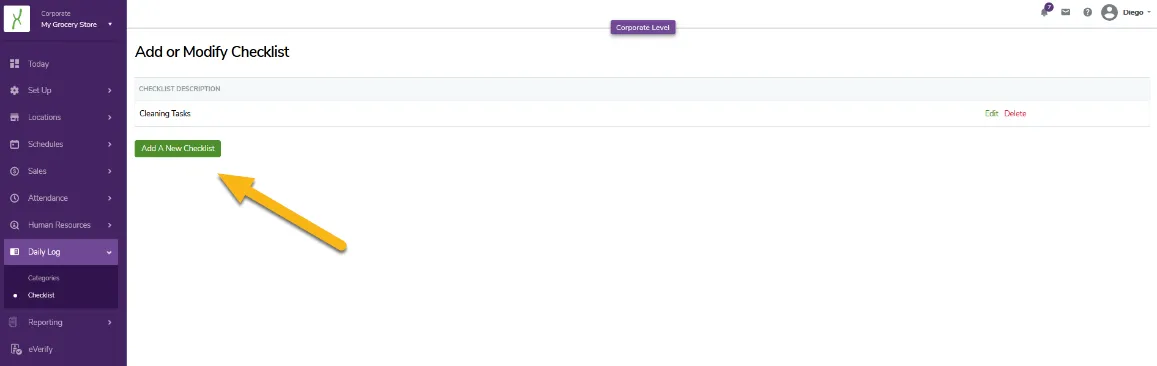
The Checklist page shows all of your Checklists.
To create a new Checklist, click on the Add A New Checklist button.
When you create a new checklist, you will add to-do items or tasks, grouped in whatever way makes the most sense for your business.
Each task can be flagged with different options that control things like whether you should receive notifications or reminders about them, how often the tasks should be completed, etc.
These options are explained below.
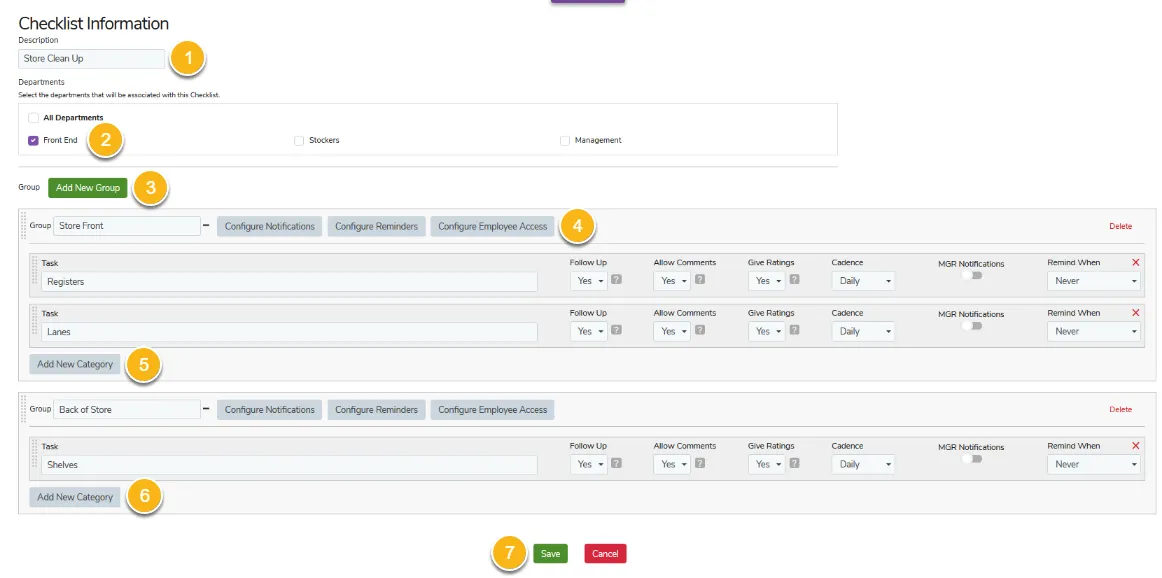
- Enter Description of your Checklist
- Select Departments: Check the appropriate departments associated with this Checklist.
- Add a Group by clicking on the “Add New Group” buttons: Groups allow you to arrange your Checklist into sections. For example: a Group called “Store Front” that holds all things regarding to the front of the store.
- Configure Notifications/Reminders and Employee access: Configure Notifications allows you to pick which employees TimeForge informs of a new task waiting to be completed. Configure Reminders allows you to select who receives a notification when any item in this group becomes past due. Lastly, you can pick which employees see and interact with the Categories in the group when you select Configure Employee Access.
- Add Categories to your Groups: Categories are the individual items or tasks in you checklist. For example: Checking lights or stocked items.
- Set the options: Each task can be set up allow Follow-Ups, Comments, or Ratings. A Follow-Up allows you to set an employee to follow up with regarding that specific task. Comments are simple comments attached to a task. Ratings allows you to give a task a star rating.
- Save: Click the “Save” button at the bottom of the page.
That’s all there is to it!
Complete the tasks on your checklist
Once your Checklist has been created, you can check off the items there, either from your browser or using a tablet or mobile device. This is sometimes referred to as “going on a store walk,” but TimeForge’s task management solution actually supports all kinds of to-do lists. Walking the store is just one of the many things you can do with our built-in checklists.
In this guide, you’ll learn how to complete the tasks on your checklist.
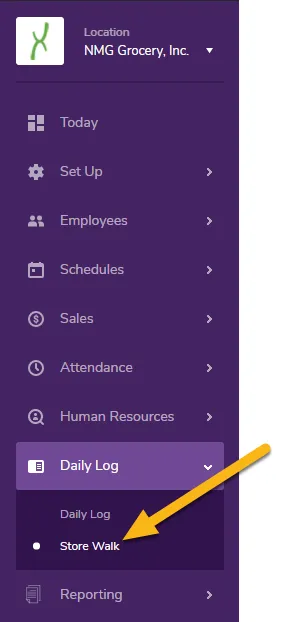
Once you’re logged in, open the Daily Log tab and click on Store Walk in the menu.
Tasks will be listed in a table that includes the checklist they belong to, which group, the task name, status, due date, score, notes, and finally any additional actions that may be taken. To select a task, simply click on a row:
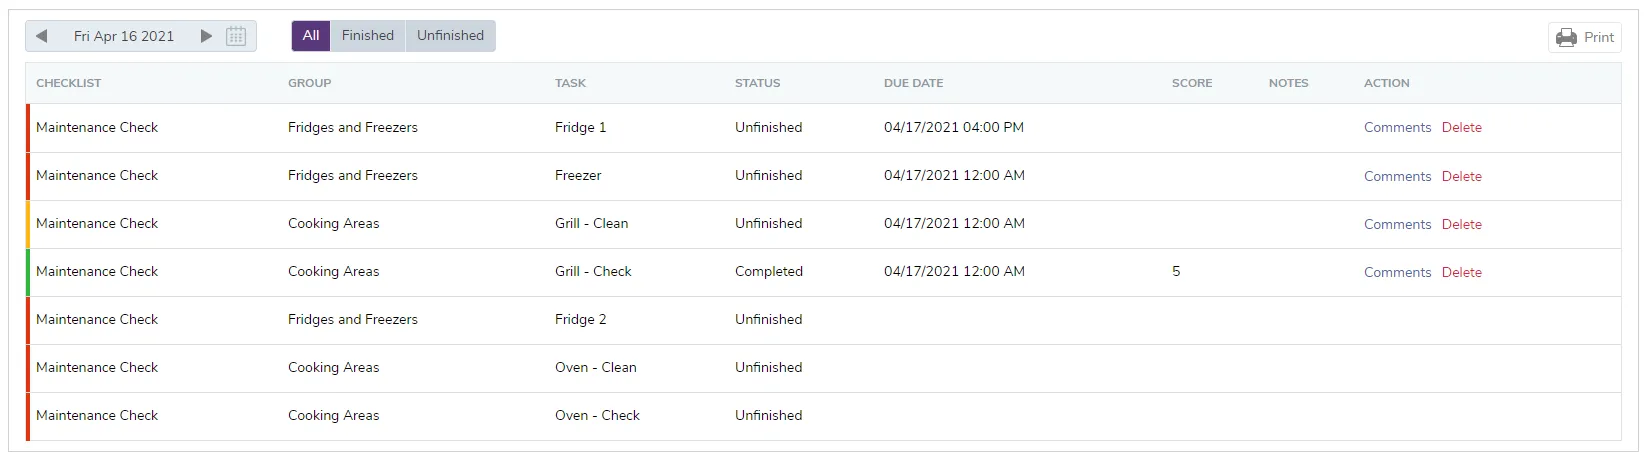
Note the colored bar on the left side of each row.
- When an item is Red, it is not started or is still incomplete.
- When an item is Green, it is all complete.
- When an item is Yellow-Orange, it is still waiting for Follow Up.
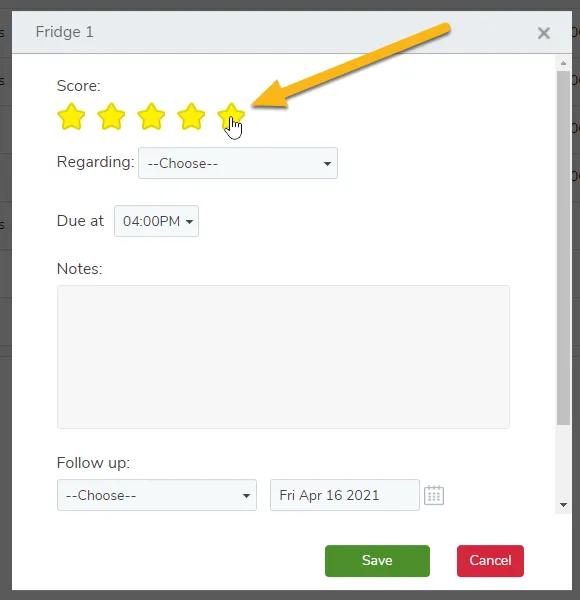
When you select a task, a pop-up will appear with various options. The options will depend on how the task was configured (for example, if it was set to allow ratings or follow-ups).
If ratings are turned on for the task, you’ll see 5 stars at the top. Click a star to set the rating on the task:
Under the score/rating area, you can select an employee to associate with the task, adjust the due date, and add any notes.
If the task allows for follow-ups, you can choose someone to be responsible for the follow-up and indicate when it should occur.
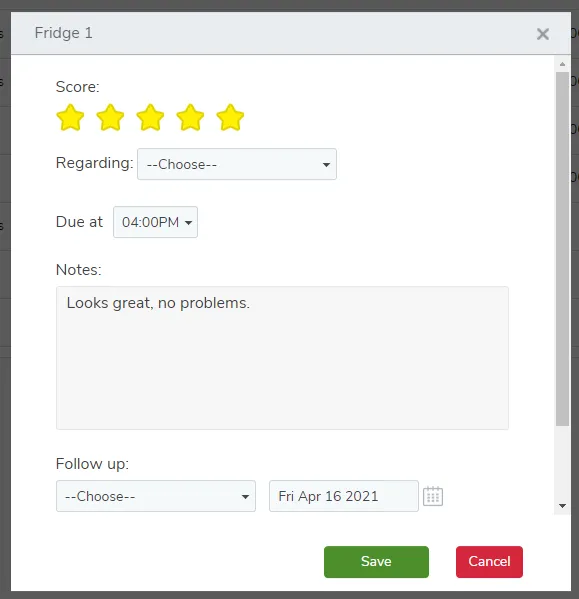
Near the bottom of the task, there’s an option to upload files, such as images, documents, etc. Under that is a checkbox to mark the task as complete, if it’s done.
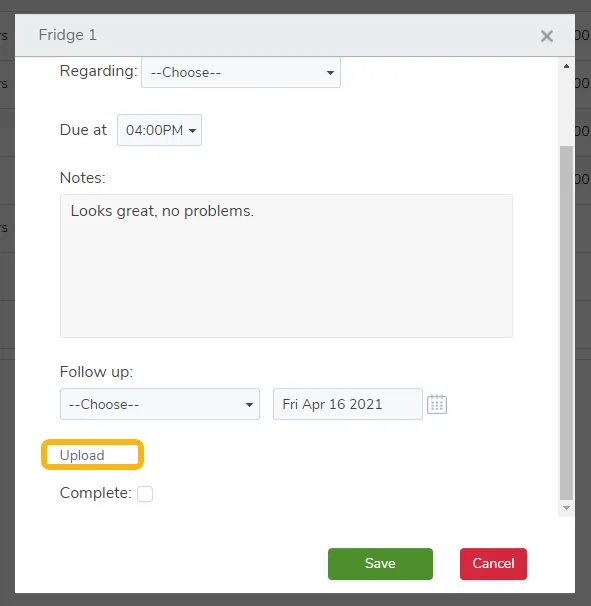
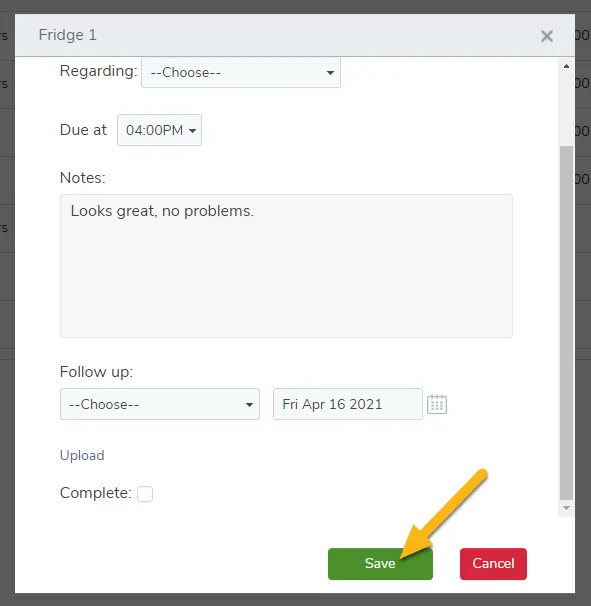
When everything looks how you want it, don’t forget to save your changes!
Enable follow-ups for checklist items
TimeForge’s task management solution allows you to remind managers to follow up on tasks assigned to them or other employees at a location. Each time you assign a follow up to them, a manager/supervisor sees an updated To-Do list item in the “Store Walk” widget on the dashboard.
This guide walks you through how to configure tasks for follow-ups, assign them, respond, and close out items in your to-do list.
To update existing tasks in a checklist, open up the Daily Log tab and click Checklists.
If you have more than one location in your account, you’ll first need to go to the corporate level before accessing the Checklist page.
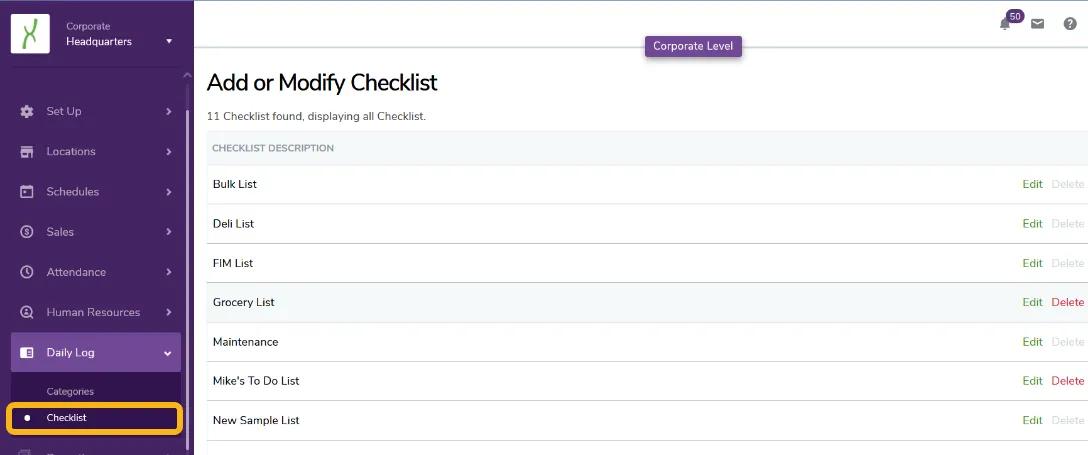
Next, click on the Edit option next to the checklist that has the tasks you want to update.
Once you find the item you want to enable follow-up assignments on, change the Follow-Up box to “Yes.” Shown here below:

Now that you have some tasks flagged for follow-up, you’ll want to assign those follow-ups to someone. To do this:
- Select/go to the location for which you want to appoint a manager a follow up assignment. Make sure you’re on the Today page (the new dashboard).
- For the “Store Walk” widget, click on the Edit button next to the tasks you want to update:
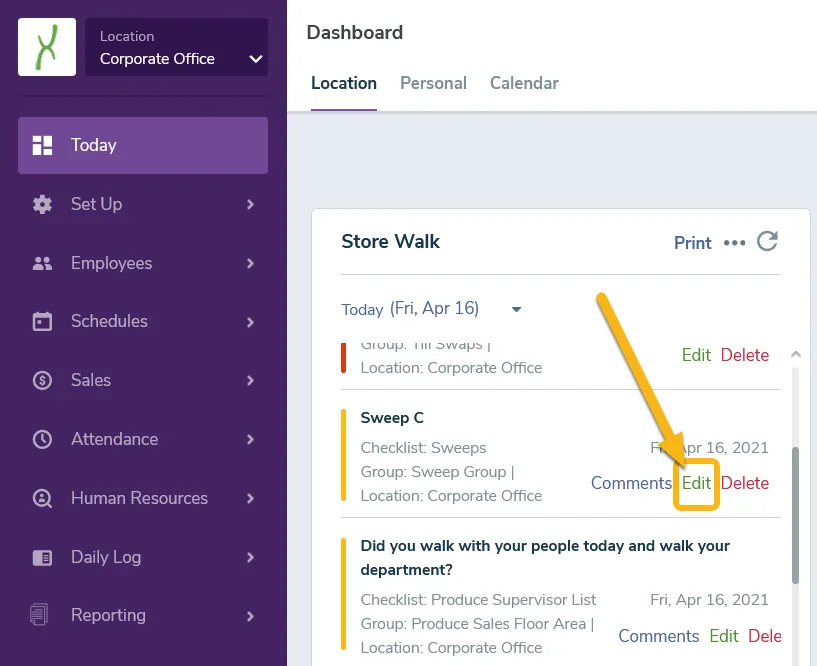
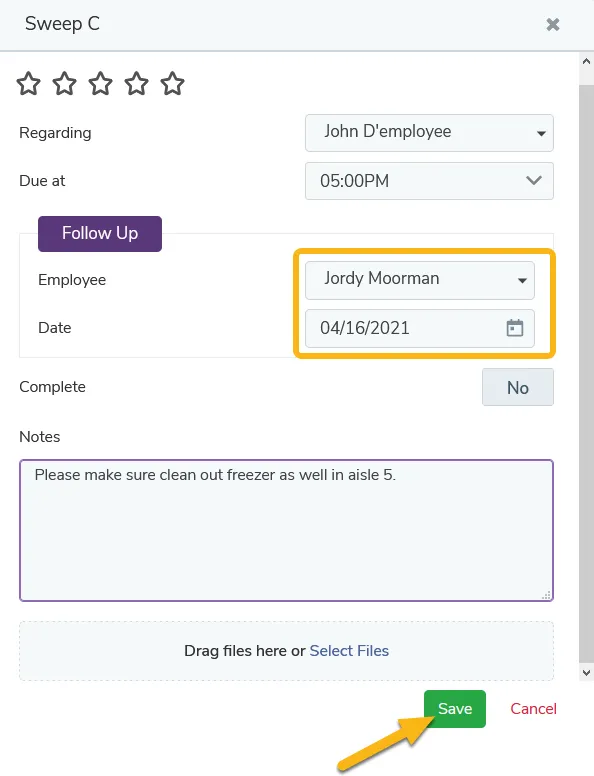
- Once the pop-up appears, fill in any information needed such as star rating, notes, etc., but leave “Complete” unchecked.
- Select a supervisor/manager from the list for Follow-up.
- Pick a date you would like for the follow-up to take place by.
- Click the Save button once you’ve submitted all your updates.
- The tasks will then appear on the Follow-up assignee’s To Do List for that selected date.
To view any tasks assigned to you personally to follow-up on at your location, navigate to the Today page and select the Personal dashboard. Look for the “Store Walk” widget.
All follow-up tasks have a “Do This” banner next to them:
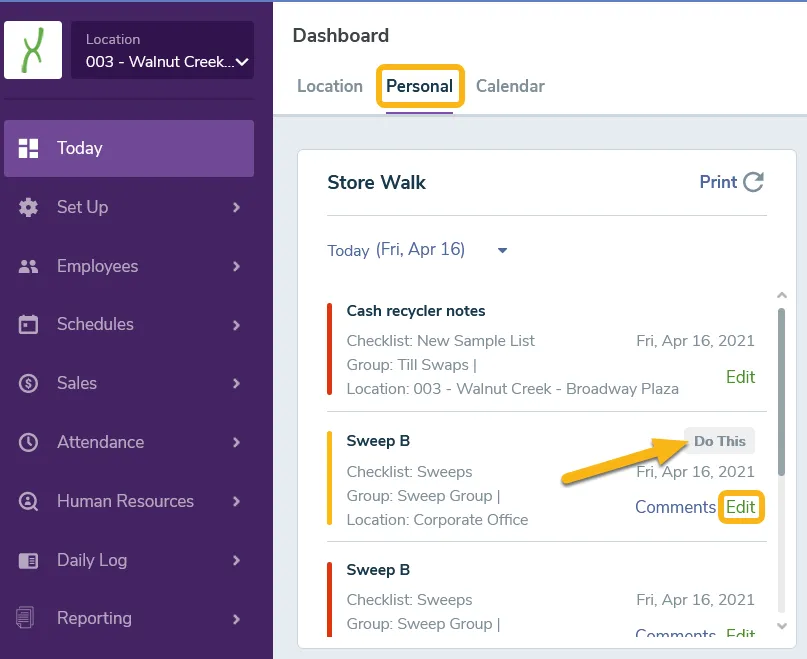
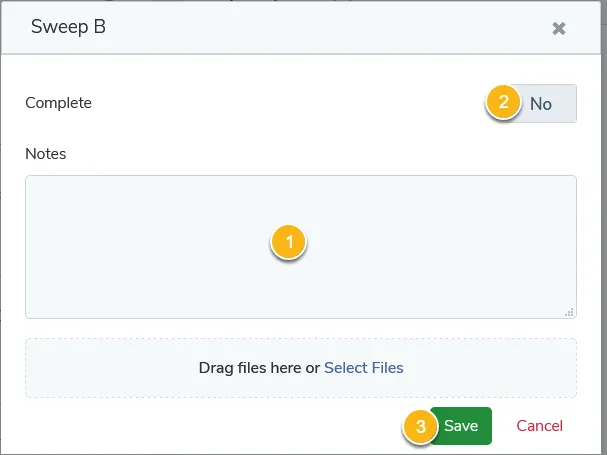
To complete or update a task, click the Edit button next to your assigned task. A pop-up will appear.
- Type in any notes or upload helpful files or images.
- Update the Complete option to “Yes” if you finished the task assigned.
- Click the Save button once you’ve finalized your changes.
Attach files and images to items on your checklists
TimeForge’s task management solution allows you to rank, comment on, and upload files to a task that has been created in the system. Our file upload feature helps managers as well as employees keep track of activities they complete or work on throughout the day. This can be especially useful for documenting things like liquid spills, broken equipment, or other hazards, especially if you operate in an industry or area that requires visual documentation of workplace hazards.
This guide outlines how you can use the file upload feature to share images and documents for any tasks.
You can find the “Store Walk” widget on the Today page.
If you are an employee, you can find the widget under the Personal tab.
If you are a manager or supervisor, you can find the widget under the Location tab.
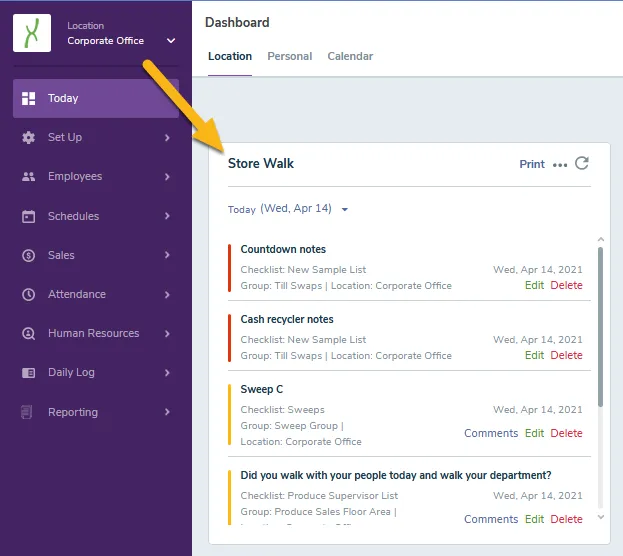
Click Edit on an item that you would like to upload a document or image to. A pop-up will appear for that task.
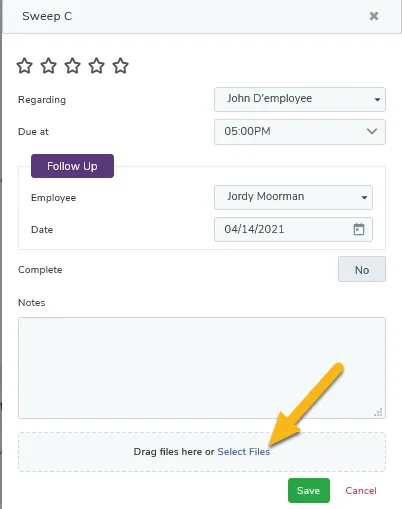
At the bottom of the pop-up, you’ll see an area that says ‘Drag files here or Select Files.’ You can click ‘Select Files’ to choose one on your device.
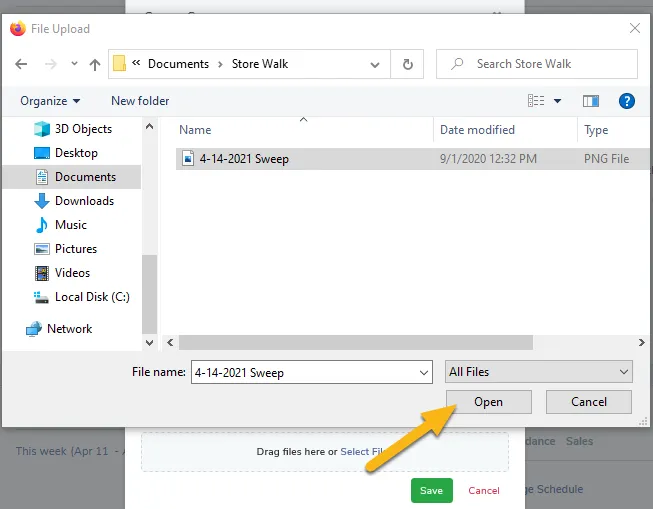
Navigate to the location you have your image/document saved and select to Open the file.
Once you have selected the file you wanted to upload and added in any comments, click the Save button to update your task.
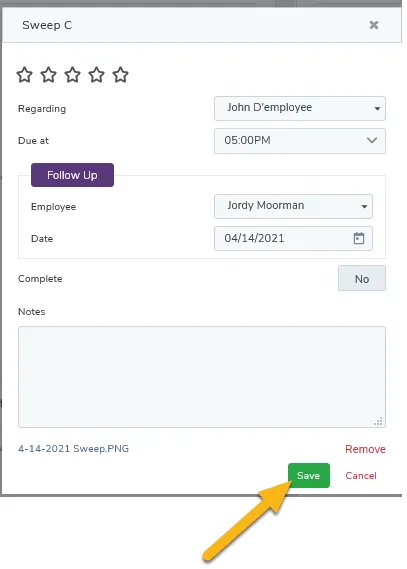
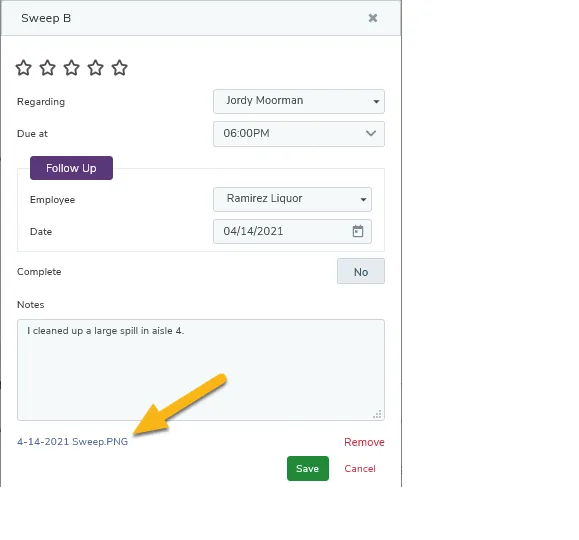
Documents or images that are attached to an item will appear at the bottom of the item next. Simply clicking on the document or image’s name will open it for you to view.