

Create short term labor goals
TimeForge allows managers to configure their sales per labor hour (SPLH), costs per labor hour (CPLH) calculations, and labor targets in order to meet their store’s labor goals while remaining within their labor budget.
This guide will show you how to set up your location correctly so that you can make use of this feature and will then walk you through creating a schedule that meets your labor goals and budget.
Make sure the location is configured properly
Section titled “Make sure the location is configured properly”The first thing you’ll want to do is make sure your location is configured with the CPLH calculations and labor target percentages that will be used to calculate labor target hours.
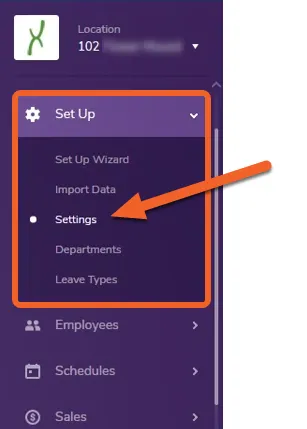
Go to the location Settings page under the Set Up tab
Section titled “Go to the location Settings page under the Set Up tab”With a location selected, open the Set Up tab and click Settings.
Enable the settings for Labor Budgets
Section titled “Enable the settings for Labor Budgets”On the Settings page, find the setting that reads, “Do you want to calculate Labor Budgets for this location?”
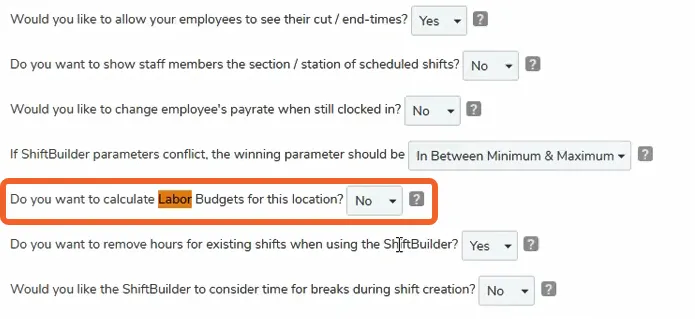
Select “Yes” for this setting to enable it (if it is not already enabled). This will cause two related settings to appear underneath:
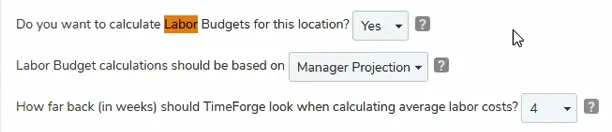
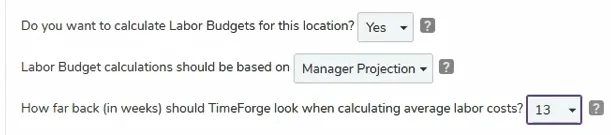
Labor Budget calculations should be based on the Manager Projection, and TimeForge should look back 4 weeks when calculating average labor costs.
(If your location does not have sales data from the past four weeks that can be used to make accurate calculations, you can set this number higher to look back even further in time.)
Scroll down and Save your changes
Section titled “Scroll down and Save your changes”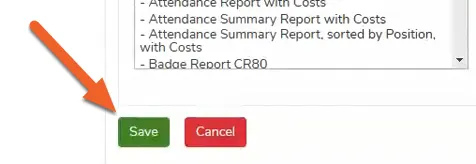
Go to the Sales Category page under the Sales tab
Section titled “Go to the Sales Category page under the Sales tab”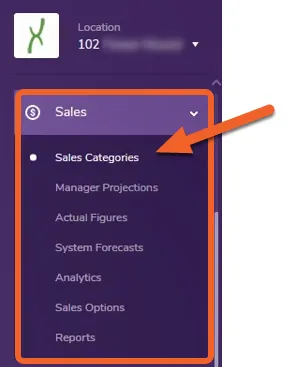
Open up the SALES category
Section titled “Open up the SALES category”Click the SALES card to open up the settings page for that category.
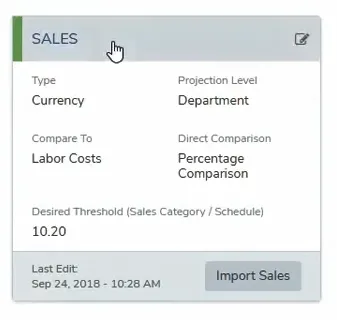
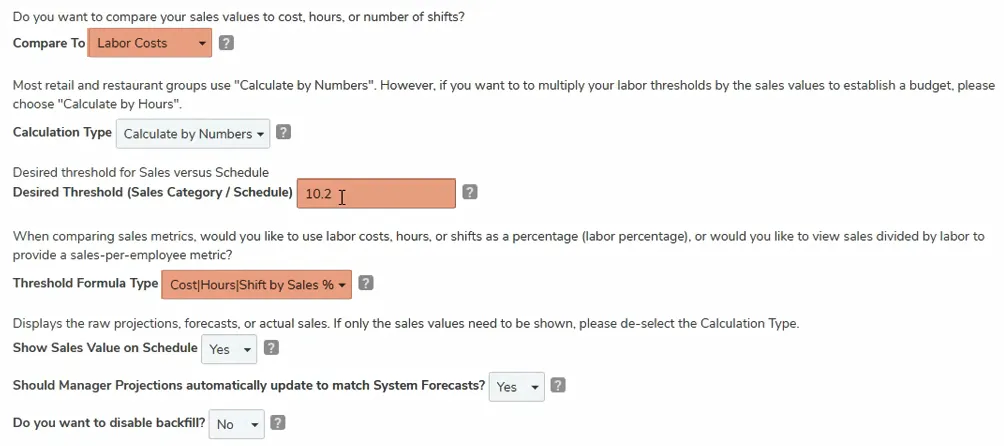
Check to make sure your Sales category settings are correct
Section titled “Check to make sure your Sales category settings are correct”You should be comparing your sales values to Labor Costs, and when comparing sales metrics, you should be looking at Shift by Sales %. Your desired labor target should be set to whatever your goal is for that location. In the example below, it is set to 10.2.
Make sure there are data to reference
Section titled “Make sure there are data to reference”Now that the location is set up correctly, we should make sure there are data for TimeForge to reference when making calculations.
Go to the Manage Attendance page under the Attendance tab
Section titled “Go to the Manage Attendance page under the Attendance tab”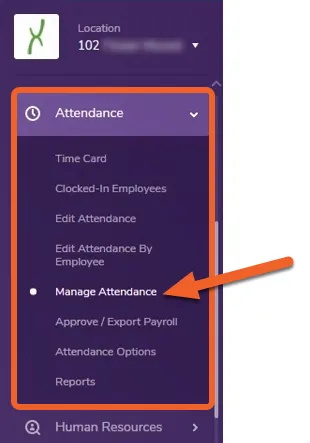
Look for your most recent attendance data
Section titled “Look for your most recent attendance data”If you don’t have recent attendance, you can use the back button or the date selector to locate your most recent attendance data.
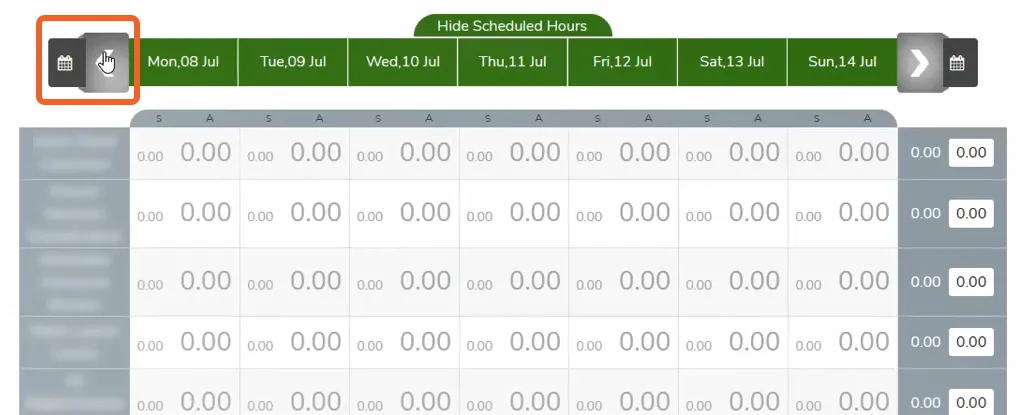
In this example, we don’t have any attendance in the past few weeks, so we need to go back and update our location settings for labor to look further back than four weeks. You can set TimeForge to look back as many as 13 weeks (shown below).
(In most cases, for active stores, there should be recent attendance data, and this step should not be necessary.)
Next, we need to make sure we have sales data.
Go to the System Forecasts page under the Sales tab
Section titled “Go to the System Forecasts page under the Sales tab”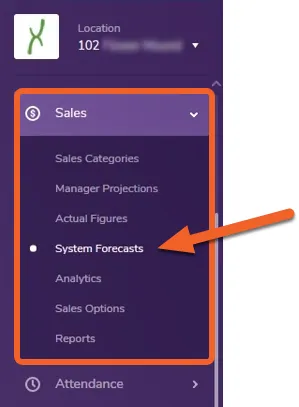
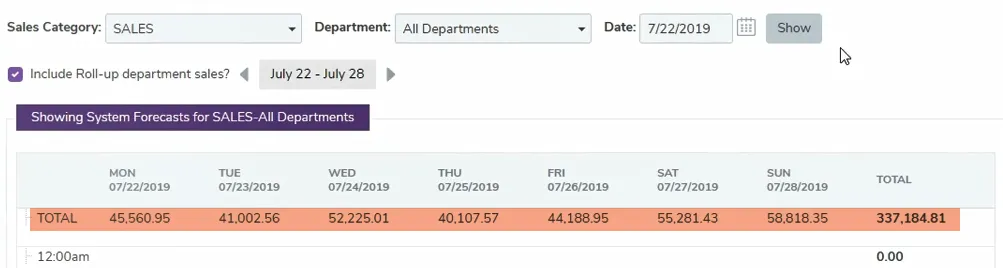
Make sure there are forecasted sales for this week and next
Section titled “Make sure there are forecasted sales for this week and next”If you see sales forecasts for the current week and next, you should have all the data you need for calculations when scheduling.
Go to the Manager Projections page
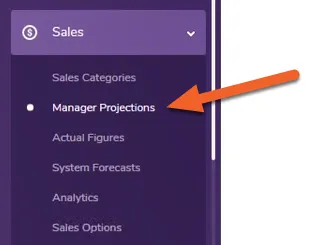
Section titled “Go to the Manager Projections page”With the Sales tab still open, select Manager Projections from the left side menu.
Again, as with the forecasts, we want to make sure we have Manager Projections through this week and next, in order to accurately create our next schedule to meet our labor and budget targets.
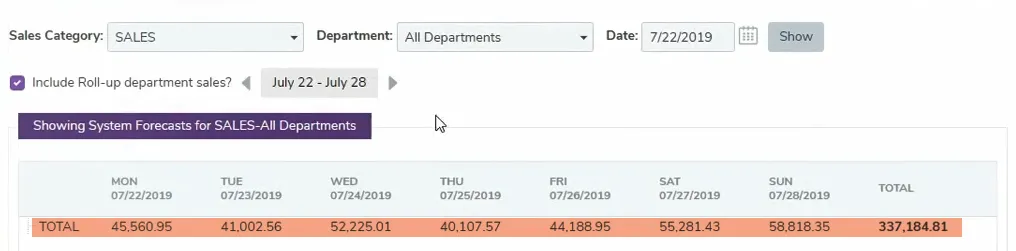
We can also use the Calculate Weekly button to add projections for additional weeks.

Try out the new settings by creating a schedule
Section titled “Try out the new settings by creating a schedule”We are now ready to try out our new CPLH and labor target settings! Let’s head over to the Schedules page to create a schedule.
Open the Schedules page under the Schedules tab
Section titled “Open the Schedules page under the Schedules tab”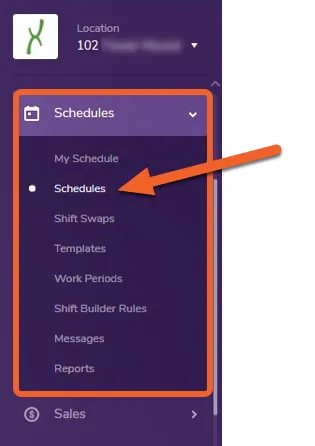
Add a schedule as you normally would
Section titled “Add a schedule as you normally would”Click the + Add Schedule button in the top right corner of the page, then fill out the form as usual.

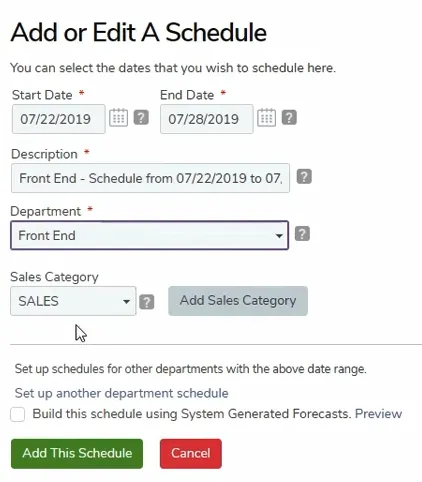
After handling any employee requests for time off, select your weekly template and then hit the Assign Employees button at the bottom of the page.

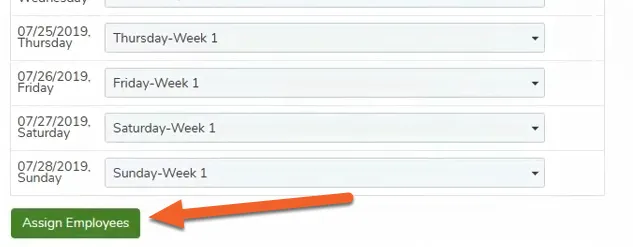
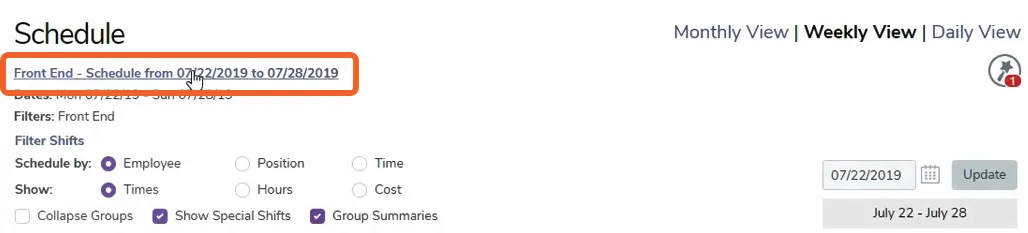
TimeForge will proceed to autoschedule your employees using your chosen template. Selecting the name of the schedule will show you a pop-up list of additional actions.
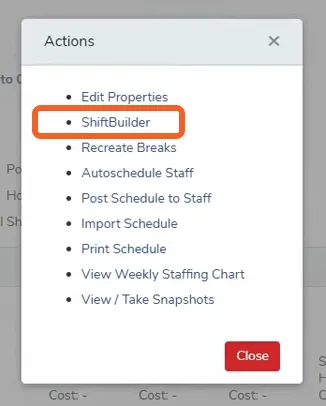
Choosing ShiftBuilder will allow you to generate the schedule based on your shift rules.
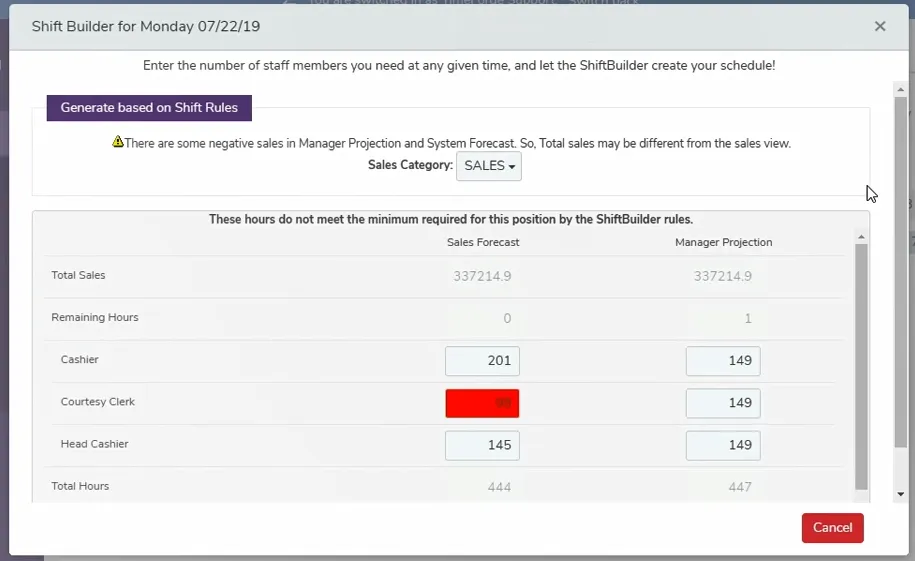
So for example, if the Sales Forecast for the schedule is 337214.9 (as shown above), TimeForge will allocate 444 total labor hours based on the SPLH. It then distributes those hours across positions based on how attendance is typically allocated.
If a value is in red, it means the allocated hours don’t meet the minimum required for that position, as defined by the shift builder rules. Thus, in the example above, if we schedule the 98 hours, we can expect to be short staffed in courtesy clerks.
The values in these boxes can be adjusted, but for this example, we’re going to go ahead and scroll down and Distribute by Forecasts.

TimeForge will generate labor coverage among staff members based on the forecasted hours. Let’s scroll down to the bottom to view the summary.
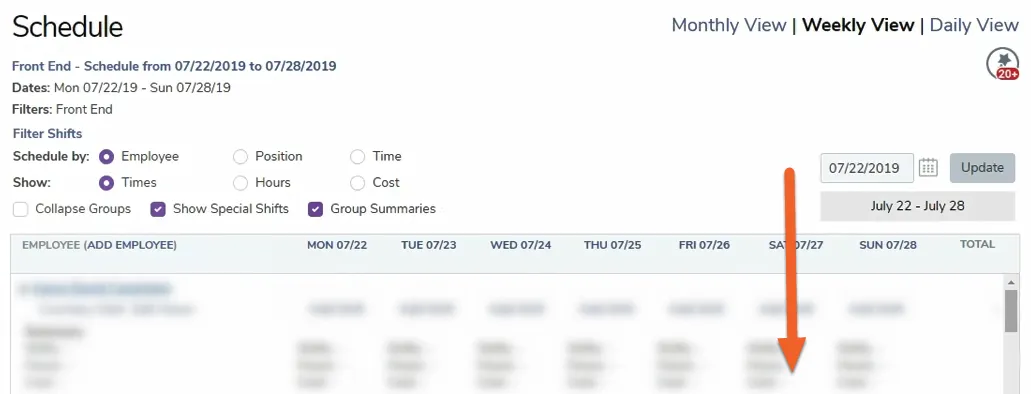
Here we can see some interesting information about our labor allocation. Let’s look at the first column, which is for Monday 07/22 (the last column in the grid represents the entire week):
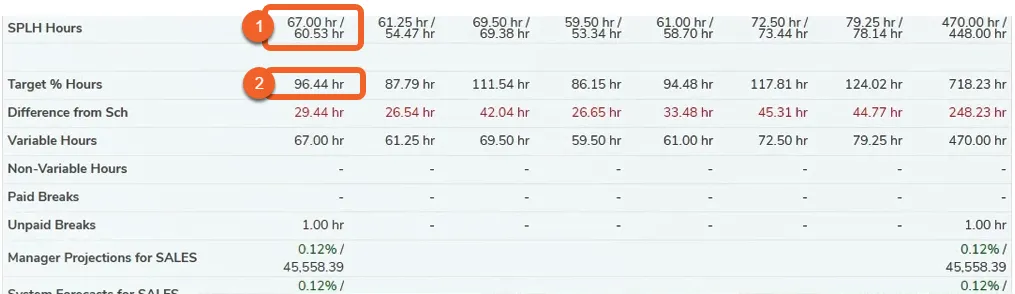
- Next to SPLH Hours, the top number is what’s on the schedule based on what the shift builder just generated. The bottom number is the number of hours that TimeForge thinks we need based on SPLH and the distribution of sales.
- Next to Target % Hours, based on our labor target for this store (we used 10.2%), our SPLH is estimating that we should be using 96.44 hours this day. The difference between that number, and what we have scheduled, is shown below it in red (29.44 in this example). This means we have 29.44 hours we could allocate before we exceed our labor budget for that day.