How to Use the Time Machine (Employee Guide)
In this guide, you’ll learn how to log into and use the Time Machine timeclock. The timeclock allows you to clock in and out for your shift and review your schedule and attendance.
Logging into the Timeclock
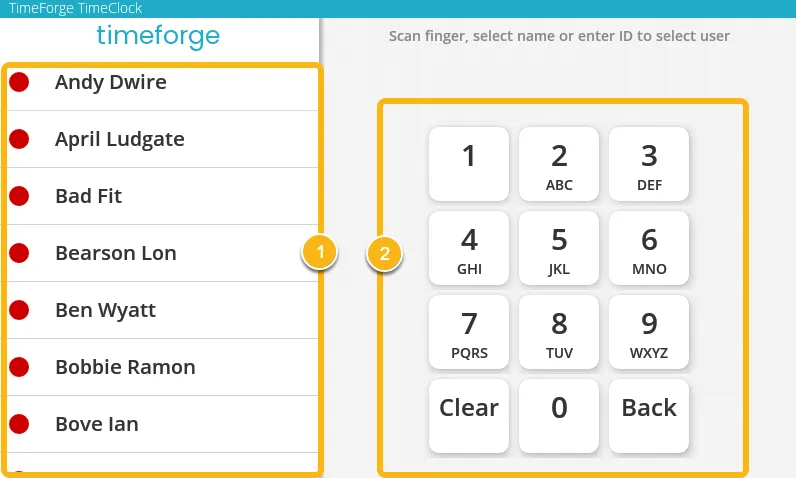
Section titled “Logging into the Timeclock”The Time Machine home screen lists everyone in your location at a glance.
1. The list on the left shows each employee in alphabetical order, sorted by first name. By tapping on your name in the list, TimeForge will select your profile, and you can then enter your Internal Password or place your finger on the scanner to log into your account.
2. On the right is a panel where you can input your Internal Number instead of searching through the employee list page.
Verifying Your Access
Section titled “Verifying Your Access”When you select your name from the left-hand menu or enter your Internal Number, TimeForge should display your name at the top of the right panel, as in the example below:
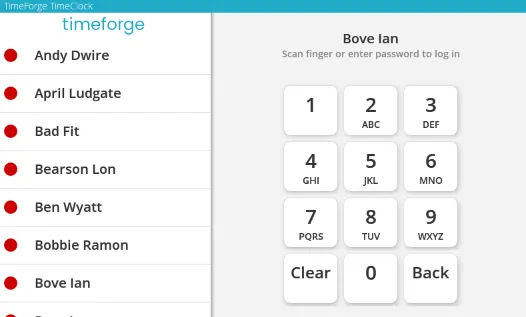
From here, you can either enter your Internal Password or scan your fingerprint to log into the timeclock.
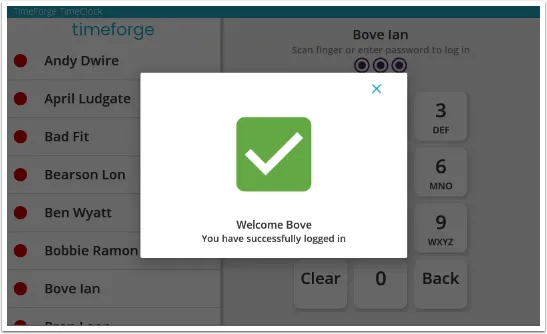
When you successfully log in, you will get a welcome message from TimeForge:
Understanding the Dashboard
Section titled “Understanding the Dashboard”Important information is displayed for you on your dashboard:
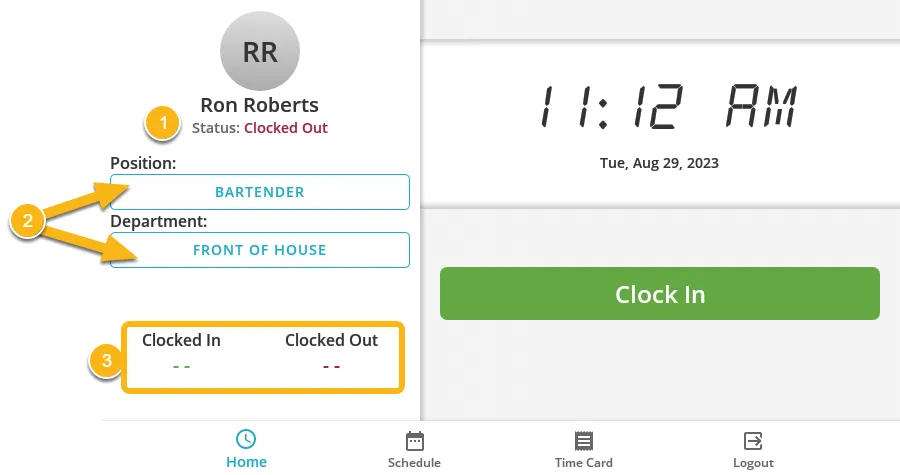
- Status: This will display “Clocked Out”/“Clocked In”/“On break” based on what your current status is.
- Department/Position: These fields show your currently selected department and position. If you are a cross-trained employee, by clicking on the fields you can clock into different departments and positions.
- Clocked In/Out: This shows you the time that you clocked in or out for your shift.
Clocking In
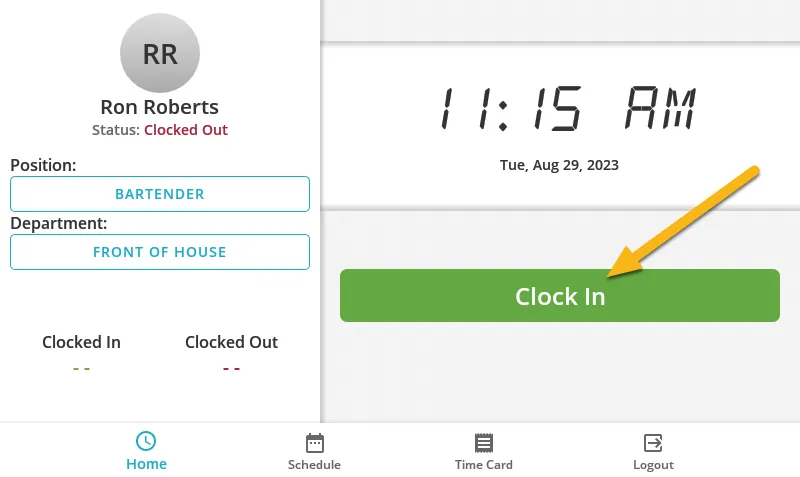
Section titled “Clocking In”To clock in for the day, simply tap the Clock In button.
Taking a Break and Clocking Out
Section titled “Taking a Break and Clocking Out”When you’re ready to take a break or clock out, you’ll need to first log back into the timeclock.
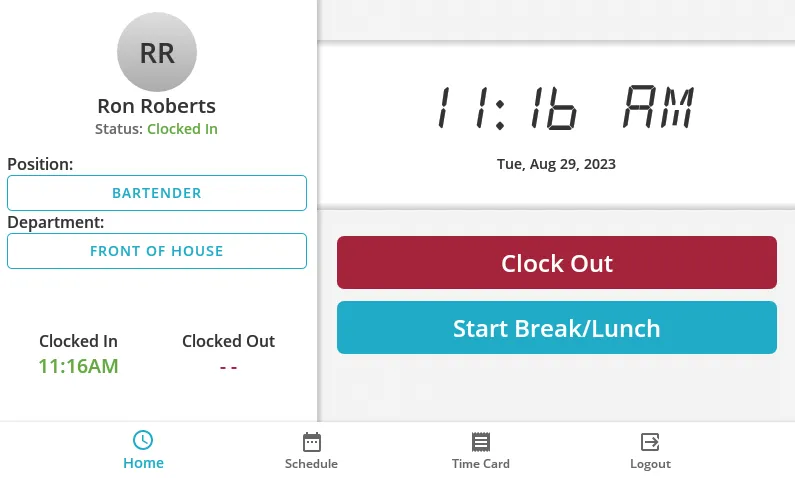
Once logged in, you can take a break by tapping the Start Break button, which will bring up a selector to choose which break you’re eligible for, or will automatically put you on break based on your company’s break policies.
To clock out at the end of the day, simply tap the Clock Out button.
Requesting Overrides
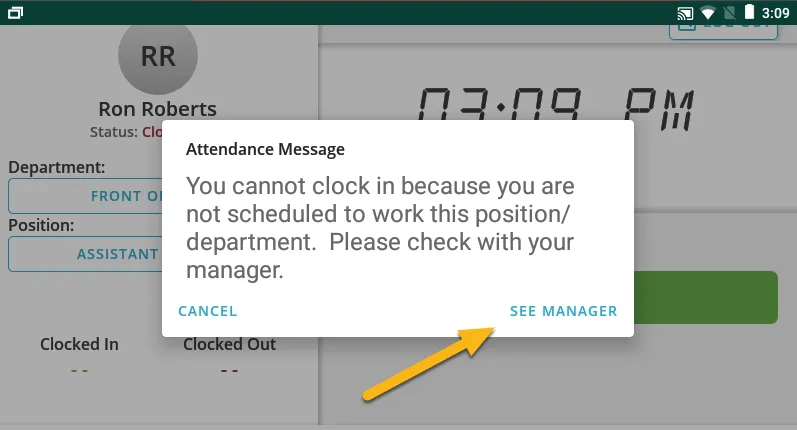
Section titled “Requesting Overrides”Depending on your company’s policy, you may receive a message when trying to clock in early before the start of your scheduled shift or if you try to clock out later than the end of your scheduled shift.
When this happens, simply tap on See Manager in the lower right corner, then notify your manager.
Schedule
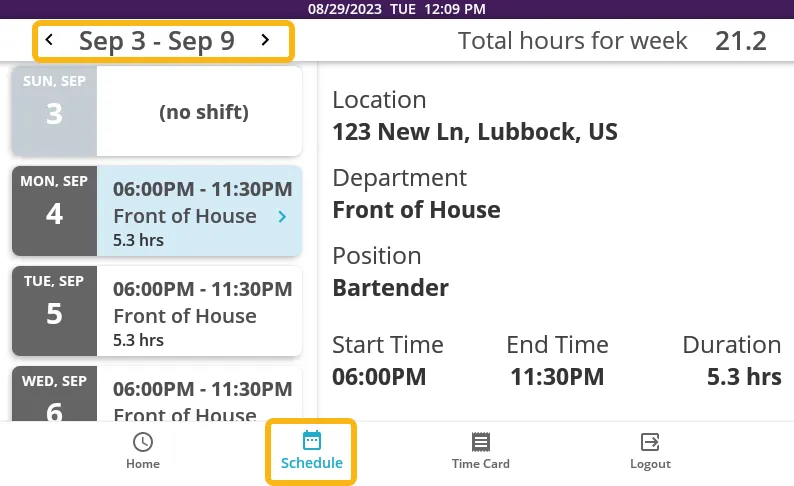
Section titled “Schedule”Using the navigation arrows at the top of the screen, you can view past and currently scheduled shifts. Once you navigate to the dates you can to review, the timeclock will display your scheduled shifts dates, time, and duration. If you tap on a specific shift, you can then view additional information such as the location, department and position you were scheduled to work under.
Time Card
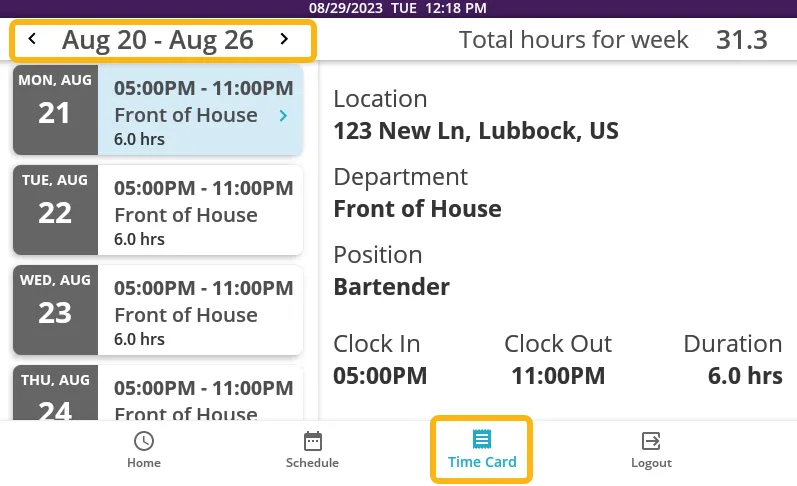
Section titled “Time Card”By default, when you tap the Time Card button, you can view the hours you’ve recorded for the current week. Using the navigation arrows at the top left corner, you can navigate to view attendance entries from previous weeks. The timeclock will display an attendance entry’s date, time, and duration. If you tap on a specific shift, you can then view additional information such as the location, department and position the attendance entry was recorded under.