Install TimeForge with Dinerware Point of Sale
TimeForge is capable of integrating with several Point of Sale systems, including Dinerware. Dinerware is a wonderful Point of Sale system, with dealers all over the world.
This integration will ensure you get the most out of Dinerware and scheduling; the process involves installing the TimeForge Dinerware Bridge software on the main computer system. Need a copy of the software? No problem. Just contact our support team.
The software will read and write to your Dinerware system as necessary and can enforce your TimeForge schedules - preventing employees from riding the clock. Additionally, you can use the TimeForge biometric TimeClock or Fingerprint scanner with Dinerware to allow biometric clock-ins and clock-outs.
Begin installing the TimeForge Dinerware Bridge software.
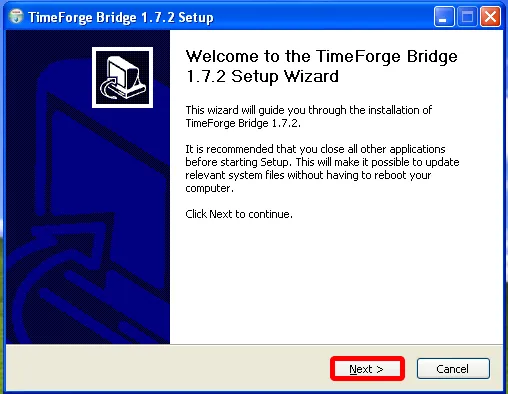
If you agree to the terms, accept the terms by clicking “I Agree.”
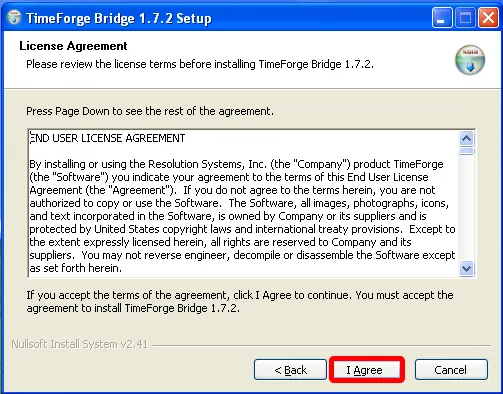
Choose a folder that will be the destination to install the TimeForge Dinerware Bridge. The default is usually correct.
Then, click “Next.”
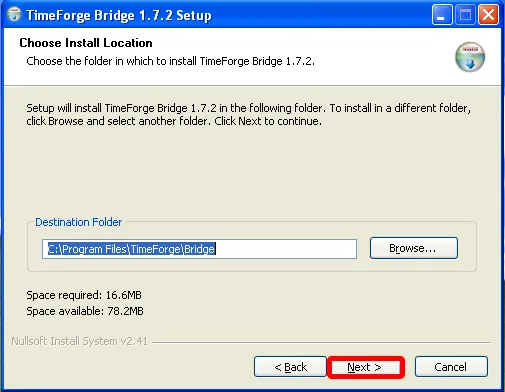
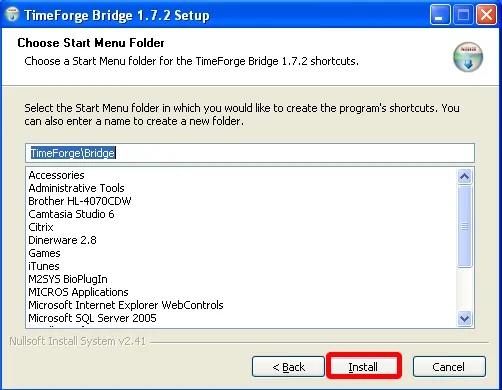
Choose the Start Menu Folder to install the software. The default is usually correct, but you can also create a new folder or select another folder.
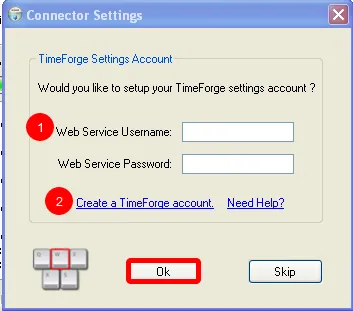
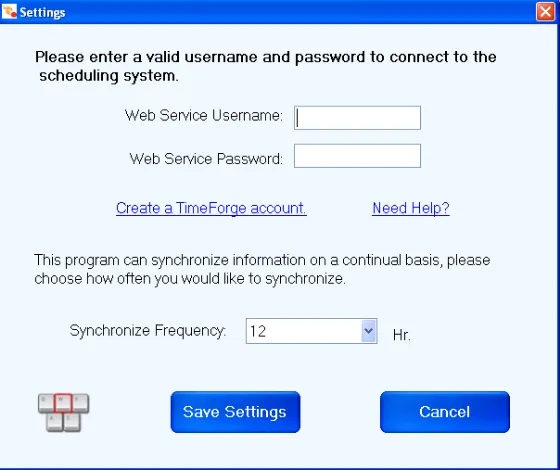
1. If you already have a TimeForge account, enter your Web Service Username and Password to connect with TimeForge.
A web service username and password is not the same as your TimeForge username (usually your email address), but is a secured username and password that allows the Dinerware TimeForge Bridge to communicate with TimeForge.
You can create a Web Service account by logging into your account and going to the Settings for your location / store. You can then set your web service username and password.
2. Click the link if you do not yet have a TimeForge account. We will create a Web Service Username and Password for you automatically.
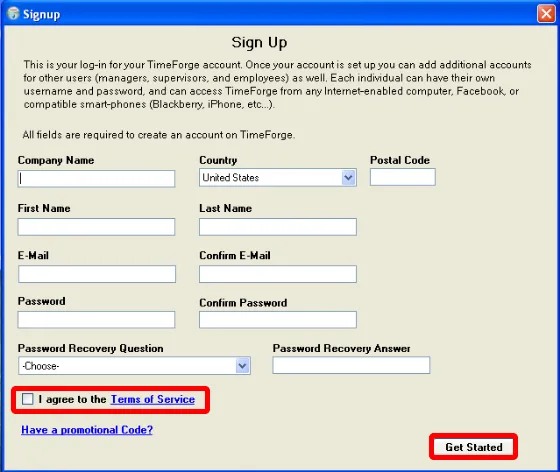
If you need to create a TimeForge account, please fill out all of the fields, including your company name, first and last name, email address, password, and a password recovery answer.
Select the check box if you agree to the Terms of Service, then click “Get Started”. We will then automatically create your Web Service Username and Password for you.
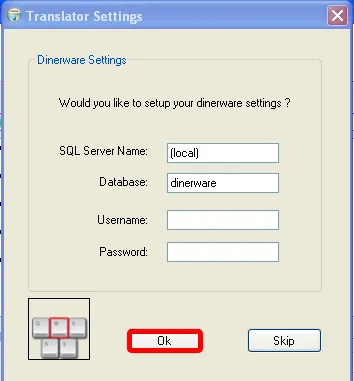
Set up the Dinerware database connection settings. Most likely, the default settings will work with your Dinerware installation.
If you don’t know your SQL name and database, this information can be found on the Dinerware brain. Click “Ok” to continue.
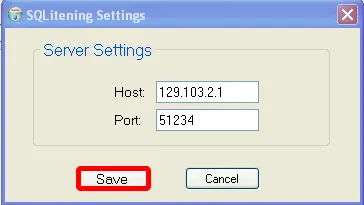
The “Host” and “Port” information will automatically be correct. There is no need to alter any settings.
Simply click “Save” and continue.
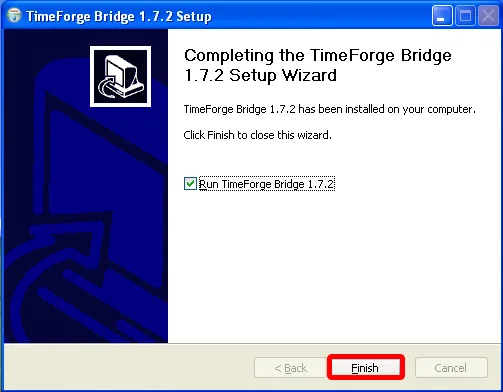
At this point, you can run the TimeForge Bridge software.
Configure TimeForge with Dinerware Point of Sale
This guide will teach you how to properly configure TimeForge to integrate with Dinerware POS if you encounter problems. It assumes you’ve already performed the steps in our installation guide.
If the TimeForge Dinerware Bridge was not properly configured to use a Web Services account, you will first need to configure the Web Services. Follow the options given on screen (shown here, below).
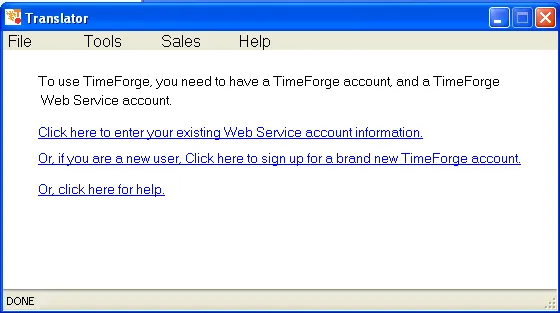
See our instructions on how to set up the Web Services Username and Password.
These values can be configured on the TimeForge web site and will allow the software to communicate with TimeForge securely.
Next, configure the Dinerware POS side of the TimeForge Dinerware Bridge.
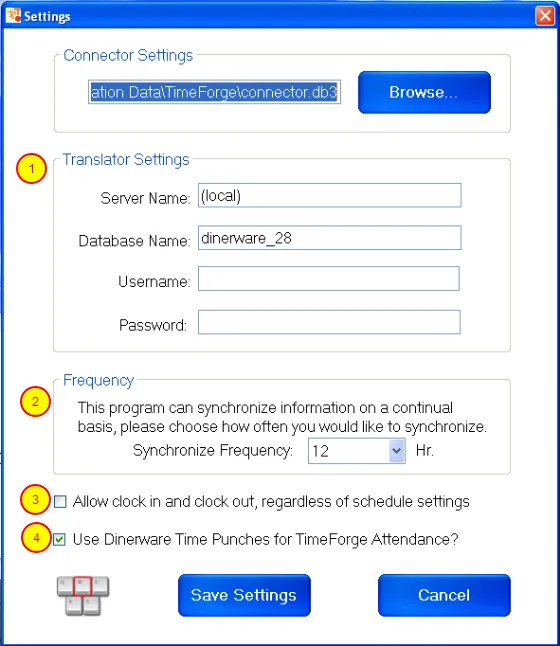
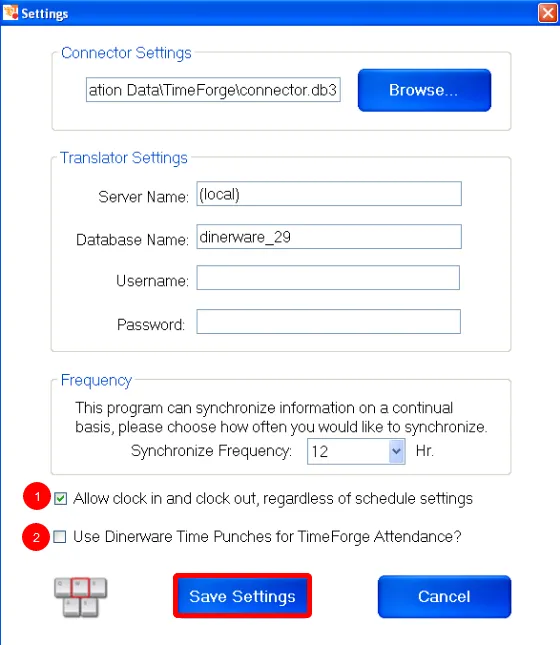
Some of the important values on this screen include:
- Dinerware Server settings, including the Server Name, Database Name, Username and Password. In most cases, the defaults will work for your Dinerware installation.
- Choose how often the software should poll or synchronize with the Dinerware POS system.
- If you would like to override the TimeForge settings for early clock-in’s and late clock-out’s, or to enable staff members who are not scheduled to clock in (without manager approval), please check this box.
- By default, TimeForge uses the time punch values from Dinerware. However, if you would like to circumvent the Dinerware time punches, and would prefer to use the TimeForge Attendance system and biometrics, then please un-check this option.
Review the TimeForge Dinerware Bridge dashboard.
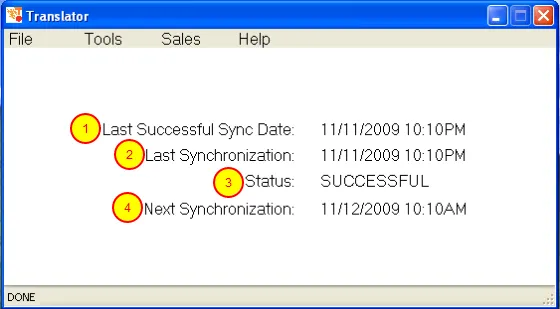
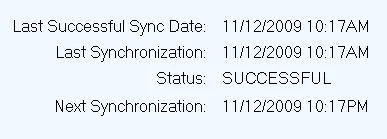
- The Last Successful Sync Date shows the last date and time that the software was able to read from your Dinerware database.
- The Last Synchronization shows the last date and time that a synchronization was attempted.
- The Status shows the status of the last synchronization (it will either be SUCCESSFUL or FAILED).
- The Next Synchronization shows the date and time of the next scheduled synchronization.
You are all done! TimeForge will synchronize your data based on the needs of your restaurant and will keep the data in TimeForge and in Dinerware POS communicating properly.
Define menu items for Sales Forecasting with Dinerware POS
TimeForge integration with Dinerware makes labor management easier for your business by streamlining the functionality of Dinerware and scheduling. Installing TimeForge to work with Dinerware is easy and involves installing the TimeForge Dinerware Bridge software on your main computer system.
When building schedules, it is often useful to forecast sales at your store or to ensure that sales and labor have an acceptable ratio. TimeForge automatically pulls sales data from your Dinerware POS system, synchronizes this data to TimeForge, and allows you to build fast and simple schedules.
You can forecast sales by gross sales, individual menu items, or groups of menu items (such as entrées or desserts).
In the TimeForge Translator, access the “Sales” menu to set up menu items and menu item groups for Sales Forecasting within TimeForge. This will allow you to benchmark and schedule labor in comparison to your desired labor needs.
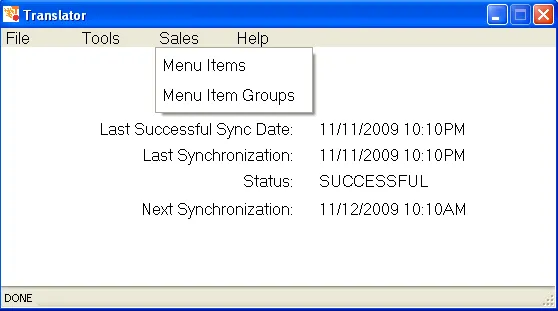
TimeForge allows up to 10 menu Items from your Dinerware menu to be chosen for Sales Forecasting. Details for the sales of these 10 menu items are copied from Dinerware to your TimeForge labor management system and will allow you to accurately compare sales against schedules and actual attendance.
Click “Save” once you’ve finished selecting menu items for sales forecasting.
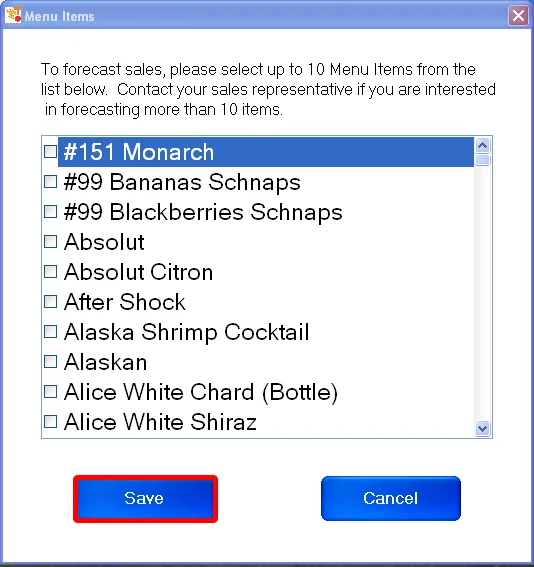
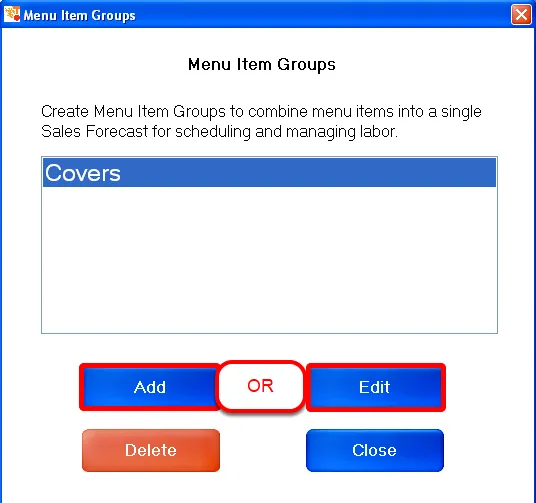
Menu Item Groups allow you to easily and quickly combine sales from multiple menu items in your Dinerware menu into a single Sales Forecast.
For example, you may want to build schedules based on entrées, drinks, or some other combination of menu items. These can be set up as Menu Item Groups and then compared to your employee schedule or attendance later.
Click “Add” to create a new Menu Item Group, or click “Edit” to edit the properties of an existing Menu Item Group.
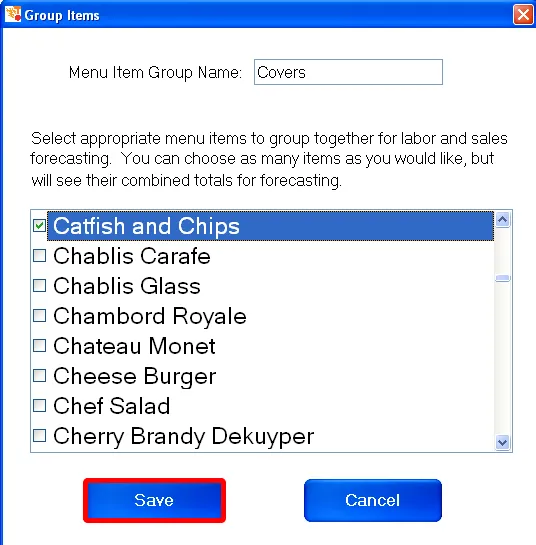
Enter a descriptive name and choose the necessary menu items from your Dinerware database. Choose “Save” when you are finished. TimeForge will automatically synchronize your sales data the next time it connects to the TimeForge server!
Add employees to TimeForge with Dinerware POS
After installation, the TimeForge Dinerware Bridge copies the data from your Dinerware POS to your TimeForge account. This can ensure that you get the most out of not only Dinerware and scheduling but all your labor management needs. In most cases, the data is automatically copied over, but there are a few rules to follow that can ensure TimeForge and Dinerware work seamlessly together.
One key point is adding employees. To do this, you’ll simply need to enter your employee into the Dinerware system and then sync to TimeForge. That way, you don’t have to waste time entering duplicate information.
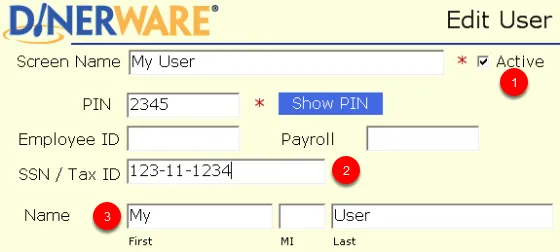
Add your users to the Dinerware POS software. Some of the key fields include:
- Active/Inactive. The employee must be active in Dinerware to appear in TimeForge. If an employee is made inactive, TimeForge will assume they are terminated and will remove them from your employee list (they can later be re-activated).
- SSN/Tax ID. The SSN / Tax ID is not required, but if provided, it must be unique to employees within your company. For example, two employees cannot share the same social security number.
- Name. Each Dinerware employee must have a unique first and last name. For example, only one employee can be named “John Smith.”
Additionally, you need to enter:
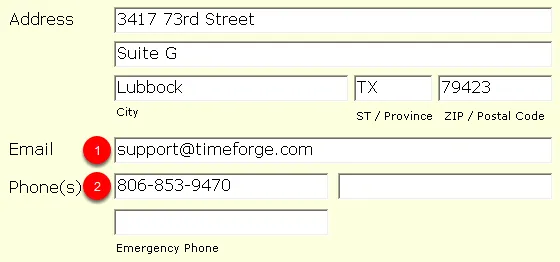
- Email address. The staff member must have an email address. TimeForge will automatically send the employee an email address to allow them to set up a username and password to log in to TimeForge. Email addresses must be unique to each staff member, i.e. employees cannot share email addresses.
- Phone number. To receive cell phone and text message alerts about upcoming schedules, enter the staff member’s cell phone number in the “phone” field.
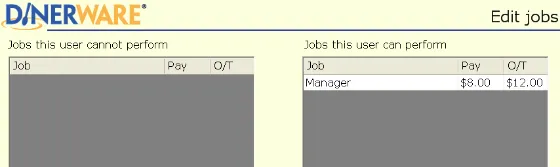
TimeForge requires that each staff member work at least one job, or position.
TimeForge regularly syncs with Dinerware to ensure that the data is current and accurate.
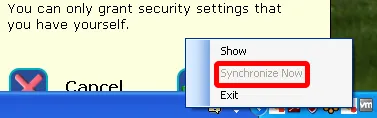
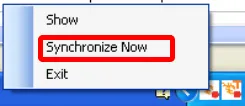
After adding your staff members, you can manually synchronize the system by right-clicking on the connector icon and clicking “Synchronize Now.” Alterntively, you can wait for TimeForge to automatically sync later.
Once synced, TimeForge will add staff members to the appropriate departments and locations if you are using TimeForge at multiple locations or with department-level scheduling.
TimeForge and Dinerware with Scheduling Enforcement
TimeForge has the ability to integrate with a variety of Point of Sale systems, including Dinerware. Integrating these two systems will ensure that you get the most out of both Dinerware and scheduling employees.
The first step in using TimeForge with Dinerware is installing the TimeForge Dinerware Bridge software on your computer system. The software will read and write to your Dinerware system as necessary, and can enforce your TimeForge schedules, thereby preventing employees from riding the clock.
When combined with the 1-to-1 matching that the TimeForge biometric TimeClocks offer, you never have to worry about inaccurate employee attendance again!
Check the Windows task bar, which is the bar that normally runs along the bottom of the computer and contains the “Start” menu (on the left) and clock (on the right).
You should see icons similar to those shown below. For Dinerware and scheduling to work, both of these icons should be displayed. Contact us if your system isn’t functioning and these icons don’t appear.

Scroll down the page to the options directly following the open and close times.
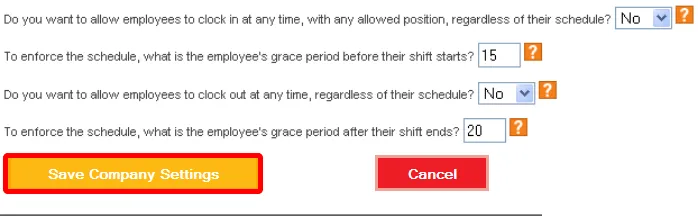
Set the grace periods for early clock in and late clock out. These settings can be any value that makes sense for your business, though many businesses choose a 5-10 minute early clock in and a 10-20 minute late clock out.
Click “Save” at the bottom of the page once you’ve finished making changes.
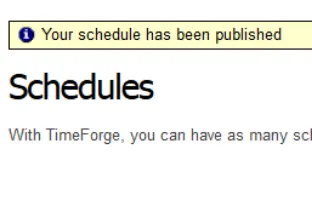
Create and post a schedule in TimeForge so that staff members are notified of upcoming shifts. This will also allow the TimeForge Dinerware Bridge to synchronize and enforce the schedule. TimeForge will confirm when you’ve successfully published a schedule, like so:
TimeForge automatically synchronizes data between your Dinerware POS system and the live TimeForge server. This ensures that employees, positions, schedules, time cards, and sales are automatically transferred between the two systems.
During heavy activity at your restaurant, this synchronization is done frequently. Alternatively, the synchronization will occur less often when your business isn’t as busy.
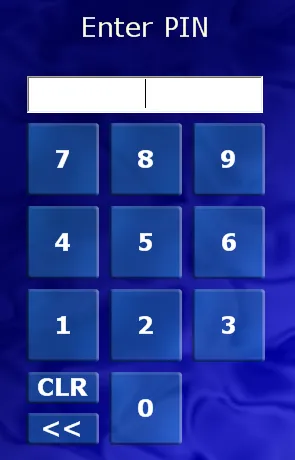
Before an employee can access the Dinerware POS, they must enter their PIN or swipe a mag card (if configured).
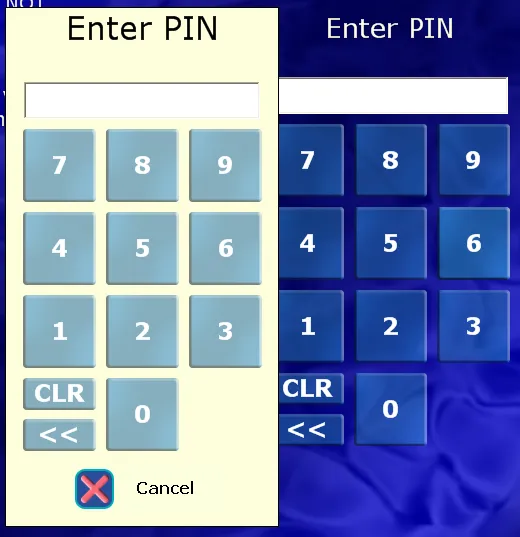
An employee who is not on the schedule will be presented with a screen for a manager override. Additionally, employees who show up too early or attempt to clock out too late will also be prompted for a manager override.
This will reduce the amount of clock riding that staff members can do, reducing labor costs by 2% - 3% instantly!
TimeForge Attendance with Dinerware POS
TimeForge is capable of integrating and communicating with many of the leading Point of Sale systems to reduce the time you spend entering data. Dinerware is a focused and easy-to-use Point of Sale system with dealers all over the world.
Integrating TimeForge with Dinerware will ensure that you get the most out of Dinerware and scheduling, and is also great for tracking employee attendance. The first step toward using these features is to install the TimeForge Dinerware Bridge software on your main computer system.
The TimeForge Dinerware Bridge software will read and write to your Dinerware system as necessary, and can enforce your TimeForge schedules, thereby preventing employees from riding the clock.
In some cases, you may want to use TimeForge Attendance exclusively as a way to track time and attendance at your business. To do this, you can turn off the synchronization of time punch entries from the POS system and use the full power of the TimeForge Attendance system instead, including our fingerprint scanner (to stop buddy punching), and our comprehensive meal and staff break system.
You should see icons similar to those shown below. These icons will appear on the Windows task bar, which is the bar that normally runs along the bottom of the computer and contains the “Start” menu (on the left) and clock (on the right).
The TimeForge Dinerware Bridge is running when both of these icons are displayed. Contact us if these icons don’t appear and your system isn’t working properly.
Click the connector icon to load the connector settings.
- In the TimeForge Translator, make sure that the check box next to “Allow clock in and clock out, regardless of schedule settings” is selected. This will allow your users to clock in and out of Dinerware as necessary, which is important for choosing cash drawers and meal coursing, as well as check printing.
- In the TimeForge Translator, make sure that the check box next to “Use Dinerware Time Punches for TimeForge Attendance” is NOT selected. This option turns off the synchronization of the Dinerware time punches, and instead allows you to use TimeForge Attendance for tracking time.
Click “Save Settings” once you’re finished.
To use the software immediately, you will need to force a synchronization so that both softwares know there was a change. Right-click on the connector and choose “Synchronize Now” to immediately sync Dinerware with TimeForge.
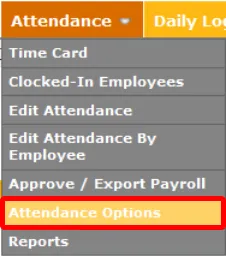
TimeForge Attendance is very flexible and can allow your employees to clock in from their cell phones, Facebook, or any Internet-enabled computer. However, most businesses will prefer to have staff clock in from restricted computers, such as those provided at their work location. This option can be found by hovering over “Attendance” and selecting “Attendance Options” in TimeForge.
You can also lock down attendance tracking by limiting clock-ins and clock-outs to specific IP’s. To do so, simply click on the button displayed below, which will add the computer you’re currently using to the list of allowed IPs.

Employees can now log in to TimeForge using their username (usually their email address) and password. Alternatively, if the location is using a compatible fingerprint scanner, staff members can use their fingerprints to log in to TimeForge.
After logging in, they will see a clock in / clock out box on the right-hand side of their screen.
Clocking in and out is now point-and-click easy!