Install TimeForge with Restaurant Manager Point of Sale
TimeForge can integrate with several Point of Sale systems, including Restaurant Manager. Restaurant Manager by ASI, is an easy to use and powerful Point of Sale system, with dealers all over the world.
TimeForge integration with ASI Restaurant Manager involves installing the TimeForge RM Bridge software on the main RM computer system.
The software will read and write to your Restaurant Manager system as necessary, and can enforce your TimeForge schedules - preventing employees from riding the clock.
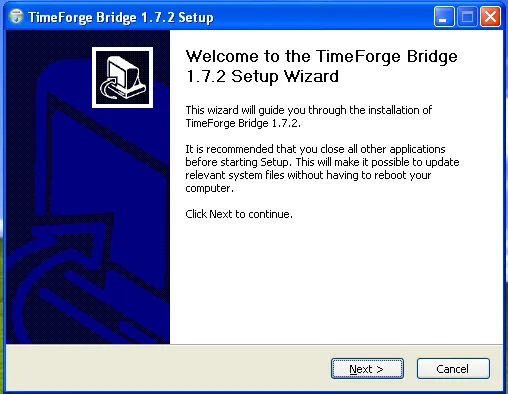
Begin installing the TimeForge-Restaurant Manager Bridge software.
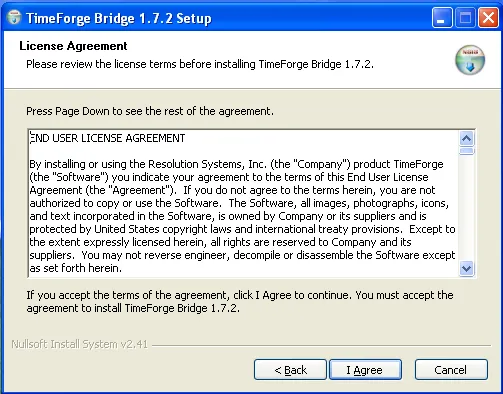
Accept the terms of the End User License Agreement.
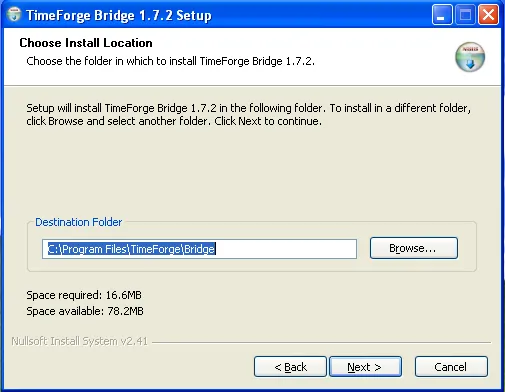
Choose a directory to install the TimeForge-Restaurant Manager Bridge. The default is usually correct.
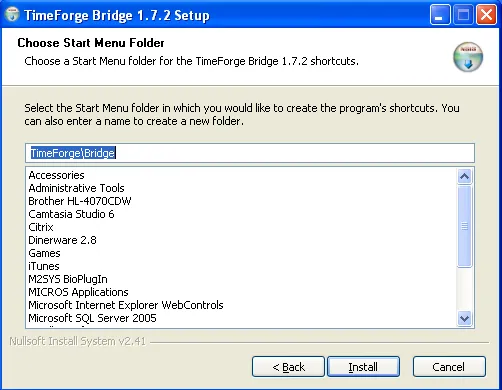
Choose the Start Menu Folder to install the software.
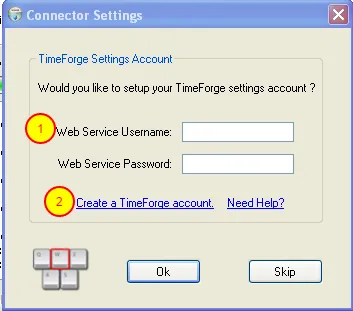
1. If you already have a TimeForge account, enter your Web Service Username and Password to connect with TimeForge.
A web service username and password is not the same as your TimeForge username (usually your email address), but is a secured username and password that allows the TimeForge-Restaurant Manager Bridge to communicate with TimeForge.
You can create a Web Service account by logging into your account, and go to the Settings for your location / store. You can then set your web service username and password.
2. If you do not yet have a TimeForge account, get started by creating a TimeForge account. We will create a Web Service Username and Password for you automatically.
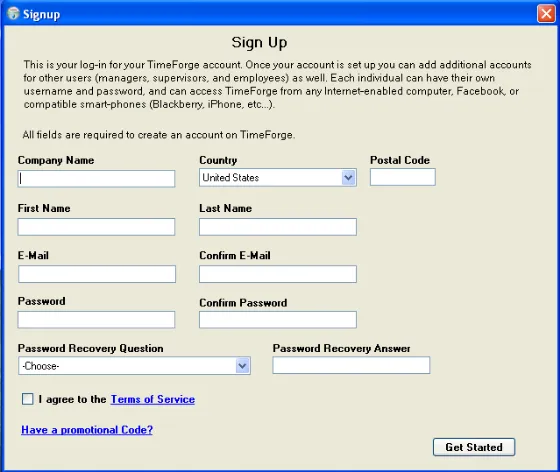
If you need to create a TimeForge account, please fill out all of the fields, including your company name, first and last name, email address, password, and a password recovery answer.
We will automatically create your Web Service Username and Password for you.
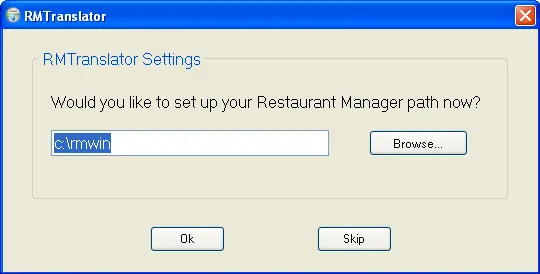
Set up the Restaurant Manager database connection settings. Most likely, the default settings will work with your RM installation.
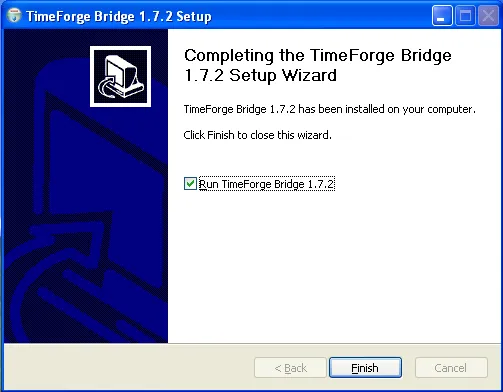
At this point, go ahead and run the TimeForge Bridge software.
Configure TimeForge with Restaurant Manager Point of Sale
TimeForge integrates with a number of powerful POS systems, including Restaurant Manager. ASI Restaurant Manager, is a powerful and easy to use Point of Sale system, with dealers all over the globe.
Integration between TimeForge and Restaurant Manager requires installing the TimeForge RM Bridge software on the main Restaurant Manager computer.
The integration software will read and write to your Restaurant Manager system where necessary, and can enforce your TimeForge schedules - preventing employees from clocking in before they are scheduled to work.
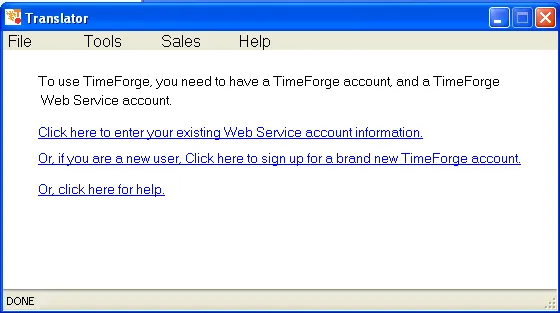
If the TimeForge-Restaurant Manager Bridge was not properly configured to use a Web Service account, you will first need to configure the Web Services.
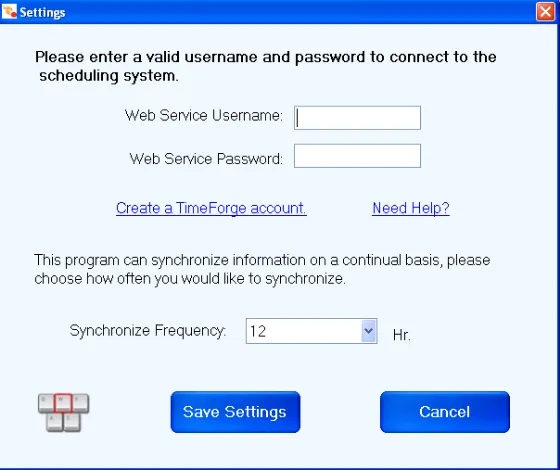
If the TimeForge-Restaurant Manager Bridge has not yet been fully configured, make sure to set up the Web Service Username and Password.
These values can be configured on the TimeForge web site, and will allow the software to communicate with TimeForge securely.
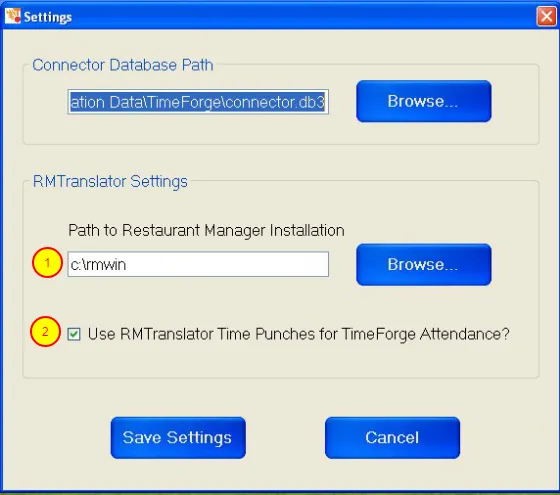
Configure the Restaurant Manager POS side of the TimeForge-Restaurant Manager Bridge. Some of the important values on this screen include:
1. Restaurant Manager system location. This is the directory with all of the DBF files, and Restaurant Manager programs, in it. In most cases, the defaults will work for your Restaurant Manager installation.
2. By default, TimeForge uses the time punch (login) values from Restaurant Manager. However, if you would like to circumvent the Restaurant Manager time punches, and would prefer to use the TimeForge Attendance system, then please un-check this option.
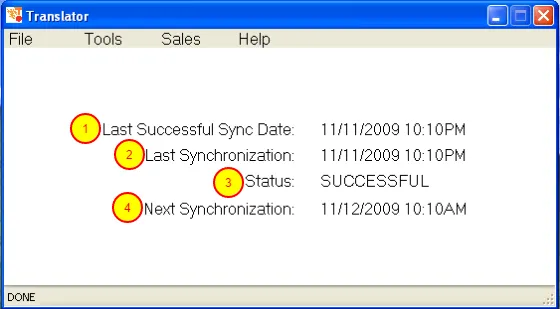
Review the TimeForge-Restaurant Manager Bridge dashboard.
1. The Last Successful Sync Date shows the last date and time that the software was able to read from your RM database.
2. The Last Synchronization shows the last date and time that a synchronization was attempted.
3. The Status shows the status of the last synchronization (it will either be SUCCESSFUL or FAILED).
4. The Next Synchronization shows the date and time of the next scheduled synchronization.
You are all done. TimeForge will synchronize your data based on the needs of your restaurant, and will keep the data in TimeForge and in Restaurant Manager POS communicating properly.
TimeForge and Restaurant Manager
TimeForge integrates with a number of powerful POS systems, including ASI Restaurant Manager. Restaurant Manager, is a powerful and easy to use Point of Sale system, with dealers all over the globe.
To synchronize data between TimeForge and Restaurant Manager, you must first install and configure the TimeForge RM Bridge software on the main Restaurant Manager computer.
The integration software will automatically read and write to your Restaurant Manager POS system when required, and can enforce your TimeForge schedules - stopping employees from clocking in before they are scheduled to work.

Check the Windows task bar, which is the bar that normally runs along the bottom of the computer and contains the Start menu (on the left) and clock (on the right).
You should see icons similar to those shown above. Both of these icons should be displayed, and if they are, then TimeForge is running properly.
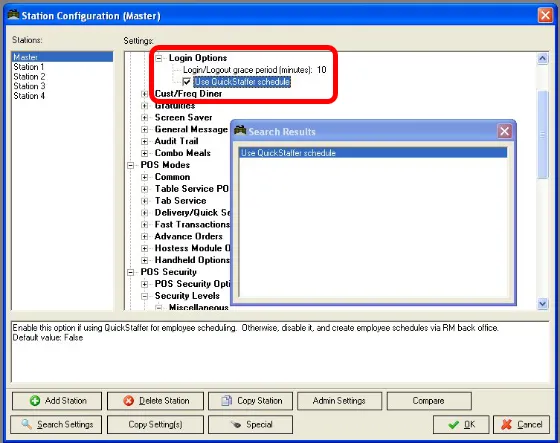
Make sure to configure QuickStaffer.
1. Run the Station Config. To do so, launch the RM Back Office, then choose “Setup Station Config.”, and choose Station 1.
2. Look for the “Use QuickStaffer Schedule” option, and ensure that this is set to true.
Repeat steps 1 and 2 for each Station you want to use TimeForge with.
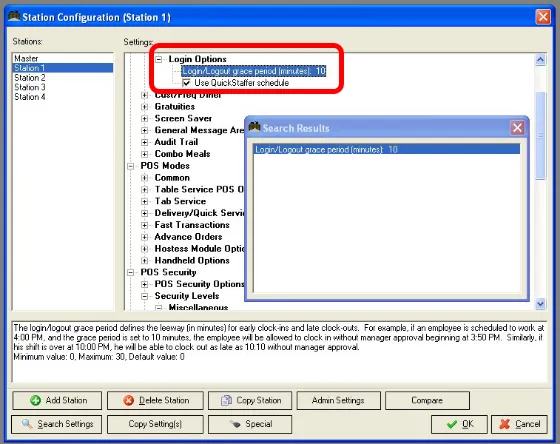
Configure the allowable clock in grace period when enforcing the TimeForge schedule.
1. Run the Station Config. To do so, launch the RM Back Office, then choose “Setup Station Config.”, and choose Station 1.
2. Locate the “Grace Period” option, and change this to allow the desired grace period (such as 5 minutes or 10 minutes).
Repeat steps 1 and 2 for any other stations you would like to enforce the schedule with.
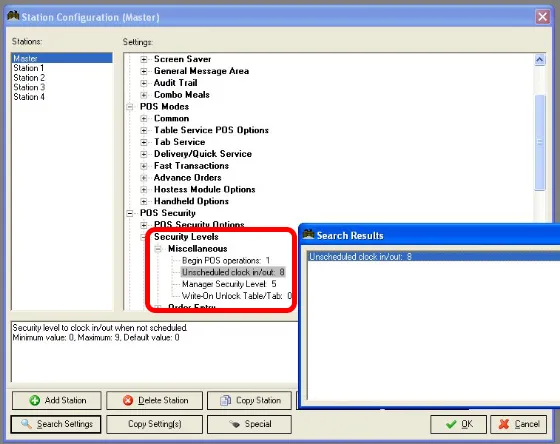
Configure the Security level of the manager providing overrides for employees who are too early.
1. Run the Station Config. To do so, launch the RM Back Office, then choose “Setup Station Config.”, and choose Station 1.
2. Click on “Search Settings”, and look for “unsched”. Find the “Unscheduled Clock in/out” setting, and change this to the security level you would like to require for someone to allow a staff member to clock in, who isn’t on the schedule. For example, 8 might be a good value.
Repeat steps 1 and 2 for any other stations you would like to enforce the schedule with.
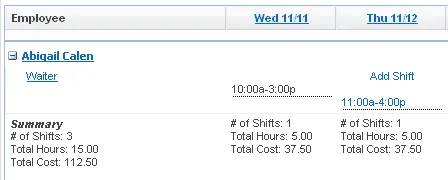
Create and post a schedule in TimeForge, so that staff members are notified of upcoming shifts.
This will also allow the TimeForge-Restaurant Manager Bridge to synchronize and enforce the schedule.
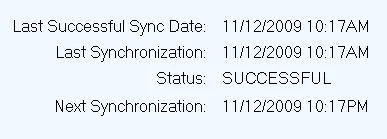
TimeForge automatically keeps data between your Restaurant Manager POS system and the live TimeForge server synchronized. This ensures that employees, positions, time cards, schedules, and sales are automatically transferred between the two systems without you needing to do anything.
During heavy activity at your restaurant or hotel, this synchronization is done automatically very often, and during slower periods of activities, it is done less often.
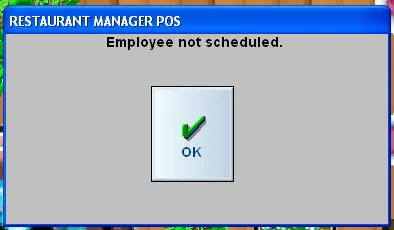
Before an employee can access the Restaurant Manager POS, they must enter their PIN, swipe a mag card (if configured), or use their fingerprint (if configured).
If they are too early, or are not on the schedule, Restaurant Manager will display the above warning.
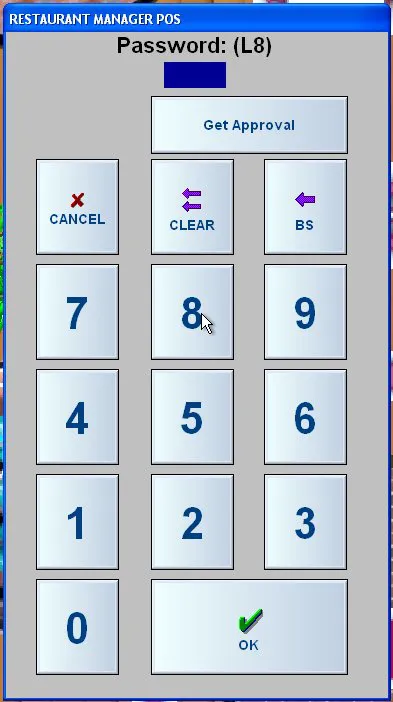
An employee who is not on the schedule will be presented with a screen for a manager override. Additionally, any staff member who shows up prior to the grace period for their shift will also be prompted for a manager override.
Enforcing the schedule will immediately reduce the amount of clock riding that staff members can do, reducing labor costs by 2% - 3% instantly!
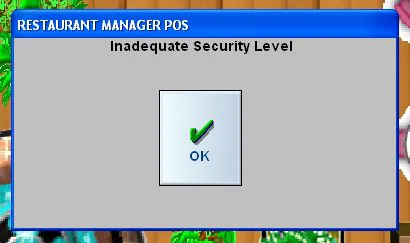
If the overriding manager that is attempting to clock in the staff member doesn’t have a sufficient security clearance, they will be presented with the above dialog box, and will not be able to clock the employee into Restaurant Manager.