The Today Page displays important information about your TimeForge account, including pending, approved, and denied requests. The Today page also includes the ability to clock in / clock out (if enabled by management), information about upcoming schedules, availability, and possible shift swaps.
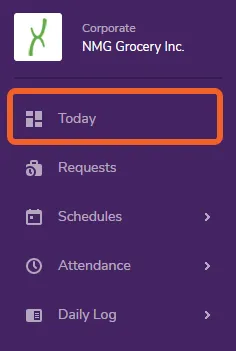
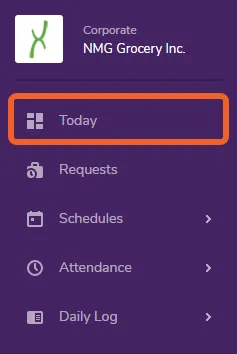
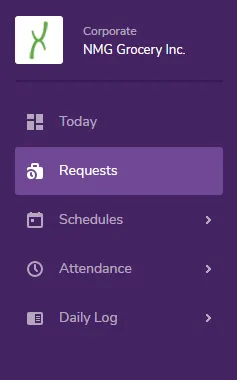
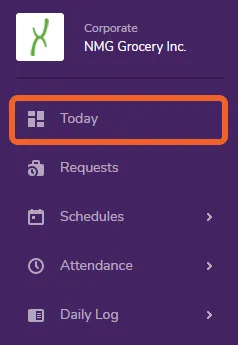
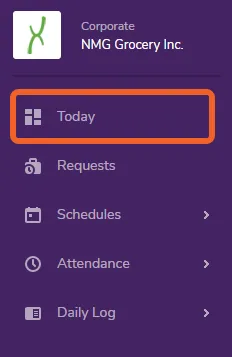
This guide will walk you through the features of your Today Page, from top to bottom. To get to the today page, simply click the Today tab in the left side navigation menu.
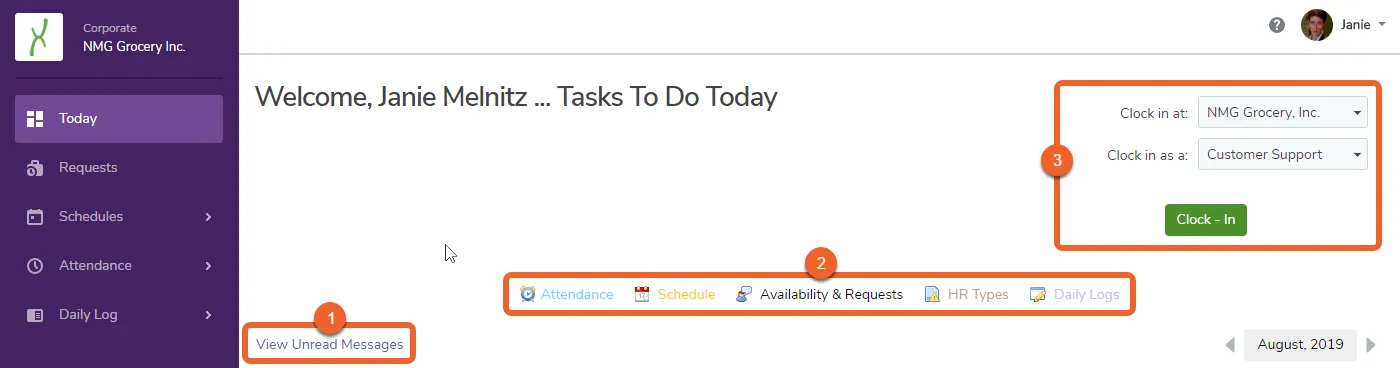
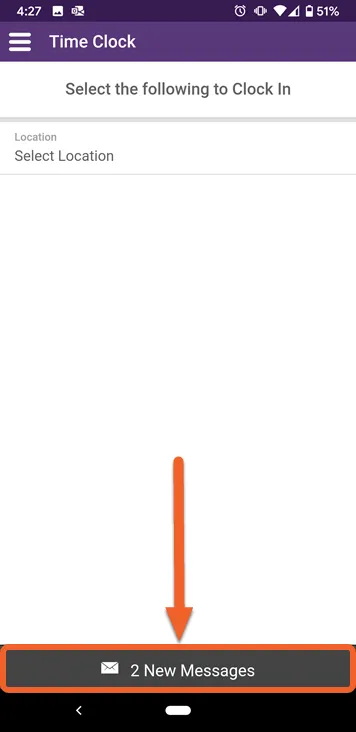
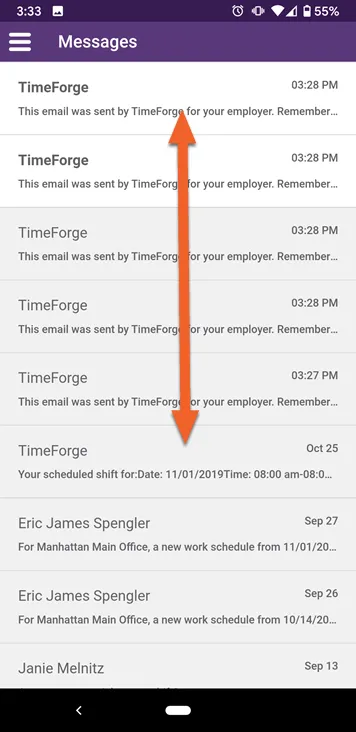
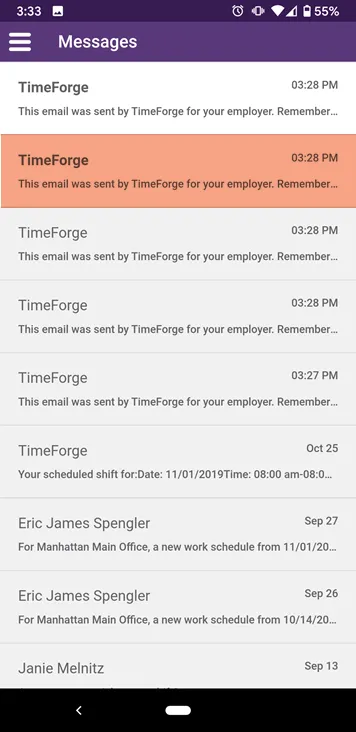
1. If you have unread messages waiting for you, you can click this link to be taken directly to your Messages inbox. Messages can include information from TimeForge about planned maintenance, as well as messages from your Manager or coworkers regarding your availability requests, bid shifts, and upcoming schedules.
2. These quick links will take you to other areas of TimeForge that may be relevant to you, such as your schedule or availability. Additional links are available to you on the left side of the screen as part of the navigation menu.
3. Depending on your company’s policies, if you are allowed to clock in from the computer you are using, an appropriate clock-in message may be displayed here. You should always check with management to be sure you are clocking in from an approved device.
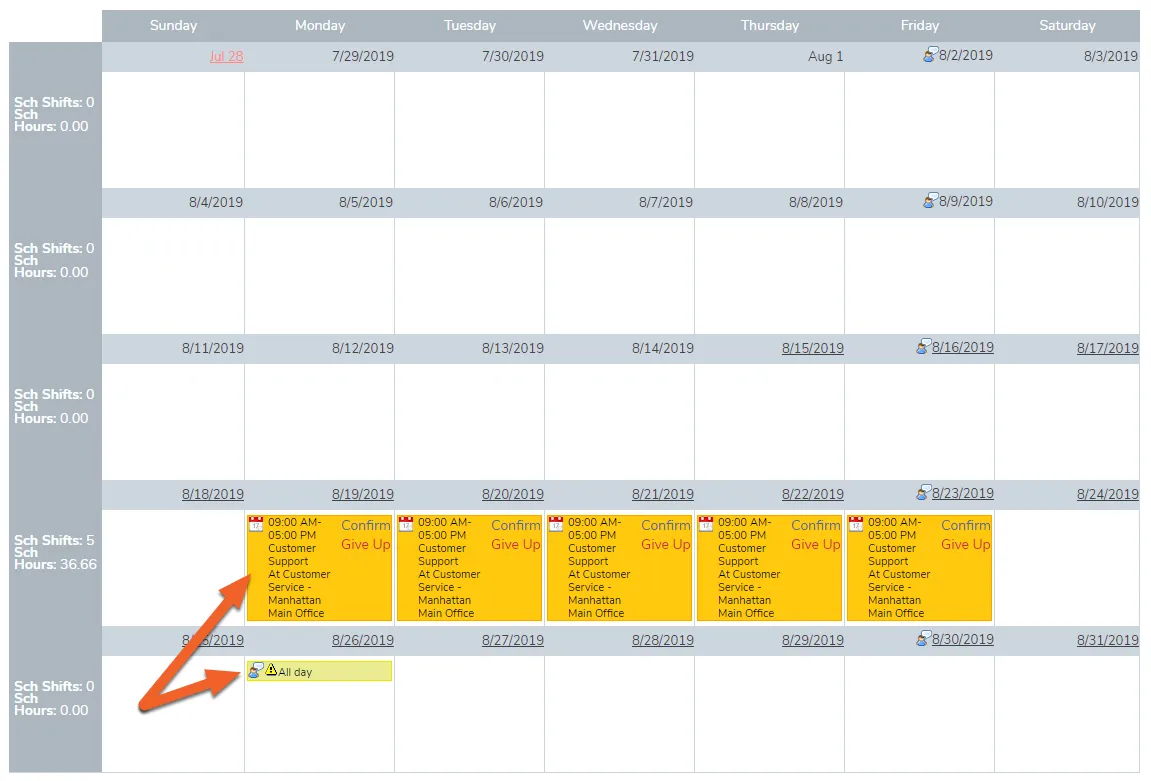
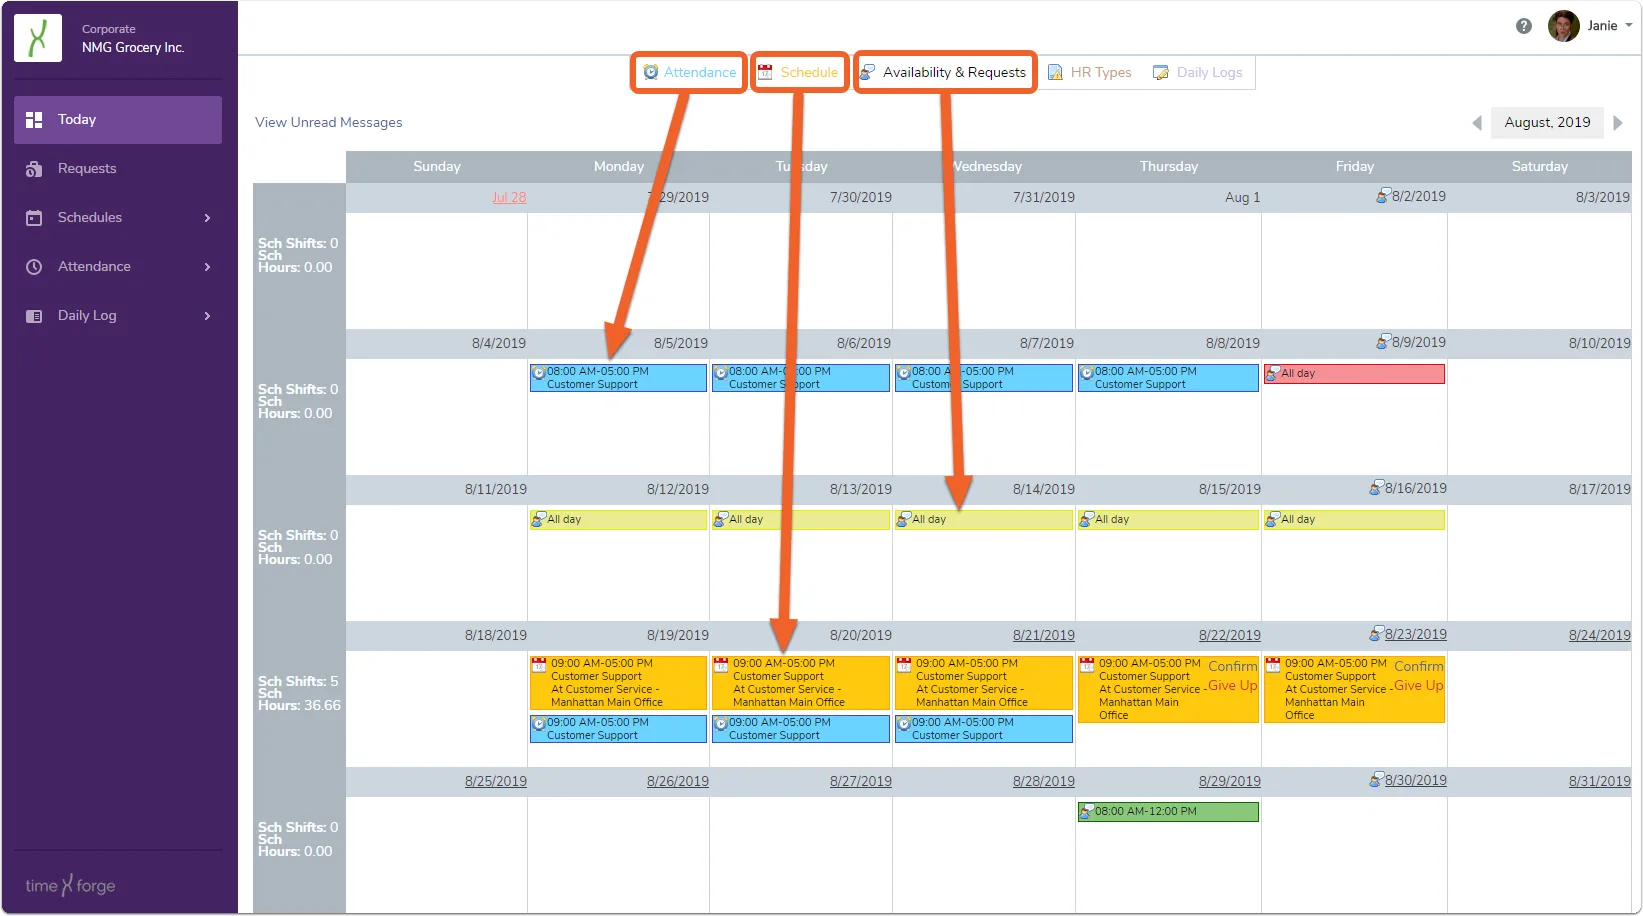
While Managers see an overview of staffing on the today page, Employees see a convenient calendar with their schedule, availability requests, and any important alerts.
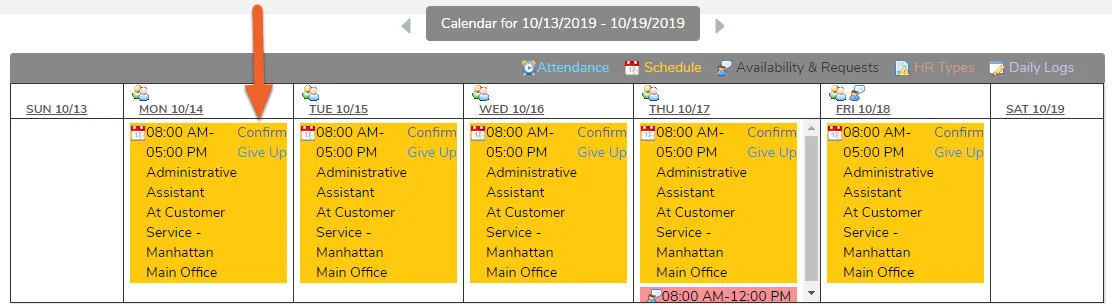
In this example, we see the employee is scheduled to work Monday through Friday 9AM-5PM as Customer Support in the Customer Service department at the Manhattan Main Office location. The employee in this case has the option to confirm each shift or give it up – allowing other employees to pick up the shift in their stead. Additionally, the employee has a pending time off request for the following Monday.
Whether employees must confirm their shifts or whether they can give up/pick up shifts is constrained by the company’s settings.
Bottom of the Today Page (Requests and HR Activities)
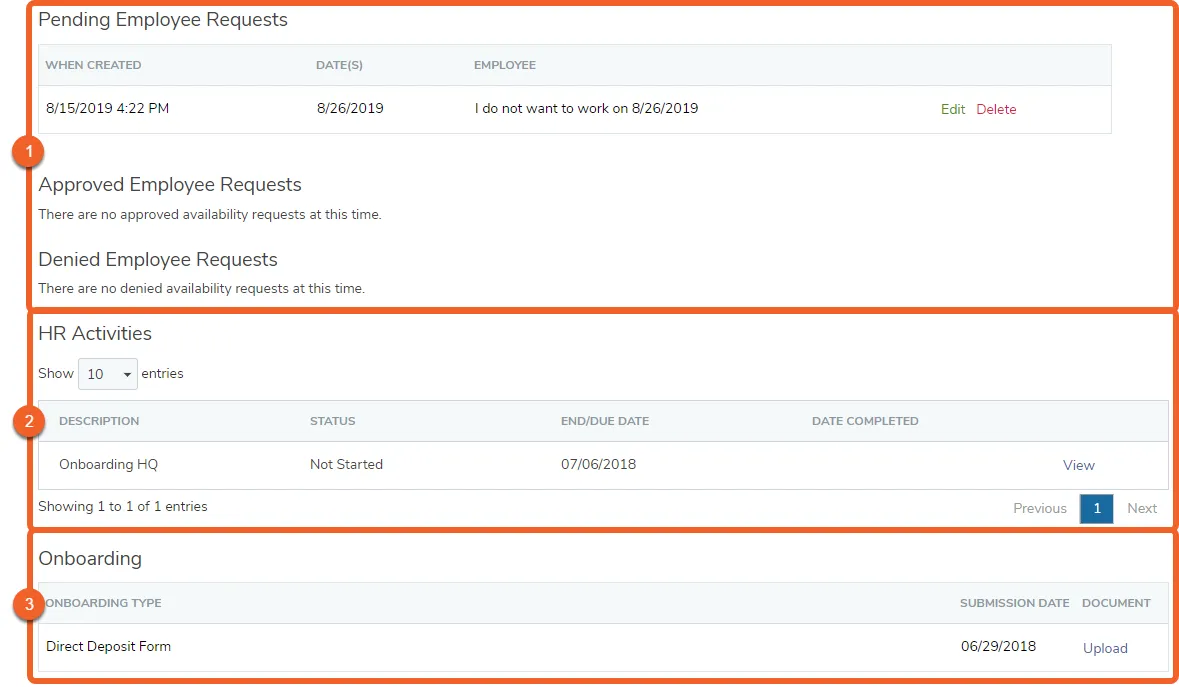
Below the calendar, you will see sections for Pending, Approved, and Denied availability and time off requests, and below that, any outstanding HR activities and onboarding documents.
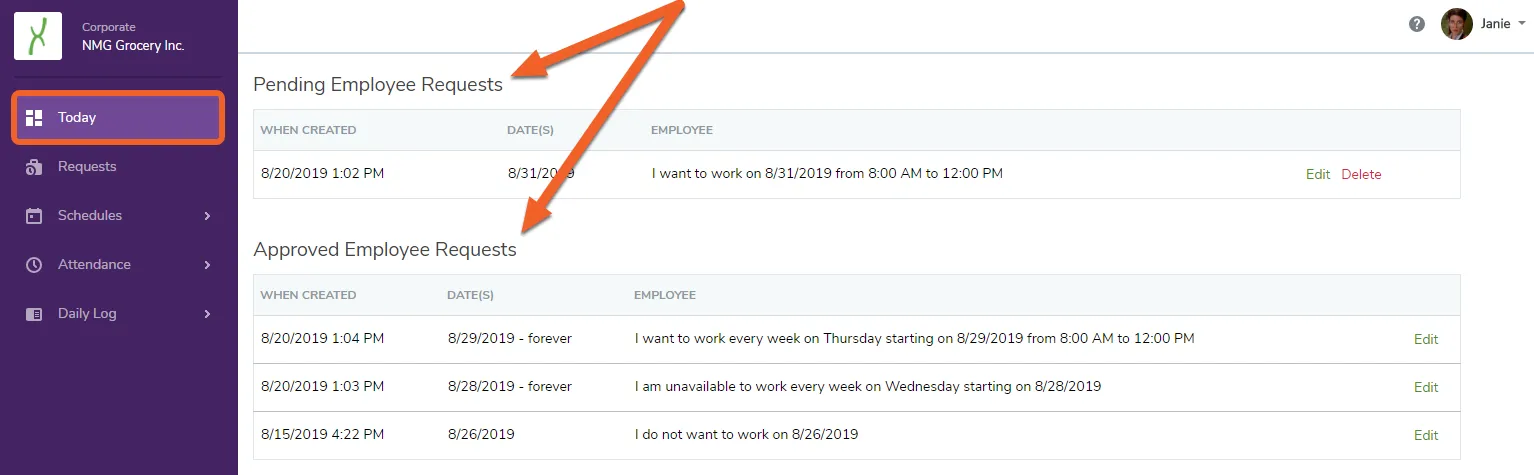
Pending Employee Requests are schedule requests or changes to availability that have not yet been reviewed by your management team. These are displayed for your reference. Approved Employee Requests are schedule requests or changes to availability that have been allowed by your management team, while Denied Employee Requests are those that have been rejected by your management team.
HR Activities contains any tasks that need to be performed for HR, such as acknowledging receipt of documents, signing forms, or completing a certification course and submitting the paperwork. These may be listed with a status and due date.
Onboarding contains the Human Resources documents relevant to your job. These are displayed for your reference.
Clock in or out from the Today page
TimeForge Attendance is a powerful online time clock system that keeps track of when you clock in/out and when you take breaks. This makes it easier for management to review and approve your payroll hours. In addition to basic time punch information, TimeForge can also track your declared tips and mileage (e.g. if you’re a delivery driver). You can also enter notes about each shift, which can then be reviewed by your manager at a later date.
You can use the clock in/out feature on the Today page to start or end your shift or to take breaks. Clocking in/out can also be done from the Employee mobile app if your employer allows it.
Log into TimeForge or, if you’re already logged in, click the Today button to visit the Today page
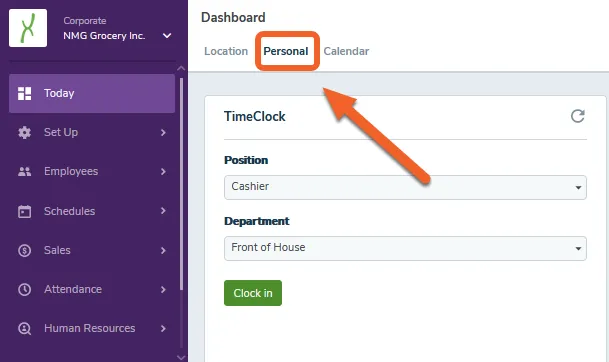
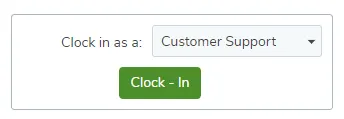
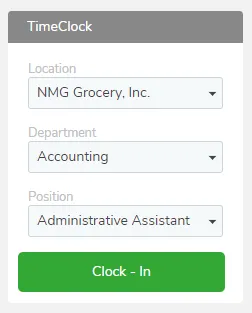
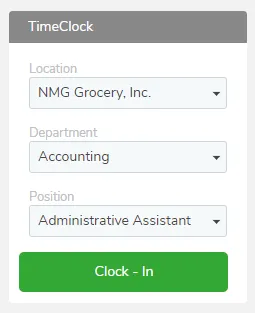
If you are on a computer which allows employees to clock in with TimeForge Attendance, you will see a Clock - In button. Click the button to clock yourself in for the selected Department and/or Position.
Depending on the clock in/out rules set up by your employer or manager, you may also notice that:
Clocking in or out may require manager approval if you are too early or too late.
Your clock in or out time may be rounded.
You may only be able to clock in or out from specific computers or networks.
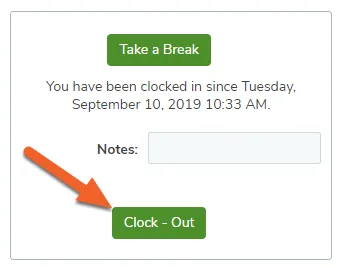
When you are ready to clock out of TimeForge Attendance, you should first enter any declared tips, mileage, or notes which are relevant to the shift, then click the Clock - Out button.
Take or end a break
TimeForge Attendance is a powerful time tracking tool for businesses and staff members alike. Employees can clock in and out using TimeForge, track scheduled and unscheduled breaks, lunch breaks, meal periods, and others. Taking breaks is easy with TimeForge!
When you log into TimeForge, click the Today tab in the left side navigation menu to visit your Today Page, also known as your employee dashboard. Here you can see important information about your schedule, time off or availability requests, messages, and more.
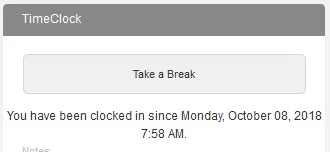
If you are on a computer which allows employee clock-ins with TimeForge Attendance, you will also see a button to clock in. Make sure you’re clocked in – otherwise you won’t be able to take a break through TimeForge.
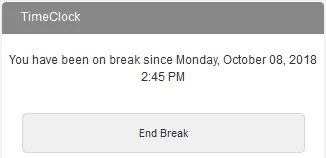
When you are ready to end your break, simply return to the Today Page and click the End Break button.
Fill out and submit onboarding documents
Employees can receive onboarding documents and notifications directly through TimeForge, without having to learn a separate system or shuffle piles of paper forms. This is part of TimeForge’s powerful Human Resources module.
If your HR department has sent you materials through TimeForge, you can use these steps to fill out and submit your documents. As always, make sure you follow any instructions provided by your HR department!
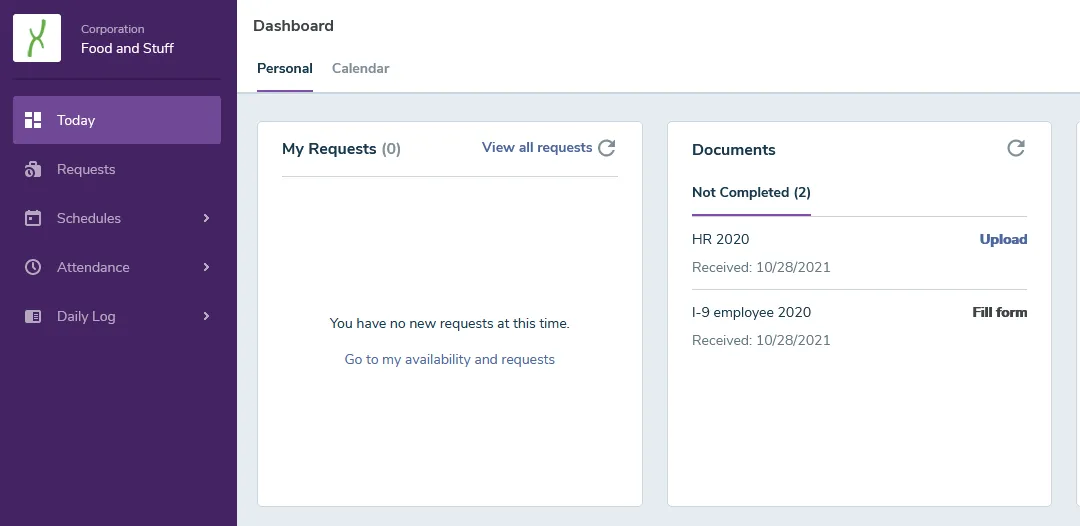
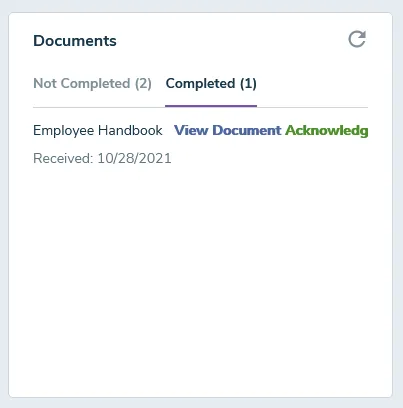
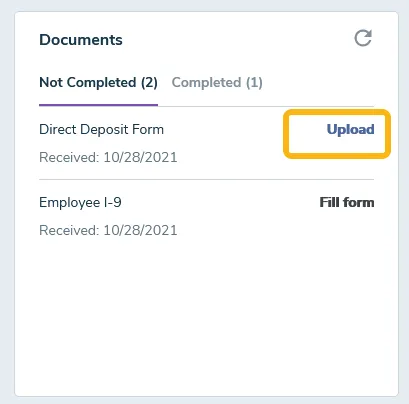
While logged in and on the Today Page, navigate to Documents module. Your page should look something like this:
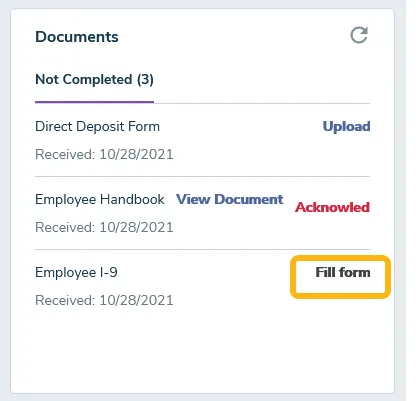
If the link says Fill Form...
The form is an online form. Simply click the link to open and complete the form online in your browser window.
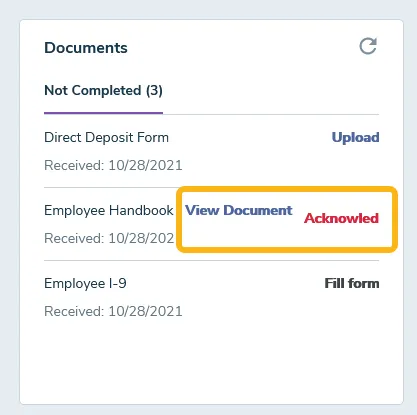
If the link says View Document/Acknowledge
The document is a PDF or another type of file. You’ll need to view and download the file to proceed. Don’t worry! We’ll explain how below.
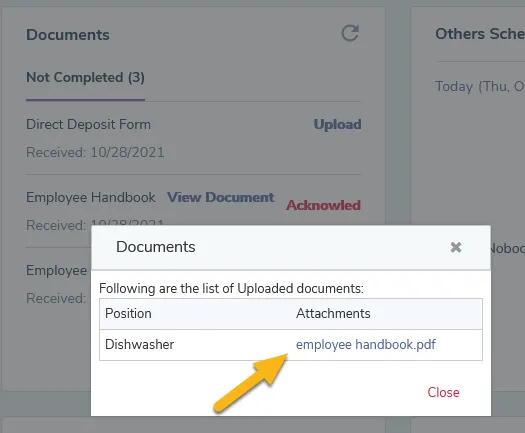
Click View Document to select the file uploaded by your employer. Click on the name of the file next to open the document.
Depending on your computer’s settings, this may open the document in a program like Adobe Reader, or the document may simply open up in a new browser window. If at all possible, open with Adobe.
After you have read the document, make sure to click on the Acknowledge option. This will move your document to the Completed section.
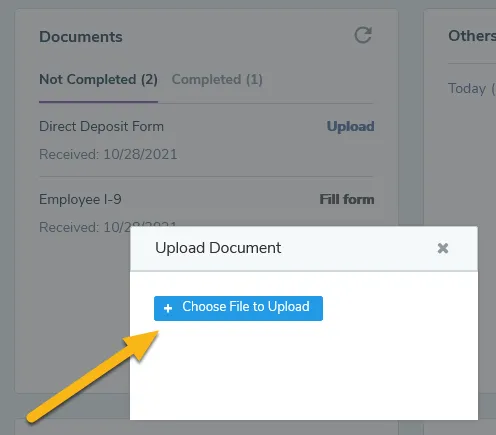
Click the Upload link to attach and upload your completed and signed form.
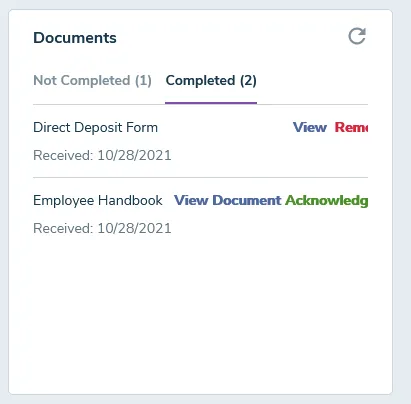
After you select the file you want to upload, the document will appear in the Completed section and available for HR to view.
Help! When I try to download or save the filled-out form, it only saves a blank version!
That’s because Adobe is proprietary software, and you likely don’t have access to a paid version. No sweat.
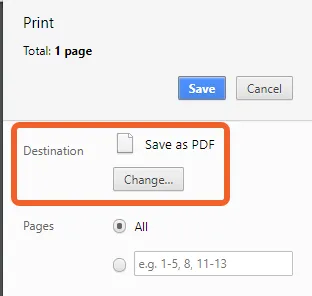
If you are filling out a PDF form, and you are unable to save, you may need to select the print option, then choose “Print to PDF” or “Save to PDF,” depending on your system. This will “print” a filled-out version of the form to your desktop as a PDF file.
Here’s an example of what it would look like if you were to select print and then “Save as PDF” in Google Chrome:
View and send messages through TimeForge
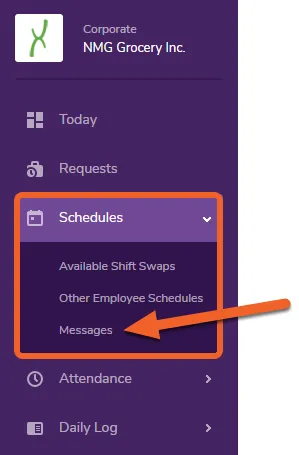
TimeForge’s messaging system provides a single location for convenient and simple work-related messages. Messages sent or received through TimeForge are accessible via the Messages page inside the application. If you have an email address configured in TimeForge, you will also receive messages by email.
To send and receive messages by email, make sure that you have an email address associated with your TimeForge profile. Your managers and coworkers will also need to set their email addresses in order to do the same.
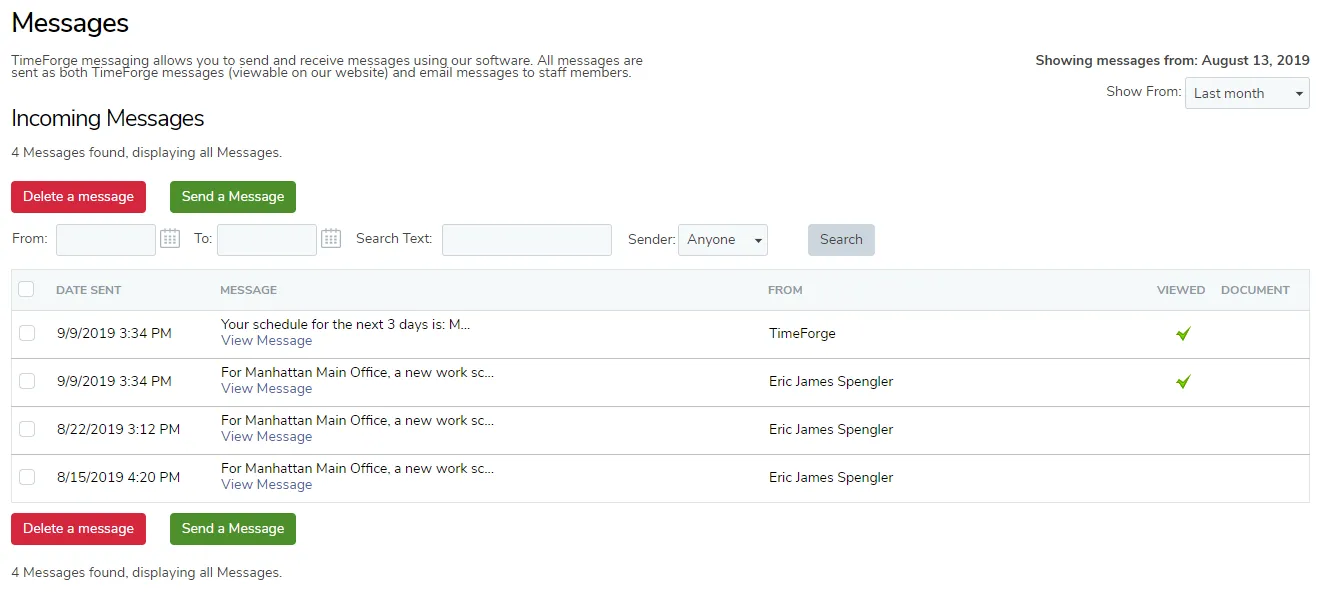
The Messages page displays all incoming / received messages from managers and other staff members, as well as messages that you have sent to other team members.
Incoming messages are displayed first, followed by Sent messages:
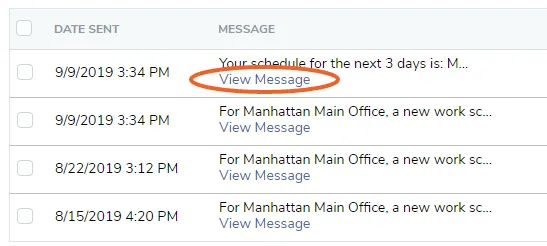
To read a message, simply click the View Message link.
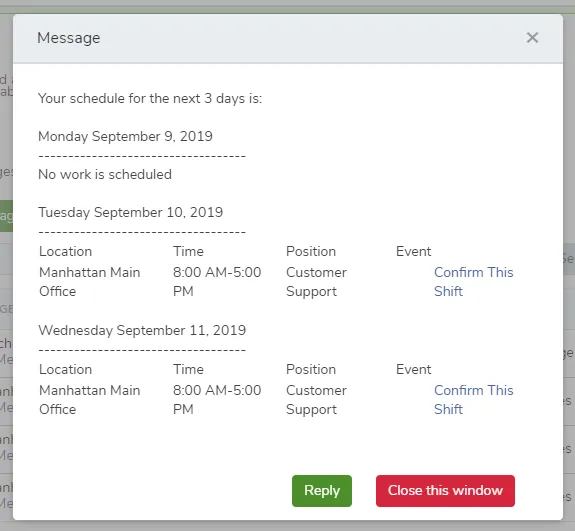
The message will display in a pop-up window and will allow you the option to Reply or to simply close the window. For some messages, such as automatic schedule notifications you’ve signed up for (see the Alerts tab in your profile), the message might also contain links to confirm your shifts.
Viewed messages receive a check mark next to them in the list:
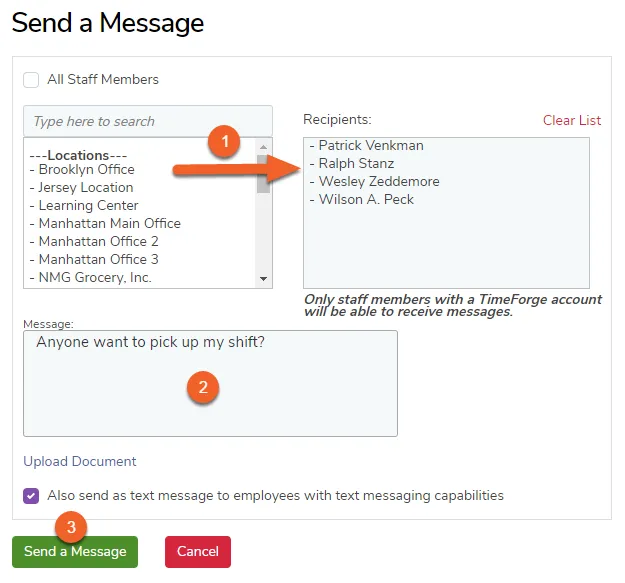
Start by choosing the staff members that should receive your message. Staff members are displayed in an easy to read / locate fashion, and you can send a message to multiple staff members by simply selecting all of the staff member names. Team members and managers that do not have a TimeForge account are shown with a line drawn through them, as these individuals cannot receive messages using TimeForge.
Next, enter an appropriate message in the text field. Selected individuals will receive notification of the message through their TimeForge account as well as through email.
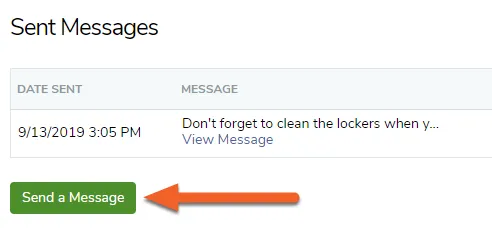
When you’re ready, click Send a Message to send the message – the message will now appear in your Sent Messages section.
You can review the status of your sent messages at any time. TimeForge records the message date and time, the body of the message, and the number of recipients (both within TimeForge and via email). You can also view the names of the people who have viewed your message inside of TimeForge by clicking the number in the Viewed Messages column.
Employee Guides › Account Settings
Edit your profile and choose which alerts to receive
TimeForge is a powerful tool for employees, and it can send nightly email alerts about upcoming shifts that you are scheduled to work. Your management team may use your email address to contact you with important work messages. TimeForge can even allow you to view your schedules and attendance on your cell phone and on Facebook!
In addition to nightly email messages, TimeForge can send a reminder text message to your cell phone before your shift starts, so you always know when to work!
To enable notifications for your schedule, TimeForge needs to know your email address and cell phone number. The instructions below will help you set up your account to receive alerts.
Go to your profile by clicking the menu in the upper right
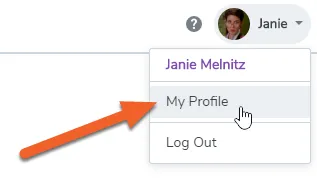
When you log in, you’ll see a drop down menu in the upper right corner of the screen. Click this to open the menu, then select My Profile from the options.
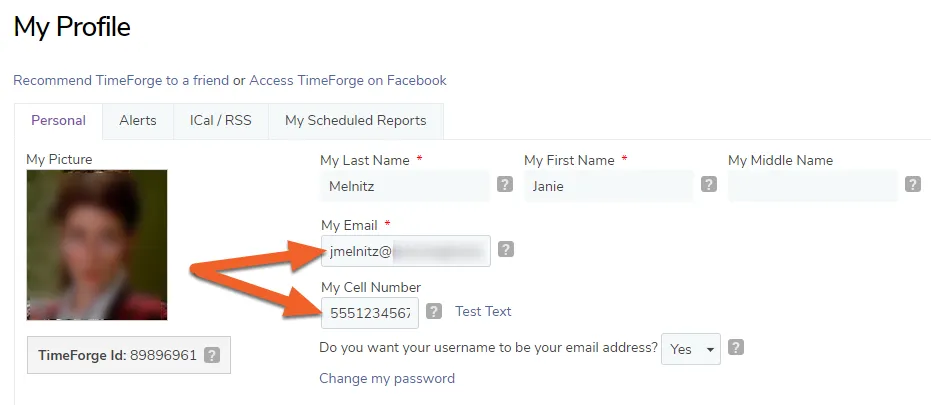
By default, you’ll see the Personal tab, which contains basic information such as your picture if you have one, your full name, email, and cell phone. Enter in your email address and cell phone into their respective boxes.
Open the Alerts tab and choose which alerts to receive
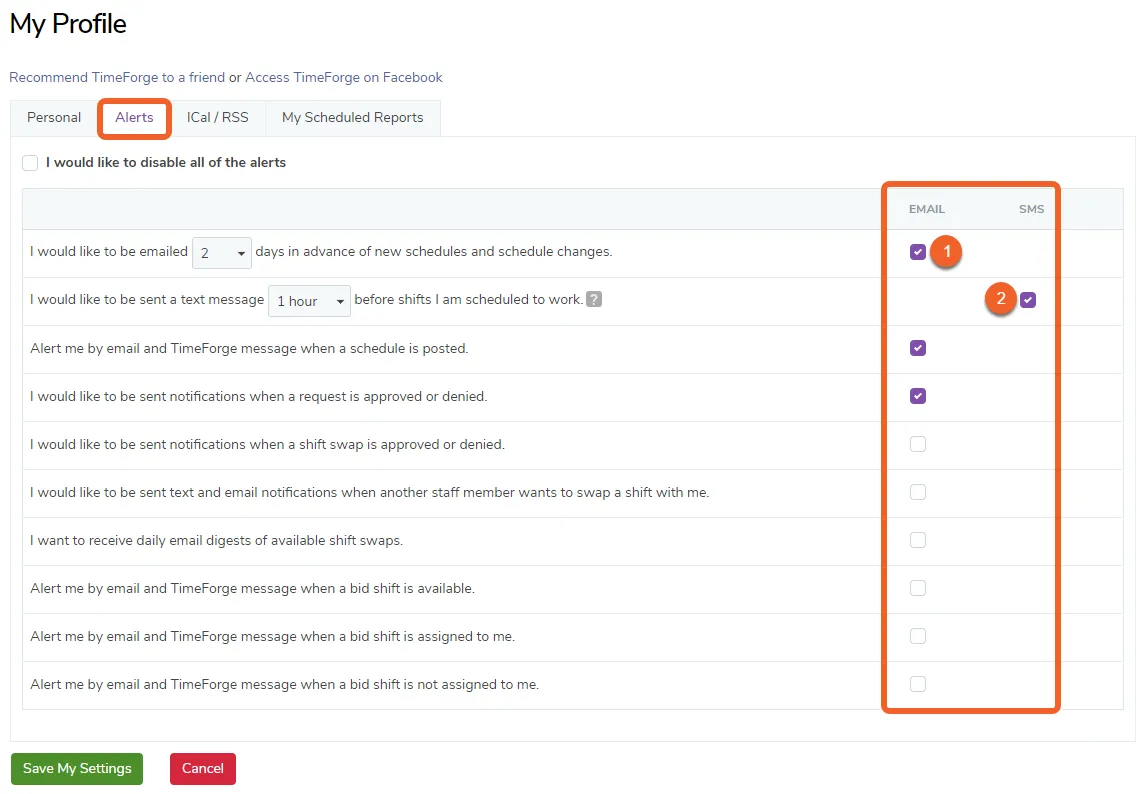
Now that you’ve set up your email and cell number, it’s time to configure your alerts. First, click the Alerts tab. Then, check the boxes for the alerts you want to receive by email and SMS (text message).
As you can see, TimeForge can generate a number of different email and text message alerts, based on the information that you would like to know about.
For example, you can receive an email or text message to remind you of:
Daily Schedules
Bid Shifts
Swap Shifts
Approval/Denial of Shift Swaps
Approval/denial of All Requests
The top two options are likely to be important for most employees:
Check this box if you would like to receive emails about new schedules and schedule changes. The number in the drop-down box (above shown as “2”) is the number of days you would like to be notified in advance, and can be set up to 30 days. You will only be able to receive information about schedules that your management team has posted/published.
Check this box if you would like us to send a text message reminder before your shift begins. You can receive these reminders up to 24 hours in advance of your upcoming shift. You may be charged by your cell phone carrier to receive the text message. TimeForge is not liable for any text messaging charges that you may receive from your carrier.
Click the Save My Settings button to save your changes
Don’t forget to click Save My Settings when you’re done.
Employee Guides › Availability & Requests
Create requests or change your availability
Creating time-off or want-to-work requests and changing your availability to work is easy with TimeForge!
Staff requests are immediately sent to management for manager approval, and you will receive notifications through TimeForge and email when your request is approved or denied.
In many restaurants, retail businesses, and other industries, staff members are required to work with two different concepts for work preferences:
Availability is when you are normally available to work. For example, you may be available on Monday, Wednesday, or Friday from 8am - 2pm. Perhaps you are not available to work on Tuesdays or Thursdays because of school conflicts or another job. Availability sheets are typically passed out on a continuous basis (school semesters are common) and are filled out by staff members.
Requests are normally one-time changes to your normal availability. For example, you may be available next Tuesday to work because your professor canceled class. In many locations, requests are placed in some sort of log book - either an industry specific manager log (such as a Red Book from Red Book Solutions or a Beat Yesterday book) or a simple spiral notebook or binder.
TimeForge supports both types of work preferences from a single Availability & Requests page. Recurring requests can be be made within TimeForge, similar to an Availability sheet, and individual daily Requests can also be made within TimeForge.
TimeForge supports 4 different types of Availability and Requests that enable staff members to easily customize their work schedule:
Available to work. By default, you are always available and can be scheduled to work. Create either Wants to work, Does not want to work, or Unavailable to work requests to change your availability. Each of these types is explained below.
Wants to work. If you would like to work a particular shift, for example on a day that works well with your schedule, create a Wants to work request.
Does not want to work. These requests indicate that you would prefer to not work but can work if required.
Unavailable to work. If you cannot work, an Unavailable to work request will ensure that you are not placed on the schedule during this time frame.
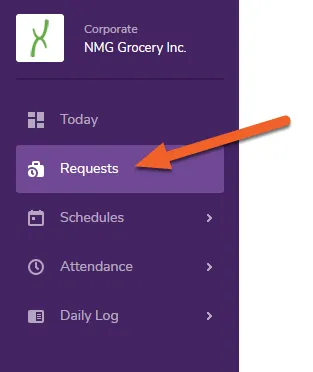
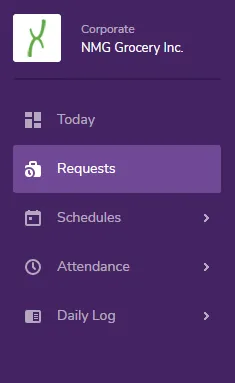
Click the Requests tab in the left side navigation menu
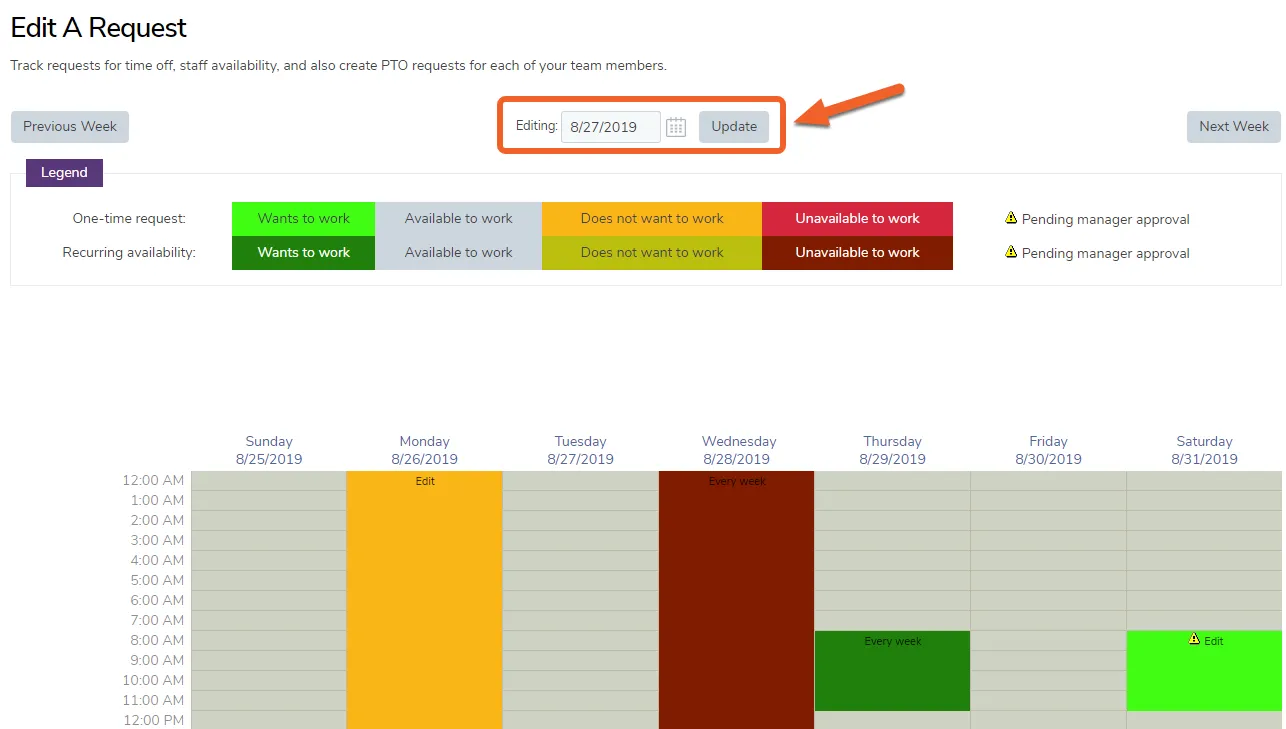
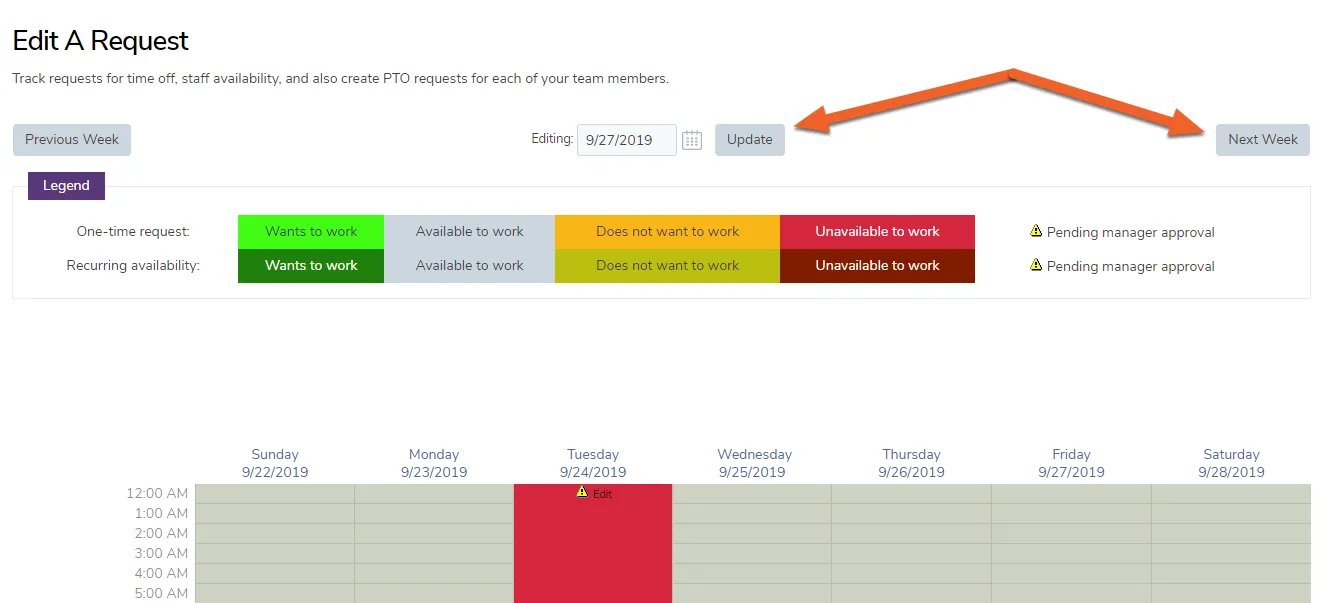
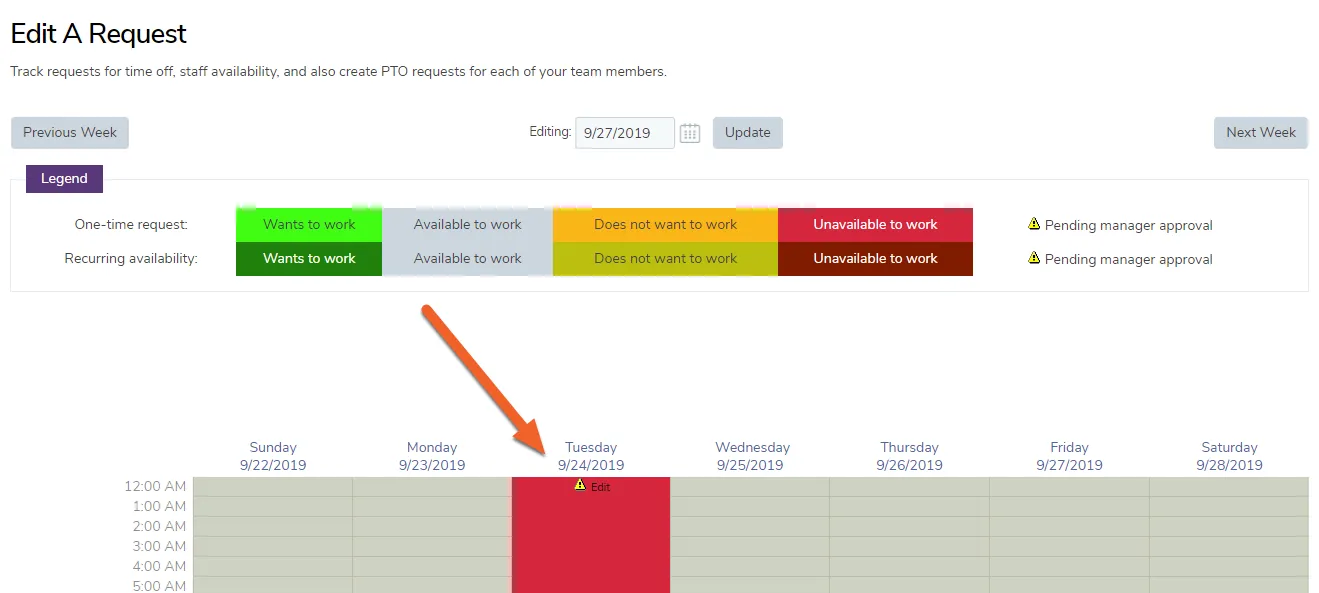
The Request Calendar shows the current week and any requests or availability that have been made, both approved and pending. You can navigate around this page by clicking on the Previous Week or Next Week buttons. Alternatively, you can use the date selector (centered between the Previous/Next buttons) to jump directly to the work day of your choosing.
Create a new Request or update an existing Request
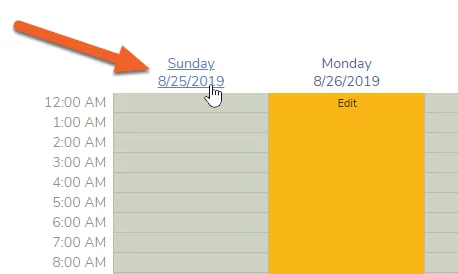
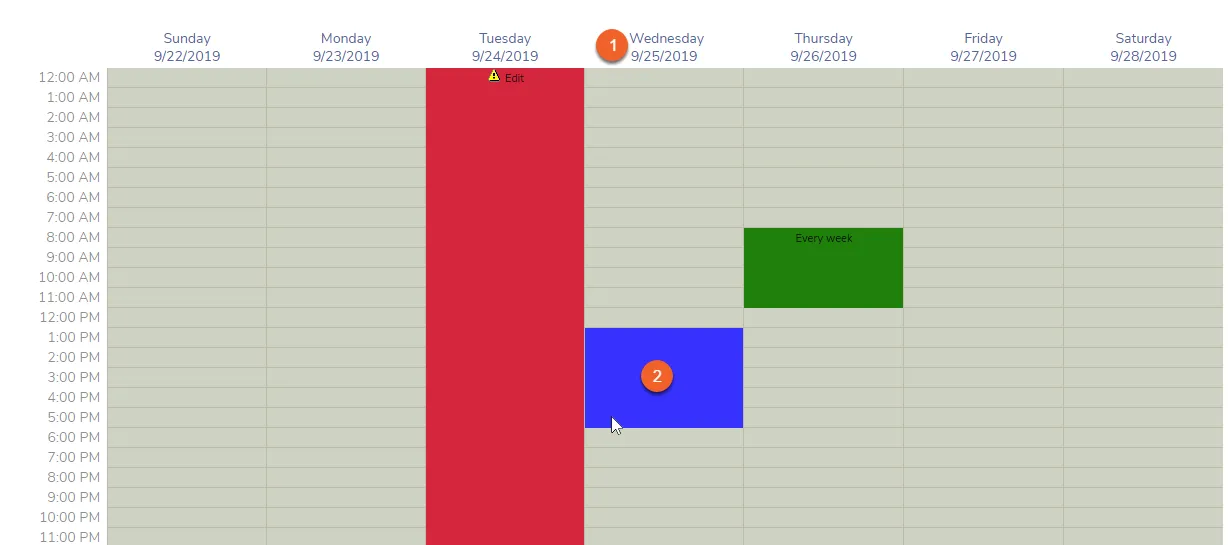
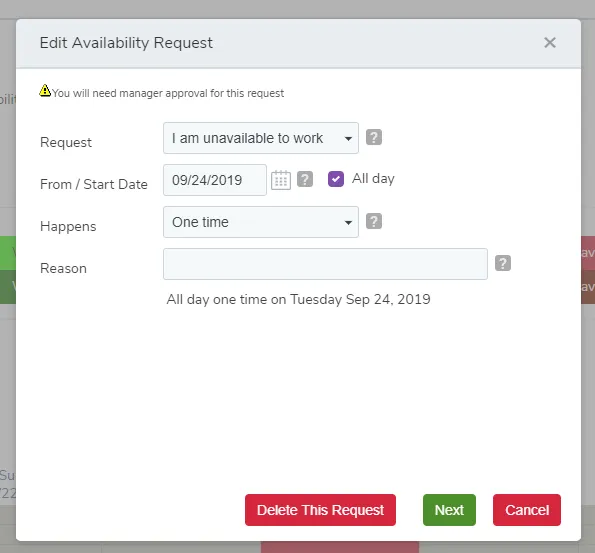
To create a request or update your availability, click on the date links above each column on the calendar, or click and drag your mouse over the date and times you want to adjust. This will open a pop-up window, allowing you to fill out the details of your availability request.
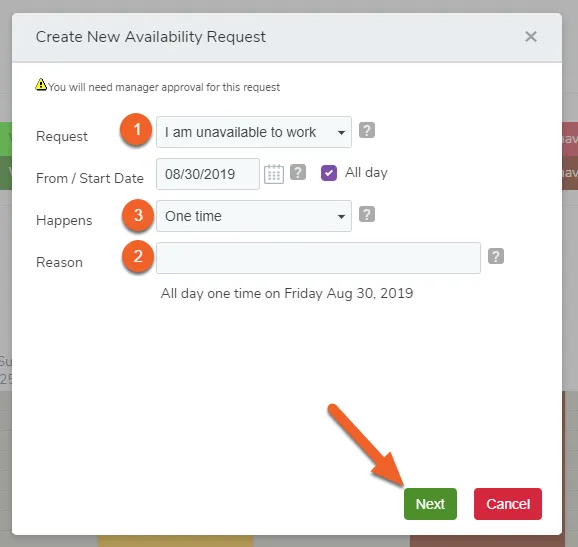
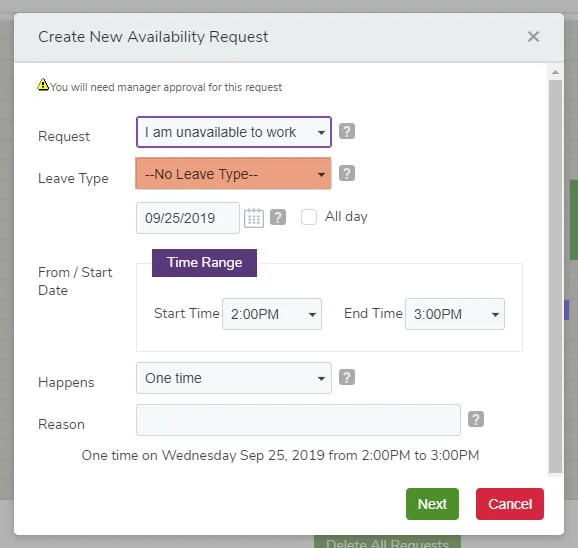
After clicking on a date on the Calendar, the above pop-up will be displayed.
Choose the appropriate request (Wants to work, Available to work, Does not want to work, or Unavailable to work).
Enter a reason for management to review, and if necessary.
The Happens selection can be modified so that the request can happen:
One time: The request occurs only once on the start date
Daily: The request occurs every day between a start date and end date
Every weekday (Mon - Fri): The request happens on Monday, Tuesday, Wednesday, Thursday, and Friday’s in between the start date and the end date
Every weekend (Sat - Sun): The request happens on Saturday’s and Sunday’s in between the start date and the end date
Every Mon, Wed, and Fri: The request occurs on Monday, Wednesday and Friday’s in between the start date and the end date
Every Tue and Thurs: The request occurs on Tuesday and Thursday’s in between the start date and the end date
Weekly: You can pick which days of the week the request occurs on
Monthly: The request can occur either monthly or based on the day of the month.
TimeForge will also allow you to make a request for specific parts of the day. You can enter your own time range by unselecting the checkbox that says All Day.
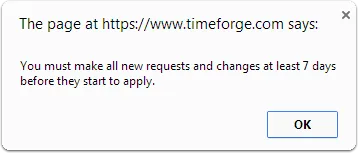
Managers can require that all requests and availability changes be made several days in advance, to ensure that the labor schedule is not disrupted. In this example, requests must be made at least 7 days in advance, and TimeForge will not allow you to continue:
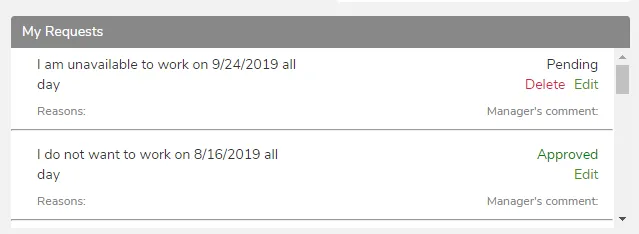
After a request or change to availability has been made, you can see the request and status on your Today page.
Request time off
This article will show you how to request time off in TimeForge using a Leave Type. The Leave Types you have access to will depend on your company’s rules regarding PTO (for example, they might offer a week’s worth of paid leave after your first year, or you might be required to accrue your leave over time based on the number of hours you worked). Leave types can be paid or unpaid, accrued or not.
If your employer requires you to submit PTO requests a certain number of days in advance, TimeForge will automatically let you know if you try to create a request that does not meet the requirements.
You can either use the date selector in the middle of the page or the Next Week button to the right. Many businesses require employees to submit their requests at least a week in advance.
When you’ve found the right date, you can either:
Click the link at the top of the appropriate column, or
Select a time period by dragging the cursor between two times (e.g. 1PM and 5PM, to request a half day).
Choose the type of leave you wish to use for this request (if any)
If you are using a leave type, such as PTO or some other accrued leave, make sure you select it in the drop down menu. You will only be able to view and select leave types for which you are eligible.
Be sure to fill out the rest of the form, then click the Next button to submit your request. Your manager will be notified of the pending request, and you will be able to see and edit the request both on your Today page as well as under Requests.
Edit or delete an availability or time off request
Editing and deleting requests and changing availability is easy with TimeForge! Prior to manager approval, Pending Requests can be edited or deleted. After a request is approved by management, you cannot edit the request, but you may delete it.
Click the Requests tab to go to your requests page
Requests that are pending manager approval can be seen on your Request Calendar with a small caution icon next to them. These requests may also be edited or deleted.
After a request or change to availability has been made, you can see the request and status on your Today page.
Employee Guides › Schedules & Time Cards
View your upcoming work schedule
As an employee using TimeForge, you can see work schedules that your management team has posted. Schedules can be emailed to your email address, sent to your cell phone via text message, or you can log in to TimeForge at any time to review posted schedules.
When you log into TimeForge, the first thing you will see is your Today page (which acts like your home page in TimeForge). Your Today page contains a ton of useful information regarding your upcoming schedule, all provided in an easy-to-read calendar format:
The legend above the calendar tells you what you’re looking at. For example, attendance entries have a clock icon and are blue, while your posted shifts have a calendar icon and are in orange.
Time-off requests and availability are denoted by the team member icon and are color-coded based on the type of request (e.g. Wants to work, Does not want to work, Unavailable to work).
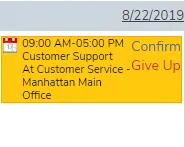
Your scheduled shifts will include important details, such as the hours scheduled (e.g. 9AM-5PM), what department (e.g. Customer Support), and for what position and location (e.g. Customer Service rep for the Manhattan Main Office), as in the example below:
Using your calendar, you can also perform a number of work and shift related actions:
Give Up a shift, allowing other staff members to pick up and work your assigned shifts.
Pick Up a shift, if another staff member or coworker has given up a shift that you would like to work.
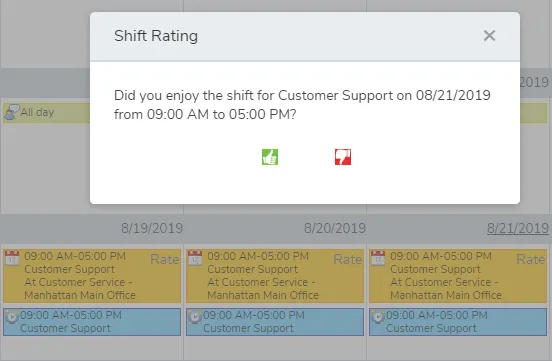
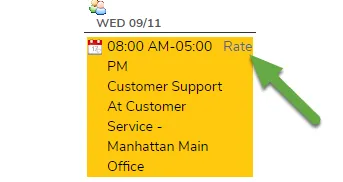
Rate a shift after it has been worked, providing feedback to managers about the shift - simply mark the shift up or down. (Shift ratings must be enabled for your location. In enabled, a Rate link will appear next to your worked shifts.)
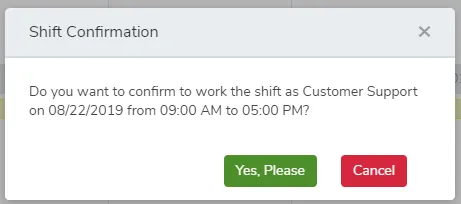
Confirm a shift, indicating that you intend to be at work for this shift.
TimeForge uses data collected from Ratings, Shift Confirmations, and Shift Swaps in an attempt to build future work schedules that are better suited to your needs.
Accept or reject a shift
TimeForge is a great tool for managers because it makes scheduling employees and tracking attendance simple.
TimeForge is also great for employees because it gives them the power to accept or reject their shifts for someone else to pick up. If an employee decides to deny their shift and give it up, manager approval will still be required before it takes effect. The employee will have to log in to their TimeForge account and follow these steps to accept or reject their shift.
The employee’s upcoming work schedules are displayed in an easy to read format, and include today’s scheduled shifts as well as any upcoming shifts that managers have posted. Each shift includes the start and end times, as well as the position (and section) the employee is supposed to work. Scheduled shifts appear in yellow.
The employee can click on Confirm or Give Up for any particular shift, which acts as a way to accept or reject the shift.
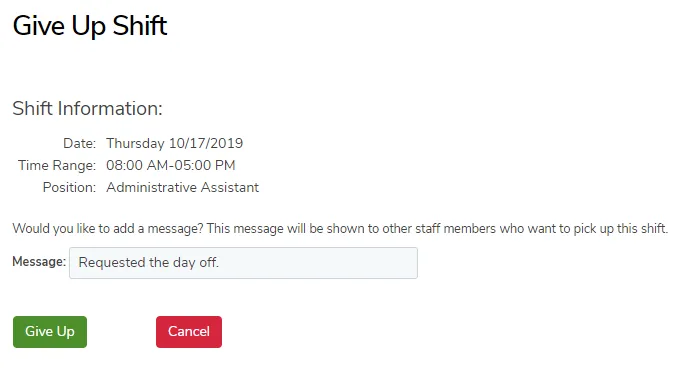
On the Give Up Shift screen, review that the shift information is correct. You can also enter a brief message that will be shown to other staff members and managers before they pick up the shift or before management approves the shift.
Once you give up a shift, it will be “pending” until someone picks it up and the manager approves the swap.
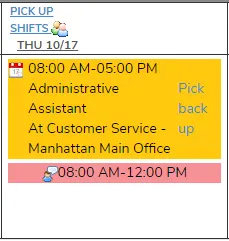
You can pick it back up yourself on the Today page if needed.
Pick up a bid shift or shift swap
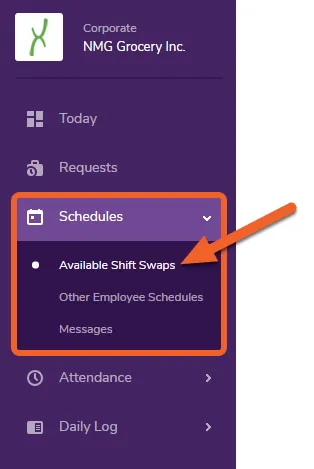
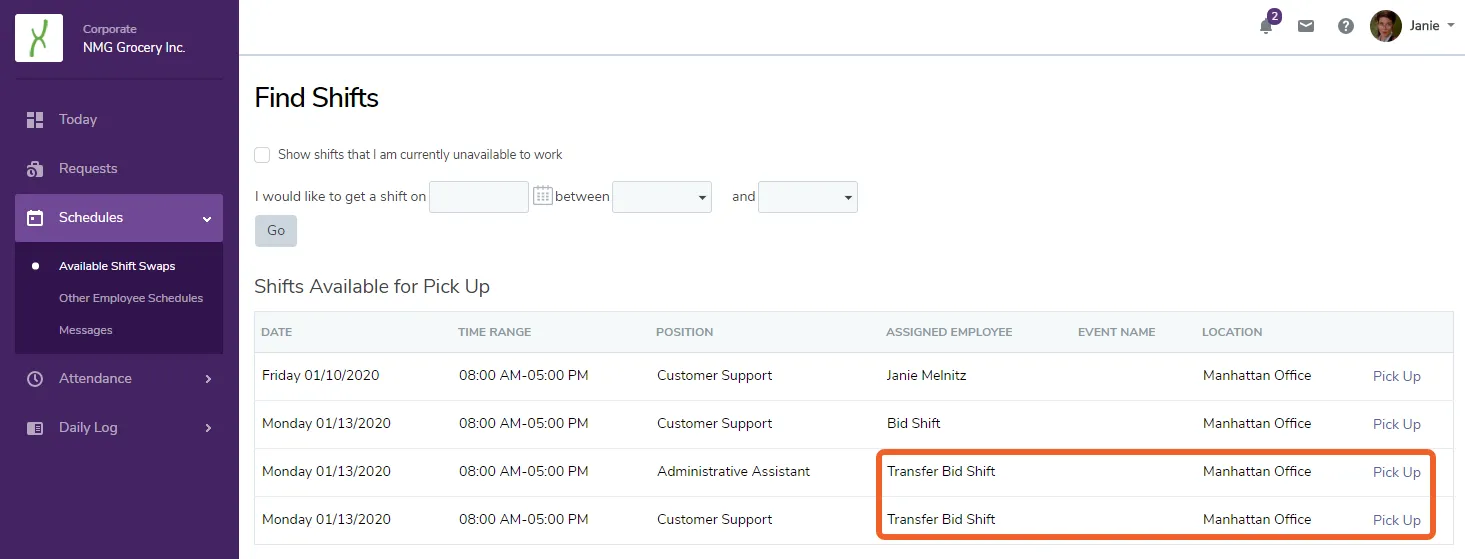
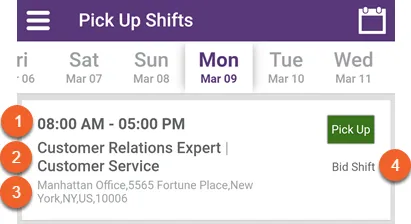
You can Pick Up shifts that have been assigned to other employees (shift swap) or that have been made available as bid shifts or transfer bid shifts by a manager. This is done on the Available Shift Swaps page in TimeForge or directly from the Today Page for any date that has a PICK UP SHIFTS option.
TimeForge provides two ways to look for shifts to pick up, if you would like to work extra hours:
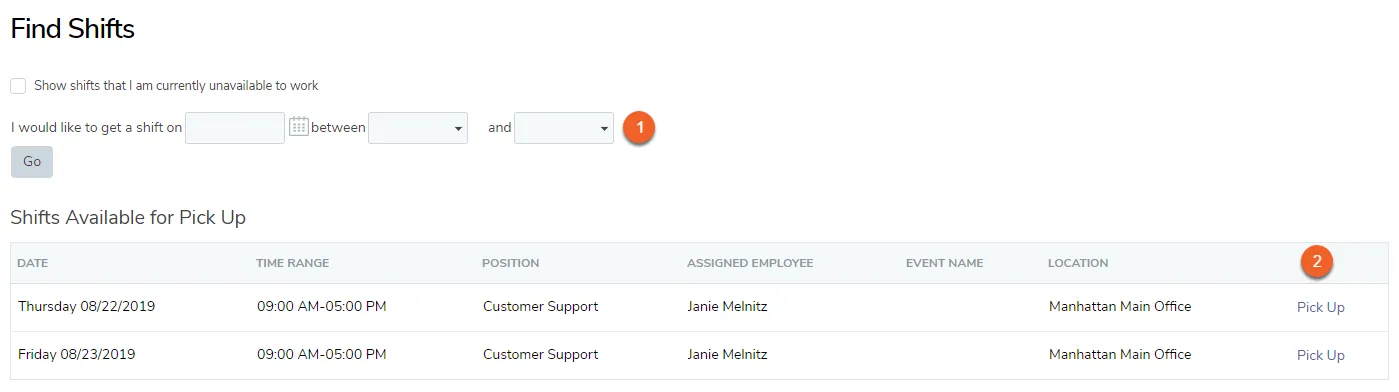
Find Shifts. You can search for shifts on a certain date between the times that you specify. If a shift is found, you may request to pick it up. This option may be useful if there are a lot of available shifts to choose from and you need to narrow down the list.
Pick Up an Available Shift. Qualifying shifts that have already been given up by other staff members are listed beneath the Find Shifts section. These shifts display the date, length of the shift, position, and the employee that is currently assigned to work the shift. If the shift swap is approved, you will be replacing the Assigned Employee.
After searching for shifts using the Shift Swaps page, any found shifts are displayed directly beneath the Find Shifts screen. This shift is currently assigned to another staff member, as shown:
When you click on Request to Pick Up this shift, TimeForge will attempt to reassign the shift to you. This may require manager approval depending on your location’s settings in TimeForge.
Once the shift swap is approved, TimeForge will assign the shift to your account and will notify you (according to your Alert preferences in your profile) that the shift is now your responsibility.
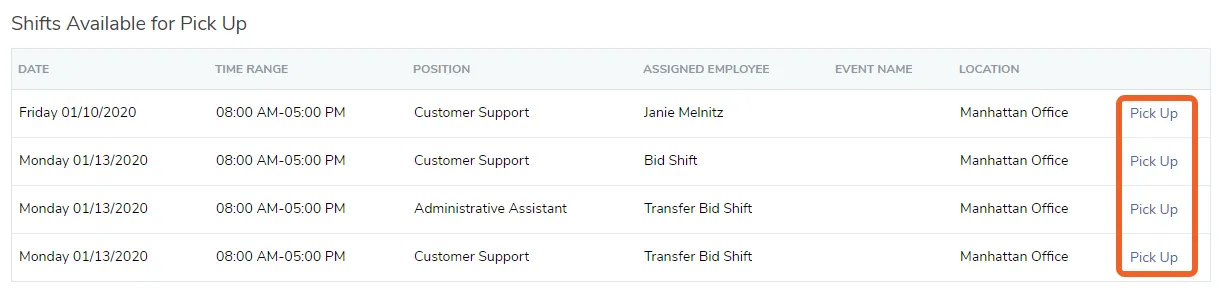
Alternatively, instead of searching for a shift to pick up, you can simply click the Pick Up link next to an available shift. If the shift is a bid shift or transfer bid shift, this will be listed under the ‘Assigned Employee’ column in place of a name.
Again, if approval is required, TimeForge will notify your manager of your request. If the shift swap is approved, you will be notified according to your alert preferences, and TimeForge will assign the shift to your account.
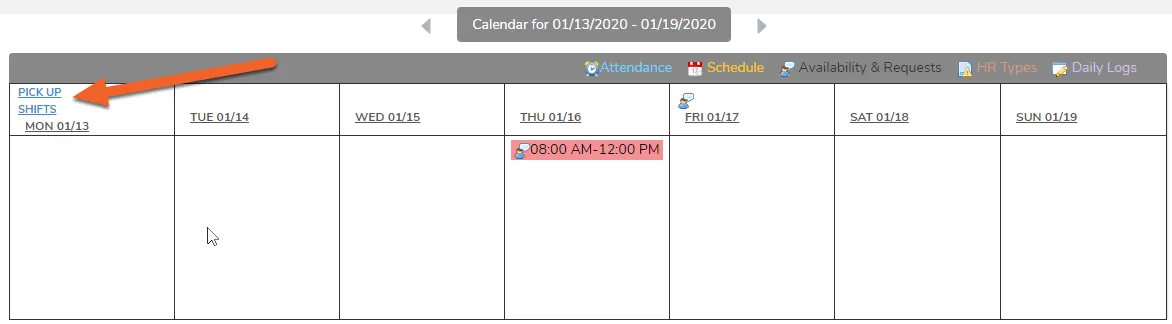
Shifts you are eligible to pick up will also display on your Today Page calendar. Simply click the PICK UP SHIFTS link on the date you’d like to work. This will take you to the Available Shift Swaps page (described above), where you’ll see a list of available shifts.
Pick up a transfer bid shift
Transfer Bid Shifts are just like normal bid shifts, except they’re shared across store locations. They must be enabled by management and scheduled by a manger in order to be available to pick up. When you pick up a transfer bid shift, you follow the normal rules for bid shifts and shift swaps as set by your management, who may require the pick up to be approved before you are responsible for working the shift.
To pick up a Transfer Bid Shift, you follow the same steps as you normally would for picking up an available shift. Any shifts that you are eligible for will display on your Today Page and in your Available Shift Swaps.
If starting from the Today Page, simply PICK UP SHIFTS for the date you’d like to work.
This will take you to your Available Shift Swaps page, where you can select the shift you’d like to pick up.
For Transfer Bid Shifts, you’ll want to make sure you note the location of the shift, as it might be different from your usual/home location.
If manager approval is required, TimeForge will notify the store manager of your request. If the pick up is approved, you will be notified according to your Alert preferences, and TimeForge will assign the shift to you.
Import your schedule into Google Calendar
Here are some quick and easy steps for importing your schedule into your Google Calendar.
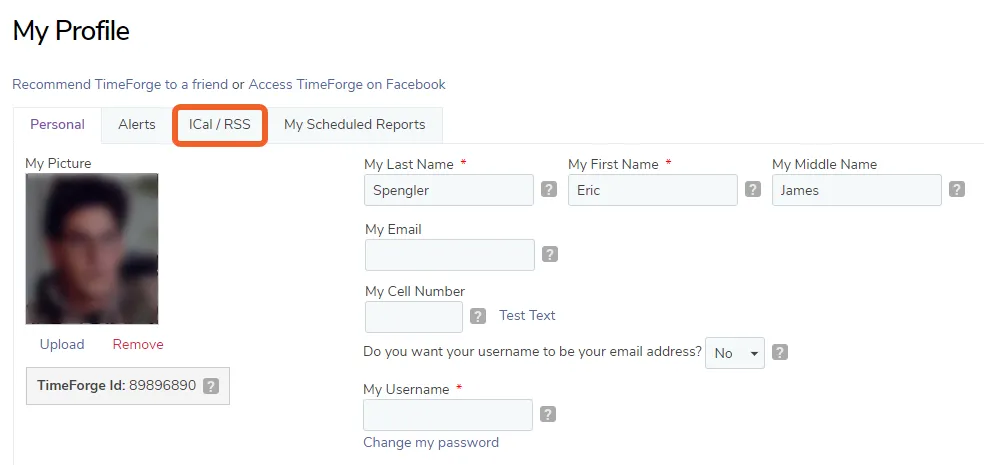
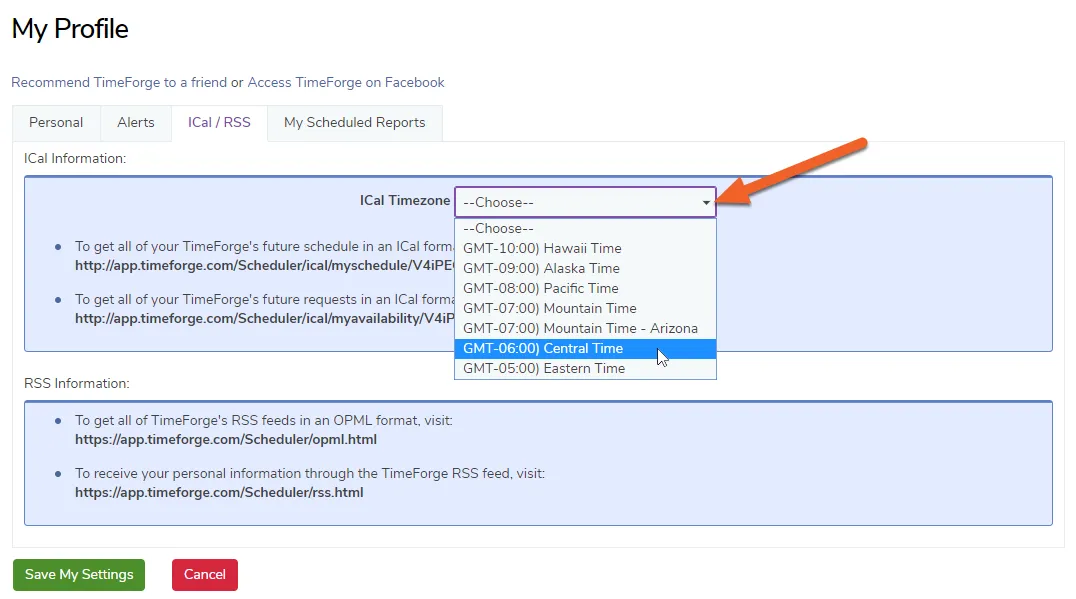
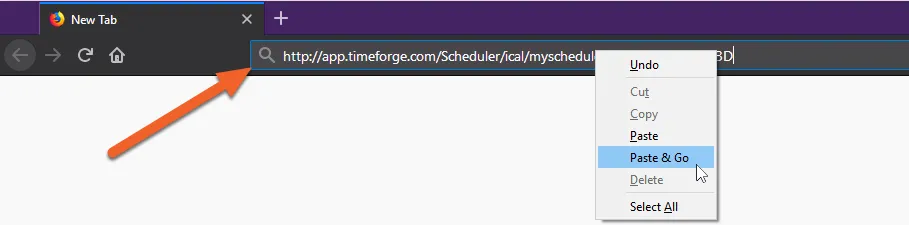
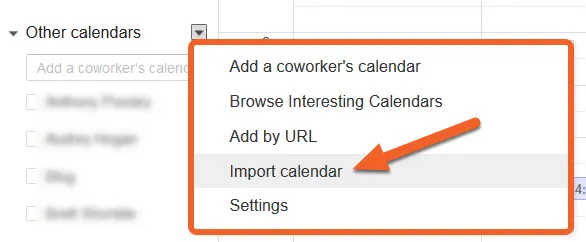
Next, highlight the URL for the schedule you want to import, then right-click and select Copy. This will copy the URL, which you will need for the next step.
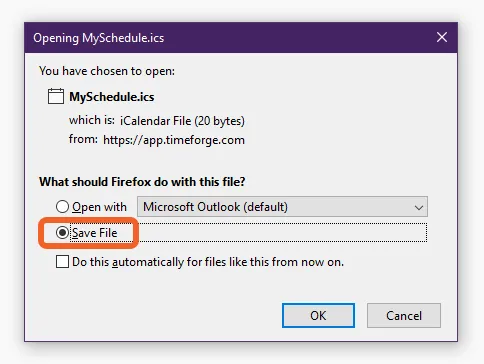
Depending on your browser’s settings, the ICal file (.ics) may download automatically, or you may be prompted to choose where to save it. If prompted, save the file.
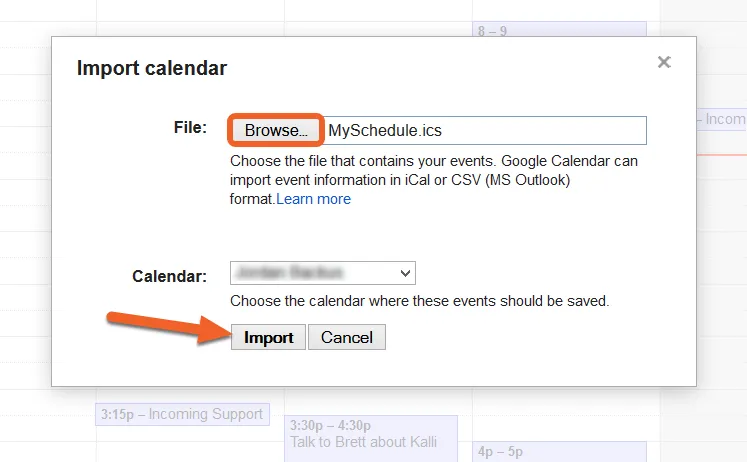
Browse for the file you just saved, then click Import. Your schedule will then appear on your Google Calendar!
Rate your shifts
When enabled, shift ratings are a quick and easy way for your managers to get an idea of how good the schedule was so that they can make the best schedules possible in the future. Shift ratings also help the TimeForge AutoScheduler better understand which schedules work best for employees, so that TimeForge can build them even better schedules.
The goal of every schedule is to make everyone happy – happy managers, happy employees, and happy customers. Be sure to rate all of your shifts so your managers know how you feel.
Look for the date you were scheduled to work (scheduled shifts are in yellow and are preceded by a calendar icon in the upper left). In the upper right, you’ll see a Rate link – click this to rate your shift.
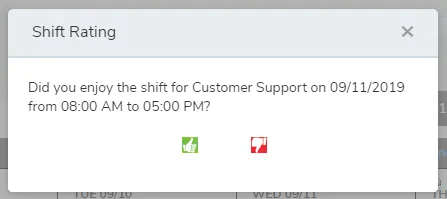
Click on the green “thumbs up” button if you enjoyed your shift. If you did not enjoy your shift, click on the red “thumbs down” button.
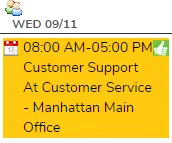
That’s all there is to it! The rated shift will now show the icon for the rating you gave it:
Employee Guides › Getting Paid Early
How to use Earned - TimeForge's same day pay feature
TimeForge’s Earned feature give employees early access to a portion of their earned wages. This feature comes in handy when an unexpected expense occurs and an employee needs access to their wages prior to their payday. This guide outlines how employees can sign up for Earned and how to submit an on demand pay request.
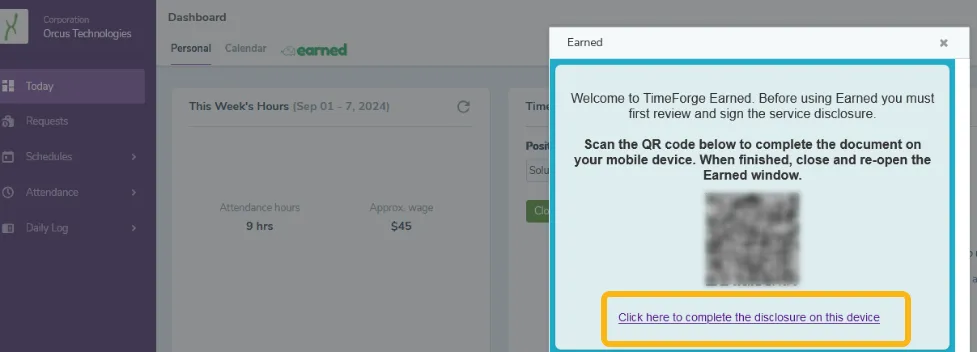
You must review and sign the Earned service disclosure form before you can gain early access to your Earned wages. To review the form follow the next four steps.
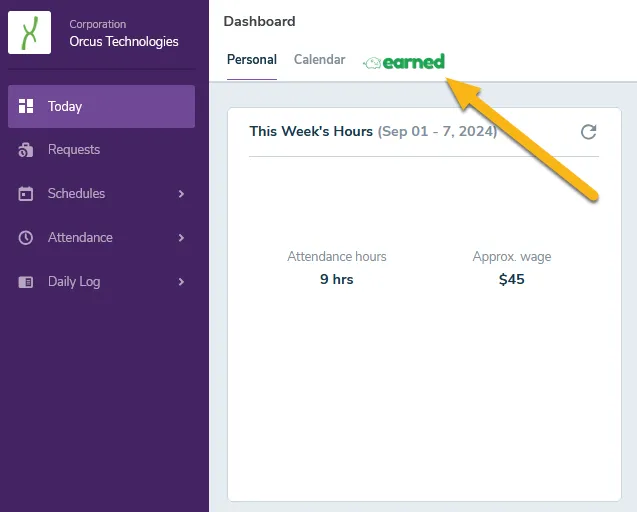
After signing the disclosure of service form, you can begin accessing your wages. To request an amount from your Earned digital wallet, first visit the Today page and click on the Earned button.
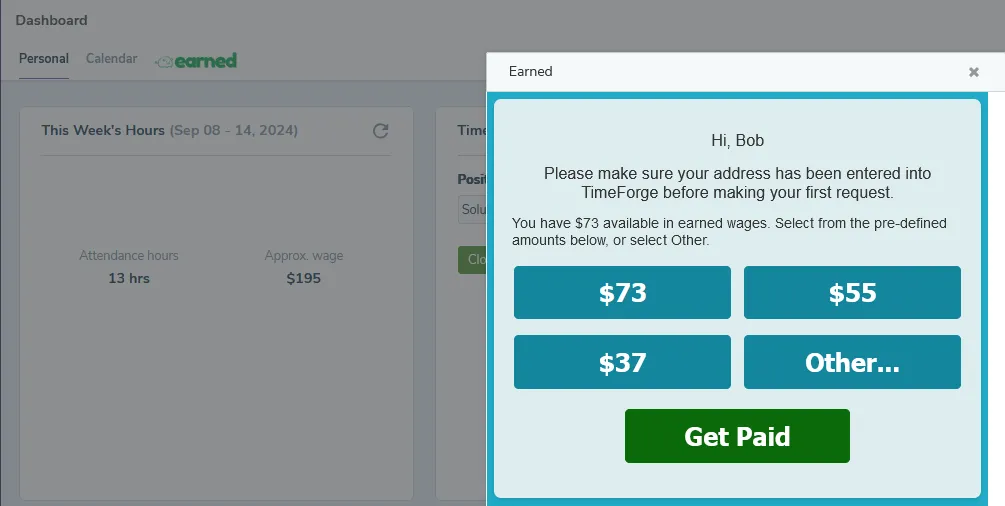
Next, the page will present a dialog box where you can select a predefined amount of your available wages to request. If you’d like to request a specific amount, select the “Other” option.
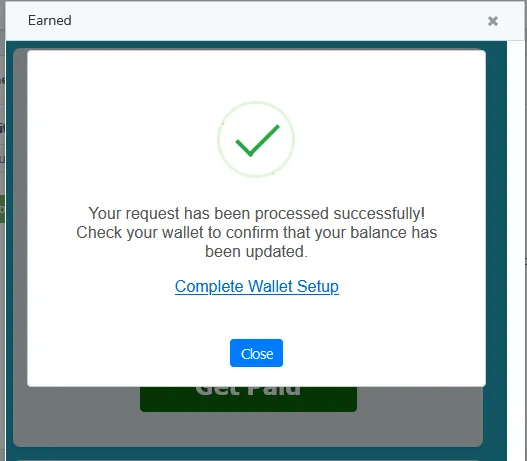
Once you enter the amount you’d like to request, select the “Get Paid” button. Next confirm your request by clicking on the “Submit Request” option. A message notifying you the request went through successfully, should then appear. Click the “Complete Wallet Setup” link to move the final step in accessing your wages.
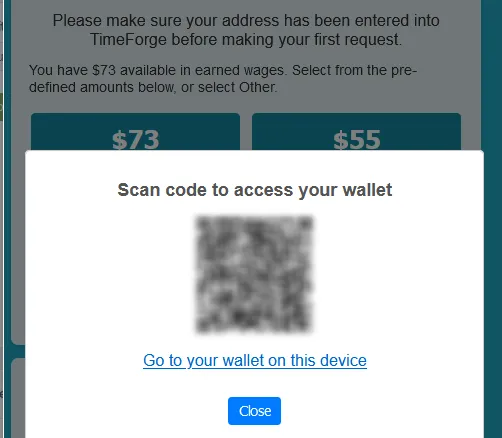
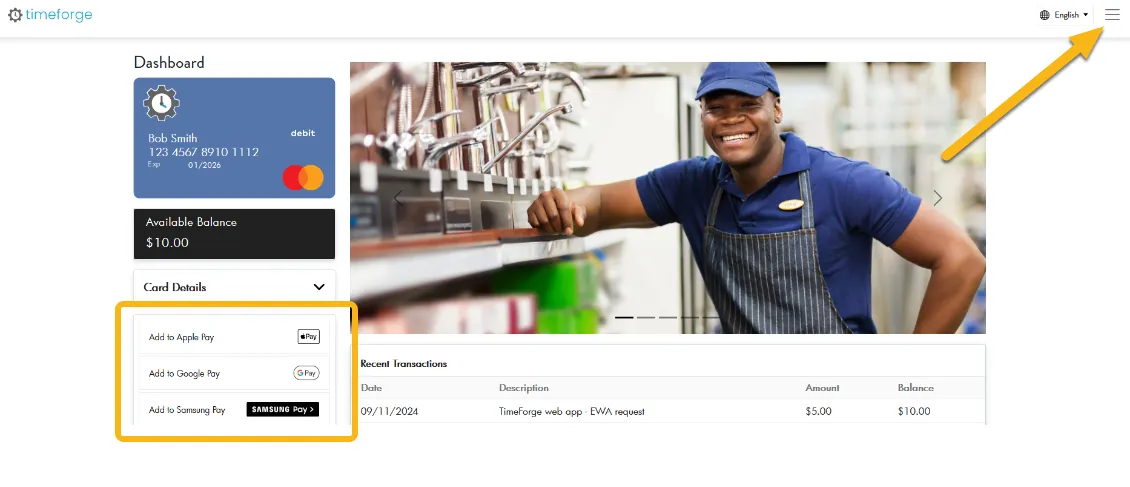
When you select the “Complete Wallet Setup” link, your browser will open a separate tab to your Earned dashboard. From this page view instructions on how to add your Earned card into your Apple, Google or Samsung Pay account by clicking the tabs highlighted below.
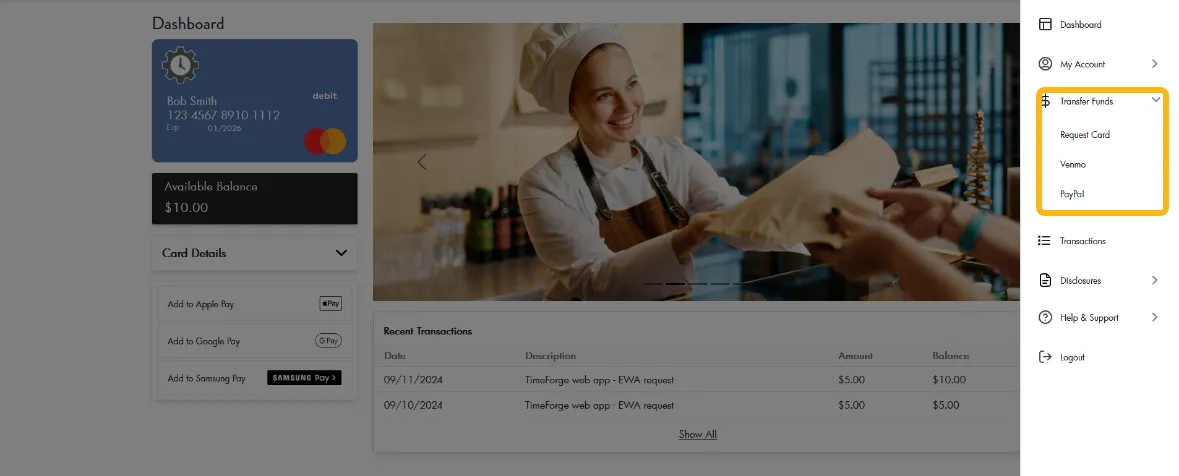
If you click the menu icon (see the screenshot above) at the top right corner, you can select to transfer your funds to a Pay Pal or Venmo account as well as request a physical card.
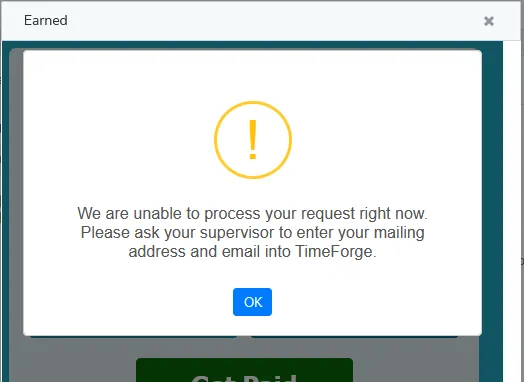
What do I do if I receive a “We are unable to process your request right now” message?
To access the Earned, your profiles must have the next three fields entered.
Cell phone number
Email
Address
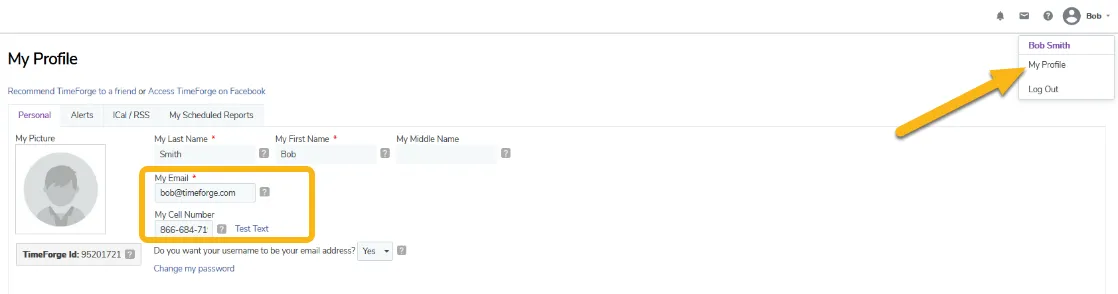
You can check the cell phone number and email assigned to your profile by clicking on your name at the top right corner and selecting “My Profile.”
If you need to update your cell phone number or email, click on the corresponding field, enter your contact information, and select the save button at the bottom of the page.
If you need to update your home address, reach out to your manager directly. Your manager has access to update your address.
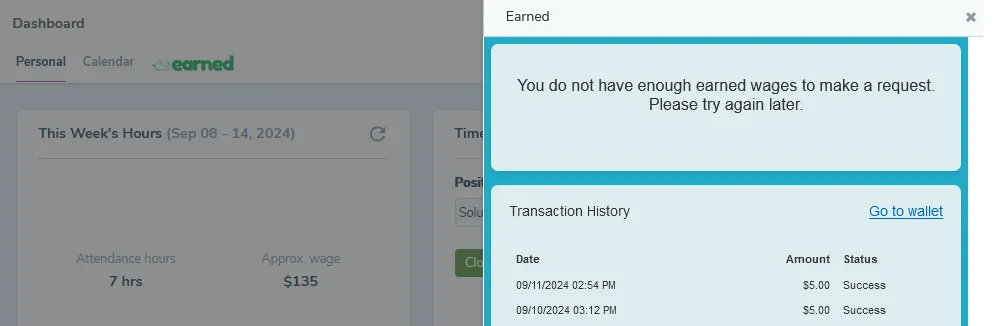
What does a “you do not have enough earned wages to make a request” message mean?
Earned allows you to request same day pay for wages you’ve accrued for the current pay period. You may see the message below if one or more of the scenarios below occurred.
A new pay period has begun and you have not yet accrued the minimum amount of wages you can request.
Your profile is missing pay rate information
Employee Guides › Mobile App
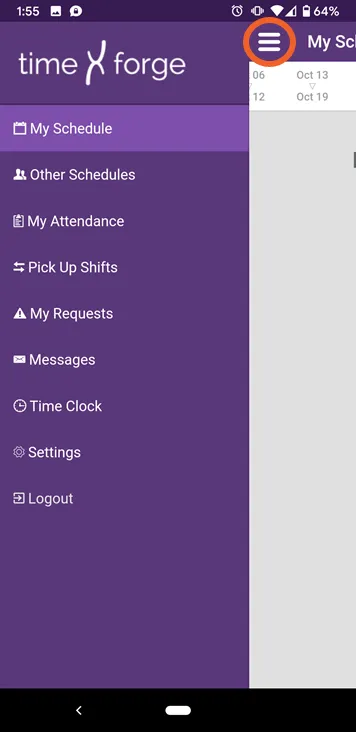
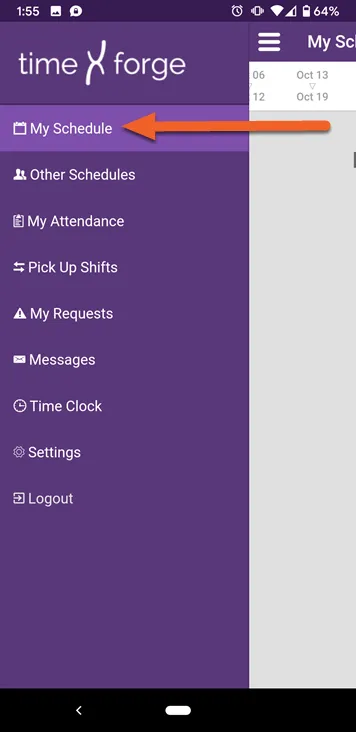
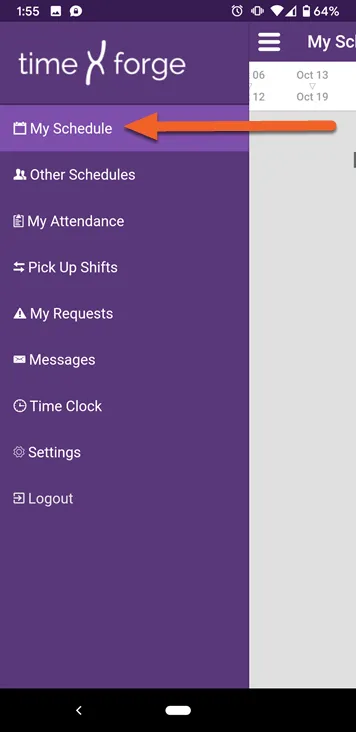
Log in and navigate the app
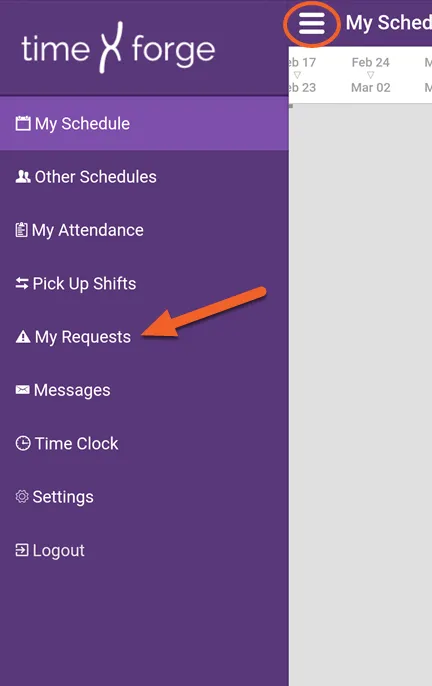
The TimeForge Employee mobile app allows employees to view their schedule, attendance, and even swap shifts with each other, all from the convenience of a mobile phone or tablet.
This guide will teach you the ins and outs of using the app, including how to request time off directly from the app (a new feature introduced in 2019).
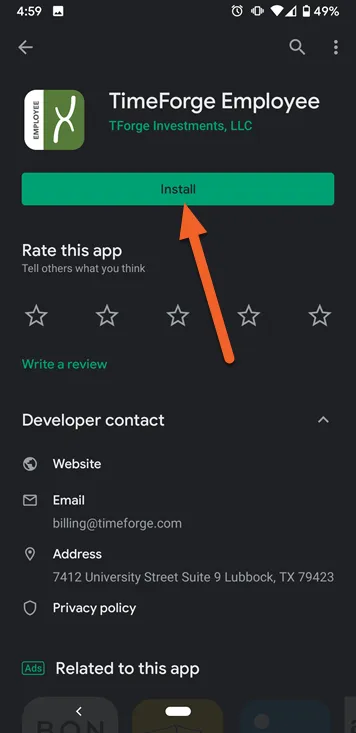
The app is available from both the Apple Store and Google Play Store for FREE!
Don't have the app yet? Here's how to get it.
Search the Apple Store or Google Play store for the mobile app
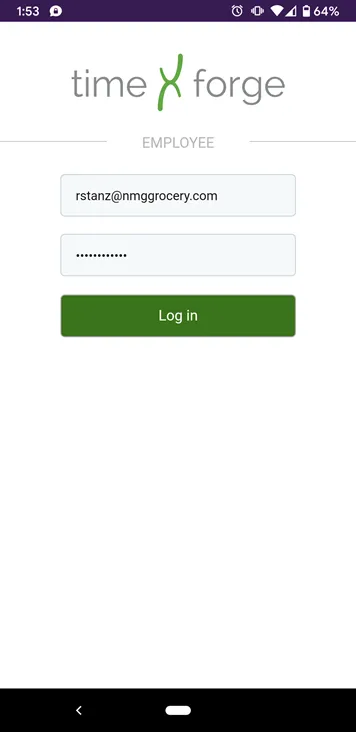
To log in to the TimeForge Employee app, you will use the same username and password that you use for your TimeForge account when you log in from a browser.
If you do not have a username and password, you will need to contact your supervisor for assistance.
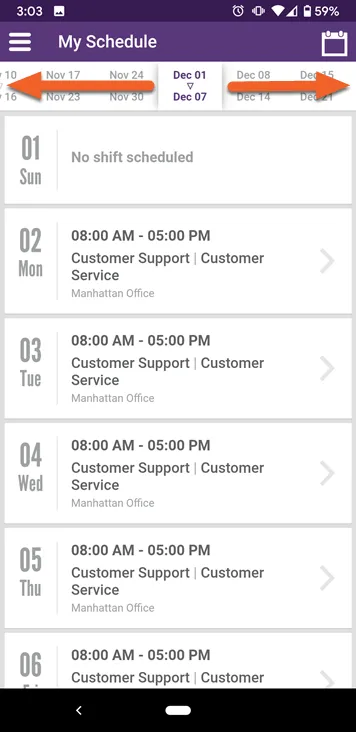
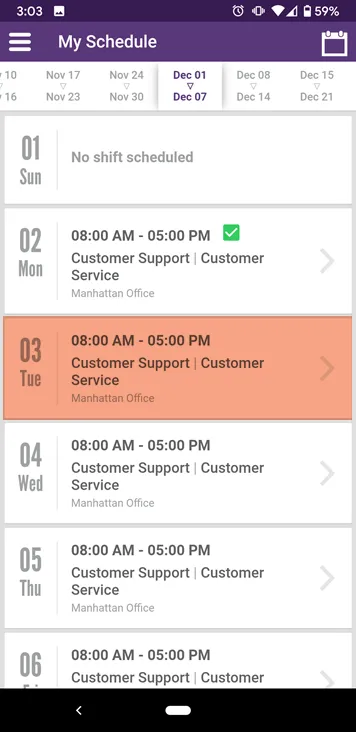
By default, the page will open to the current work week. At the top of the screen, there’s a scrolling date selector. Swipe right or left to view past or future work weeks.
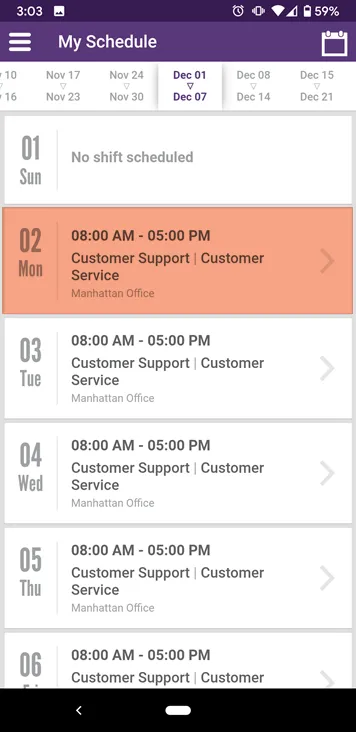
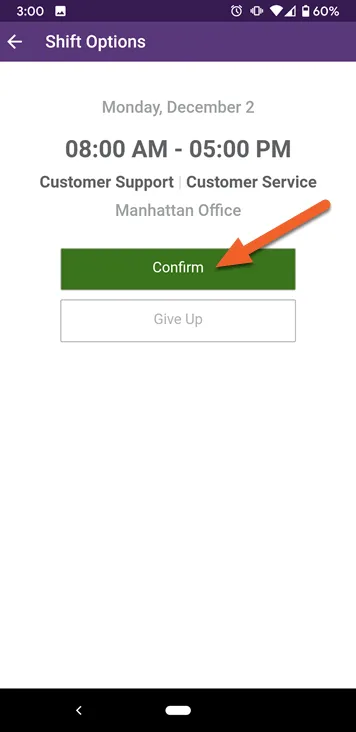
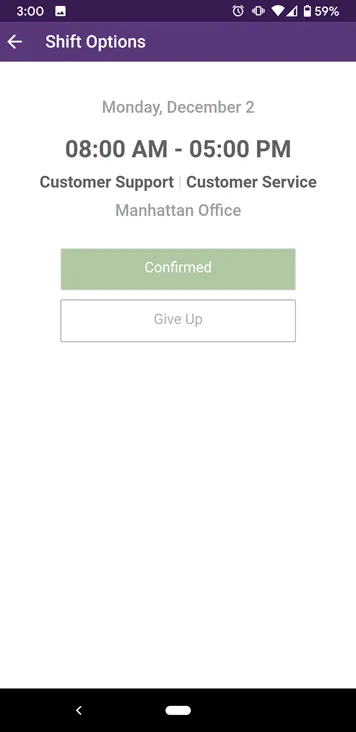
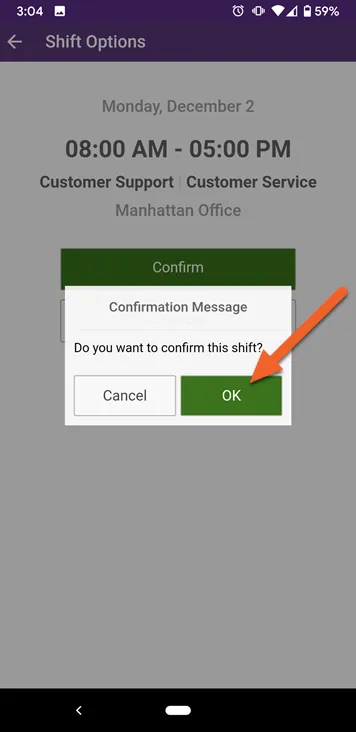
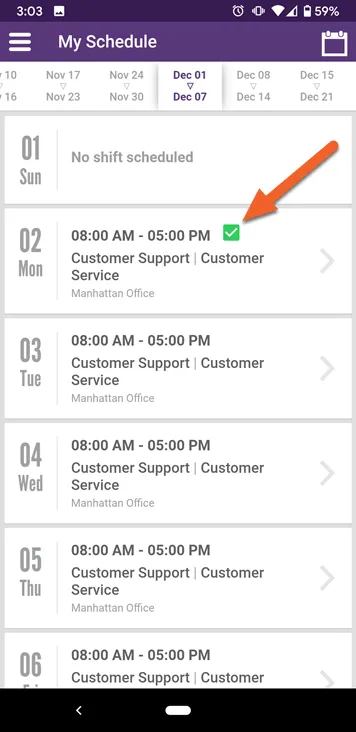
When you confirm a shift on your schedule, you are committing to working that shift. Your employer may not require you to confirm shifts – or they may ask that you confirm on the day you’re scheduled to work.
Shifts that are confirmed have green check boxes next to them:
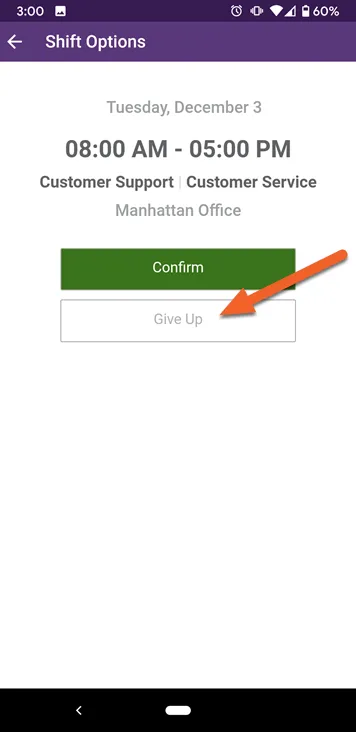
Give up shifts
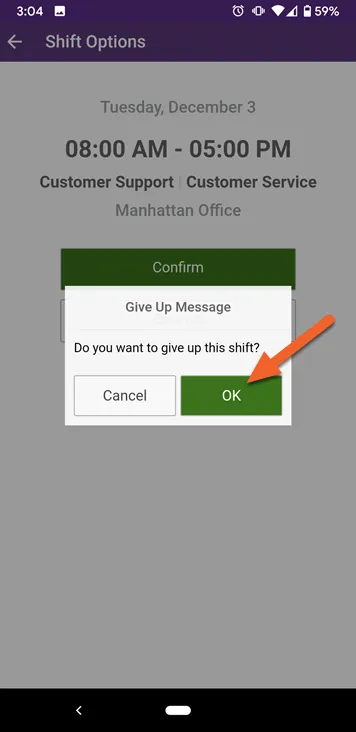
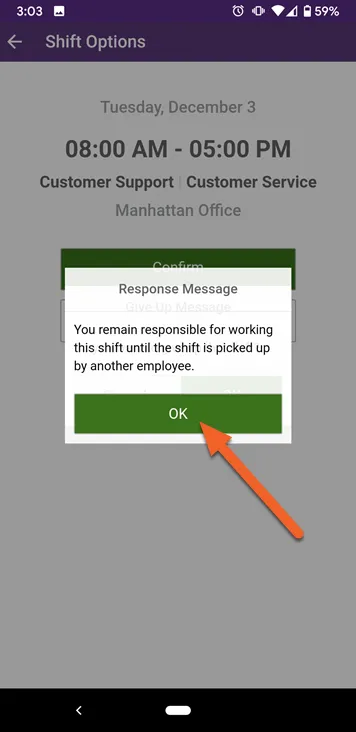
When you give up a shift, you are indicating that you don’t want to work that shift if possible. Keep in mind that you are still responsible for working that shift until another employee has picked it up and the change has been approved by your manager.
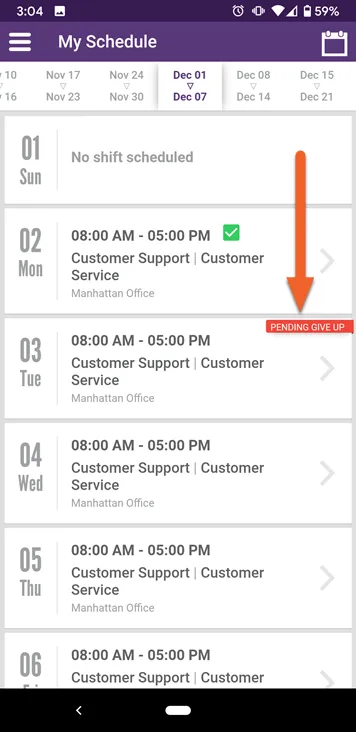
When a shift is given up, a red “Pending Give Up” box will appear on the shift until another employee picks it up and a manager approves.
After approval, the shift will disappear from your schedule.
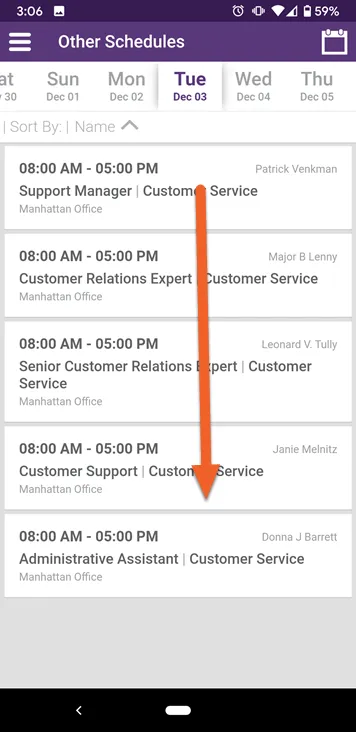
View other employees' schedules
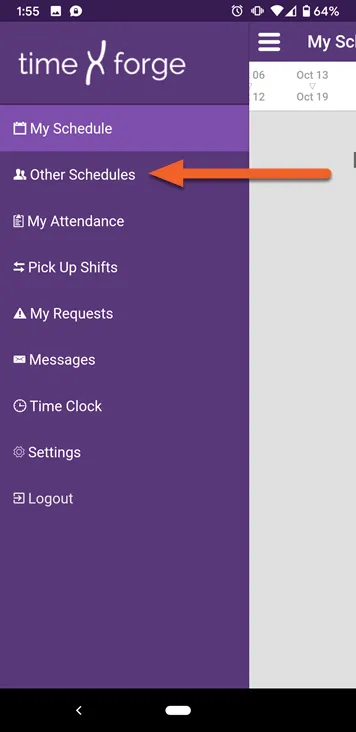
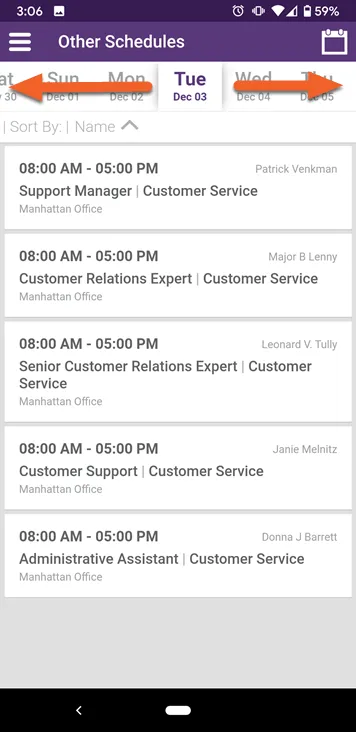
Curious to see who else is working with you? Maybe you need to view another employee’s schedule to swap a day off? You can view other schedules from within the Employee Mobile app. Here’s how.
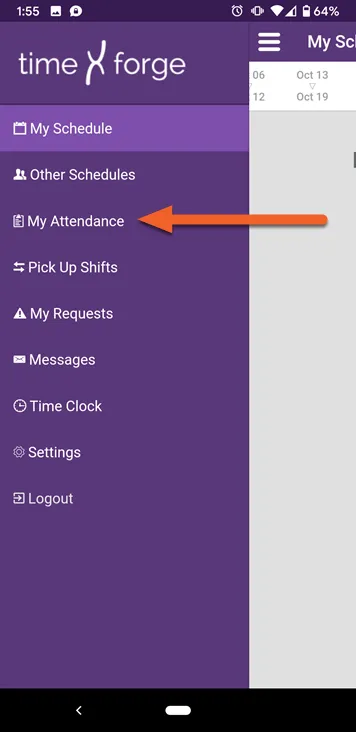
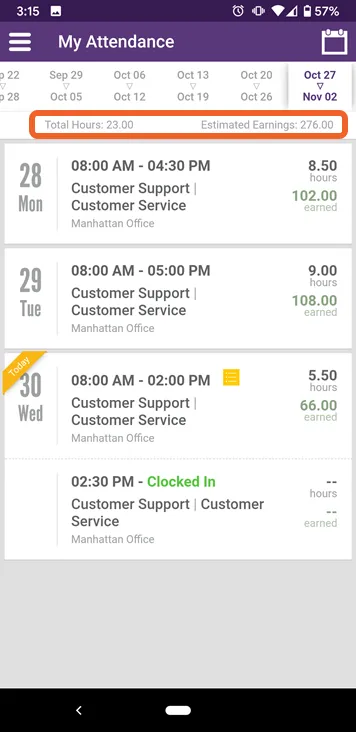
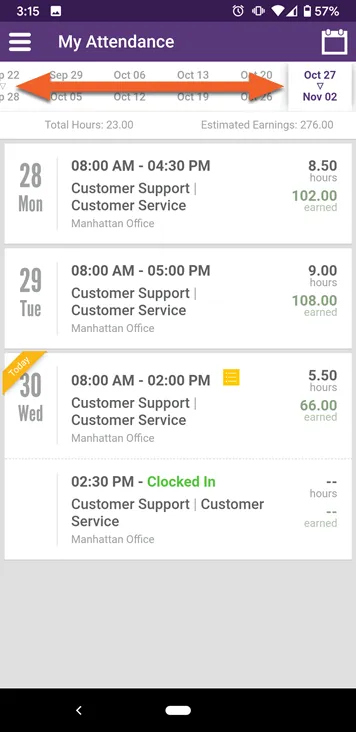
By default, the page will open to the current week. Just below the date selector, you’ll see your total hours and estimated earnings for the week:
You’ll also see a daily breakdown of hours and dollars earned according to your attendance.
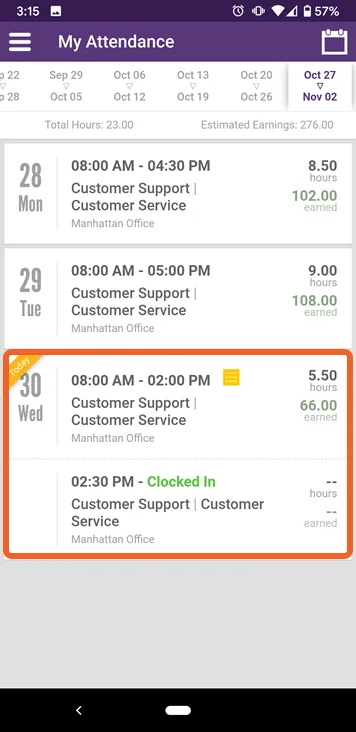
The current date will be highlighted with a “Today” ribbon in the upper left. If you have left any shift notes, the entry will also be marked by a list icon. The app will also let you know if you’re clocked in:
To view previous attendance, swipe the date selector:
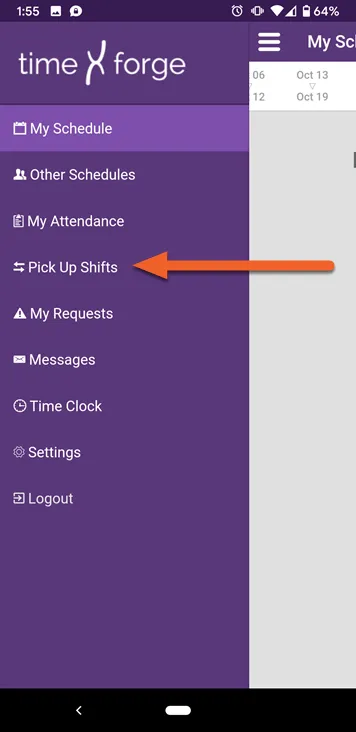
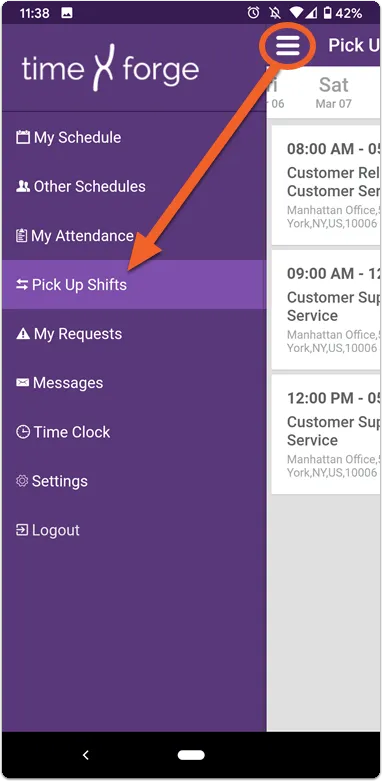
Pick up shifts that have been given up by other staff members
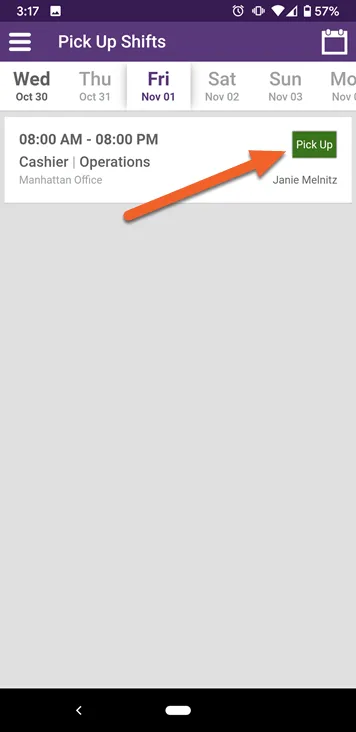
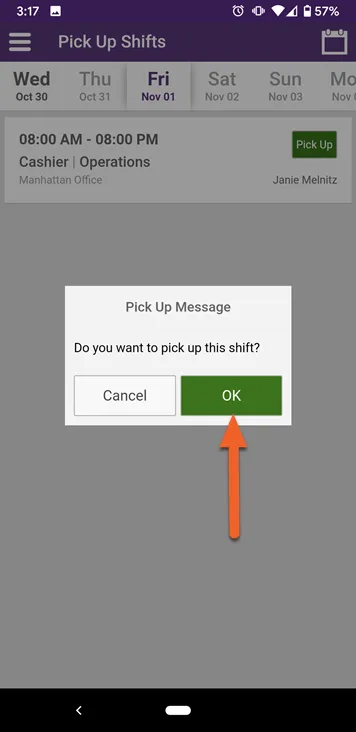
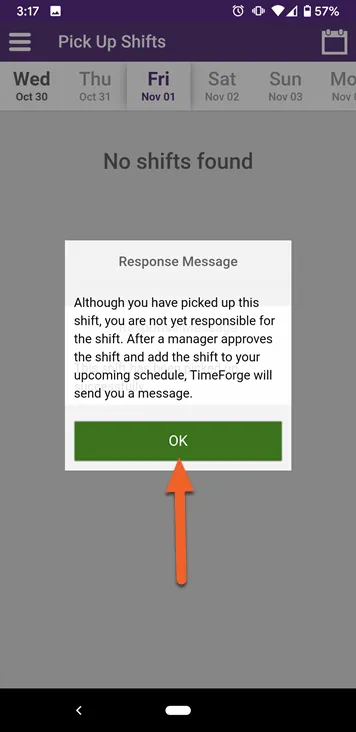
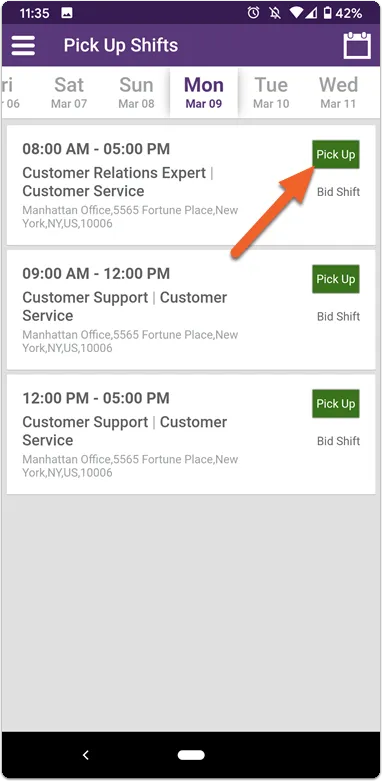
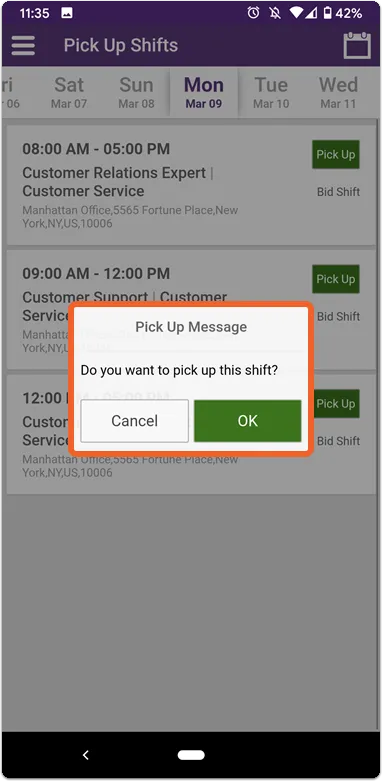
In addition to being able to give up shifts, you can also pick up available shifts using the TimeForge Employee mobile app. Keep in mind that you are not responsible for a shift until your manager has approved the pick-up.
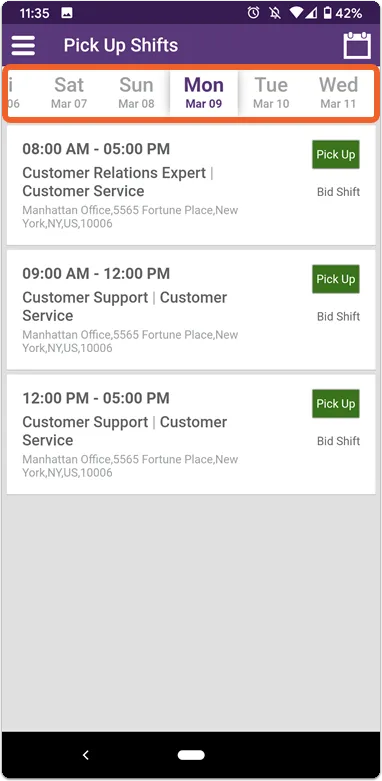
Bid Shifts are unassigned shifts that have been made available by management and which can be picked up by eligible employees. Depending on the rules set by management, the first person to bid on a shift may automatically with the bid – or your manager may prefer to select a winner manually. Either way, employees are not responsible for the shift until their bid has been approved.
Transfer Bid Shifts are just like normal bids, except they’re shared across store locations. When picking up a transfer bid shift, make sure to note the location address and give yourself plenty of time to arrive on-site for your shift.
By default, the app may show you the current date, but you can use the sliding date selector at the top to skip ahead and pick up shifts for next week, for example.
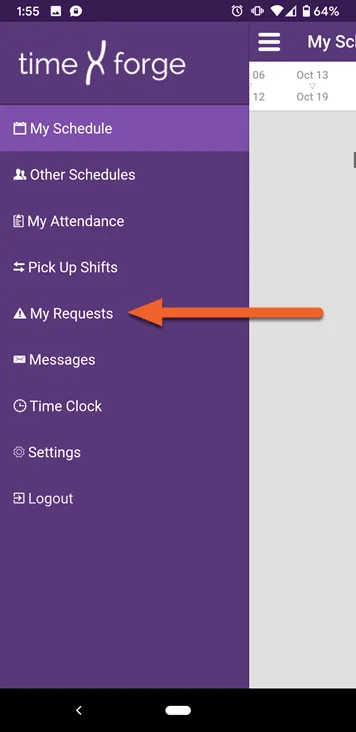
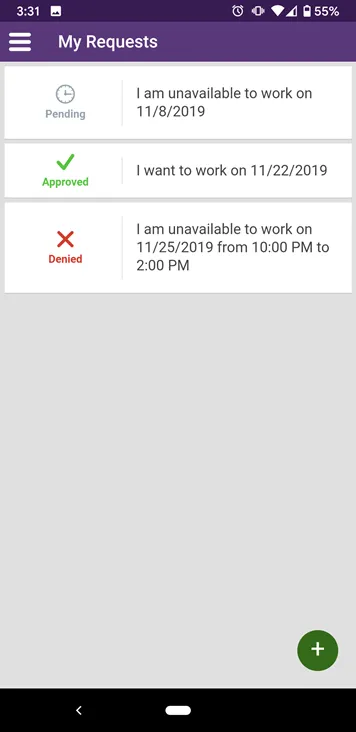
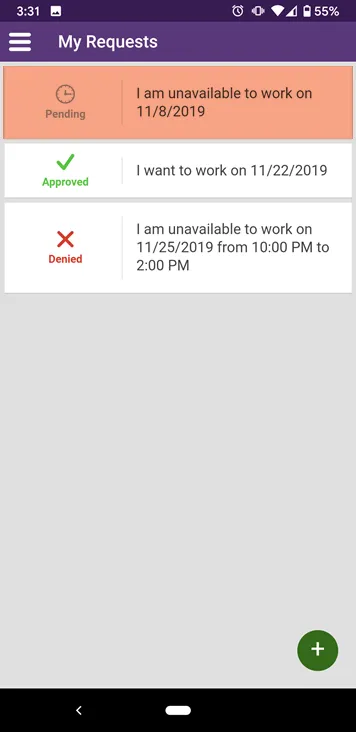
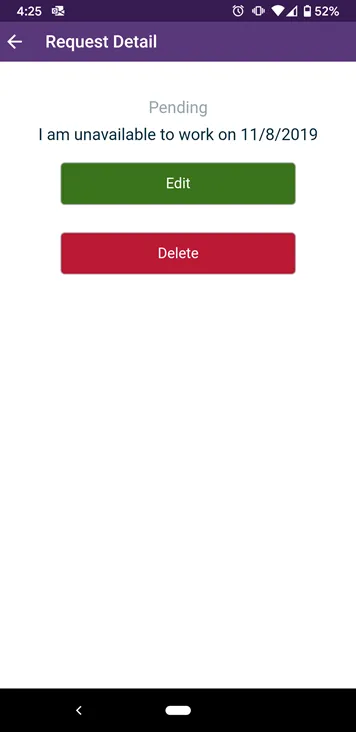
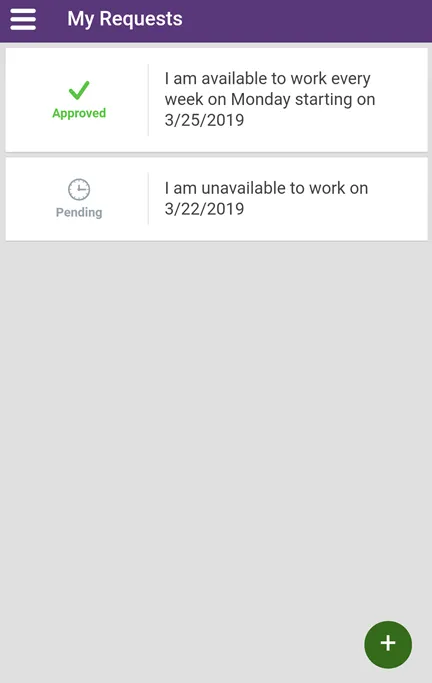
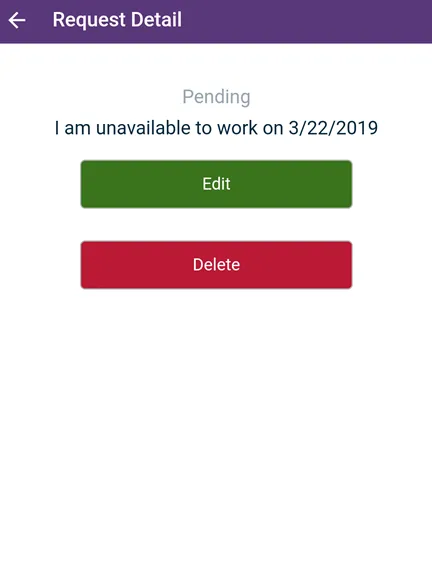
Pending requests can always be edited/deleted. Approved and denied requests may be inaccessible depending on how your employer has configured TimeForge.
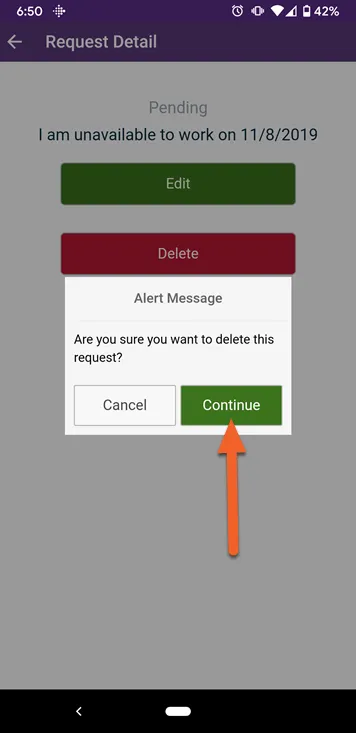
If you choose to Delete, you will be asked to confirm your choice by tapping the Continue button.
Keep reading this guide to learn more about creating and editing requests!
Request time off or set your availability
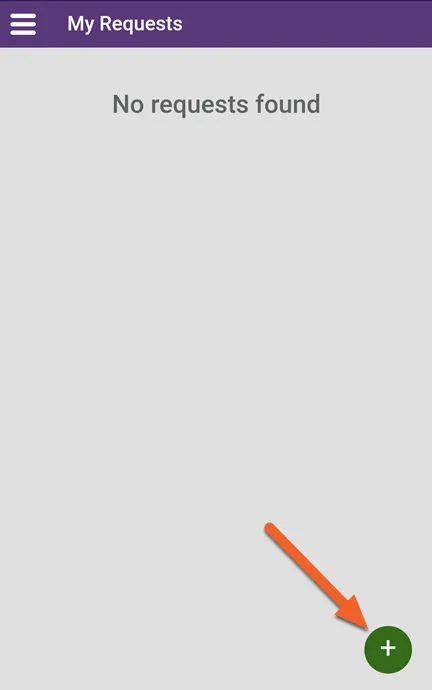
The TimeForge Employee Mobile App now offers the ability to submit availability requests directly from your smart phone! This makes it easier than ever for employees to indicate their availability.
In order to make use of this feature, you’ll need to have the latest version of the Employee Mobile App installed on your device. This app is free and is available for both iOS and Android. To download, simply visit the Apple store or Google Play store and search for “TimeForge Employee App.”
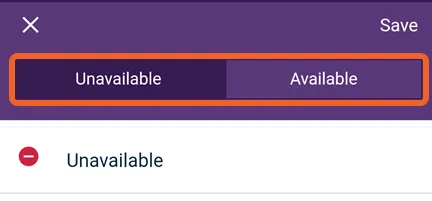
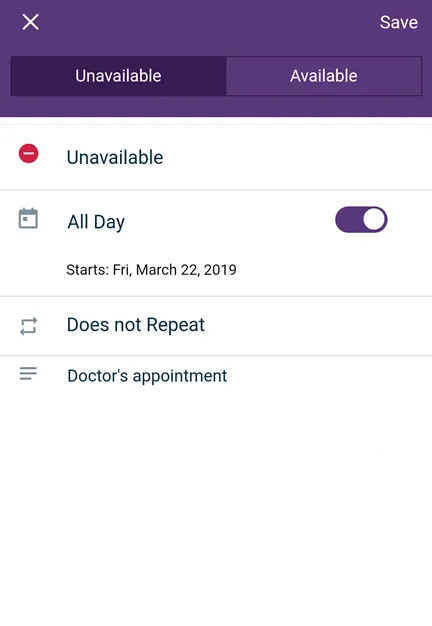
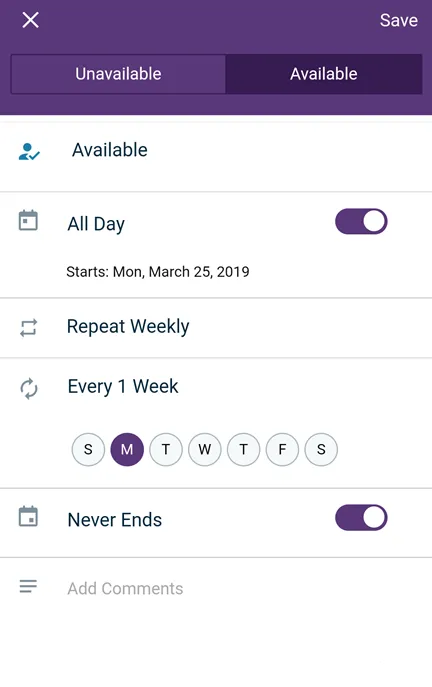
At the top of the screen, you’ll see two options: Unavailable and Available. If this is a request for time off, select Unavailable. Otherwise, select Available.
Then, select the options for date, time, whether the request should be recurring (repeat), and any comments you’d like to provide to your manager.
Here’s an example of a request to take a full day off from work:
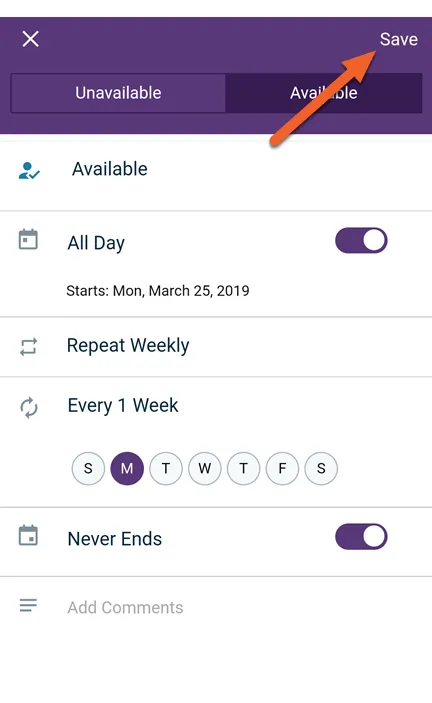
And here’s an example of a request to let your manager know that you’re available all day every Monday:
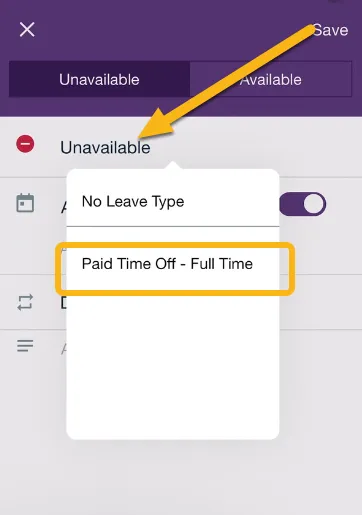
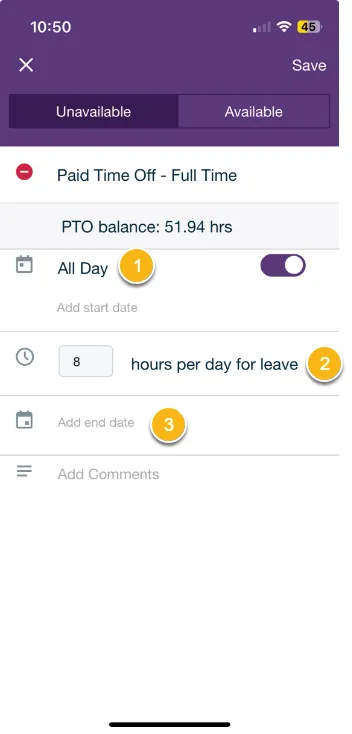
If your employer tracks PTO, Sick, or other leave policies in TimeForge, you can create time off requests using your available hours. To create a time off request using a leave policy, first tap the “Unavailable” option. You should then see leave policies assigned to your profile with an available balance.
After you select the leave policy you want to use, you can view your available balance and set up the following parameters.
The date your time off request begins
How many hours you’d like to use for each of your days off
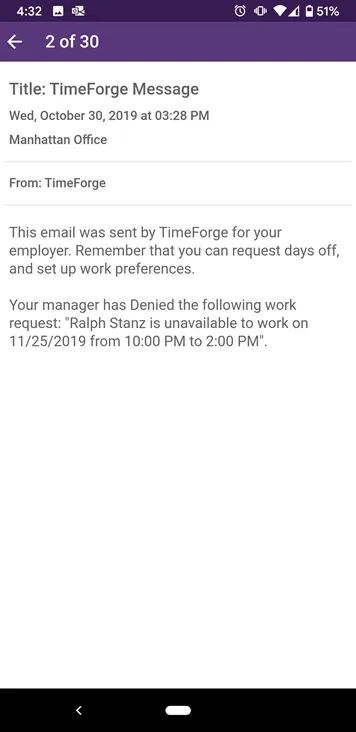
Here’s an example of a message indicating that a manager has reviewed an employee’s time off request:
Clock in and out
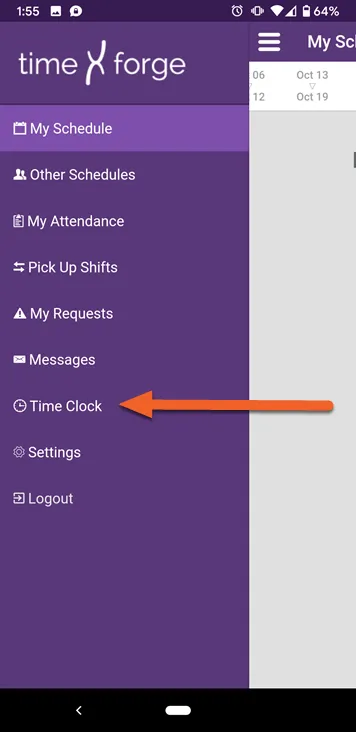
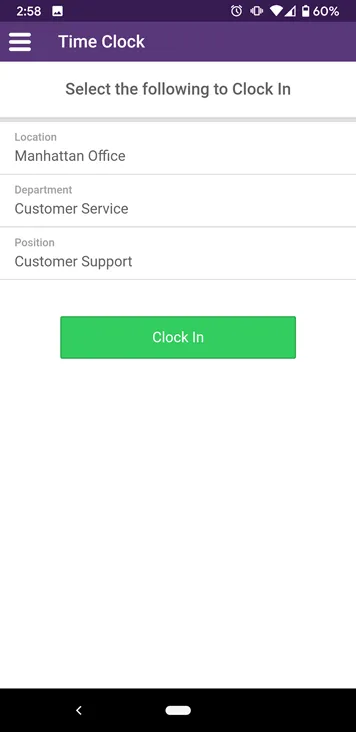
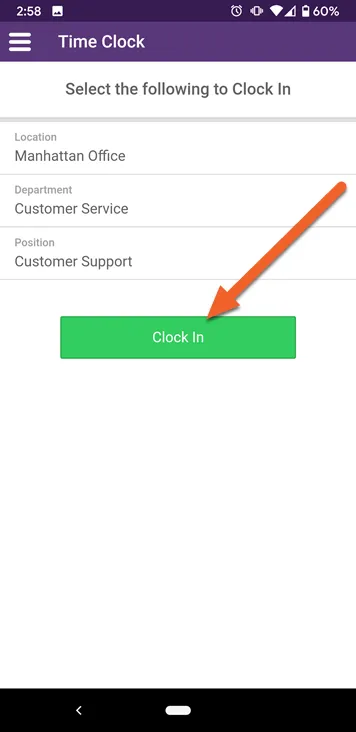
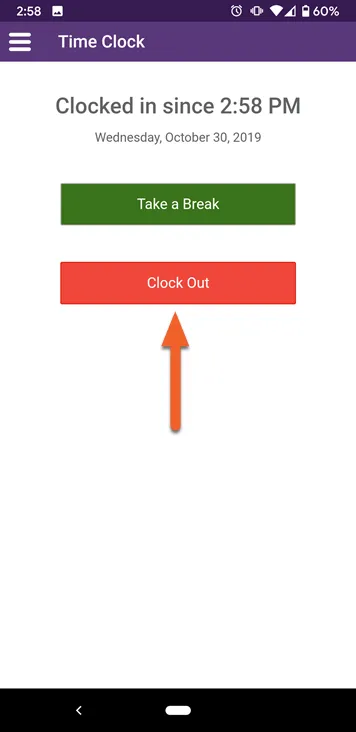
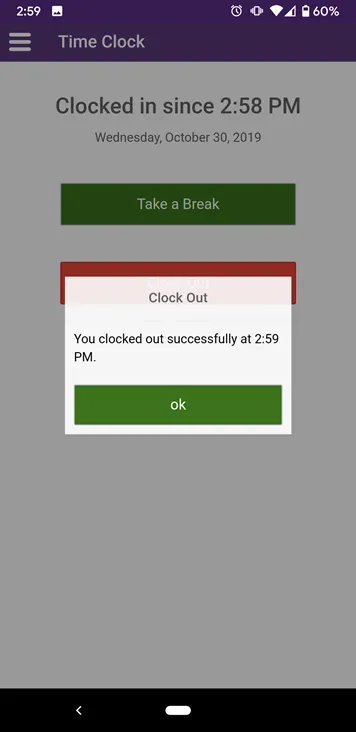
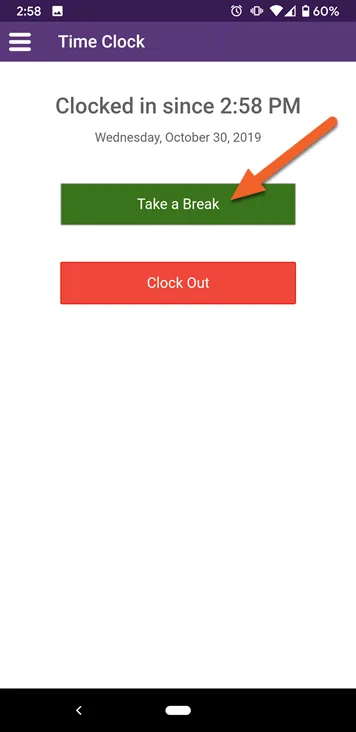
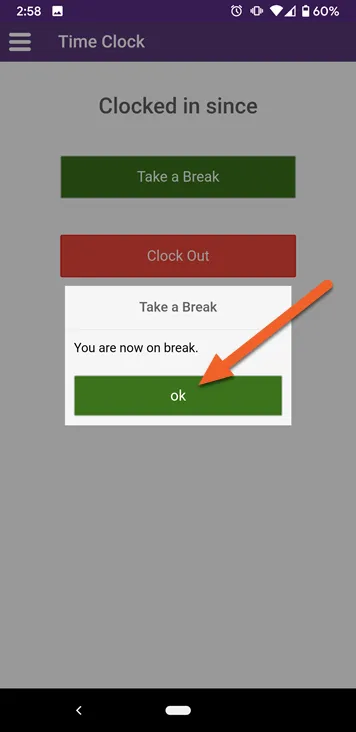
If clock-ins and clock-outs are enabled for mobile, you can use the Employee Mobile app to clock in, out, or even take breaks. Please note that some employers may not allow this feature or may restrict its use to certain IP addresses (such as a workplace IP), thus requiring employees to be on-site before they can clock in/out.
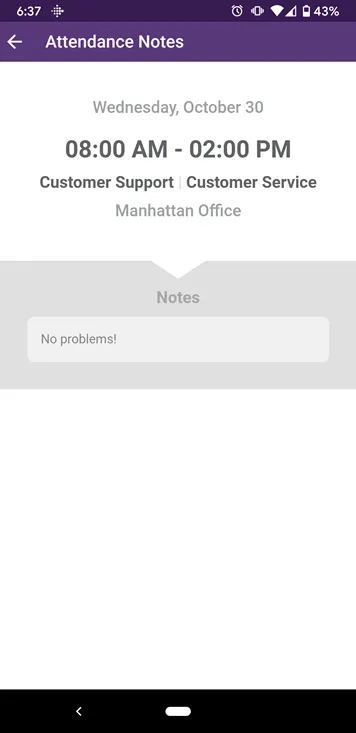
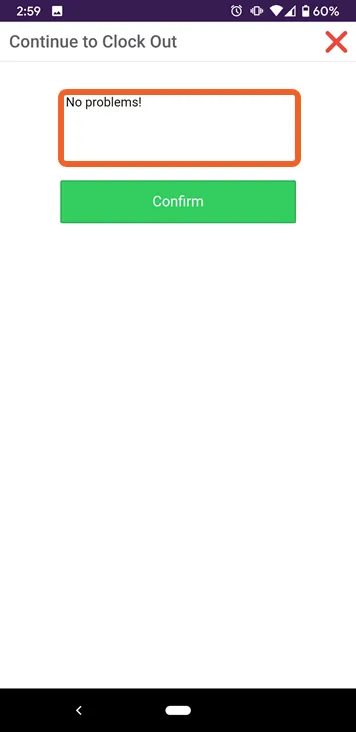
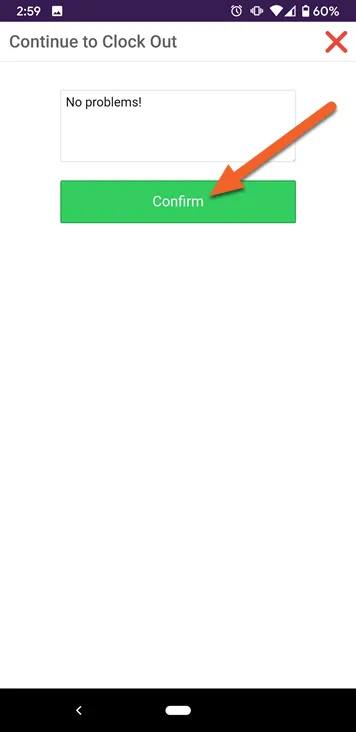
You will be given the option to add a note about your shift before you confirm your clock-out. Tap the box and use your on-screen keyboard to add a note about how the shift went.
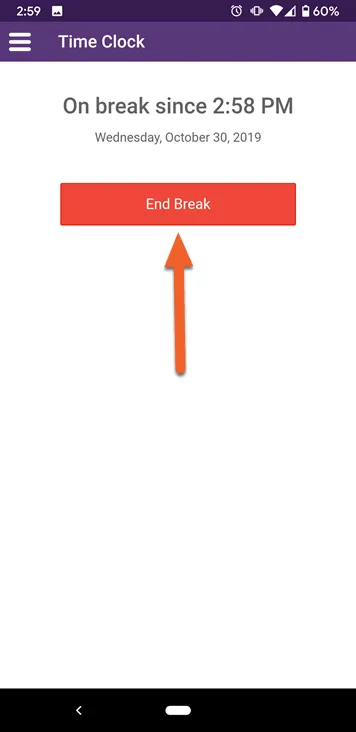
While you’re on break, the Time Clock screen will show you how long you’ve been on break and will display an End Break button. Simply tap this button to end your break.
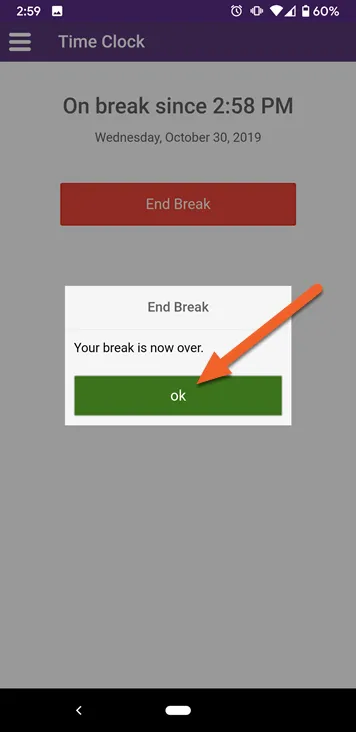
The app will inform you that your break is now over. Tap ok to return to the Time Clock screen.
Adjust the app settings
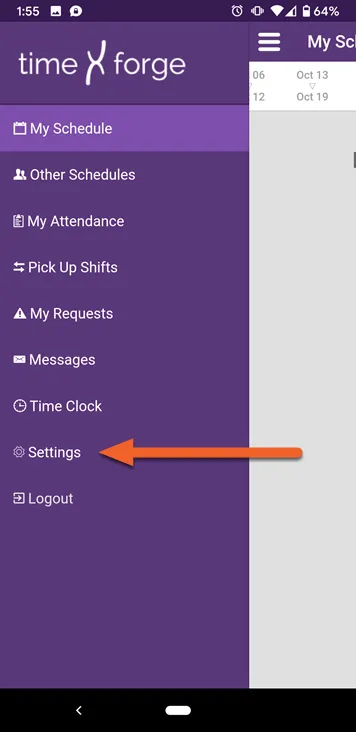
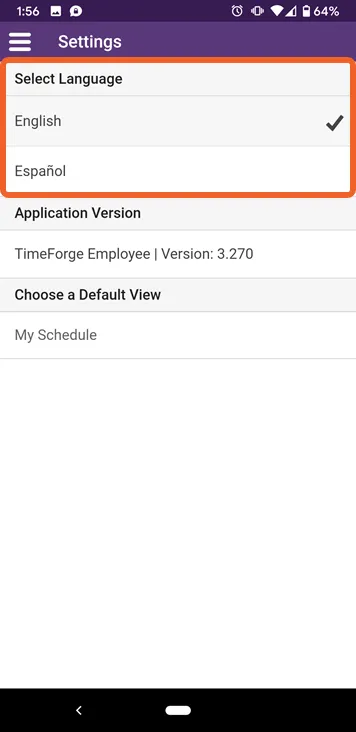
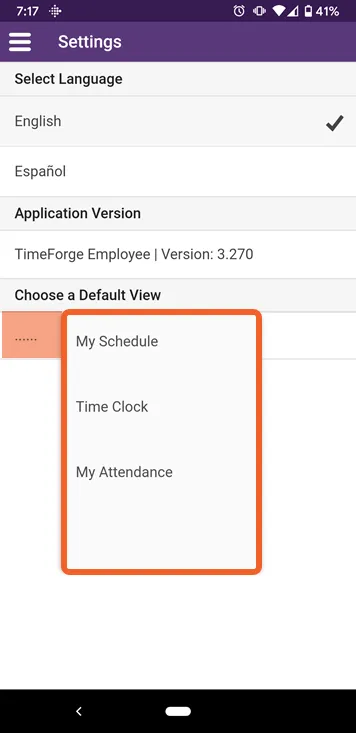
The settings page allows you to select which language to use throughout the TimeForge Employee Mobile app (English or Spanish) and to set your default page when you log in (can be set to My Schedule, My Attendance, or Time Clock).
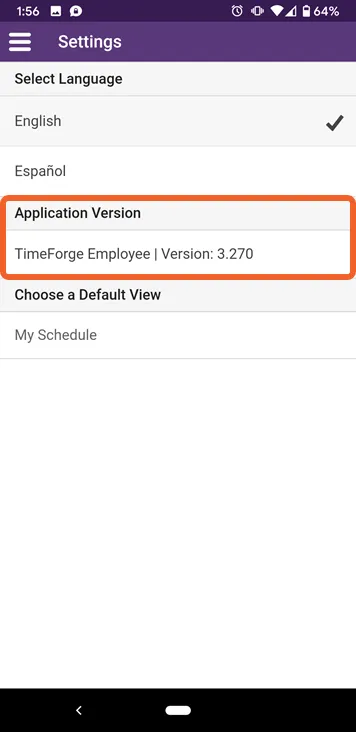
This shows the software version of the Employee App. There is nothing to select here, but if you have problems with the app, it may be useful to mention the version you’re using when you call Support.