Enable PTO payout requests
TimeForge now allows you to turn on PTO payouts for Leave Types of your choosing. When turned on for a Leave Type, employees and managers can make requests to “cash out” all or part of their PTO balance for that Leave Type.
PTO payouts must be enabled on a per-location basis for non-hidden Leave Types in order for employees to make requests and can only be enabled for Leave Types that track accrual. If your company does not allow negative accruals in TimeForge, then the employee must have a positive accrual balance to request a PTO payout.
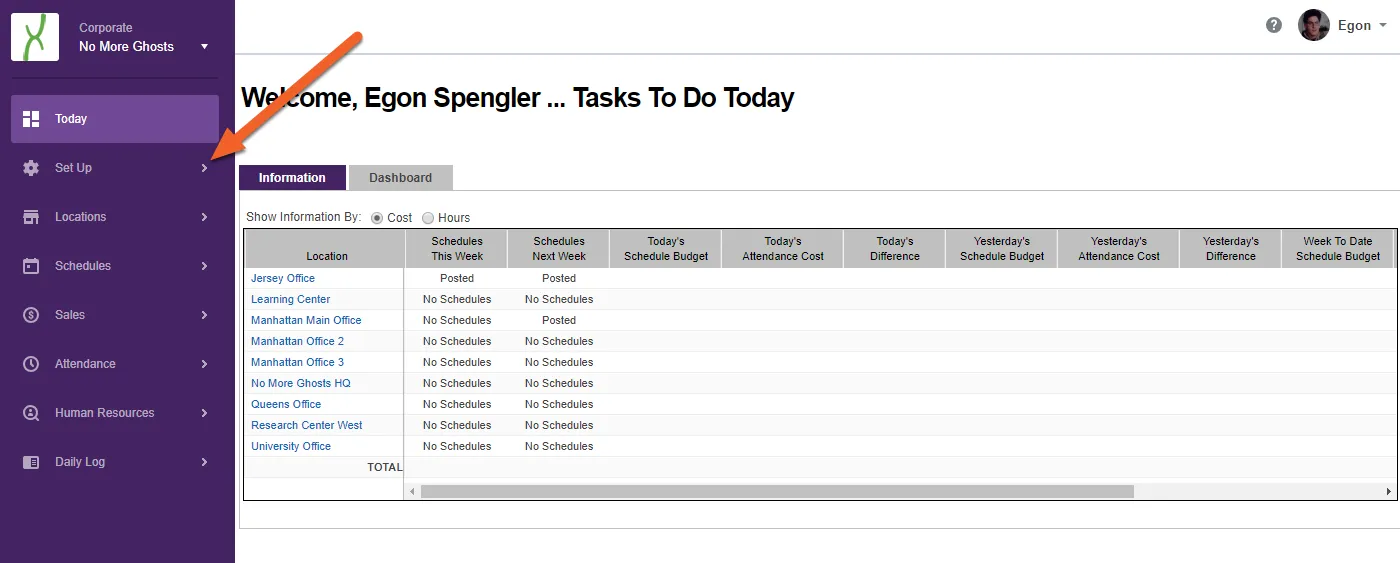
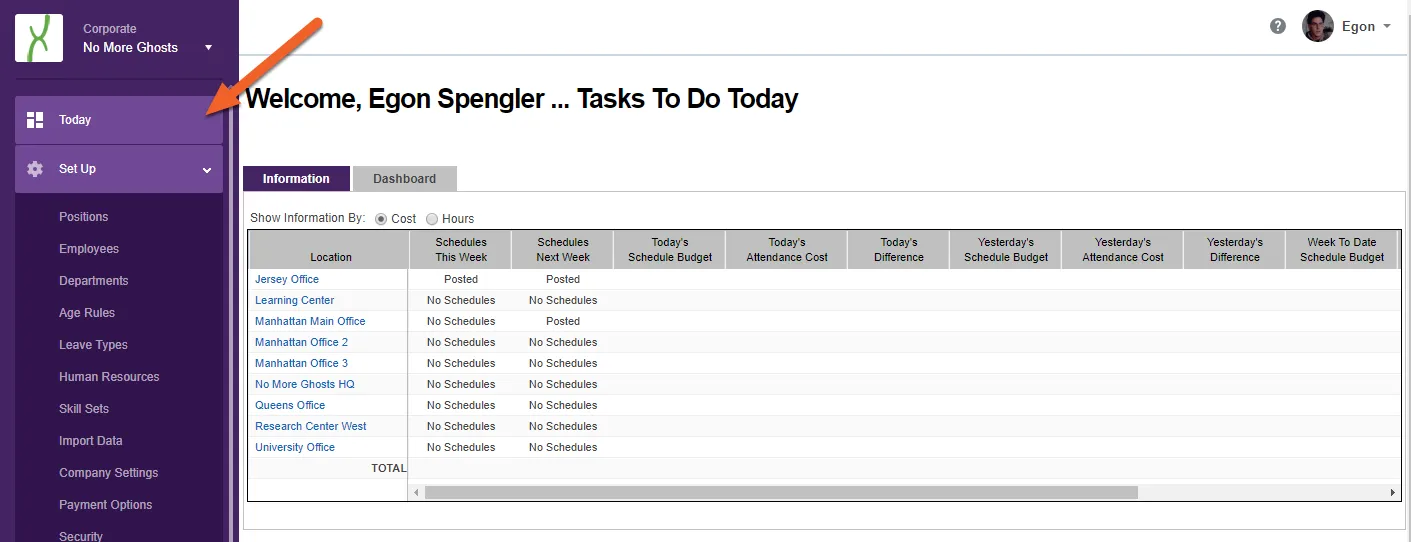
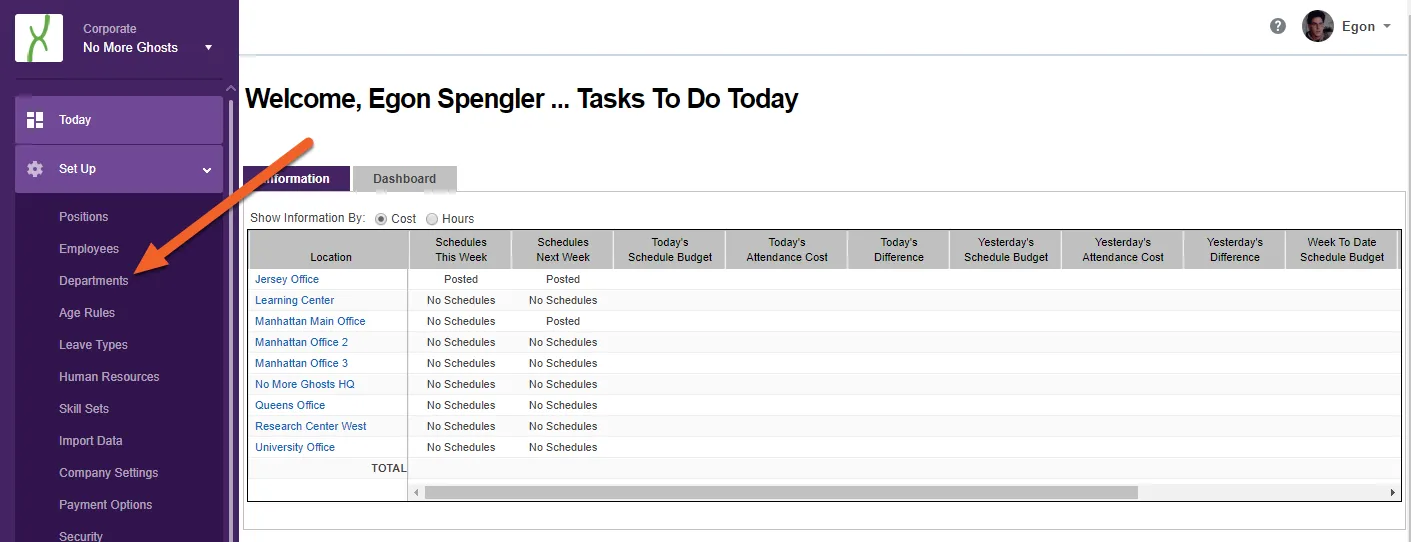
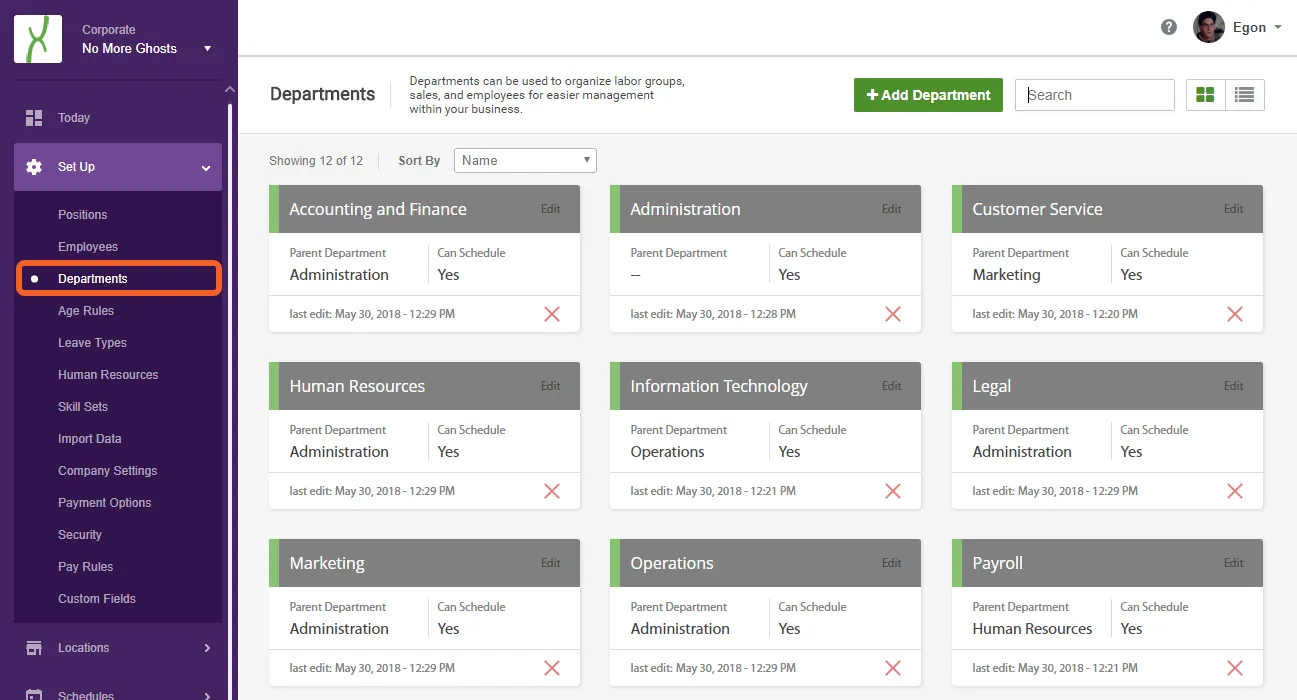
From the Corporate level, navigate to Leave Types under the Set Up tab, then select the Leave Type you’d like to enable PTO payouts for.
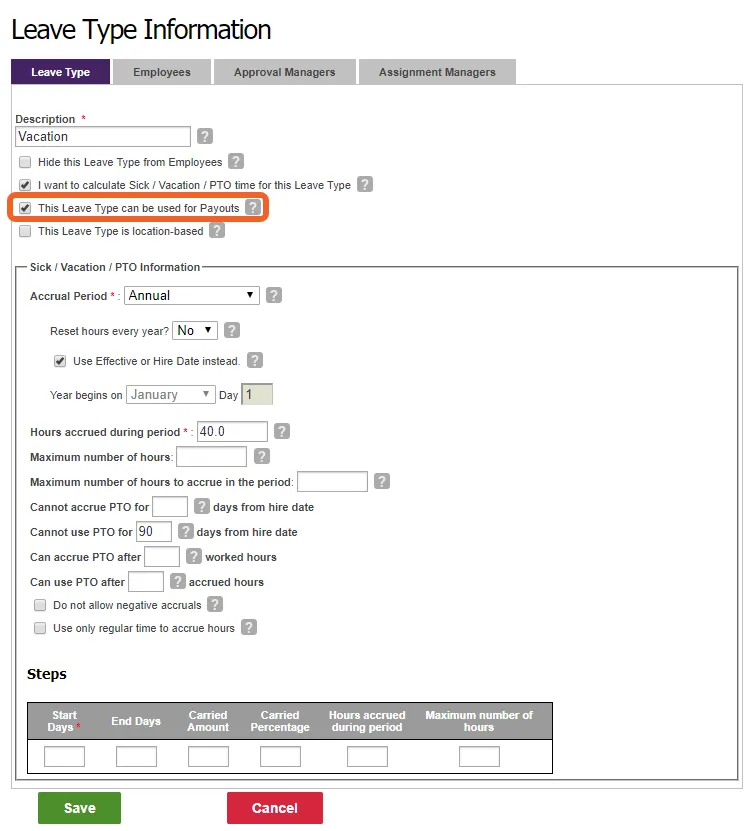
Under the Leave Type options, check the box that reads “This Leave Type can be used for Payouts.” Click Save to save your changes.
This will enable PTO payouts for this Leave Type but only if the employee works at a location for which PTO payouts have been enabled. To enable PTO payouts for your location, proceed to the next step.
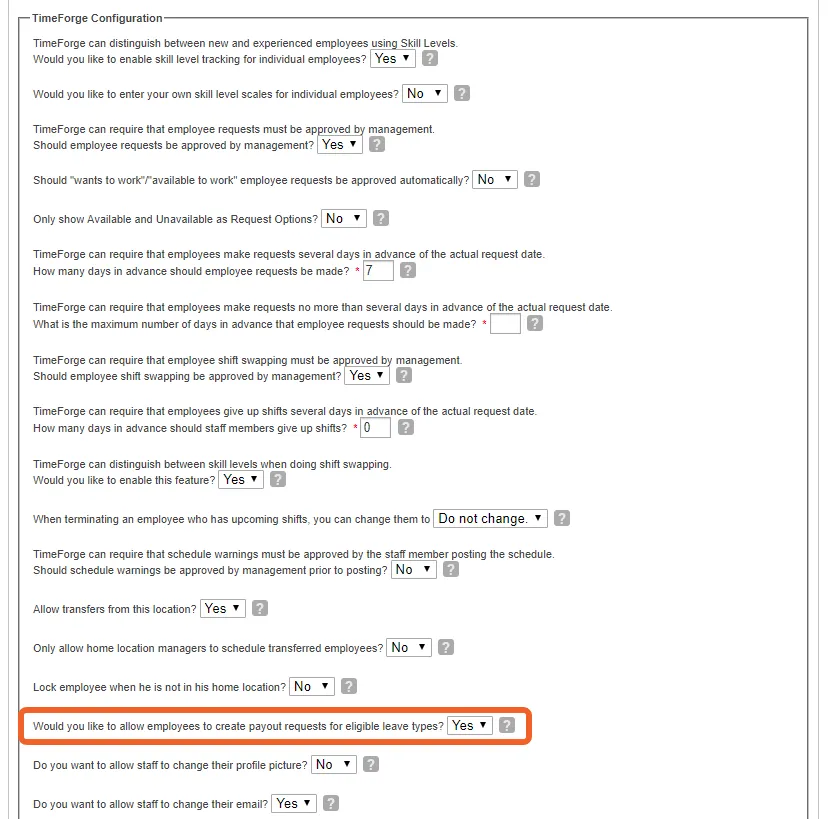
To enable PTO payouts for a location, navigate to your Location settings and find the option that reads “Would you like to allow employees to create payout requests for eligible leave types?” Select Yes, then scroll down and click Save to save your changes.
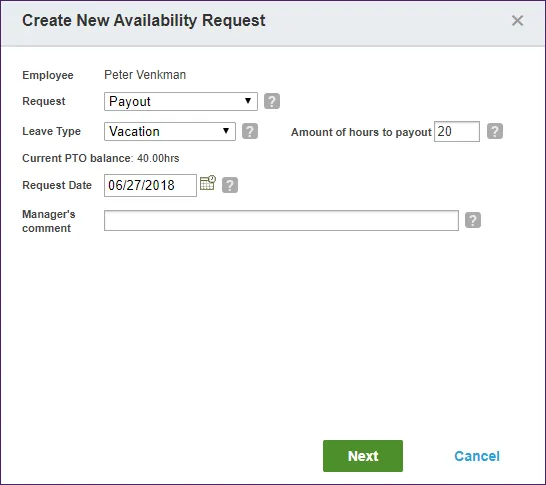
In order to receive a PTO payout, the employee (or their manager) must make a request under Availability and Requests and select “Payout” as the request type. They need to select the Leave Type to be paid out, as well as the number of hours.
The submitted request will appear on the availability and requests page:

A PTO payout request must be approved by an Approval Manager before the balance can be distributed via payroll. The “used” PTO amount will be reflected on the next payroll export.
Getting to Know Your Dashboard (Today Page)
The new TimeForge dashboard makes it easy to view at-a-glance information, such as upcoming schedules, pending availability requests, clocked-in staff, shift swaps, daily log entries, and reports – all in one location on your Today page!
This guide will give you a brief tour of the new dashboard and its features.
Help me enable the new dashboard!
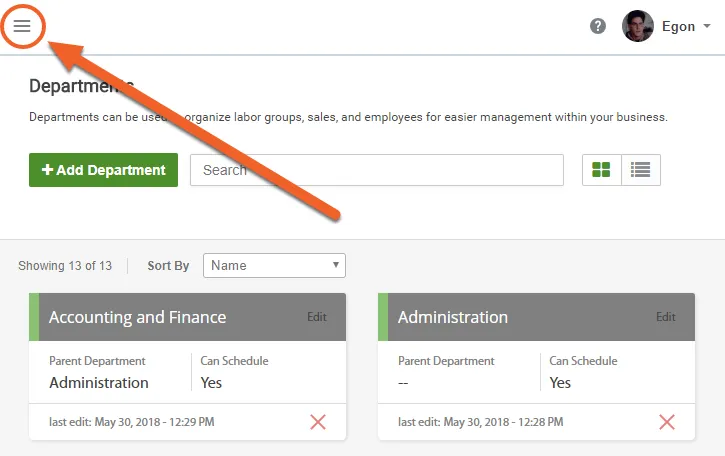
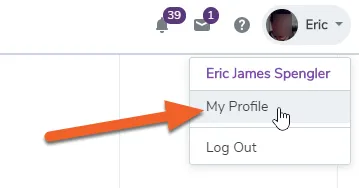
If you don’t see the link to Use new dashboard, just navigate to your profile:
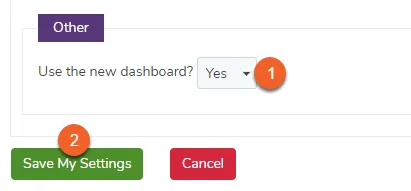
Select Yes to use the new dashboard, then Save:
That’s all there is to it!
With the new dashboard enabled, your Today page will feature tabs for Personal information, a full-page Calendar with filtering options, and, if you’re a manager, a special Location dashboard.
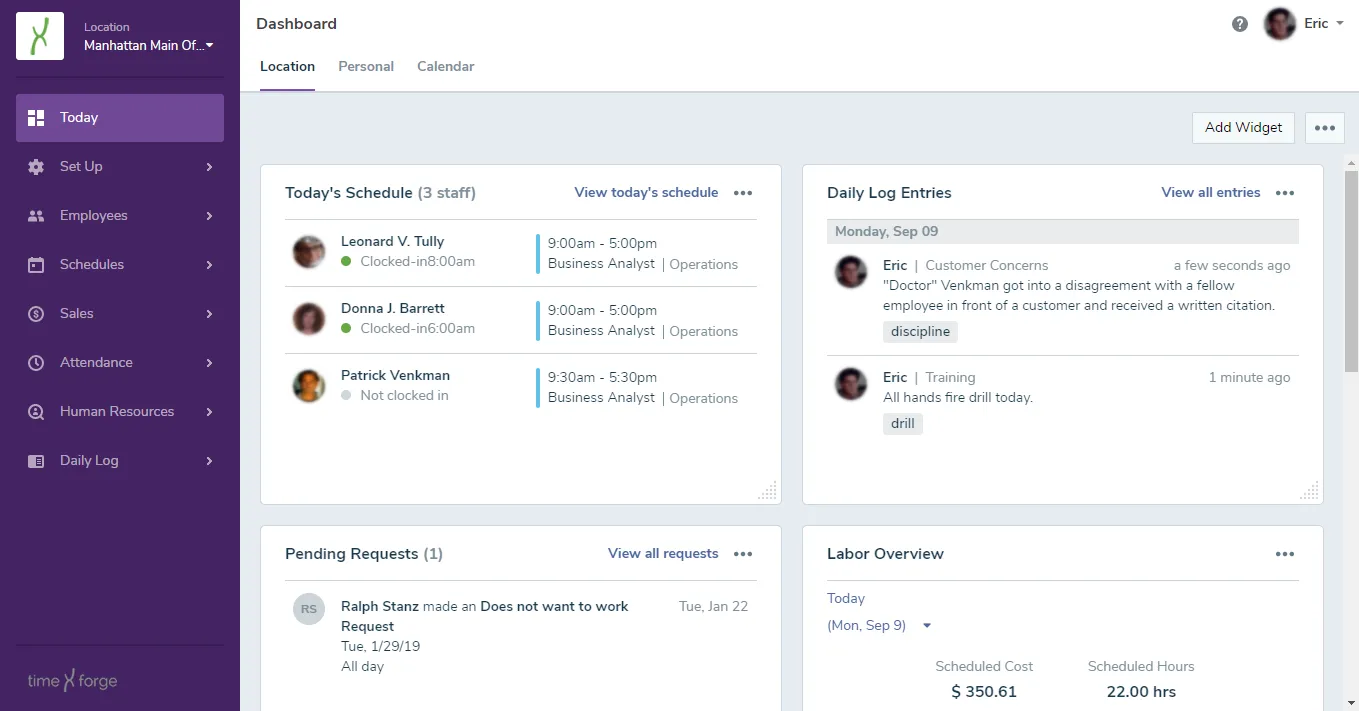
As an employee, you can:
- Arrange your dashboard how you want. Add, remove, resize, and arrange widgets to suit your needs.
- View your calendar to visualize your scheduled shifts for the month.
As a manager, you can:
- Arrange your dashboard how you want. Add, remove, resize, and arrange widgets to suit your needs.
- Easily view the information you want for your business, and quickly switch to your personal dashboard to view what is important to you, like your messages.
- Dashboard: The place to view your data visually.
- Widgets: A dedicated component for showing focused information, like weather.
- Location tab: Dashboard showing widgets dedicated to the business at the current location, like today’s sales.
- Personal tab: Dashboard showing widgets dedicated to the user, like my attendance.
- Calendar tab: Large calendar showing information dedicated to the user, like scheduled shifts.
To switch between dashboard tabs, simply click on a tab header at the top of the page! Your current tab will always be highlighted compared to the others.

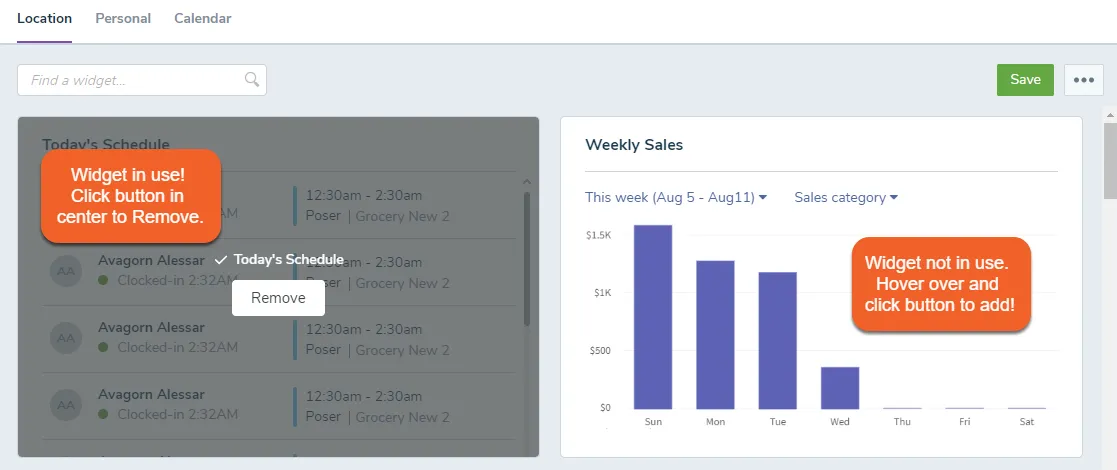
To add a new widget, click the Add Widget button in the upper right.

You’ll see all the available widgets. All the ones you’re already using will be grayed out with a checkmark and a Remove button. Hover over any other widget to see a button to add it to your dashboard, then click the Save button in the upper right to save your changes and return to your dashboard.
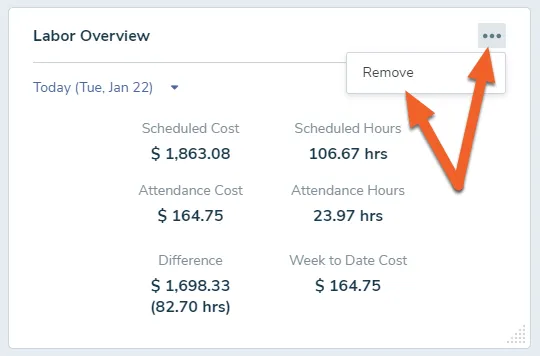
To remove a single widget, click the more menu (…) in the upper right corner of that widget, then select Remove. You can always re-add a widget if you change your mind!
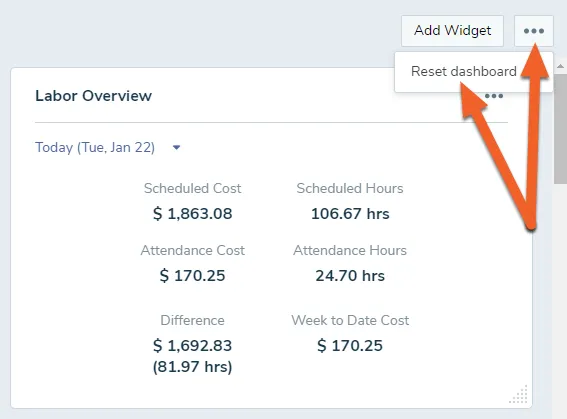
You can reset your dashboard to the default configuration anytime. Simply click the more menu (…) in the upper right and select Reset Dashboard.
To rearrange, click the top of the widget, then drag and drop.
The following widgets are available to employees using the Personal dashboard:
- My Requests: View a list of my availability and requests.
- Messages: View my messages.
- Available Shifts: View any available shifts for pickup.
- HR Activities: View any assigned HR Activities.
- Others Availability: View the availability of other employees.
- Others Scheduled: View the schedules of other employees.
- HR Documents: View any assigned HR Documents.
- TimeClock: Clock into or out of a position/department.
The following widgets are available to managers through the Location dashboard:
- Today’s Schedule: View who is scheduled for the day.
- Weekly Sales: View sales over a week period.
- Birthdays: View upcoming employee birthdays.
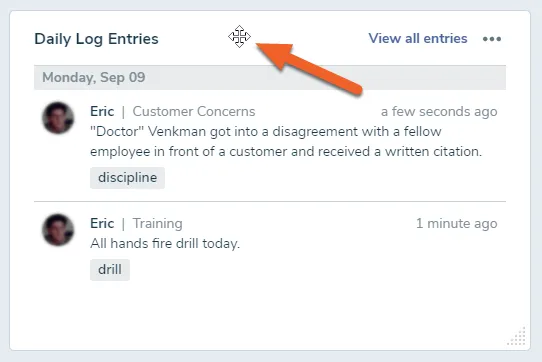
- Daily Log Entries: View recent Daily Log Entries.
- Favorite Reports: View links to your Favorite Reports.
- Labor Overview: View an overview of labor, such as scheduled hours and attendance hours.
- Last Sync: View last connector sync times.
- On Leave: View who is currently on leave.
- Applicants: View a list of new applicants.
- Clocked in Staff: View is currently clocked in.
- Pending Requests: View requests that pending and need manager approval.
- Pending Shifts: View shifts swaps, opens shifts, and bid shifts that are pending manager approval.
- Unconfirmed Shifts: View scheduled shifts that have not been confirmed by employees.
- Weekly Labor: View a chart of labor information by week, like hours scheduled and cost.
- Weather: View weather for today and tomorrow.
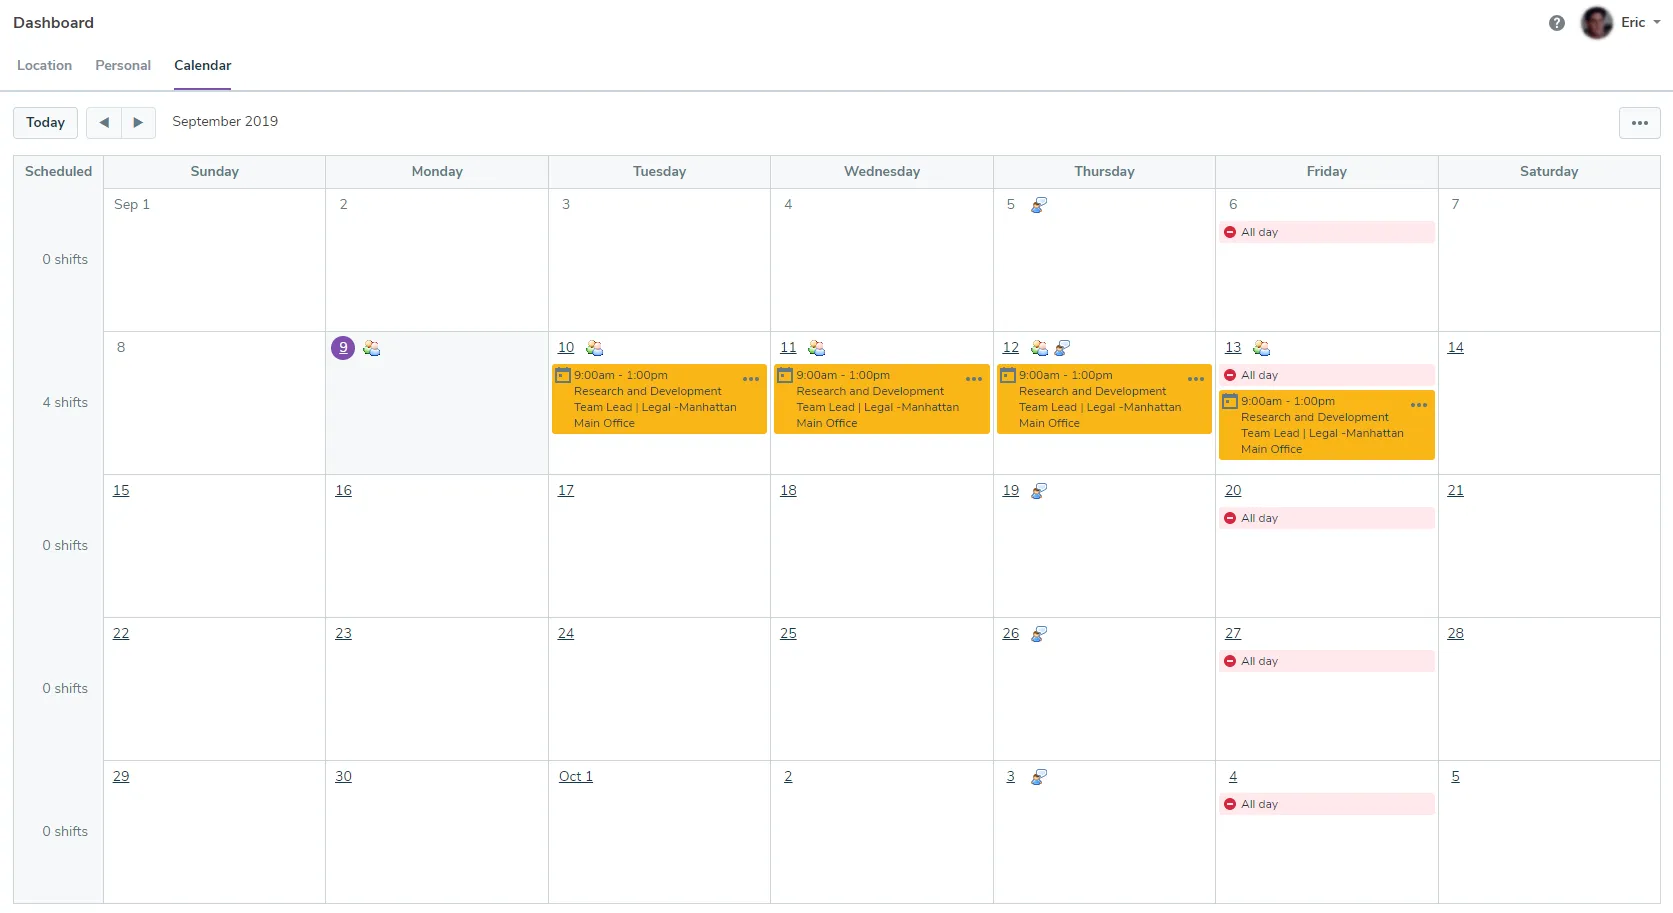
The Calendar tab shows important schedule information.
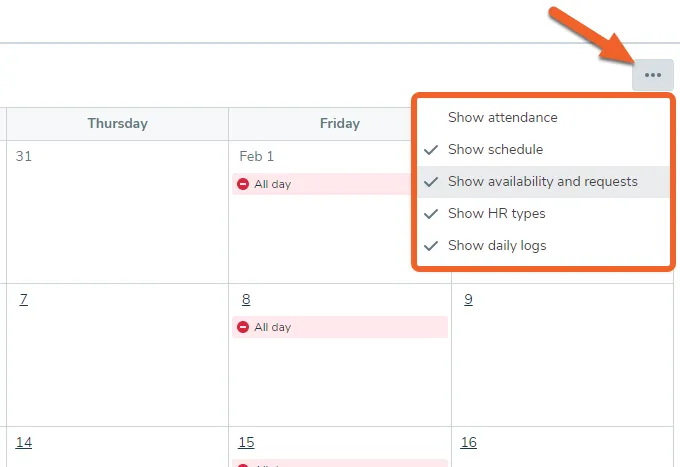
Click each filter option to toggle it on (checkmark) or off (no checkmark). Options include attendance, schedule, availability and requests, HR types, and daily log entries!
Automated Meal and Rest Penalties
California mandates that employees who work a certain number of hours without a rest period or without a meal period are eligible to be paid extra, but there are different thresholds and rules that dictate what counts as a meal or rest penalty, respectively. Fortunately, TimeForge makes it easy to automate the tracking and compensation of both meal and rest penalties.
Note - this isn’t just important for California. Other states have adopted non-standard meal and rest policies too.
This article will show you how to configure TimeForge to automate meal and rest penalties so that your business can remain compliant.
TimeForge can reference breaks rules, exception rules, and pay rules to automatically add regular pay (usually set to 1 hour) to an employee’s time card when they fail to take a scheduled meal period, or if their attended meal period is less than the allowed duration (i.e. 30 minutes). This hour is coded with a meal penalty pay code (not straight time). Similar logic can be applied for rest periods (e.g. 10 minutes) as configured. This functionality does not reference waivers. This functionality is configurable by location or company-wide.
Manual overrides to system-generated meal penalties are possible for managers and supervisors with the appropriate security templates.
The following must be set or enabled in TimeForge:
- Scheduling and Attendance platforms in use (the logic to automatically assess meal penalties and rest break penalties relies on both)
- Meal penalties set to count as regular time
- Meal break and rest break exceptions configured under Attendance Options
- No lunch and Late lunch exceptions configured under Attendance Options
- Breaks can not be taken automatically by TimeForge (the employee must clock in/out of breaks)
Let’s start by configuring TimeForge to automatically identify and apply penalties when meal and rest exceptions occur.
If you need assistance getting meal penalties enabled, our support desk is also always ready to help.
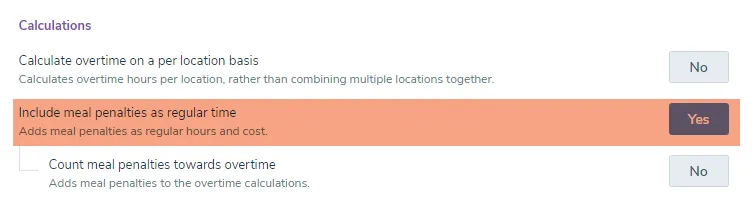
Under the location’s Attendance Options, scroll down to Calculations and select Yes to include meal penalties as regular time. This will ensure that employees are compensated for a missed lunch in the form of a regular paid hour.
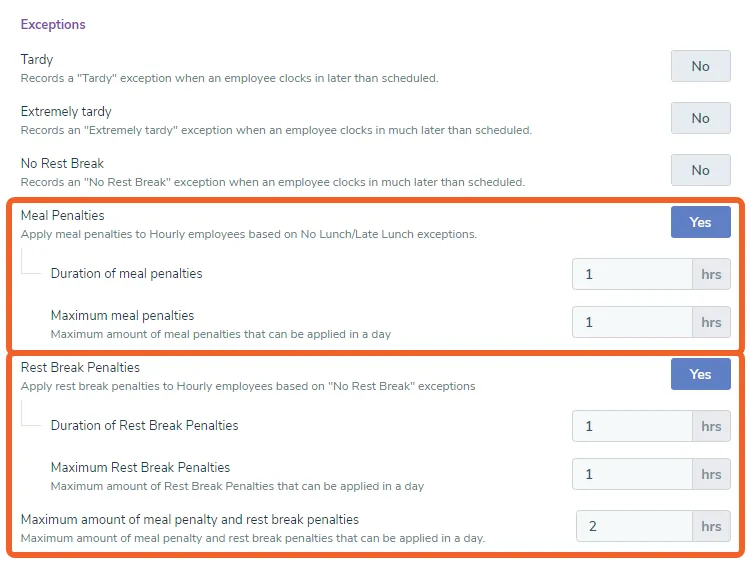
Next, scroll down to Exceptions and select Yes to enable meal penalties and rest break penalties.
Selecting Yes will provide configuration options for each. These options should be configured as per your state’s laws regarding missed breaks and meals and the maximum number of penalties that can be applied in a day. Always be sure to consult your legal team for guidance on applicable state and local guidelines or wage orders.
Just below the Exceptions settings, you’ll see a few additional options for late lunch and no lunch. Make sure these are set correctly, as well:
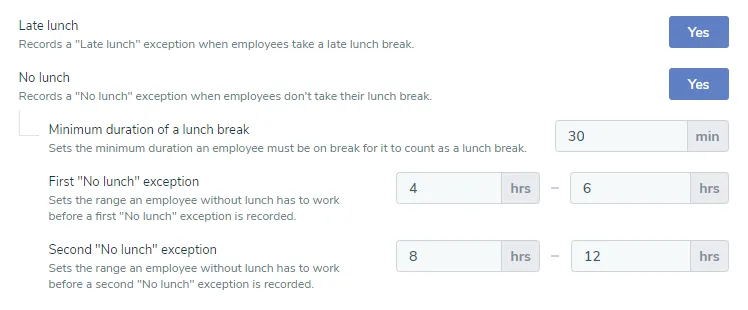
All penalties are assessed in real-time and when correctly configured to enforce unpaid break duration on meal periods to 30 minutes, should almost completely eliminate meal penalties due to short meals.
When a manager or supervisor navigates to Manage Attendance and views an employee’s attendance entry, they can see (near the bottom of the record) whether any exceptions or penalties have been applied to that shift:
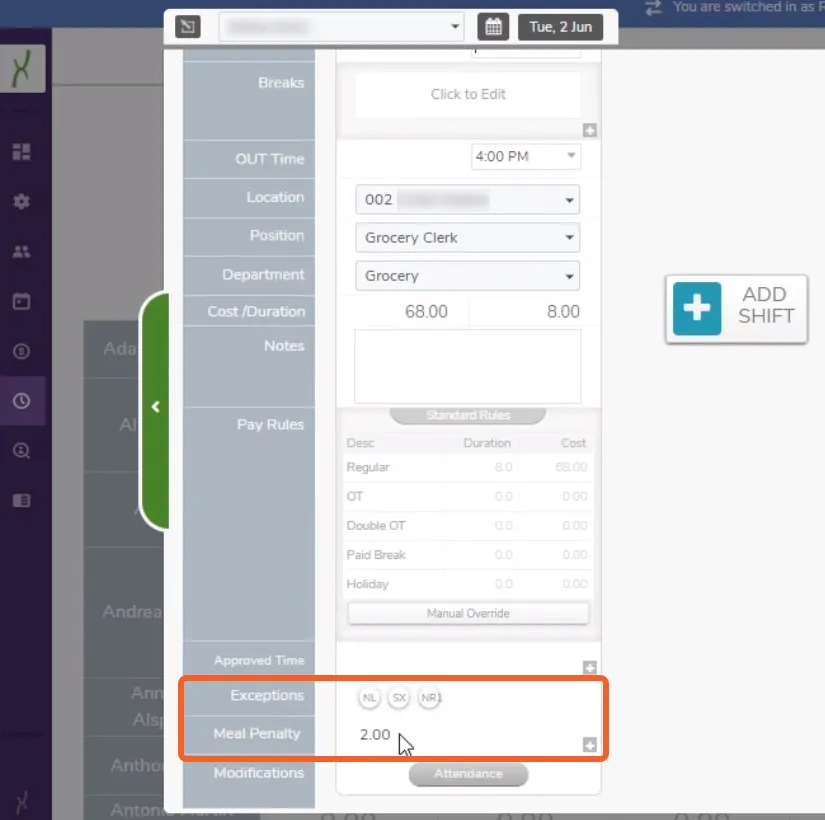
So in this case, two regular hours have been counted toward meal penalties for this employee’s shift.